
You are looking for information, articles, knowledge about the topic nail salons open on sunday near me how to dry stamp ink on Google, you do not find the information you need! Here are the best content compiled and compiled by the Chewathai27.com team, along with other related topics such as: how to dry stamp ink how to dry stamp ink on glossy paper, quick dry stamp ink, how to moisten a dry stamp pad, quick dry ink for plastic, dry stamp seal, dry ink pad, stampin up ink pads dry, ink refresher recipe
Contents
How can you make ink dry faster?
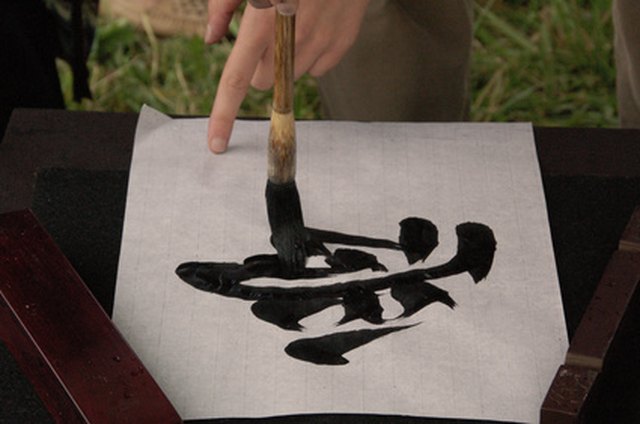
Dry thick caligraphy ink on a flat surface to air dry for about two minutes to let the ink congeal. Moving the page may cause the heavy ink in the stress points of your writing to run. Use a heat gun or hair dryer to speed the drying time. Never stack pages of caligraphy on top of each other until the ink is fully dry.
How long does it take a stamp to dry?
Quick dry stamp ink is ideal for stamping non-porous surfaces including metal, plastic, photographs, glossy paper and cds. Dries in 20 seconds – 2 minutes on non-porous surfaces depending on the ink used.
How do you keep stamp ink from smearing?
Some inks seem more likely to smudging than others, and some inks simply don’t pair well with certain types of crafting materials. Use specialty inks or papers or apply a fixative to your inked project — the two primary ways to assure the ink does not smear.
Does heat dry ink?
yep, heat setting it will work. Pigment inks should definitely be heat set… some take a long time to air dry and some seem to never air dry!
How do you dry ink on sticker paper?
- After the photo has finished printing, remove the photo immediately from the machine and place on flat surface to dry for 24 hours. …
- Do not place anything on top of photo until after 24 hours.
Do Pre-Inked stamps dry out?
In a self-inking stamp, the ink pad works with the die to leave an impression, then retracts back into the stamp body. A pre-inked stamp is also quieter than their self-inking cousin. And, it comes with a stamp cap so your ink doesn’t dry up over time.
How long does stamp ink last?
For self-inking stamps, the ink pad will last for up to 10,000 impressions before needing to be replaced. For pre-inked stamps, the ink pad will last for up to 50,000 impressions before needing to be replaced.
Does Hairspray Stop ink from smudging?
A Better and Cheaper Solution
After trying several methods which were not really successful I found a website claiming that spraying the paper with hair spray actually stopped the bleeding. Not just any hair spray but apparently VO5 Firm Hold Hair Spray was the best one for the job!
Does Hairspray fix ink?
Even in the best of circumstances, hairspray or rubbing alcohol really works best if the stain is fresh. A long-dried ink stain is unlikely to come out easily, no matter what type of cleaner you try to use on it. Water-based inks are another matter.
How do you keep ink from smearing on cardstock?
Go into your printer preferences and change the paper type to a heavy gauge material like “Cardstock” or “Heavy Paper”. This will reduce the speed the laser printer feeds the material which will give it more exposure to the machine that is fusing thus giving the toner a better fuse to the print medium.
Can you dry ink with a hair dryer?
Yes, a hairdryer is fine for drying inks. My DH, who is a fine art painter, he works in acrylic and watercolor, has used a cheap hairdryer for decades to dry his paint more quickly. RE: Stick: Yes, a hairdryer is fine for drying inks.
Will ink ever dry on glossy paper?
The best way to speed up the drying of ink on glossy paper is to increase temperature and decrease humidity. The exact drying time of ink under the infrared heat lamp will depend on the temperature of the lamp as well as the general humidity. More humidity equals a longer drying time.
How long does ink take to dry on glossy paper?
While the standard recommendation is for you to wait a minimum of 24 hours, the actual time period varies according to a wide variety of factors. These range from the type of photo you’ve printed to the type of ink and paper you’ve used.
What pen ink dries fastest?
As we touched on above, in our opinion, the Pilot Iroshizuku range of inks is the best fast drying ink option for fountain pens currently on the market. If you are left handed or need a fast drying ink for any other reason then it is our primary recommendation to our readers.
What ink dries the fastest?
The fastest dry time I have seen is Noodler’s Polar Purple at three seconds. The longest dry time I have seen is J. Herbin Rouge Hematite at a whopping 90 seconds. I have noticed that high sheening inks take longer to dry than average inks.
How long does block printing ink take to dry?
Speedball Fabric Block Printing Inks are oil-based; but can be cleaned up with soap and water, eliminating the need for harsh solvents. These inks dry to the touch overnight and are ready for the wash after 4-7 days.
How to Dry Ink | eHow
- Article author: www.ehow.com
- Reviews from users: 41648
 Ratings
 - Top rated: 4.4
- Lowest rated: 1
- Summary of article content: Articles about How to Dry Ink | eHow Updating …
- Most searched keywords: Whether you are looking for How to Dry Ink | eHow Updating Drying ink may seem like a common sense step in ink projects, but science has a lot to do with it. There are ways to speed up drying times and allow you to move on with your project.
- Table of Contents:
Printer Ink
Step 1
Step 2
Step 3
Step 4
Step 5
Step 6
Step 7
Quick Dry Stamp Ink for Stamping Non-Porous Surfaces
- Article author: www.thestampmaker.com
- Reviews from users: 5263 Ratings
- Top rated: 4.7
- Lowest rated: 1
- Summary of article content: Articles about
Quick Dry Stamp Ink for Stamping Non-Porous Surfaces
Updating … - Most searched keywords: Whether you are looking for
Quick Dry Stamp Ink for Stamping Non-Porous Surfaces
Updating - Table of Contents:
Products
Helpful How-Tos and Tips
How to Stop Ink From Smearing | eHow
- Article author: www.ehow.com
- Reviews from users: 5936 Ratings
- Top rated: 3.2
- Lowest rated: 1
- Summary of article content: Articles about How to Stop Ink From Smearing | eHow Updating …
- Most searched keywords: Whether you are looking for How to Stop Ink From Smearing | eHow Updating Smearing ink is cause for concern when you’re printing out images on a home printer, creating your own hand-inked illustrations, or stamping designs for a scrap-booking project. Some inks seem more likely to smudging than others, and some inks simply don’t pair well with certain types of crafting materials.
- Table of Contents:
Computer-Printed Projects
Stamp-Pad Ink Smudges
The Fixative Fix
Quick Tip – Drying Stickles, Pigment Ink etc FAST! – YouTube
- Article author: www.youtube.com
- Reviews from users: 20012 Ratings
- Top rated: 4.0
- Lowest rated: 1
- Summary of article content: Articles about Quick Tip – Drying Stickles, Pigment Ink etc FAST! – YouTube Updating …
- Most searched keywords: Whether you are looking for Quick Tip – Drying Stickles, Pigment Ink etc FAST! – YouTube Updating you can watch the video on how i made this card here:http://www.youtube.com/watch?v=hcQstgwGbn4my ETSY shop:http://www.etsy.com/shop/PrairiePaperandInkto fri…AmyR, Prairie, Paper, and, Ink, Stamping, Scrapbooking, Papercrafting, Halloween, Supplies, Sneak, Peek, MME, My, Minds, Eye
- Table of Contents:

How to Reink a Dry Ink Pad
- Article author: www.scrapbook.com
- Reviews from users: 8755 Ratings
- Top rated: 3.3
- Lowest rated: 1
- Summary of article content: Articles about How to Reink a Dry Ink Pad Don’t distress over a dry ink pad – reink it! … You can stamp with it, blend with it, make big dabs and small, you can stencil with it, add it to mixed … …
- Most searched keywords: Whether you are looking for How to Reink a Dry Ink Pad Don’t distress over a dry ink pad – reink it! … You can stamp with it, blend with it, make big dabs and small, you can stencil with it, add it to mixed … reinkers, reink, distress, oxide, stamp, ink, pad, dry, dried, how to, re ink, storage, stamping, scrapbooking, organization, bottleDon’t distress over a dry ink pad – reink it! Rethink how you reink and get all the insider tips and tricks for keeping your ink pads in tip top shape!
- Table of Contents:
What are Reinkers
How Do I Know When My Ink Pads Need Ink
How Do I Reink My Ink Pads
What’s the Best Reinker Storage
Quick Dry Stamp Ink for Stamping Non-Porous Surfaces
- Article author: www.thestampmaker.com
- Reviews from users: 41267 Ratings
- Top rated: 4.9
- Lowest rated: 1
- Summary of article content: Articles about
Quick Dry Stamp Ink for Stamping Non-Porous Surfaces
Quick dry stamp ink is eal for stamping non-porous surfaces including metal, plastic, photographs, glossy paper and cds. Dries in 20 seconds – 2 minutes … … - Most searched keywords: Whether you are looking for
Quick Dry Stamp Ink for Stamping Non-Porous Surfaces
Quick dry stamp ink is eal for stamping non-porous surfaces including metal, plastic, photographs, glossy paper and cds. Dries in 20 seconds – 2 minutes … - Table of Contents:
Products
Helpful How-Tos and Tips
Error 403 (Forbidden)
- Article author: www.quora.com
- Reviews from users: 36024 Ratings
- Top rated: 4.5
- Lowest rated: 1
- Summary of article content: Articles about Error 403 (Forbidden) Place over the stamp image, being careful not to move them around. Press firmly and evenly, rubbing (again, without moving the paper) from one se to the other … …
- Most searched keywords: Whether you are looking for Error 403 (Forbidden) Place over the stamp image, being careful not to move them around. Press firmly and evenly, rubbing (again, without moving the paper) from one se to the other …
- Table of Contents:
how to dry stamp ink
- Article author: nvlpubs.nist.gov
- Reviews from users: 5727 Ratings
- Top rated: 3.4
- Lowest rated: 1
- Summary of article content: Articles about how to dry stamp ink DRYING STAMP.PAD INKS. By C. E. Waters. ABSTRACT. Inks for use with rubber stamps are generally made by dissolving dyes in a mixture of glycerol and water. …
- Most searched keywords: Whether you are looking for how to dry stamp ink DRYING STAMP.PAD INKS. By C. E. Waters. ABSTRACT. Inks for use with rubber stamps are generally made by dissolving dyes in a mixture of glycerol and water.
- Table of Contents:
US2208551A – Quick-drying stamp-pad ink
– Google Patents
- Article author: patents.google.com
- Reviews from users: 3669 Ratings
- Top rated: 3.2
- Lowest rated: 1
- Summary of article content: Articles about US2208551A – Quick-drying stamp-pad ink
– Google Patents The present invention relates to quick-drying 5 stamp-pad inks and aims generally to improve the same. Most of the inks intended for use With rubber stamps are … … - Most searched keywords: Whether you are looking for US2208551A – Quick-drying stamp-pad ink
– Google Patents The present invention relates to quick-drying 5 stamp-pad inks and aims generally to improve the same. Most of the inks intended for use With rubber stamps are … - Table of Contents:
Info
Links
Classifications
Description
Priority Applications (1)
Applications Claiming Priority (1)
Publications (1)
ID=22811058
Family Applications (1)
Country Status (1)
Cited By (4)
Cited By (4)
Similar Documents
– Google Patents
Different Types of Stamping Inks
– RubberStamps.com
- Article author: www.rubberstamps.com
- Reviews from users: 10461 Ratings
- Top rated: 4.5
- Lowest rated: 1
- Summary of article content: Articles about Different Types of Stamping Inks
– RubberStamps.com Embossing ink, or watermark ink, is a slow-drying, thick clear ink typically used for heat embossing. Embossing ink acts like a glue for rubber … … - Most searched keywords: Whether you are looking for Different Types of Stamping Inks
– RubberStamps.com Embossing ink, or watermark ink, is a slow-drying, thick clear ink typically used for heat embossing. Embossing ink acts like a glue for rubber … Not all inks are created equal! There are a variety of different types of stamping inks to choose from, depending on the task at hand. Take a look at our guide for a rundown on which rubber stamp ink you should grab for your next project.RubberStamps.com, www.rubberstamps.com - Table of Contents:
Dye Ink
Pigment Ink
Watermark Embossing Ink
Solvent Ink
Inkless Thumbprint Pad
Skin-Safe Ink
Pre-Inked Ink Pad
Pre-Inked Stamp Refill Ink
Self-Inking Ink Pad
Self-Inking Stamp Refill Ink
Hybrid Ink
Fabric Ink
Distress Ink
Chalk Ink
HOW DO YOU STAMP
Leave a comment

– RubberStamps.com
See more articles in the same category here: https://chewathai27.com/toplist.
Quick Dry Stamp Ink
Stamp Non-Porous Surfaces with Quick Dry Ink Pads
If you need to stamp and stack various items quickly, quick dry stamp ink is an excellent option. With a clean and fast dry, this ink minimizes the possibility of streaks and fading. This style of ink is a time-saving option for small businesses, such as design agencies, photographers, tech engineers, and more. Fast drying ink works best on non-porous surfaces, such as metal, plastic, photographs, glossy paper, or CDs. It is commonly used in industrial or factory settings, where operators must stamp metal or plastic parts. We carry quick dry ink pads if you’re just starting out, and we also have ink that enables you to re-ink your current pads.
Most of our quick dry ink dries in 10 seconds to 2 minutes on non-porous surfaces, which eliminates the likelihood that your ink marks will run or smear. If you’re stamping several photos, plastic items, or glossy paper at once, fast drying ink is an excellent option. This ink is ideal for photographers, engineers, artists, graphic designers, and many other industry professionals. Quick dry ink is also a great tool for art projects or kids’ arts activities in the home, at camp, or in schools to reduce messes. Easily stamp logos, designs, identification numbers, and more with fast drying ink for stamps.
How to Stop Ink From Smearing
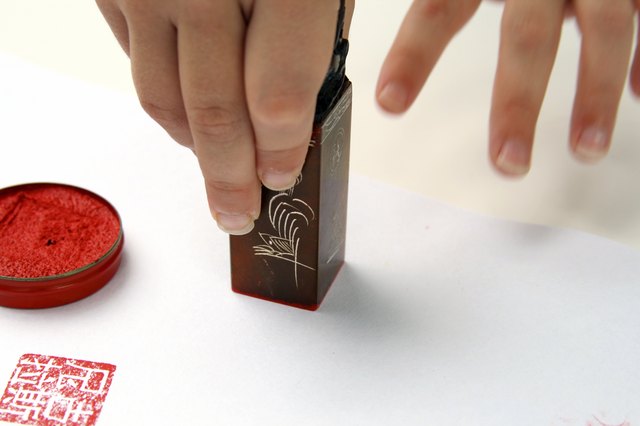
Stamping ink on paper. Image Credit: Rebecca Grabill/iStock/Getty Images
Smearing ink is cause for concern when you’re printing out images on a home printer, creating your own hand-inked illustrations, or stamping designs for a scrap-booking project. Some inks seem more likely to smudging than others, and some inks simply don’t pair well with certain types of crafting materials. Use specialty inks or papers or apply a fixative to your inked project — the two primary ways to assure the ink does not smear.
Advertisement
Video of the Day
Computer-Printed Projects
Home-based inkjet printer ink smears quite easily on standard office paper. If water touches the ink, it turns the ink into a watery mess that looks more like watercolor paint. Select a quick-drying photo paper, rather than standard office or copy paper, to ensure a quality printout. The ink still needs at least a minute or two to dry completely, so set the paper aside before touching it.
Advertisement
Stamp-Pad Ink Smudges
Stamp pad inks are either dye- or pigment-based. Dye-based inks dry quickly and are less prone to smudging, even on materials such as vellum, so choose a dye-based ink whenever possible.
Advertisement
The Fixative Fix
A fixative or artist’s varnish protects work of all sorts from smearing — even pastels or charcoal pencils. Choose an archival fixative, as it does not yellow over time. Spray the inked project by holding the fixative can 18 inches or more away from the project, working in smooth, slow, overlapping strokes, as if spray painting. Test the fixative on a scrap piece of paper of the same variety, over the same type of ink you use on your projects.
How To Reink A Dry Ink Pad
How To Reink A Dry Ink Pad
In the world of crafting, ink plays an important part on the road to creating an absolute masterpiece. You can stamp with it, blend with it, make big dabs and small, you can stencil with it, add it to mixed media, really anything at all!
Eventually, your favorite ink pads will start to grow weary from helping you create unforgettable layouts, one-of-a-kind handmade cards, planner calendars, notebook pages, and more.
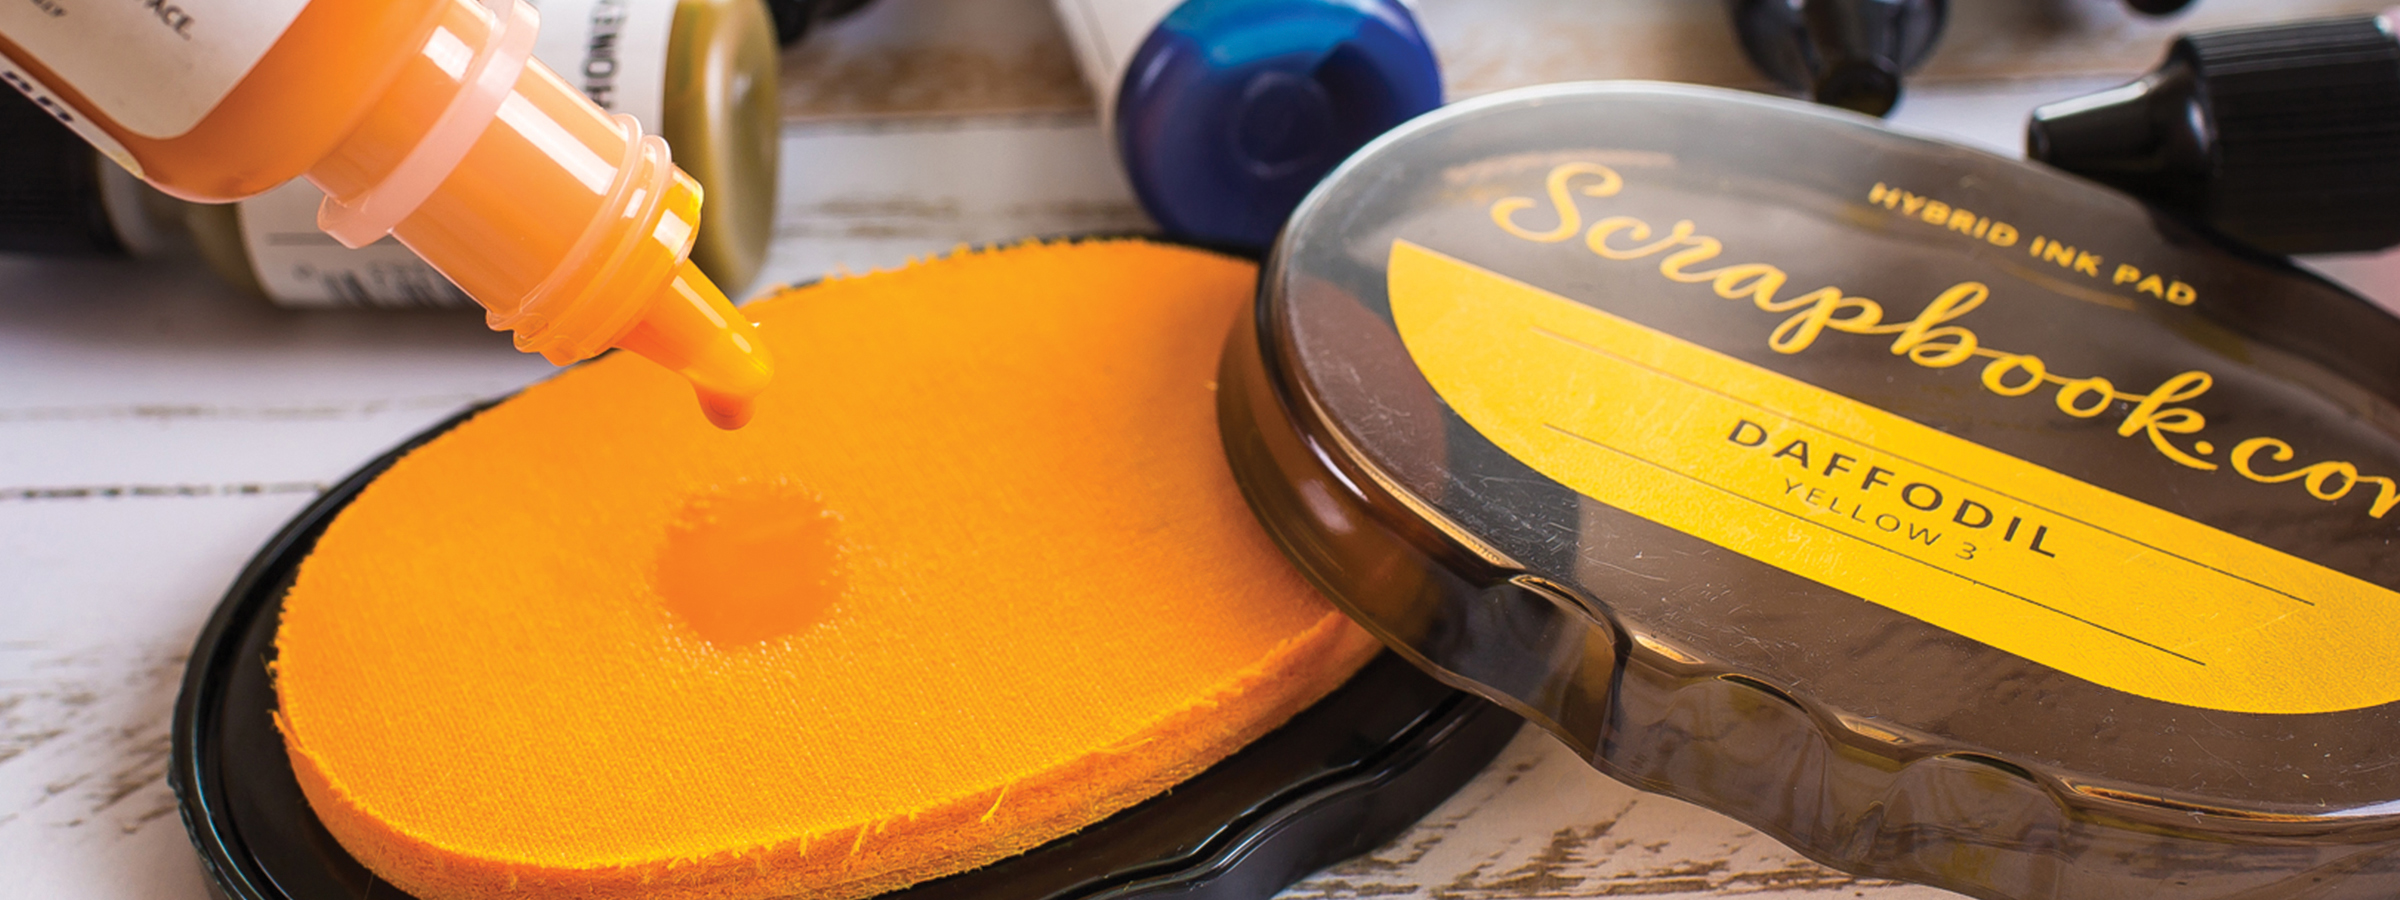
That’s why the fan-favorite Scrapbook.com Premium Hybrid Inks Collection, and many of your other favorite brands of ink pads, have reinkers available to keep your ink pads full of bold and beautiful pigment.
What are Reinkers?
If you’ve just gotten into stamping, or maybe just have some amazing, long-lasting ink pads in your stash, you may not be familiar with reinkers and how they work.
For many popular brands in the paper crafting industry, ink comes in pads, big and small. But when your pad starts to dry out from extended use, instead of tossing it in the trash for a new one, you can usually pick up a reinker in the same ink shade!
In our store, we have a reinker for every single color of ink in our exclusive Inks Collection, available in singles, color families, and the entire 51-shade set. We also carry a large assortment of reinkers from Ranger, Tim Holtz, Wendy Vecchi, Simon Hurley, Lawn Fawn, and more!
These tiny bottles hold endless possibilities in a huge rainbow of hues. But their original purpose is to ensure your much-loved ink pads stay bold, bright, beautiful, and begging to be brought out for your next inky adventure.
How Do I Know When My Ink Pads Need Ink?
When your ink pads need some time with a reinker, you should be able to spot the tell-tale signs. Here are a few super helpful tips from our resident craft expert.
If you’re a stamper, chances are good that you are well-versed in ink coverage on your clear or red rubber stamps. If you’re not getting a solid layer of ink coverage on your stamps, or you find yourself doing an excessive amount of impressions with your stamping press, it might be time for a reinker to do what it does best.
Take a close look at the surface of your ink pad (not too close, or you might get ink on your nose!). Ink pads come with either a felt or a foam insert that the ink is absorbed into. Both of these surfaces will be able to tell you if they are moist enough for some amazing stamping action. If the top or edges of the felt or foam are looking a little dried out, grab a reinker!
If you don’t know where to start, we recommend starting with your staple colors, such as your black inks. They tend to be used the most often, especially for stamping sentiments.
Helpful Hint: To avoid your ink pads drying out quicker than normal, ensure you are always putting the lid back on tightly as soon as you’re done with that color. Exposure to the air for unnecessarily long periods of time will cause undue wear on your favorite hues.
How Do I Reink My Ink Pads?
Once you’ve determined that your ink pads need some maintenance, get those reinkers out and ready to go!
Before you get started, make sure your work surface is adequately protected from any unintentional droplets or smears of ink. A craft mat is always a good idea to make clean-up a breeze. You might also want to grab a rag or some wipes for getting ink off your fingers if you touch the reinker tip or pad edges.
When you’re adding ink into your ink pads, you want to ensure you’re getting edge to edge, even coverage throughout the area of the pad. Instead of randomly placing drops, try adding zig-zag patterns back and forth in one direction, then in the other. All the while, you want to apply gentle pressure to the reinker bottle to ensure a steady flow of ink is distributed throughout the pad.
If your pad was truly thirsty for some ink, you should see it start to absorb immediately as you’re adding the ink.
Helpful Tip: Don’t use a freshly-reinked ink pad right away! Put the lid on and set it aside for 10 to 15 minutes for the new ink to absorb into the pad before you get stamping!
If your ink pad was a little more saturated with ink than you thought, you might end up with some fresh ink sitting on the top of the pad and not absorbing right away. In those instances, you just need to help the ink along by spreading it around the pad and distributing it evenly.
We found that one of the best tools for getting this done efficiently was the Vicki Boutin silicone Art Wedge*, but you can use an old gift card or similar tool. A few quick and gentle scrapes back and forth will distribute the ink, press it into the pad, and even remove some unnecessary excess ink that the pad didn’t need.
While the tiny reinker bottles are full of exciting potential, it is definitely possible to get too excited and over-ink your ink pads. If you’re noticing that the ink won’t fully absorb, you might have added just a little too much. Don’t worry – you haven’t ruined your ink pad!
*Please note this product has been discontinued
Helpful Tip: If you try to stamp with an over-inked ink pad, your stamp impressions will not come out crisp and clean. The extra ink saturation will flood the grooves of your stamp and may leave a drippy image.
When your ink pad ends up super juicy and saturated from over-inking, it’s time for a little adjustment. Get out your Art Wedge, plastic card, or spatula tool and start scraping. If you’re seeing drips and streams of ink coming off the pad as you’re scraping, you definitely got a little ink-happy with the reinker!
When you’re reinking your ink pads, it’s best to start off with a very light layer of ink first to see how much ink is really needed. Add a layer and wait 10 to 15 minutes for it to absorb. Then, get out a stamp to test how well the ink pad is coated. Try not to use your favorite stamp – maybe designate a test stamp for this process.
If you’re still noticing that your stamp is still not coating evenly, add another very light layer of ink and repeat the test process.
If the ink coverage on the stamp is too heavy, puddled, or slightly drippy, you may have gotten a little overexcited about reinking and need to do some scraping and redistributing of the ink. This is great practice for next time you reink!
And if your stamp impression is positively perfect, then you have mastered the art of reinking!
Also, if you’re a fan of ink blending, a dried out ink pad is not going to be your best friend. Once it’s reinked, you’ll love dabbing your Domed Ink Blending Tool into those gorgeous ink hues to create backgrounds, stenciled effects, and more!
The quick step-by-step guide to reinking:
Grab a craft mat and a rag to protect your surface
Open your dried ink pad and its corresponding reinker
Gently squeeze the liquid ink onto your pad in a zig-zag pattern to cover the whole surface area
Set aside and allow the ink to absorb; repeat if needed until the pad is adequately saturated
If too much ink is applied, use an Art Wedge or plastic card to distribute the ink and remove excess
Test the ink saturation with a stamp to ensure the desired ink coverage and impression is achieved
Enjoy your refreshed ink pad!
What’s the Best Reinker Storage?
When you have a variety of inks and coordinating reinkers for all your favorites, you need a fantastic storage system to ensure you never lose a single one! Scrapbook.com’s exclusive .5 oz bottle ColorCase is the absolute must-have storage for your collection of reinkers. They’re clear, they stack, they’re unbelievably handy, and they look amazing anywhere in your craft space!
When you’re in the zone and getting all your ink pad maintenance done, the ColorCase is your trusty sidekick for all your reinker action. Each bottle slot is designed to hold your reinkers right-side-up when you’re in the middle of inking, so you never have to worry about knocking over one of the tiny bottles and getting ink everywhere!
And if you love your Tim Holtz products like Distress Oxides and Distress Archival Inks, then you’re going to love the ColorCase for storing those reinkers!
Check out Scrapbook.com’s extensive selection of stamping supplies, including ink pads, reinkers, and everything else that a stamper needs to create brilliance! For more helpful tips, tricks, and how-tos, check out our cleaning and organizing guide and the top tools for stampers!
So you have finished reading the how to dry stamp ink topic article, if you find this article useful, please share it. Thank you very much. See more: how to dry stamp ink on glossy paper, quick dry stamp ink, how to moisten a dry stamp pad, quick dry ink for plastic, dry stamp seal, dry ink pad, stampin up ink pads dry, ink refresher recipe