
You are looking for information, articles, knowledge about the topic nail salons open on sunday near me how to record loud vocals without distortion on Google, you do not find the information you need! Here are the best content compiled and compiled by the Chewathai27.com team, along with other related topics such as: how to record loud vocals without distortion
Contents
How can I record audio without distortion?
- Use the proper equipment. You’ll typically choose between two methods of audio capture in most types of production: lavaliers or a shotgun mic mounted on a boom pole. …
- Don’t touch the mic. …
- Position your microphones correctly. …
- Avoid bad ADR. …
- RECORDING ENVIRONMENT. …
- MIC CHOICE. …
- MIC PLACEMENT.
How do you make badly recorded vocals sound good?
- Use LEVELS To Identify Problems In The Mix.
- Use Editing Tools To Tighten Up Performance Issues.
- Use a High-Pass Filter to Remove Unwanted Low End.
- Use a Surgical EQ to Isolate and Remove Resonances.
- Use a De-Esser to Prevent Harshness and Sibilance.
Why do my vocals sound distorted?
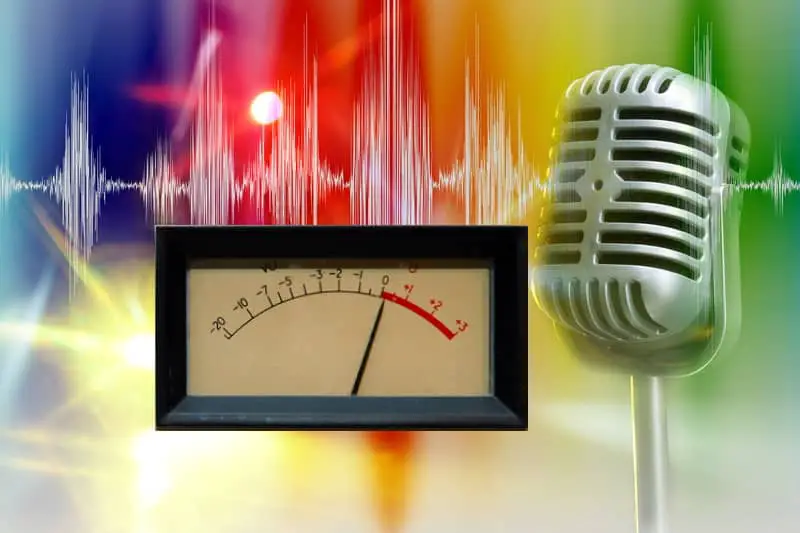
The most common reason that vocals are distorted is that they have been recorded too loud. On average, the recording level should be about -18dB, peaking at no more than -12dB. Being too close to the microphone and poor microphone technique can also contribute to the signal being too loud.
How do I professionally record a song?
- Create a home recording setup. Setting up your own home recording studio is super easy. …
- Run a digital audio workstation. …
- Organize what to record. …
- Set Up Your Equipment. …
- Create Your Base Track or Guide. …
- Record the Rhythm Section. …
- Record the Harmonies. …
- Record the Melodies.
What mic pattern is best for singing?
The most commonly used polar pattern for recording vocals is cardioid, which is more sensitive to sound arriving from the front of the mic than the back. Cardioid mics have the advantage of reducing ambient noise; however, they will also colour the sound more than an omni-directional design.
Why don’t my vocals sound professional?
If your vocal is dynamic in volume, the compressor may have to work hard to level things out. When a compressor is working too hard, it can cause your vocal to sound “squashed.” If this is the case, you may need to ride the volume of your vocal to reduce the amount of hard peaks in volume.
Why is mixing vocals so hard?
Mixing is hard because you have to train your ears to hear stuff you haven’t previously heard. It’s like learning an instrument. It takes patience and practice. And once you can hear all that stuff you still have to experiment a lot to have an opinion about it.
Why don’t I sound good when I record myself?
Singers sometimes sound bad when they record themselves singing due either file compression, improper microphone technique or being unaccustomed to hearing their voice from a third person perspective.
How do I stop my microphone from distorting?
- Right click on the Sound icon in the bottom right of your screen on the desktop.
- Click on Recording devices.
- Right click on the microphone.
- Click on the Properties.
- Click on the Enhancements tab.
- Check the ‘Disable’ box inside the box.
- Click ‘Ok’
How do I make my audio crunchy?
Use the Distortion effect to make the audio sound distorted. By distorting the waveform the frequency content is changed, which will often make the sound ‘crunchy’ or ‘abrasive’.
Why is condenser mic distorted?
The main cause of distortion in microphones is improper microphone handling techniques such as standing too close to the mic and failure to position the mic well. Poor quality or damaged microphones can also lead to distortion, especially when used to perform heavier tasks than they can handle.
What does distorted sound mean?
The term distortion usually refers to a deviation from the original perfect form. In sound contexts this is a deviation from the perfect, desired sound curve. We recognize distortion from the bad speakers at drive-through restaurants or at bingo halls.
How To Record Loud Vocals Without Distortion – Home Music Producer
- Article author: www.homemusicproducer.com
- Reviews from users: 27143
 Ratings
 - Top rated: 3.7
- Lowest rated: 1
- Summary of article content: Articles about How To Record Loud Vocals Without Distortion – Home Music Producer Use a pop filter … When it comes to recording loud vocals, pop filters are really handy. Utilizing a pop filter can be helpful because most … …
- Most searched keywords: Whether you are looking for How To Record Loud Vocals Without Distortion – Home Music Producer Use a pop filter … When it comes to recording loud vocals, pop filters are really handy. Utilizing a pop filter can be helpful because most …
- Table of Contents:
Gain
Use a pop filter
Don’t record directly into the Microphone
Compression
The Vocalist
Conclusion (The Process)
1 thought on “How To Record Loud Vocals Without Distortion”
AFFILIATE DISCLOSURE
Recent Posts
Post navigation
5 ways to avoid distortion and noise – Videomaker
- Article author: www.videomaker.com
- Reviews from users: 16190 Ratings
- Top rated: 3.7
- Lowest rated: 1
- Summary of article content: Articles about 5 ways to avoid distortion and noise – Videomaker Updating …
- Most searched keywords: Whether you are looking for 5 ways to avoid distortion and noise – Videomaker Updating Though REAPER and Audition are extraordinary audio editors, nothing can fix bad audio production. Good sound design paints a portrait of your film’s world
- Table of Contents:
Use the proper equipment
Don’t touch the mic
Position your microphones correctly
Avoid bad ADR
RECORDING ENVIRONMENT
MIC CHOICE
MIC PLACEMENT

How to record EXTREME VOCALS | SpectreSoundStudios TUTORIAL – YouTube
- Article author: www.youtube.com
- Reviews from users: 19634 Ratings
- Top rated: 4.0
- Lowest rated: 1
- Summary of article content: Articles about How to record EXTREME VOCALS | SpectreSoundStudios TUTORIAL – YouTube Updating …
- Most searched keywords: Whether you are looking for How to record EXTREME VOCALS | SpectreSoundStudios TUTORIAL – YouTube Updating How to record EXTREME VOCALSShure SM7B: http://bit.ly/2HTUCcKThe ZEN OF SCREAMING: http://amzn.to/2oE8eA3Rode Nt1A: http://bit.ly/2rAbZ9hDistressor: http…Spectre Sound Studios, SpectreSoundStudios, Glenn Fricker, Glen Fricker, studio, mic, hard rock, heavy metal, Spectre Media Group, Bass Guitar, Mesa Boogie, Peavey, Schecter, Bias Fx, Room, Music, Stupid Musician Texts, recording, extreme, extreme vocals, shure, sm7, sm7b, metal vocals, heavy vocals, cupping the mic, distressor, rode nt1, sound, shure sm57, microphone, loud, recording studio, ad friendly, guitar amp
- Table of Contents:
How to Fix Clipped/Distorted Vocals | RX7 Walkthrough/Demo – YouTube
- Article author: www.youtube.com
- Reviews from users: 13888 Ratings
- Top rated: 4.1
- Lowest rated: 1
- Summary of article content: Articles about How to Fix Clipped/Distorted Vocals | RX7 Walkthrough/Demo – YouTube Updating …
- Most searched keywords: Whether you are looking for How to Fix Clipped/Distorted Vocals | RX7 Walkthrough/Demo – YouTube Updating ► Spark your creativity and get rid of beat block. Download My FREE Production Loop Kit: https://geni.us/FreeLoopKitSUBSCRIBE: https://geni.us/SubToMyChanne…music production, audio engineering, home recording, vahn, solo, vahn solo, how to fix clipped audio, how to fix clipped vocals, how to fix distorted audio, how to fix distorted vocals, izotope rx7 review, izotope rx7 walkthrough, izotope rx7 demo, izotope rx7, audio repair, how to repair audio clipping, how to repair audio distortion, izotope, rx7, audio repair software, izotope rx7 features, how to recover clipped vocals, how to recover distorted vocals, clipped vocal repair
- Table of Contents:
Tips for Repairing Bad Recordings
– Mastering The Mix
- Article author: www.masteringthemix.com
- Reviews from users: 43588 Ratings
- Top rated: 3.5
- Lowest rated: 1
- Summary of article content: Articles about Tips for Repairing Bad Recordings
– Mastering The Mix Updating … - Most searched keywords: Whether you are looking for Tips for Repairing Bad Recordings
– Mastering The Mix Updating The first step of the mixing stage is correcting issues that were caused while recording. It’s vital that you correct these issues as soon as possible, otherwise they can cause additional problems. In this blog, we’ll share a few tips for correcting some of the most common issues. - Table of Contents:

– Mastering The Mix
Error 403 (Forbidden)
- Article author: www.quora.com
- Reviews from users: 36305 Ratings
- Top rated: 4.6
- Lowest rated: 1
- Summary of article content: Articles about Error 403 (Forbidden) Choose your recording software of your choice. · Create an audio track. · Leave the fader as it is, don’t touch its volume fader. · Increase the input gain / … …
- Most searched keywords: Whether you are looking for Error 403 (Forbidden) Choose your recording software of your choice. · Create an audio track. · Leave the fader as it is, don’t touch its volume fader. · Increase the input gain / …
- Table of Contents:
Loud vocals without clipping. | HomeRecording.com
- Article author: homerecording.com
- Reviews from users: 40822 Ratings
- Top rated: 5.0
- Lowest rated: 1
- Summary of article content: Articles about Loud vocals without clipping. | HomeRecording.com First of all, get a good microphone. Second of all, there is a plugin in Audacity that allows you to remove clipping if ever needed. …
- Most searched keywords: Whether you are looking for Loud vocals without clipping. | HomeRecording.com First of all, get a good microphone. Second of all, there is a plugin in Audacity that allows you to remove clipping if ever needed. Hello all,
How does one record loud vocals without having experiencing any distortion.
Thank you,
mat
- Table of Contents:
How to prevent distortion in your vocal recordings – Home Music Creator
- Article author: homemusiccreator.com
- Reviews from users: 49181 Ratings
- Top rated: 4.5
- Lowest rated: 1
- Summary of article content: Articles about How to prevent distortion in your vocal recordings – Home Music Creator Back in the old analog recording days, it was best practice to record as loud as possible without going into the red i.e. with the meter hitting as close to 0dB … …
- Most searched keywords: Whether you are looking for How to prevent distortion in your vocal recordings – Home Music Creator Back in the old analog recording days, it was best practice to record as loud as possible without going into the red i.e. with the meter hitting as close to 0dB … I have been recording vocals in my home studio for over twenty years. In that time I have made pretty much every mistake it is…
- Table of Contents:
Prevention is better than cure for vocal distortion
Most common cause of distortion is recording too loud
Vocal recording process for avoiding distortion
Faulty equipment can cause distortion
Dealing with distortion at the mixing stage
Potential “fixes” to try to reduce vocal distortion
About Me
LEGAL INFORMATION
How to Get Your Master Loud WITHOUT Distortion — Sage Audio
- Article author: www.sageaudio.com
- Reviews from users: 10700 Ratings
- Top rated: 4.4
- Lowest rated: 1
- Summary of article content: Articles about How to Get Your Master Loud WITHOUT Distortion — Sage Audio Making your master loud without distorting it is one of the most challenging things a mastering engineer can do. …
- Most searched keywords: Whether you are looking for How to Get Your Master Loud WITHOUT Distortion — Sage Audio Making your master loud without distorting it is one of the most challenging things a mastering engineer can do. Making your master loud without distorting it is one of the most challenging things a mastering engineer can do.
- Table of Contents:
Use True Peak Limiting and Oversampling
Increase the Release of a Limiter to at Least 30ms
Try a Double Limiter Approach
Use the MetaPlugin with 8x Oversampling
Conclusion
How to Avoid Audio Clipping When Recording Dynamic Vocals
- Article author: www.izotope.com
- Reviews from users: 18156 Ratings
- Top rated: 4.0
- Lowest rated: 1
- Summary of article content: Articles about How to Avoid Audio Clipping When Recording Dynamic Vocals How to record vocals without audio clipping … You don’t want to clip on the loud parts, but if you’re recording quieter vocals with the … …
- Most searched keywords: Whether you are looking for How to Avoid Audio Clipping When Recording Dynamic Vocals How to record vocals without audio clipping … You don’t want to clip on the loud parts, but if you’re recording quieter vocals with the … Vocal Production,Vocal Recording,Arthur Kody,Spire AppAudio clipping is a common problem with vocal recording. In this article, learn how to record vocals that won’t clip using features in the Spire app for iOS.
- Table of Contents:
Learn Music and Audio Production iZotope Tips and Tutorials
What is audio clipping
How to record vocals without audio clipping
Recording dynamic vocals using the Spire app
Put an end to audio clipping
4 Tips for Vocal Recording on Your Phone
5-Step Tutorial on Recording Vocals at Home
How to Use Spire Pro’s Lo-Shift and Hi-Shift Vocal Effects
We make innovative audio products that inspire and enable people to be creative

See more articles in the same category here: https://chewathai27.com/toplist.
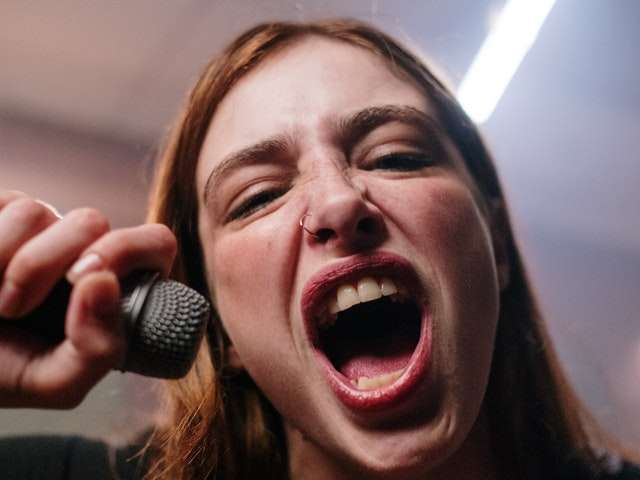
How To Record Loud Vocals Without Distortion
Recording loud vocals can pose a challenge especially if you don’t know what you’re doing,
that is why you have to ensure that you understand how best you can tackle loud vocal projection recordings whilst avoiding distortion.
Distortion basically comes in when a particular audio signal is too strong or too over powering,
leading to the recording components being unable to cope with the incoming signal resulting in parts of the audio signal being lost which makes the audio signal sound like a distorted raspy-like sound.
Some genres like EDM, Metal Rock and Pop may involve some loud vocal recordings therefore it becomes the duty of the recording engineer to be able to carry out the task properly.
In this article I go through some techniques that you can use in your recording when you’re particularly dealing with a loud vocalist or a session in particular that requires loud vocal recordings.
Gain
Gain is used to adjust the strength of an audio signal and it usually found on most audio interfaces, mixer boards and digital audio workstations.
The gain should not be confused with the volume because while the gain adjusts the audio signal strength,
all the volume does is just adjust the loudness of the signal as you hear it through your studio speakers or headphones.
Gain control can help you get the right input levels.
So for example if you have a microphone that has a higher output signal then you would typically using a very low amount of gain if you’re recording a particular person with loud vocals in order to avoid any distortion from the signal.
You would typically utilize a lot more gain if your microphone output level was low, and the person you were recording had low vocal projection.
Therefore one of the ways you can avoid distortion and clipping when recording loud vocals is utilizing the gain of the pre amp, audio interface, mixer board or DAW in order to ensure that the peaks do not exceed the maximum dynamic range.
The maximum dynamic range is usually indicated by 0db or by an overload LED indicator.
Therefore you have to make sure that your microphones signal does not exceed 0db,
so you can reduce the gain to compensate for the loud vocals this will ensure that the signal that is recorded doesn’t clip or distort.
Your main goal here will be to get as close as possible to 0db without exceeding it.
One key take away when it comes to gain is that; depending on the gain level you have set, your input signal with either gain strength or lose strength.
Find out if you should actually use microphone gain
Use a pop filter
When it comes to recording loud vocals, pop filters are really handy.
Utilizing a pop filter can be helpful because most recordings done without a pop filter usually have vocals that have prominent sounding B’s and P’s.
This problem can be further amplified if the person recording is pretty close to the mic.
This is why you need a pop filter to be able to completely eliminate all these plosive sounds.
Pop filters are great to use in loud recording sessions because they are able to tackle issues both on the high end and low end,
which makes it easier for you to edit all your frequencies.
The truth is that, one of the main things that you will be faced with in recording loud vocal projections is distortion so you have to properly account for it.
Using a pop filter can be one of the ways that you tackle and account for distortion;
another advantage of using pop filters is that you can be rest assured that the impacts of fast moving air on the microphone will be eliminated.
Another great advantage of using a pop filter is that it can help you to reduce on sibilance which is the hiss sounds commonly from words that have the letter “S” in them.
So, does it matter the pop filter that you get? find out here
Don’t record directly into the Microphone
Another way you can tackle loud vocals is not to record directly into the microphone,
another alternative you might want to try is backing away from the microphone and recording a bit far from it or you could simply turn your microphone a tad bit away from your mouth or input audio source.
Another way of tackling a loud vocal is using a unidirectional dynamic microphone instead of a condenser microphone.
Condenser mics are highly sensitive by design which makes them not best suited for loud vocals, dynamic microphones on the other hand much more able to deal with loud vocals.
Also avoid being too close to the microphone in order to avoid running into the proximity effect problem.
Compression
You can put some compression on the track being recorded in. One thing you can count on with compression is consistency and uniformity in the vocal.
When using a compressor I highly recommend using pre fader metering too.
Essentially pre-fader metering determines where the audio signal level will be measured along the signal flow on a channel strip,
and you have to make sure that the vocal doesn’t go into the red.
The rule of thumb here is that for aggressive vocals a compressor is a must this is due to the variety of the swings in the dynamic range of loud vocals.
You can use compression in post-production but I highly recommend that you have it already on the mixer channel that your recording is being routed to.
To learn more about recording with compression check out this post.
as an example:
When recording loud vocals I like to use the following compression settings/parameters:
Firstly, I set the makeup gain to around 2db Secondly I usually have my ratio set to 2:1 Thirdly I like my attack time between 15ms to 30ms, the key being that the more I increase the attack time the more punchier the vocal gets Fourthly, I set my release time to around 40ms Lastly I use a threshold well below the vocal to about -24db
Be reminded that these settings are basically a rough estimation of I what I go for most of the time,
what you’ll need is to experiment with your compression plugin using your own parameters.
Vocals differ so you cannot take my settings as the only settings that you could use. But they can you context.
So experiment with your plugin and the vocal.
Compression is about normalizing the louder peaks and basically reducing their volume; to achieve this you need a fast attack time and a higher ratio.
As a personal preference I also like to cut the low end of the particular input signal,
I do this to basically reduce the fighting of frequencies between the vocals, and the instruments (bass, kick, snares etc) present in the instrumental.
Cutting the low end might also work in your best interests if you’re using a condenser microphone to record the loud vocals because condenser mics tend bring out the lows more prominently than dynamic microphones.
The Vocalist
Whilst recording vocals may have to do equipment and all these techniques that are mentioned in this post,
but remember without the vocalist, there isn’t a vocal to record.
It’s really essential to have the vocalist prepared before the session,
because there isn’t anything in this world that will magically perfect a poor vocal performance.
That is why you have to ensure that the recording artists have all the bases covered.
Conclusion (The Process)
As a process, recording loud vocals can be easily done with the techniques mentioned in this post.
The process begins with the vocalist being prepared and trained to be able to record loud vocals; this requires some work on the vocalist’s part.
The second step is getting the right microphone,
a dynamic microphone is more ideal in this case, but you could consider using a condenser microphone provided that you take the low end into account and cut it out.
The third step is learning various microphone techniques, in this case you’re recording an overpowering vocal,
and therefore you may have to record a bit far away or you can simply not record directly into the microphone by simply not facing it directly but facing it at an angle.
The goal here is trying to account for the extra strength in the vocal that may distort if it is recorded too close to the microphone.
The third step also involves picking the right pop filter depending on the microphone that you intend to use, the pop filter will help with sibilance and plosive sounds.
The Fourth Step now that you have your microphone set up with your pop filter ready and the recording artist ready to experiment the various microphone techniques,
you can then start dealing with the gain, either in the DAW, or on the mixer or your audio interface to ensure that the recorded signal is properly optimized not to distort.
Remember that the gain can and should improve your output signal either by giving a low input signal some strength therefore improving the output or by simply reducing the strength of the input signal to avoid distortion and clipping.
The Fifth step is introducing compression into the equation. Compression will help with uneven parts in the vocal therefore ensuring that the vocal sound balanced and even without some parts sounding too loud or too dull.
You can use the compression on the particular channel into which the vocal is being recorded or you can use the compression that comes with some mixers to get the right vocal.
I hope you found this article helpful.
Related Articles You Might Find Interesting
What Effects Make Vocals Sound Better?
How You Can Record Professional Vocals At Home
What Is The Difference Between Saturation And Distortion?
Additional Helpful resources
Recording Loud Vocals – Gearspace.com
5 ways to avoid distortion and noise
Though REAPER and Audition are extraordinary audio editors, nothing can fix bad audio production. Good sound design paints a portrait of your film’s world and bad sound design subtracts from that. Noisy or distorted audio is a primary culprit when it comes to ruined audio clips. Here’s what you can do to prevent distortion and noise in your audio recording.
Amazing tool, awful crutch.
Use the proper equipment
You’ll typically choose between two methods of audio capture in most types of production: lavaliers or a shotgun mic mounted on a boom pole. You want to make sure your mic is sensitive, but not too sensitive. Your shotgun mic, ideally, will capture anywhere from 80-140Hz.
There are three parts to a boom-mounted shotgun microphone setup. First is the pole itself, which your boom operator will use to support the mic.
Advertisement
If the microphone is improperly supported by a flimsy boom pole, it will be harder to manage. This often leads to noise from the operator making adjustments. Plus, it’s more likely to sneak into your shot.
Next up is the shock mount, which holds the mic in place. A good shock mount is vital to keeping the microphone from falling through your shot, even in the most extreme of situations. It can also prevent excessive handling noise from coming through on the recording.
Without headphones, it would be easy to accidentally catch set noise.
Speaking of, make sure your boom operator is patched into their own channel via an external device and a good pair of headphones. They need the audio played to them live in order to maintain channel integrity. Without headphones, it would be easy to accidentally catch set noise.
Don’t touch the mic
Seriously. In a run-and-gun situation like an on-the-street interview, do not hand the mic to someone who doesn’t know how to use it. They’ll hold it too close, or too loosely because they don’t know how much a shotgun can cost.
Microphones have sensitive parts that shouldn’t be breathed on, shaken, or, god forbid, dropped. When interviewing someone unfamiliar with industry standards, the reporter should hold the microphone. It should be 6-12 inches away from the speaker, to prevent distortion. Hold it steady!
Position your microphones correctly
If you’re going to mount a microphone on your DSLR, you’re going to have to be very careful. Filming an event with a one-mic setup is essentially a promise to re-record everything you hear.
Some moments will inevitably be filmed at a distance, leaving the audio compromised to distortion and noise. Set up audio devices at every juncture, if you have the time and resources.
More realistically, you could go back as the event is concluding and re-record whatever audio you can. Worst comes to worst, you don’t use shots that you don’t have sound to supplement.
A documentary crew with multiple audio capture devices spread out among different frequencies would be able to capture nat sound and interviews, all at once.
Although, recording audio in an overly large room, or “echo chamber” could lead to some unwanted noise.
Avoid bad ADR
Automatic dialogue replacement is only discernible when it’s done poorly. Out-of-sync audio is easy to spot and ruins a film’s immersion. It’s always best to get a second opinion on if that pesky line of dialogue really lines up with the scene in question, though sync is a job left to editors.
On top of that, sound and location have to share the same acoustics, mixed together with their combined loudness not peaking. Like sound design itself, good ADR comes with a lot of practice, and it can be a difficult craft to master. Plus members will find an instructional course here. Good ADR can solve any audio issues in post.
RECORDING ENVIRONMENT
VO and dialogue should always be recorded in a studio environment. However, when conducting an onsite interview, audio quality may be out of your control. Getting a meaningful, cinematic shot comes first. A studio-quality microphone with directional controls will end your woes. A unidirectional stereo channel is the way to go. Boom movements will be undetectable. On the contrary, when a cheap microphone moves, you can hear the unsteadiness in the recording, causing noise and reverb.
A documentary crew with multiple audio capture devices spread out among different frequencies would be able to capture nat sound and interviews, all at once. Although, recording audio in an overly large room, or “echo chamber” could lead to some unwanted noise.
MIC CHOICE
A reliable microphone captures room tone and timbre, and has mounted audio controls. It should be compact, portable, and come with a wind sleeve. You’ll only want to use a wind sleeve in outdoor situations, where ADR isn’t an option. It’s an extremely useful tool for news and documentary stories covering outdoor events. You’ll also want to purchase a lavalier mic for your reporters. It should be omnidirectional, with relatively low sensitivity.
Content creators and podcast show-runners typically purchase Blue Yeti microphones, connected to a soundboard. Though there are cheaper options, since a cheap mic works best when it’s stationary, it will take a lot more work to consistently produce great audio. Content creators who aren’t stationary, however, might want to purchase a lavalier, with wireless being a more high-end, expensive option.
MIC PLACEMENT
The 3:1 myth, while being just that, a myth, is somewhat based in reality. Mount interviewees with wireless lavaliers. You’ll also want to mount a camera mic for safety. In the case of a celebrity interview, mic both the interviewer and the interviewee. You can use either a boom or a mounted microphone for safety, since it’s safe to pick up sound from both parties.
When filming in a controlled environment, if you don’t have the budget to ADR everything, you’ll need to be extremely careful as to where you keep your boom. An extremely helpful tip from Shazam! Director David Sanberg is to record everything normally and then go back in REAPER to reroute audio clips for certain scenes. Then, you can mix it down with room tone to create your final mix. It’s a lot of work to create audio atmosphere, but it’s undeniable that the end result sounds great.
Tips for Repairing Bad Recordings
Tips for Repairing Bad Recordings
The first and arguably most important step of the mixing stage is correcting issues that were caused while recording. With so much excitement and energy in the studio during the recording process, it’s easy for a boomy bass or shrill cymbal to go unnoticed. And while it might not be the most glamorous part of mixing, it’s vital that you correct these issues as soon as possible, otherwise they can cause additional problems later down the road. In this blog, we’ll share a few tips for correcting some of the most common issues.
Use LEVELS To Identify Problems In The Mix
Before you can start repairing bad recordings in your mix you have to figure out what the problems are. LEVELS makes it easy to instantly identify issues with your mix. Add LEVELS to your mix bus, select a preset from the drop-down menu, and check each of the tabs to instantly identify issues with your mix.
Use the Peak tab to see if your mix is peaking, which can cause unwanted distortion. The LUFS tab will tell you if your overall mix is too loud for the selected streaming service. If your mix is too loud, streaming services will adjust the level to compensate, which can affect the balance of the track.
Use the Stereo Field tab to see if there are any phase issues—typically caused by drum overheads or dual mic’d guitar cabs. If you notice the meter hovering towards -1, it indicates that your mix has phase issues. Identify any stereo tracks and flip the phase on one channel—this should correct this issue and make your bass sound full and rich again.
You can also use the Dynamic Range tab to tell if your mix has been over-compressed, and the Bass Space tab to tell if the instruments in your mix are eating up too much of the low-end. After using LEVELS to check your mix for technical issues, make a list of all the things you need to address in your track and check them off one by one.
Use Editing Tools To Tighten Up Performance Issues
Good mixing starts with good editing—that’s why it’s important to address any performance issues before you start tweaking your tone. Start by using quantization to tighten up any timing issues in the performance. Make sure the downbeat and backbeat always feel strong, and that the song has a solid groove.
Use pitch correction to correct issues with the vocal performance. Use a light touch with the pitch correction for a more natural sound, or lean into it and go full-on robot voice for the T-Pain effect. You can also reverb to help mask notes that are a little sharp or flat.
Use a High-Pass Filter to Remove Unwanted Low End
One of the most common issues with any mix is boomy or muddy sounding low-end. Thankfully, there’s an easy solution for this. Use a high-pass filter to roll-off the low-end on every track and remove any unnecessary frequencies.
The specific frequency will vary from track to track. You may want to use an EQ with a frequency analyzer to help you determine where to place the high-pass filter for each instrument. For some instruments, like the kick and bass, you’ll just need to trim off the lowest frequencies—typically below 60 Hz.
However, with other instruments like cymbals, background vocals and synth pads, you can roll-off the low-end up to 300 Hz or more. Your goal is to make room for the instruments that are intended to occupy this range to keep your mix sounding clean and focused.
Use a Surgical EQ to Isolate and Remove Resonances
Another common issue caused by bad recordings are resonances. Often caused by poor mic placement or room modes in untreated rooms, frequency resonances can make instruments stick out in your mix like a sore thumb.
It’s especially common to hear resonances in the snare drum and guitar tracks—these complex instruments are prone to producing harmonic resonances that can go wild if not kept under control. In the mixing stage, use a surgical EQ like BASSROOM and MIXROOM to zero in on specific frequencies that are causing problems.
BASSROOM is great for taming problems in the low mid—like a kick drum that sounds like a beach ball, or a bass guitar with one note that’s louder than the rest—while MIXROOM is better for addressing issues in the high frequencies.
Use a De-Esser to Prevent Harshness and Sibilance
Sometimes, using an EQ to correct a problem can actually make a track sound worse. Especially if the problem is in the high frequencies, it can be difficult to pinpoint resonances without making the track sound dull or weak. That’s where de-essers come in.
With a de-esser, you can target specific frequencies only when they become a problem. For instance, if a vocal sounds harsh or shrill during some passages, use a de-esser to target the high-end (typically around 6 – 8 kHz) and adjust the threshold so that the de-esser only engages when the frequencies become overbearing.
This way, you retain the natural sound of the vocal most of the time, and only make an adjustment when needed—like an automated EQ.
Use a Transient Enhancer to Liven Up Over-Compressed Tracks
Whether you’re working with a compressor-happy client or you just got a little over-zealous with your threshold setting while tracking, over-compressed tracks can be difficult to manage. They suck the life out of a mix and make it hard to create any energy or excitement.
Thankfully, with a transient-enhancing plug-in like PUNCH, you can revitalize squashed tracks and restore a punchy, dynamic sound. Plus, PUNCH offers a dedicated filter to help you focus on specific frequencies.
For instance, using the filter to enhance the 2 – 6 kHz can help bring out the crack of the snare, while boosting the 8 – 10 kHz range can breathe new life into stale cymbal tracks. For further refinement, PUNCH offers mid-side processing, so you can pinpoint transients in the center or sides of your mix.
Don’t Fix It—Destroy It
Sometimes, if you can’t seem to fix an issue, the best option is to make it worse. Seriously—blow it up. Add tons of distortion and aggressive compression to bring out even more grit and grime. Run it through the garbage disposal and give it some jagged edges. It could be just the thing your mix is missing!
So you have finished reading the how to record loud vocals without distortion topic article, if you find this article useful, please share it. Thank you very much. See more: