
You are looking for information, articles, knowledge about the topic nail salons open on sunday near me how to protect wood burning art on Google, you do not find the information you need! Here are the best content compiled and compiled by the Chewathai27.com team, along with other related topics such as: how to protect wood burning art wood burning finishing techniques, danish oil on burned wood, wood burning spray, do you sand after wood burning, how to seal wood burned cutting board, linseed oil pyrography, best sealant for pyrography, how to keep pyrography from fading
Spray polyurethane is a quick and easy way to seal any woodburning that has been colored, no matter what color medium was used—colored pencils, oil paints, or watercolors. Because the sealer is applied through an aerosol spray, it does not disturb or move your color work with brush strokes.If you are wood burning, simply sand the surface lightly and transfer your pattern onto the surface. After the wood burning is complete, seal the wood. Wood preparation is important for your project. Unless you are covering your surface with fabric or paper, you will need to seal the wood with a wood sealer.
Contents
Do you have to seal wood burning?
If you are wood burning, simply sand the surface lightly and transfer your pattern onto the surface. After the wood burning is complete, seal the wood. Wood preparation is important for your project. Unless you are covering your surface with fabric or paper, you will need to seal the wood with a wood sealer.
What is the difference between pyrography and wood burning?
The word “pyrography” basically means writing with fire. Many people refer to pyrography as “woodburning,” however woodburning is technically done on wood, whereas pyrography can be done on any receptive surface (including wood). Whatever it is that you’re burning, you will always need a woodburning tool.
Do you sand after wood burning?
Sanding after you wood burn a piece
Sanding your piece after you burn it gives your piece crisper and finer lines. Use a 200-grit or 220-grit sandpaper (the finer the better) and remember to be super gentle when sanding at this stage, especially if you don’t burn very deep.
How do you clean wood after pyrography?
This blog will discuss a tip someone gave me about the need to clean your artwork. The tip went something like this: you must clean your pyrography artwork with denatured alcohol before you seal it with a brush on finish.
Will Modge podge seal acrylic paint on wood?
You can use Mod Podge as both a protective sealer and as a glue. It will work on practically any porous surface. When used as a sealer, Mod Podge offers a great protective finish, ideal for acrylic painted wood, decoupage, fabrics, and any other paper projects.
Does Mod Podge seal wood?
This is the original Mod Podge formula – that have been around since the 1960s, so it has been well and truly tested. Classic Mod Podge can b used for : sealing wood, chipboard or terracotta prior to painting to give a smooth surface to work on.
Should I stain wood before or after wood burning?
Yes, you can and should stain wood after burning. It is best to stain wood after burning is complete for health and safety reasons. If you try to stain before burning, you would be putting yourself in harm’s way because burning stained wood causes a release of harmful gases into the air.
How do you treat wood burns?
- Clean the Wood Surface. Clean the wood surface with mineral spirits and a dry rag. …
- Sand Off the Burned Area. …
- Remove the Burnt Section. …
- Use a Wax Stick to Patch the Burned Area. …
- Ensure an Even Surface. …
- Clean the Surface Again and Buff to Smooth. …
- Maintain the Wood Going Forward.
Can you stain torched wood?
To enhance the look of your charred wood, you can add stain or dye. For top coats, Bickell prefers water-based products such as Polycrylic from MinWax and the thicker Enduro-Var urethane from General Finishes (excellent for coating a fully charred wood surface).
Do you sand after wood burning?
Sanding after you wood burn a piece
Sanding your piece after you burn it gives your piece crisper and finer lines. Use a 200-grit or 220-grit sandpaper (the finer the better) and remember to be super gentle when sanding at this stage, especially if you don’t burn very deep.
How do you seal a wood burning spoon?
You have a few options for food safe wood sealers. I would recommend Tung Oil because of it’s fast drying time, resistance to water, and because it does not dis-color or change the wood finish. All that’s needed is to rub a few coats over the wood burned area (or the entire wooden spoon).
how to protect wood burning art
- Article author: pyrographyonline.com
- Reviews from users: 6814
 Ratings
 - Top rated: 3.8
- Lowest rated: 1
- Summary of article content: Articles about how to protect wood burning art Updating …
- Most searched keywords: Whether you are looking for how to protect wood burning art Updating
- Table of Contents:
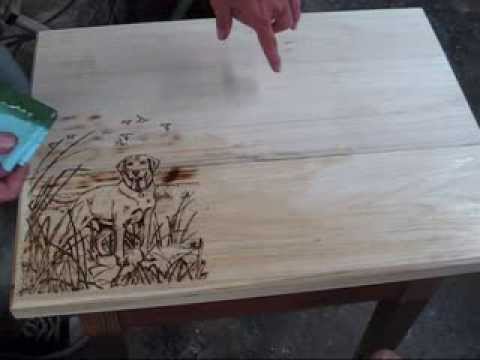
How to Seal Wood Burning Project – YouTube
- Article author: www.youtube.com
- Reviews from users: 42084 Ratings
- Top rated: 3.5
- Lowest rated: 1
- Summary of article content: Articles about How to Seal Wood Burning Project – YouTube Updating …
- Most searched keywords: Whether you are looking for How to Seal Wood Burning Project – YouTube Updating Danish Oil is one of my favorite ways to seal the wood in my wood burning projects. Follow me along in the steps and see how to apply it and how it turns out…wood burning, wood burning techniques, how to wood burn for beginners, pyrography colored pencil, pyrography for beginners, pyrography techniques, wood burning art, how to wood burn pictures, how to wood burn, learn how to wood burn, learn how to woodwork, wood burning tutorial, pyrography tutorial video, how to seal wood burning, varnish for pyrography, varnish for wood burning, seal pyrography, wood burning varnish, pyrography varnish
- Table of Contents:

Helpful Hints | Walnut Hollow – Craft
- Article author: www.walnuthollow.com
- Reviews from users: 47280 Ratings
- Top rated: 3.4
- Lowest rated: 1
- Summary of article content: Articles about
Helpful Hints | Walnut Hollow – Craft
Updating … - Most searched keywords: Whether you are looking for
Helpful Hints | Walnut Hollow – Craft
Updating - Table of Contents:
Customer Service
Learn More
How to hang wood slab and seal woodburn with mod podge – YouTube
- Article author: www.youtube.com
- Reviews from users: 41355 Ratings
- Top rated: 3.1
- Lowest rated: 1
- Summary of article content: Articles about How to hang wood slab and seal woodburn with mod podge – YouTube Updating …
- Most searched keywords: Whether you are looking for How to hang wood slab and seal woodburn with mod podge – YouTube Updating video, chia sẻ, điện thoại có máy ảnh, điện thoại quay video, miễn phí, tải lên
- Table of Contents:

Tips on wood burning finishs – YouTube
- Article author: www.youtube.com
- Reviews from users: 8941 Ratings
- Top rated: 4.6
- Lowest rated: 1
- Summary of article content: Articles about Tips on wood burning finishs – YouTube Updating …
- Most searched keywords: Whether you are looking for Tips on wood burning finishs – YouTube Updating Tips on picking out the right wood and finish to use on a wood burning project.wood, burning, art, woodworking, Burn
- Table of Contents:
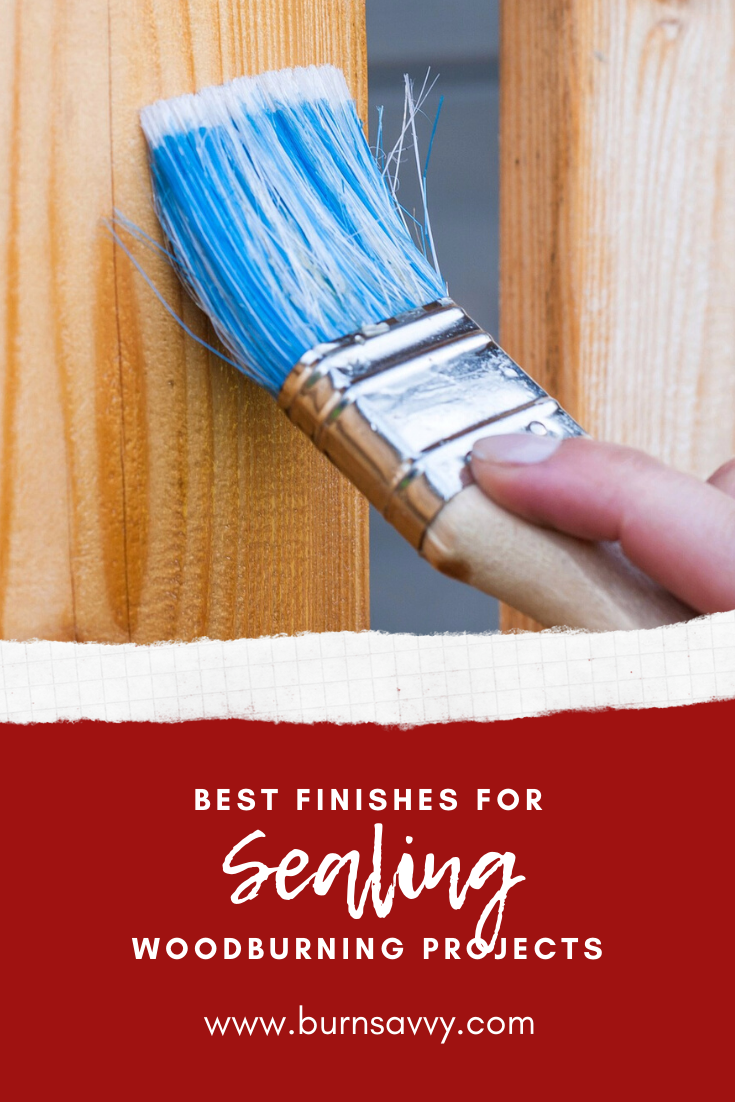
Finishes: Sealing Woodburning Projects for Long Lasting Art
- Article author: www.burnsavvy.com
- Reviews from users: 31933 Ratings
- Top rated: 4.6
- Lowest rated: 1
- Summary of article content: Articles about Finishes: Sealing Woodburning Projects for Long Lasting Art Updating …
- Most searched keywords: Whether you are looking for Finishes: Sealing Woodburning Projects for Long Lasting Art Updating Sealing woodburning projects protects your design from fade and wear. You’ll want a different finish depending on the project – wall art, food safe things like cutting boards, jewelry…
- Table of Contents:
General Finishes for Sealing Woodburning Projects
Outdoor Projects
Food Safe Finishes
Mixed Media
Other Finishes
Want to seriously up your pyrography game
⣠Consider yourself a giver â£
Best Finish for Wood Burning & Pyrography 2022 [Updated] – Working the Flame
- Article author: workingtheflame.com
- Reviews from users: 47150 Ratings
- Top rated: 3.6
- Lowest rated: 1
- Summary of article content: Articles about Best Finish for Wood Burning & Pyrography 2022 [Updated] – Working the Flame Updating …
- Most searched keywords: Whether you are looking for Best Finish for Wood Burning & Pyrography 2022 [Updated] – Working the Flame Updating Guide to the best finish for wood burning, the best finish for pyrography, the best wood burning finishing techniques & how to seal burnt wood
- Table of Contents:
How to Prepare Wood for Burning & Finishing
Considerations Before Applying a Finish
Spray On vs Brush On Products – What’s Best
Best Type of Pyrography & Wood Burning Finish (Pros & Cons)
Recent Posts
![Best Finish for Wood Burning & Pyrography 2022 [Updated] - Working the Flame](https://workingtheflame.com/wp-content/uploads/2020/08/best-finish-for-wood-burning-pyrography.jpg)
Best Sealant For Wood Burning [2022 Product Reviews]
- Article author: www.thepyrographytool.com
- Reviews from users: 37931 Ratings
- Top rated: 4.1
- Lowest rated: 1
- Summary of article content: Articles about Best Sealant For Wood Burning [2022 Product Reviews] Updating …
- Most searched keywords: Whether you are looking for Best Sealant For Wood Burning [2022 Product Reviews] Updating Using the best sealant for wood burning will protect and allow your pyrography art to last for many years. Find sealant types and their applications.
- Table of Contents:
The Right Way To Burn Onto Wood
First Things First – Prepping Your Wood For Burning
Different Types of Sealant Applications
Find The Best Sealant For Wood Burning Art
Types of Wood Sealer And Application Methods
Food Safe Products And Their Application
How To Seal Wood Burning Art with Colour Added
Preparation For Sealing A Wood Burning Artwork
Finishes For Wood Burning Done on Non-Wood Products
Conclusion
Post navigation
Similar Posts
Product Categories
Recent Blog Posts
Review Cart
![Best Sealant For Wood Burning [2022 Product Reviews]](https://thepyrographytool.s3.us-west-2.amazonaws.com/2021/12/sealant-for-wood-burning.jpg)
Helpful Hints | Walnut Hollow – Craft
- Article author: www.walnuthollow.com
- Reviews from users: 32598 Ratings
- Top rated: 4.4
- Lowest rated: 1
- Summary of article content: Articles about
Helpful Hints | Walnut Hollow – Craft
If you are wood burning, simply sand the surface lightly and transfer your pattern onto the surface. After the wood burning is complete, seal the wood. … - Most searched keywords: Whether you are looking for
Helpful Hints | Walnut Hollow – Craft
If you are wood burning, simply sand the surface lightly and transfer your pattern onto the surface. After the wood burning is complete, seal the wood. - Table of Contents:
Customer Service
Learn More
How to Seal and Finish a Wood Burning Project | Woodburning projects, Wood burning stencils, Wood burning tips
- Article author: www.pinterest.com
- Reviews from users: 4852 Ratings
- Top rated: 3.5
- Lowest rated: 1
- Summary of article content: Articles about How to Seal and Finish a Wood Burning Project | Woodburning projects, Wood burning stencils, Wood burning tips Dec 17, 2020 – An easy-to-follow tutorial for finishing your wood burning … Applying varnish is an important part of preserving any wooden art piece. …
- Most searched keywords: Whether you are looking for How to Seal and Finish a Wood Burning Project | Woodburning projects, Wood burning stencils, Wood burning tips Dec 17, 2020 – An easy-to-follow tutorial for finishing your wood burning … Applying varnish is an important part of preserving any wooden art piece. Dec 17, 2020 – An easy-to-follow tutorial for finishing your wood burning projects and ensuring the longevity of your finished pieces.
- Table of Contents:

How do you folks finish/seal your burnings? –
Woodcarving Illustrated
- Article author: forum.woodcarvingillustrated.com
- Reviews from users: 33580 Ratings
- Top rated: 3.2
- Lowest rated: 1
- Summary of article content: Articles about
How do you folks finish/seal your burnings? –
Woodcarving Illustrated
Post your Pyrography and Woodburning questions here. … what would be the proper way to finish/seal it to protect it from fading, … … - Most searched keywords: Whether you are looking for
How do you folks finish/seal your burnings? –
Woodcarving Illustrated
Post your Pyrography and Woodburning questions here. … what would be the proper way to finish/seal it to protect it from fading, … Post your Pyrography and Woodburning questions here - Table of Contents:
How do you folks finishseal your burnings
Comment
Comment
Comment
Comment
Comment
Comment
Comment
Comment
How do you folks finish/seal your burnings? –
Woodcarving Illustrated
See more articles in the same category here: Top 122 tips update new.
How to Finish / Seal Fine Wood Art Tutorial wood burning
This blog is a “how to” or “informational page” on the different products used to seal/finish fine art. It is written in part (ok, mostly) by Todd as he’s the expert in our household on this subject. Todd also creates and preps most of the boards that I burn on (yes, I’m a very lucky person), so not only will he discuss sealing the wood, but he’ll mention prepping the wood for optimal burning. Without further ado…
Last updated August 2020 – new finish test panel photo
At the bottom of the blog I summarize when I’d use a particular finish.
Watch a YouTube video on this subject by clicking on the image to the left. The information in the video covers the very basics of using finishes.
Considerations on Finishing Wood
When I say finish the wood, by that I mean to seal it. You are attempting to protect it against water (spilled or just humidity), oils (from your fingers or anyone else’s fingers who picks it up to look at it), and dirt that can accumulate and then get ground in when touched; giving it a dingy look.
Also, sealant provide a barrier to keep moisture levels constant in the wood. This prevents moisture loss/addition which can cause the wood to contract/expand. This can cause wood buckling, warping, or cracking.
Even though you seal the wood, remember that this is not bullet proof armor you will be putting on, so you must still treat it with respect. You can still scratch it, dent it, break it, etc.
Next warning: there is no “best” finish. The finish is dependent on the project. For example, I finish a cutting board very different than I do wall art.
TIPS ON PREPPING THE WOOD BEFORE BURNING:
Before we get started on finishing the wood, I’d better throw in a quick word about prepping the wood before you burn. I always sand my blanks down to at least 220 (grit sandpaper). I then take a bowl of water and a rag and wet down the wood thoroughly and let it dry. I do this to raise the nap of the wood. I then sand it down again to 220. Depending on the wood, I might do this twice. Woods like Basswood, Poplar, and Maple need a single wetting and sanding. Others, like Oak, Hickory, or Cedar, I would probably do twice. The reason you’re doing this is because, when you put your finish on, it’s wet and that will raise the nap, so you will then have to sand it to get it smooth. I find it objectionable to sand over finished artwork, therefore I try to get that all done before the wood is burned on in the first place.
So, here are a few of the most commonly used and available finishing products today – without having to mix your own. I will cover each one and give its advantages and disadvantages as I see them. I’ve used them all, including doing nothing to the wood and can give a firsthand account of how that worked out over time.
FOREWORD – a quick word about ALL finishes/sealants.
1) Never dip your brush directly into the can of sealant/finish because you can contaminate the product. Some woods, like padauk, will leach color, so the brush will pick up that color. You don’t want your finish/sealant to be tinted red, so always put a small amount of sealant into a bowl, mason jar, etc for use. Another common source of contamination is stained or dyed wood.
2) Also, all of these – excepting oil finishes and doing nothing to the wood, will require that you have a space that is warm enough to apply the finish to the wood. Read the container, but essentially, if should be about 70 degrees Fahrenheit (21.1 celsius). If it is not at least that warm the finish will either not set right or will set so slowly, glaciers will be passing it by.
Also, if you take a cold can of finish out and start to use it in a warm room, you will most likely get bubbles in the finish as it warms up. There were bubbles in there you couldn’t see and when they warm they expand and poof – there they are ruining your nice finish. Warm up your can of finish first and warm up your wood too!
3) Apply the finishes in a well ventilated area. Some of them are very strong smelling and the fumes can be irritating on the lungs.
4) Always apply at least 3 thin coats of finish to ALL sides of the wood; including bark if present. 3 thin coats will provide much better results than trying to apply 1 thick coat.
5) NEVER mix your finishes! The chemical properties of the different finish are not always compatible with each other, so mixing finishes can ruin the finish or prevent it from curing properly. If you start out with a lacquer, you finish with a lacquer. If you start with a polyurethane, then you finish with polyurethane.
SPRAY ON VS BRUSH ON
Should you spray on or brush on the finish? It really doesn’t matter unless you have applied color to your work.
If you have applied color, then use spray on finish for the first couple of layers. You can follow up with a brush on, but make sure it’s the same type of finish.
Spray on is a lot more convenient, but a bottle of spray cost more than a jar of brush on finish. Between the wood working I do and Brenda’s pyrography, we go through a lot of finish, so purchasing jars of finish is more economical for us. A standard 12 oz can of Lacquer costs around $10 and will cover approximately 3-4 art projects. Whereas a gallon can of lacquer costs a little under $30 and will easily cover 20 projects.
If you use a spray on finish, make sure to spray in uniform passes. Keep your pace steady as you move across the board. Start spraying just BEFORE reaching the board and continue to spray just after passing the edge of the board. This ensures you don’t get pools of finish along the borders of the wood, or, put another way, the layer of finish is uniform across the entire board.
MATTE vs GLOSSY FINISH
Added 6/18/2020 by Brenda. A while back I was told that matte finishes have additives put into them to reduce their sheen. Furthermore, the additives supposedly interfere with the ability to see the fine details in artwork. I will admit right off that I had not thought about this before, so I set about testing out this idea. To watch a YouTube video on this just click on the image to the left.
First off I went to the store and bought a can of Min Max polycrylic in all 4 sheen levels: Matte, Satin, Semi-Gloss, and Glossy.
Also, I created a test board, and I broke the test board up into 4 sections. Each section was labeled with the type of finish I would use on that section. Plus I left a small space between the sections that would be free of finish.
I masked off all but one section on the test board.
Then I applied the appropriate finish to that section following the directions on the can. In total each section received 3 coats of finish.
Here’s how the board looked once I was done. I cannot tell a difference between the finishes other than the sheen level.
I will continue to use Matte or Satin finish on my artwork as I don’t like the glare or reflected light interfering with viewing the artwork. The far right section on the board is matte.
Here’s the glossy end of the board showing how the light reflects off of the surface.
This is the matte section showing the before and after finish was applied. Unfortunately the lighting was different when I took the photo with the finish applied.
This is the satin section showing the before and after finish was applied.
This is semi-gloss section showing the before and after finish was applied.
This is glossy section showing the before and after finish was applied.
DIFFERENT FINISHES TESTED
Nothing – raw wood
Lacquer – Brush On, Spray On; with Lacquer Thinner
Mod Podge (hard coat) – brush on
Oil only – Mineral Oil, Tung Oil, Walnut Oil, etc.
Polycrylic – Brush on
Polyurethane – Brush On, Spray On
Shellac – Brush On, Spray On
Spar Urethane – Brush On, Spray On
Tru Oil – brush on
NOTHING
I will start the discussion with nothing, because nothing is the easiest thing to do. Once you’re done burning the wood, you simply hang it on the wall, or prop it up on a table if you like; whatever works for you.
When to use: I don’t recommend doing nothing!
Advantages:
Simplicity
Time saved; which can be several hours of work depending on size, type of finish/sealant, and the number of coats you need/want to put on.
Disadvantages:
If anyone picks it up to look at it, the oils and anything else (like hand lotion) on that person’s fingers/hands will transfer to the wood and penetrate it which means that you can’t just wipe it off.
It is more prone to moisture loss/addition which can cause the wood to contract/expand. This can cause wood buckling, warping, or cracking. Sealing the wood provides a barrier to keep its moisture levels more constant to help prevent the aforementioned problems.
LACQUER
Lacquer offers a tough, durable finish. It can age over time, but is fairly easy to repair without sanding down the wood. Lacquer can be sprayed or brushed on. It can be thinned down with Lacquer Thinner to the consistency you desire. It comes in satin, gloss, or high gloss.
When to use: This is a great finish for musical instruments and artwork. Note that it is not good in high moisture situations like a coasters.
To Apply: I recommend thinning the lacquer with lacquer thinner for the first coat; about 50/50. It flows better and dries faster. Then go to full strength. As with all sealants, use in a well ventilated area. Allow to dry a minimum of 30 minutes between coats. When applying additional coats, do not pour on and then brush out. Any lacquer that sits in a pool will soften/dissolve the previous layer and make your finish pitted and uneven.
Note that as of March 2019 Lacquer continues to be our favorite finish for Brenda’s pyrography.
Advantages:
Tough finish.
You can polish this finish after it hardens.
It requires no sanding between coats.
It does not discolor the wood as much as other products like shellac or polyurethane do.
Has the fastest dry time.
Does not have hardeners in the mix, so cans and jars of lacquer will never dry out or become a solid mass like other finishes will.
If you thin the lacquer, it flows better and the coats dry more quickly.
Disadvantages:
It will not stand up to thinner being spilled on it even after it’s dried.
Lacquer has quite a strong smell and requires a space with good ventilation. (Brenda here – to me lacquer is nowhere as stinky as polyurethane and for some reason the smell reminds me of dill pickles).
It will take three or more coats to get a good solid finish.
When thinned it is very wet and if you haven’t raised the nap of the wood and then sanded it back down, you’ll wish you had.
MOD PODGE (hard coat)
Mod Podge is a waterbase sealer, glue, and finish. It’s found in craft stores and doesn’t have a strong odor.
When to use: In crafting situations where you want to decoupage a photo onto the wood.
To Apply: Brush on a thin coat and let dry 15-20 minutes. Sand with 400 grit sandpaper between coats. Apply 3-5 coats total. Fully cured in 4 weeks.
Advantages:
Tough finish.
Cleans up with water
Doesn’t have a strong odor (Brenda here – it reminds me of Elmer’s glue mixed with acrylic paint)
Disadvantages:
Need to lightly sand between coats.
Unsure about how well the finish will age, but we are testing it.
Takes 4 weeks to fully cure. That’s a long time!
OIL ONLY (for cutting boards)
By oil only, I am referring to products like tung oil, mineral oil, lemon oil, walnut oil, etc. These are mostly for things like cutting boards to keep the wood moisturized and to prevent water from penetrating the wood that would causing it to warp, swell, or crack (this is mostly on end grain cutting boards, but you get the idea).
WHEN TO USE: Cutting boards and other items that are in contact with food and/or items that be will exposed to extremely high heats. Food grade mineral oil is what I use to treat cutting boards and trivets with. Mineral oil doesn’t get rancid and won’t react with food. Plus it can withstand very high heat without damage. I’ve taken a pan out of a 450 degree oven and placed it on a oil coated trivet with no problems.
To Apply: pour a generous amount onto the wood and rub it it. Let it sit for several hours and then apply another coat. Continue until the wood quits absorbing the oil. Once or twice a year re-apply to keep the wood protected.
Here’s an article that goes into greater detail on the different types of oils for cutting boards and cutting board maintenance. Ardec – Finish and maintain cutting boards
Advantage:
Easy to apply
Easy to reapply when you need a touch up
Minimal smell
Disadvantage:
The wood isn’t really sealed as additional oils can and will penetrate given the opportunity. Again this oil can be from an unintentional source like greasy hands.
Dirt and dust will accumulate on it and because the oil is a “wet” finish it will stick.
Oils don’t quickly dry out, but they do need to be reapplied to keep up the protection level.
A mineral oil finish is one of the better choices for projects like trivets that will be subjected to high heat. I’ve taken pans straight out of the oven at 400F (204.4 celsius) and placed them on the trivet without experiencing any problems like wood discoloration, etc.
POLYCRYLIC
Polycrylic provides a clear tough finish that is water resistant, so can be used for coasters.
When to use: This can be used for all indoor applications, and is a great choice for coasters. I wouldn’t recommend it for items that come in contact with food; especially cutting board.
To Apply: Brush on a thin layer and let dry a minimum of 2 hours. Sand lightly and then brush on another coat. Continue this process until you reach the number of desired coats.
Advantages:
Tough finish.
Comes in a variety of finishes from matte to glossy.
Cleans up with water
Doesn’t have a strong odor (Brenda here – it reminds me of Elmers white glue)
It is water resistant. (Brenda here – I did a test by placing a wet glass on it for several hours. Then I removed the glass and let the water ring dry on its own. After it was dry I couldn’t tell where the glass has been. Also I put a coffee cup filled with boiling water and let that sit for several hours. Again, it did nothing to the finish).
We couldn’t tell the difference between wood treated with this and lacquer by just looking at it. If you touch it they have a texture difference as the polycrylic has a slight plastic feel.
Disadvantages:
Need to lightly sand between coats.
Unsure about how well the finish will age. We have a test piece sitting in a window to age in the sun, so will follow up later on how polycrylic ages.
Makes the wood feel like it is coated with plastic and Brenda doesn’t care for that.
POLYURETHANE
This is a plastic in the form of a liquid that goes on either brushed or sprayed and then dries to a solid firm coat. There are basically two forms – water based and oil based. Oil based is slightly tougher than the water based. I don’t worry a lot about toughness in a finish on artwork, usually, as I find it mostly stays indoors and on a well, but if the piece is going to get handled, then polyurethane good option if you don’t mind that it adds a yellow hue to the wood.
When to use: This finished will handle tough treatment and resist moisture better than lacquer, so it is good for furniture. Note that it adds a yellow hue to the wood that in some applications this is desirable. If the yellow hue is undesired, then use Polycrylic instead.
To Apply: in a WELL ventilated area, brush on a thin coat, and let dry 3-4 hours. Lightly sand (220 grit), apply a second coat, and let dry 3-4 hours. repeat. I typically apply 3 coats to a project.
Advantages:
Tough finish
long lasting,
Easy to apply, but needs sanding between each coat.
Comes in several varieties: matte, semi-gloss, gloss, and high gloss.
Can be sprayed on or brushed on, whichever you prefer.
Oil based handles heat better than water based.
Water based finish has significantly less odor when applying.
Disadvantages:
Water based doesn’t handle high heat well, so don’t use it for the finish on your coasters, trivets, or anything that receives what’s coming out of a hot oven or stove top as it will discolor.
You have to sand between each coat; not much but it must be scuffed or the next coat will not bond properly.
Oil based will add a bit of a yellow hue to the piece you are applying it to. Water will too, but not as much.
Also oil based has quite a strong smell and you must have a large enough room with good ventilation to be working with this. (Brenda here – this stuff STINKS…a lot)
Has a very noticeable yellow hue to it.
SHELLAC
Shellac is a “natural” finish in that it is made out of the secretions of a female Lac bug and a solvent (alcohol). It is a very safe finish; once it is dried and hardened.
When to use: I have used this for woodworking (jewelry boxes), but I no longer use it. Also, it can be used on items for food, but make sure it is completely cured before using the items. I would not recommend it on cutting boards.
To Apply: In a well ventilated area apply a thin layer and let dry a minimum of 45 minutes. Then brush on another coat. Do not pour on additional layers and brush out as any pooled shellac. Otherwise it will dissolve/soften previous coats resulting in a pitted uneven finish.
Advantages:
Easy to apply
Food safe once fully cured
Disadvantages:
Will discolor under heat and it imparts a tan or yellow hue to the wood.
Not nearly as “aromatic” as polyurethane or spar urethane. (Brenda here – can’t comment on the stench factor as I’m not sure. Todd offered to let me sniff, but I declined)
SPAR URETHANE
This is a tougher form of Polyurethane with more solids in it and is consequently more durable. It is used primarily for outdoor wood or wood that will be left around the water. Same rules apply for putting it on as the polyurethane; sanding required between coats. Can be brushed or sprayed on as preferred.
When to use: If you want something for outdoor use (signs, tables, etc.,) then this is your product. Make sure to purchase the type for outdoor use (the picture shows the can show for indoor use).
To Apply: this works just like the polyurethane. In a very well ventilated area apply a light coat and let dry 3-4 hours. Lightly sand (220 grit), apply another coat, and let dry 3-4 hours. Repeat. Outdoor items need a minimum of 3 coats. Let sit for a minimum of 24 hours after last coat before placing outdoors.
Advantages:
About as tough a coat as you can get although poured epoxy might be tougher.
It is the only type finish/sealant recommended for outdoor use.
Disadvantages:
Will really yellow up your wood, however, if that’s an effect you want, based on your subject matter, composition, or preference, it can be an advantage.
Has quite a strong smell and you must have a large enough room with good ventilation to be working with this product. (Brenda here – this means that this stuff is really, really stinky)
TRU-OIL (birchwood casey)
Tru-oil is designed to provide a protective finish to gunstocks. There is also a version for guitars. Easy to apply, but extremely stinky in my opinion (brenda here). The oil is a “blend of linseed and natural oils.” Can be buffed to achieve a luster finished.
When to use: I don’t use this product and have no experience with it. It is a favorite for those who refinish gun stocks, but note that it imparts a yellow hue to the wood.
To Apply: Pour oil directly from bottle onto properly prepared wood surface in a well ventilated area. Spread evenly with the grain and allow to thoroughly dry. Buff lightly with 00 steel wool between coats. Repeat until desired finish is achieved.
Advantages:
Inexpensive. Very easy to apply
Disadvantages:
Need to lightly sand/buff between coats.
Adds a tan/yellow color to the wood
Is a touch smelly. (Brenda here – this was the nastiest smelling stuff! It smelled worse to me than any of the other finishes and I can’t even put into words what the foul smell reminded me of).
Sealing Wood with Color Pencil Work
October 2017 –
We’ve learned the hard way that color pencil will smear when lacquer is brushed on. To prevent this from happening use a spray on finish. Apply 3 layers of spray on and then you can switch back to brush on (if you so desired).
Make sure to use the same type of finish for both spraying and brushing on.
THE TIME TEST
The below latest edition to the test panel was added on March 28th, 2019
August 2020 – All of the finishes have been on the board for over two years now.
I often think that comparing the yearly photos isn’t a good idea because the light is not always the same. The light can really alter how an image looks. So I will tell you what I’m seeing from the board. The board was originally created in February of 2018, so it’s over 2 years old now.
The polyurethane (5) and Truoil (7) have yellowed a lot, but they imparted a yellow hue immediately. Of the two, the Truoil is darker.
The Mod Podge (6) and shellac (4) are close to the same tan hue. The polycrylic (3) is a bit paler in color than the lacquer (2).
The color samples all look good except the yellow which is getting tough to see on the polyurethane and the Truoil test patches.
In this photo I’m holding the board to angle it towards the sun in an effort to show the sheen of the different finishes. (this photo does not have the TruOil on it)
Our Preference for pyrography is Lacquer
Todd prefers to use Lacquer as this is what he uses in the shop, so has it on hand. Even though the polycrylic finish is a bit lighter in color than the lacquer, the color difference isn’t huge. The big difference is that you do not have to sand between coats of lacquer like you do polycrylic.
Todd uses a 2” wide brush to apply. The first coat is a 50/50 mixture of thinner and lacquer. Subsequent coats are full strength lacquer. Most of my pyrography art is sealed with 5 coats, but some items that get more handling (like flutes) receive more coats.
As mentioned before, lacquer is rather smelly so use in a well ventilated area.
Todd has found that it’s easiest to keep three mason jars filled with different solutions of Lacquer or thinner on hand. The glass jars don’t rust out, the wide mouths easily fit the brushes, and he can write the mixture on the top. Another advantage is if a jar gets contaminated, only a little amount of the product is lost.
In the photo you can see the 3 jars; The first one is full strength lacquer, the middle is half strength lacquer (50/50 mixture of lacquer and lacquer thinner), and the last one is filled with all lacquer thinner. The white stuff at the bottom of the lacquer thinner jar is lacquer that has settled to the bottom after I clean the brush. Eventually the thinner jar will get enough lacquer residue in it, that it gets poured into the 50/50 mix jar and I start over with fresh lacquer thinner.
SUMMARY –
Lacquer = Fine art & musical instruments
Mineral Oil = Cutting boards & trivets
Polycrylic = Coasters. Can use it for fine art, but it does need to be sanded between coats and lacquer does not.
Spar Urethane = Outdoor applications (signs, furniture)
Modge Podge, Polyurethane, Shellac, & Tru Oil = We don’t use. Not to say they are bad products, but we prefer to use one of the above finishes instead.
That’s it for this blog. Hope it answered some questions and helps you with your projects.
Todd & Brenda
January 2016 (original posting)
Last updated August 2020
Share this: Twitter
Finishes: Sealing Woodburning Projects For Long Lasting Art
Sealing woodburning projects is the best way to make your pyrography art stand the test of time.
What’s the big deal about finishes?
The truth is, burns tend to fade over time. They fade faster with time, sunlight and use.
You’ll want a different finish depending on the project you’re doing. For example, you’ll use a different sealant for wall art or jewelry than you will for a food-safe cutting board or wooden spoon.
So now that you’re done burning, it’s time to finish strong! (heh heh, see what I did there? #punnerd)
Here’s a list I made for you of different woodburning finishes based on the project you’re working on, along with some pros and cons to each one.
Disclosure: This post contains affiliate links. If you buy something through them they throw me a small commission at no extra cost to you. I believe in these products so you know you are in good hands. 😉 Plus it helps me to keep making *awesome* free content for you (learn more). I appreciate your support!
Best Finish for Wood Burning & Pyrography 2022 [Updated]
The Best Finish for Wood Burning & Pyrography 2022 (How to Seal Burnt Wood)
Pyrography is the art of burning images onto wood surfaces. Artists use a range of tools and wood types when working, and usually apply different finishing products when the burning process is complete. There are many finishes available on the market today, and each has its pros and cons.
While finishing products are not completely necessary, most pyrography projects benefit from the protection they offer. It is in your best interest to familiarize yourself with the products available and know their strengths and weaknesses so you can choose the best one for your project.
Walnut Hollow Deluxe Woodburning Kit with Woodburning Pen, Patterns, Color Pencils and Instructions This set has all a beginner needs to learn Woodburning (Pyrography) including a reusable Pen, and…
Also includes 4 Points (tips), 2 Wood Plaques, 6 Pencils, 8 Patterns & 2 Alphabets, Stand and…
The simple instructions teach you how to use the Points (tips) for bold outlines and subtle shading
How to Prepare Wood for Burning & Finishing
Before you can apply a finish, you need to properly prepare your project. Start by sanding down your wood to a 220 grit. Then, wipe the sanded surface with water and let it air dry. Repeat this process again depending on the type of wood used and your personal preferences.
Most woods commonly used in pyrography should be sanded and rinsed twice to ensure a smooth surface for finishing. Make sure to prep your wood in this way before burning, because sanding over artwork can damage or alter its appearance.
Considerations Before Applying a Finish
1) Put your finishing product in a bowl before using
Dipping your brush directly into the can of finish will contaminate the entire product. If your brush has been used on wood previously, some of that wood’s color may have soaked into the bristles of the brush and will cause discoloration to the finish if dipped into the can directly.
Work with small amounts in a clean bowl to prevent contaminating your entire supply of finish.
2) Make sure your work environment, finishing product, and wood are warm.
Most sealants/finishes will require warm temperatures to properly set and dry. Read the label of your product to see what temperature is required. Make sure that the room in which you are working is warm, as well as the finish itself.
If you store your wood finishes in a garage or shed that gets cold, bring the finishes inside to warm up before using.
Warming your wood surface will also be beneficial to the setting process and prevent any bubbles from forming on your work.
3) Use one finishing product at a time and apply in thin layers.
When in doubt, it is best to follow the instructions provided on the label of your finishing product. Two basic tips to always follow, however, are to not mix finishes and to work in thin coats.
Take your time when choosing and applying a sealant or finish to ensure that you are using the right one for your project with the right technique. The chemical compositions of different products do not mix, so use one per project. Apply multiple thin coats of product instead of one thick, goopy layer to get better results.
4) Work in a well-ventilated area.
Finishing products are made of strong chemicals that are potentially damaging when inhaled. Work in an airy, open space to avoid health risks.
If you are concerned about inhaling fumes, or have any preexisting health conditions, wearing a mask is also a good idea.
Spray On vs Brush On Products – What’s Best?
Some of the types of products listed below come in spray or brush on varieties. Both work well for pyrography projects, so choose what will work best for you. While sprays are more convenient, they can be more expensive, so if you do a lot of wood burning, invest in some brush on cans of finish instead.
Spray on products can also cause pooling and unevenness when sprayed incorrectly. Even, steady sprays will prevent these issues. Overall, the money you save will make the slower process of brushing on finish worth it in the long run.
Here’s a video with some great extra tips for applying spray on finish:
Spray On Advantages:
Convenient
Good for small projects
Spray On Disadvantages:
Less cost-effective
Requires good technique to avoid pooling
Brush On Advantages
Cost effective
Easy to control application and amount of product used
Brush On Disadvantages
Time consuming to apply
Best Type of Pyrography & Wood Burning Finish (Pros & Cons)
1) Lacquer
AQUA COAT Clear Lacquer, Water-Based Wood Finish (Gloss) Aqua Coat Clear Lacquer forms a hard, stain-resistant film with exceptional clarity and mar…
Extremely clear film, VOC compliant, fast drying, easy sanding, ready to use, water clean up,…
This product may be thinned with water and forms an excellent finish that can be re-coated in 30-60…
If you are looking for a product that provides a durable finish, lacquer is a great option. It should be applied with a lacquer thinner at first, and then can be built up. Lacquer has a fast drying time, can be brushed on or sprayed on, and is easy to find at hardware stores.
It has a strong smell, so work in a ventilated area. This product does age over time, so keep that in mind when choosing it. Luckily, aged lacquer finishes can be sanded down and new lacquer can be reapplied easily.
Learn more about lacquer here.
Advantages
Easy to find lacquer and lacquer thinner at local stores
Fast drying time
Durable
No sanding required
Disadvantages
Strong smell
Can age over time
Requires several coats
Should be used with a lacquer thinner
2) Oil
Oil is a durable finish that accentuates natural wood grains. Common types of oils for pyrography projects are Tung, Danish, lemon, walnut, and mineral oil. Oils are applied using a brush. Allow the oil to set and then wipe the excess with a cloth. The oil will need to set overnight before applying another coat or using the item.
Oil finishes are great for keeping wood moisturized, and are commonly used for practical items that come into contact with food, like cutting boards. Mineral oil is a great choice for cutting boards because it is non-toxic and can handle high heats without going rancid.
To learn how to finish a cutting board with oil, watch this tutorial.
Advantages
Brings out the natural look of all woods
Easy to apply
Affordable
Safe for kitchen items
Disadvantages
Doesn’t seal the wood from dust and oil
Will need to be reapplied occasionally
Sets overnight
3) Shellac
Rust-Oleum Zinsser 304H 1-Quart Bulls Eye Clear Shellac This product adds a great value
1 quart
Seals, preserves wood, art, Statuary & metal
Shellac is made from the secretions of a female Lac bug, so this product is considered a natural finish. It is therefore very safe to use because it doesn’t contain harsh chemicals. Apply shellac in a thin layer and let it set for 45 minutes. It is then okay to apply another coat or two.
This product is good for any pyrography project that is not exposed to heat. Otherwise, the shellac will discolor the wood. Avoid using this product on coasters and cutting boards.
For helpful tips and tricks about applying shellac, check out this video.
Advantages
Safe and natural
Easy to use
Disadvantages
Shouldn’t be used on items exposed to heat
4) Polyurethane
Polyurethane is one of the most common wood finishing products. It comes in spray on and brush on varieties and in a wide range of formulas. High gloss, gloss, and semi-matte finishes are the most popular and are appropriate for most pyrography pieces.
Water-based and oil-based options are offered and both are a good option depending on your personal preference. Polyurethane can give wood a yellow hue, so keep that in mind when choosing this product.
To use polyurethane properly, brush on a thin coat, let it dry for three or four hours, sand, and apply another coat. Three coats usually does the trick for pyrography projects.
Tips for applying polyurethane can be found here.
Advantages
Provides a tough, durable finish
Lasts a long time
Many varieties for different needs
Disadvantages
Sanding is required between coats
Several coats are required, each with lengthy drying times
Can give projects a yellow hue
5) Paste Wax
Trewax Paste Wax with Natural Carnauba Wax, Clear, 12.35-Ounce Restores original brilliance to several finishes while ensuring luster and long wear
Contains Brazilian Carnauba, the world’s hardest natural wax, perfect for a long-wearing finish
Great on hardwood floors, fine furniture, granite, marble and bronze
Paste wax is an affordable product that provides a natural finish for any type of pyrography project. Paste wax is applied with a clean cloth. Rub one light coat onto the surface and let it dry. As it dries, buff into a sheen and apply another layer if needed. Be careful not to apply too much wax or the wood will take on a cloudy appearance.
This method of finishing is very customizable and allows for a lot of control. It is easy to apply thin coats when using wax and the finish ends up looking very minimal and natural. Use paste wax if you want to accentuate the wood without taking away from its natural beauty.
For advice on using this product, check out this video.
Advantages
Easy to customize
Affordable
Offers a natural, minimal finished look
Disadvantages
Time consuming to apply
Requires buffing
Can be overapplied and difficult to remove
6) Nothing!
The easiest and most cost-effective option for wood finishing is using nothing at all. This is not recommended for most pyrography because the artwork will get damaged over time due to oil transfer from fingers, dust, and moisture loss.
However, if you have a simple project and you are not worried about damage, skipping the finishing process will save you time and money.
Advantages
Easy
Cheap
Disadvantages
So you have finished reading the how to protect wood burning art topic article, if you find this article useful, please share it. Thank you very much. See more: wood burning finishing techniques, danish oil on burned wood, wood burning spray, do you sand after wood burning, how to seal wood burned cutting board, linseed oil pyrography, best sealant for pyrography, how to keep pyrography from fading