
You are looking for information, articles, knowledge about the topic nail salons open on sunday near me how to open an xbox one power brick on Google, you do not find the information you need! Here are the best content compiled and compiled by the https://chewathai27.com team, along with other related topics such as: how to open an xbox one power brick xbox one power brick orange light, how to fix xbox one power brick, power brick xbox one, xbox one power brick replacement, xbox one power brick amazon, xbox one s power brick, xbox power brick not working, xbox one power pack
Contents
How do I open an Xbox One power brick?
Once screws are removed lift the plastic frame from the left side and remove it from the top of the power brick and flip it over. Unlike the X360 power brick, the light diffuser does not need to be removed from the power supply. If you want to remove it anyway simply grab it with your fingers and lift it out.
Can you fix Xbox One power brick?
Here’s what you can do: Try plugging your Xbox One power supply into different outlet. If that doesn’t work, completely unplug your power supply for a full 10 minutes before plugging it back in. Reset your Xbox One by holding the seek, eject and power buttons all at once for 10 seconds.
How do I know if my Xbox One power brick is bad?
All Xbox One power bricks have a light on them to signify they are receiving electrical current. If you see a solid white or solid orange light, the power supply is working properly. If there is no light or it flickers, it needs to be replaced.
Why will my Xbox not turn on?
If your Xbox One won’t turn on, it might be due to controller, HDMI, or power supply issues. Try a quick power reset first, as this can often fix your Xbox One. You can reset an Xbox One S and X by unplugging the console for a few seconds.
Does Xbox One S have a power brick?
Designed for Xbox One – This Power Brick (Non-OEM) is specifically designed for Xbox One Console, but not Xbox One S or Xbox One X.
How do you open the AC adapter on a pry?
- Unplug the power cord from the wall outlet or power strip, if it is still plugged in. …
- Disconnect the power cable from the laptop, if necessary.
- Place the end of a putty knife in the seam of the AC adapter. …
- Twist the putty knife to pry on the adapter.
How do you fix a broken Xbox power brick?
- Unplug the power cables from the console, electrical outlet in the wall, and power supply.
- Wait 10 seconds. Important Be sure to wait 10 seconds. …
- Firmly plug the power cable back into the electrical outlet and the power supply. …
- Check the LED light on the power supply.
Why is my Xbox One power brick orange?
Steady orange light: The power supply is okay and is set to energy-saving power mode.
Can a power outage break an Xbox?
Xbox is an electrical gaming platform and thus can be broken. An outage might not damage the Xboxes for the new consoles but will jumble the data, thus requiring a repair/reimage. For the HDD-based consoles, the HDD will most likely be fried along with other components during the spikes before or after the outage.
How do you fix a broken Xbox power brick?
- Unplug the power cables from the console, electrical outlet in the wall, and power supply.
- Wait 10 seconds. Important Be sure to wait 10 seconds. …
- Firmly plug the power cable back into the electrical outlet and the power supply. …
- Check the LED light on the power supply.
Why is my Xbox One power brick blinking orange?
Meanwhile, a flashing orange light is reserved for errors or if the power supply brick is not working correctly. If you see this light on the brick, you will need to consider troubleshooting it.
Can I power my Xbox with USB?
Yes, the USB port do stay on to power as most people who play on the Xbox will charge their accessories after using the console such as the Wireless Microphone or battery pack.
Why does my Xbox One power brick keep turning off?
If your console turns off unexpectedly during use or inactivity, the power outlet may be bad or the power cord could be plugged in incorrectly. Try plugging the supply directly into a different outlet (note: not through a surge protector), and check that the cord is properly plugged into the outlet and the console.
Xbox One Power Brick (Day One Edition) Disassembly – iFixit Repair Guide
- Article author: www.ifixit.com
- Reviews from users: 16853
 Ratings
 - Top rated: 4.1
- Lowest rated: 1
- Summary of article content: Articles about Xbox One Power Brick (Day One Edition) Disassembly – iFixit Repair Guide Updating …
- Most searched keywords: Whether you are looking for Xbox One Power Brick (Day One Edition) Disassembly – iFixit Repair Guide Updating This guide will show you how to tear down your Xbox One power brick. Your bricks internal parts may differ from what is shown here.Xbox One Power Brick (Day One Edition) Disassembly, Xbox One, Parts, Tools, Free Repair Guides, Manual, Teardowns
- Table of Contents:
Introduction
Step 1
Remove Rubber Boots
Step 2
Disconnect Fan Cable
Step 3
Remove Screws
Step 4
Remove Fan From Frame
Step 5
Disassemble Fan
Step 6
Fan Sticker Info
Step 7
Care To See What I Initially Found

Xbox One Power Brick (Day One Edition) Disassembly – iFixit Repair Guide
- Article author: www.ifixit.com
- Reviews from users: 28977 Ratings
- Top rated: 4.3
- Lowest rated: 1
- Summary of article content: Articles about Xbox One Power Brick (Day One Edition) Disassembly – iFixit Repair Guide Updating …
- Most searched keywords: Whether you are looking for Xbox One Power Brick (Day One Edition) Disassembly – iFixit Repair Guide Updating This guide will show you how to tear down your Xbox One power brick. Your bricks internal parts may differ from what is shown here.Xbox One Power Brick (Day One Edition) Disassembly, Xbox One, Parts, Tools, Free Repair Guides, Manual, Teardowns
- Table of Contents:
Introduction
Step 1
Remove Rubber Boots
Step 2
Disconnect Fan Cable
Step 3
Remove Screws
Step 4
Remove Fan From Frame
Step 5
Disassemble Fan
Step 6
Fan Sticker Info
Step 7
Care To See What I Initially Found
How to replace the power Supply in an Xbox One S – The easy way. Step by step guide for 2020 – YouTube
- Article author: www.youtube.com
- Reviews from users: 44386 Ratings
- Top rated: 4.2
- Lowest rated: 1
- Summary of article content: Articles about How to replace the power Supply in an Xbox One S – The easy way. Step by step guide for 2020 – YouTube Updating …
- Most searched keywords: Whether you are looking for How to replace the power Supply in an Xbox One S – The easy way. Step by step guide for 2020 – YouTube Updating In this video we show you how to replace the internal power supply unit inside an Xbox One S. This easy to follow, full start to finish guide shows you ever…xbox one s power supply replacement, how to replace xbox one s power supply, faulty xbox one s power supply, xbox one s won’t turn on but beeps, xbox one s power supply repair, how to test xbox one s power supply, tweaktips.com, tweaktips, #tweaktips, xbox one s power supply, how to open xbox one s power supply, xbox one s power supply not working, xbox one s won’t turn on at all, xbox one s won’t stay on, xbox one s power button not working, xbox one s dead, dead xbox one s
- Table of Contents:

How to Open and Fix Laptop AC Adapter without Damaging. DC cable and Capacitors Replacement – YouTube
- Article author: www.youtube.com
- Reviews from users: 36071 Ratings
- Top rated: 3.9
- Lowest rated: 1
- Summary of article content: Articles about How to Open and Fix Laptop AC Adapter without Damaging. DC cable and Capacitors Replacement – YouTube Updating …
- Most searched keywords: Whether you are looking for How to Open and Fix Laptop AC Adapter without Damaging. DC cable and Capacitors Replacement – YouTube Updating Open and Fix Laptop’s AC Adapter without Damaging. DC cable and Capacitors Replacement. How to open Laptop’s AC Power Adapter without damaging the plastic ca…How to open laptop ac adapter, How to open laptop ac adapter without damaging, how to fix laptop power adapter, how to fix laptop power brick, how to open laptop power brick, laptop adapter dc cable replacement, laptop dc connector fix, replace dc cable laptop power brick, laptop dc connector repair, how to diagnose laptop ac adapter, how to diagnose laptop power brick, ac adapter repair, laptop dc cable fix, ac adapter capacitors replacement, power brick fix, power adapter fix
- Table of Contents:

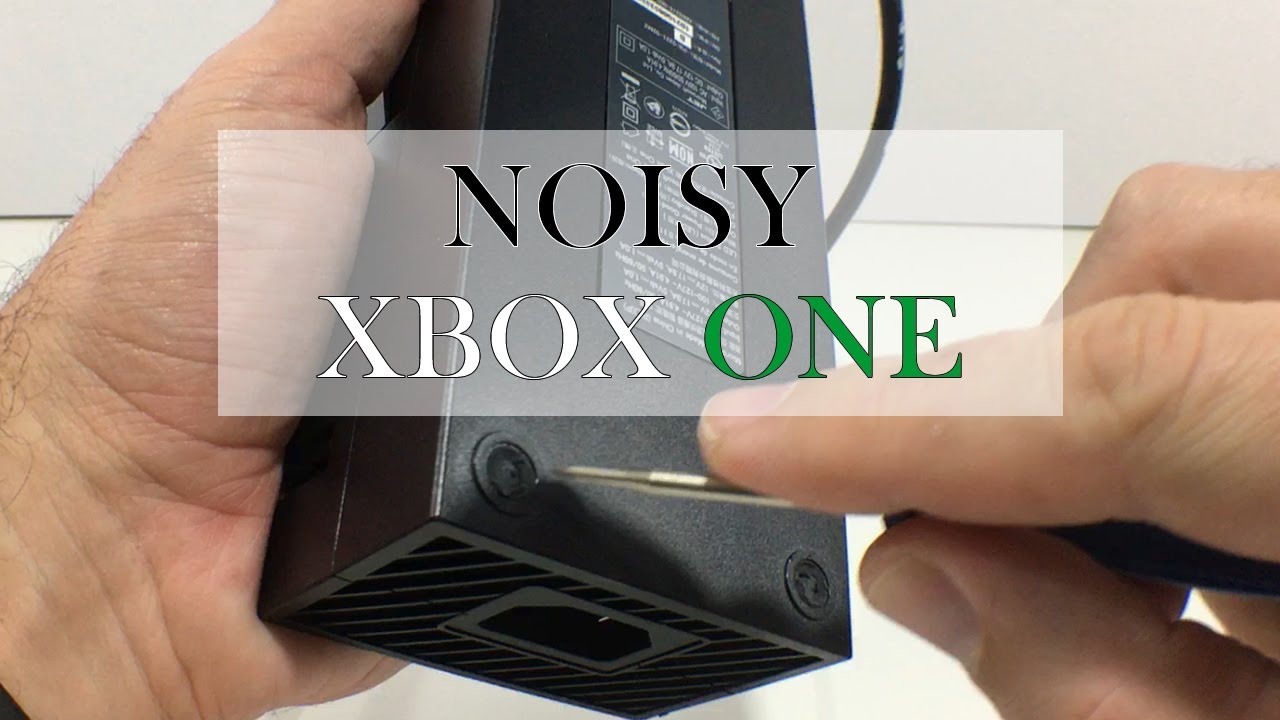
Xbox ONE Power brick noisy – HOW TO: Clean 1st gen – YouTube
- Article author: www.youtube.com
- Reviews from users: 6691 Ratings
- Top rated: 3.1
- Lowest rated: 1
- Summary of article content: Articles about Xbox ONE Power brick noisy – HOW TO: Clean 1st gen – YouTube Updating …
- Most searched keywords: Whether you are looking for Xbox ONE Power brick noisy – HOW TO: Clean 1st gen – YouTube Updating Tools used- http://amzn.to/2yG0AfMI took apart my Xbox one power brick to clean a noisy fan. 50/50 chance of it working. I will show you how to clean it an…xbox one noisy, xbox one noisy fan, xbox one noisy power supply, xbox one noisy power brick, clean xbox one, clean power supply, clean power supply in xbox one, xbox noisy fan, xbox noisy power brick, xbox noisy power supply, xbox screams, xbox one noise issue, xbox one noise issues, xbox one too loud, xbox one noise complain, xbox one problems, first gen xbox one, first generation xbox one, cleaning power supply in first gen xbox one, how to clean xbox one power brick
- Table of Contents:
Xbox One Power Brick Disassembly : xboxone
- Article author: www.reddit.com
- Reviews from users: 48129 Ratings
- Top rated: 3.6
- Lowest rated: 1
- Summary of article content: Articles about Xbox One Power Brick Disassembly : xboxone In the XBox One’s case, the rubber piece is more tightly integrated with the plastic cover and should be lifted together as one piece. Use a … …
- Most searched keywords: Whether you are looking for Xbox One Power Brick Disassembly : xboxone In the XBox One’s case, the rubber piece is more tightly integrated with the plastic cover and should be lifted together as one piece. Use a … Hello! I was trying to open a power brick from the OG Xbox One to clean it (it’s very dusty and noisy) and saw over the internet a lot of differents …
- Table of Contents:
Xbox Support
- Article author: support.xbox.com
- Reviews from users: 1927 Ratings
- Top rated: 4.5
- Lowest rated: 1
- Summary of article content: Articles about Xbox Support Note The original Xbox One console is no longer manufactured by Microsoft, nor is the console power supply unit. As a result, out-of-warranty support is no … …
- Most searched keywords: Whether you are looking for Xbox Support Note The original Xbox One console is no longer manufactured by Microsoft, nor is the console power supply unit. As a result, out-of-warranty support is no …
- Table of Contents:
Xbox One – Power Brick damaged!? | How-To: Repair by yourself! | Geekstyle Living
- Article author: www.geekstyleliving.com
- Reviews from users: 47028 Ratings
- Top rated: 4.0
- Lowest rated: 1
- Summary of article content: Articles about Xbox One – Power Brick damaged!? | How-To: Repair by yourself! | Geekstyle Living 1. Unplug the power supply from the power socket and · 2. then also unplug it from the Xbox. · 3. Plug the power adapter into the socket first. · 4 … …
- Most searched keywords: Whether you are looking for Xbox One – Power Brick damaged!? | How-To: Repair by yourself! | Geekstyle Living 1. Unplug the power supply from the power socket and · 2. then also unplug it from the Xbox. · 3. Plug the power adapter into the socket first. · 4 … The informations are refered to the old Xbox One with separate power supply! If you have an Xbox One S or X, then you can’t use this tutorial. (…)
- Table of Contents:
What happens first
Suggested Solution 1
Troubleshooting
Your comments

See more articles in the same category here: 670+ tips for you.
Xbox One Power Brick (Day One Edition) Disassembly
I took my power brick apart in order to clean it. The power settings for my Xbox had been left on “Instant On” from the day of launch until earlier this year. With your system in Instant On the fan runs continuously drawing .16Amps/19Watts. Putting your console in its Energy Saving mode only draws .03Amps/4Watts. The amount of filth inside your power brick will depend on several factors such as the energy mode you keep your system set to. If the fan isn’t running, obviously it isn’t drawing in more dust/debris than it would if it was on. The last step has pictures that show just how filthy your electronics can get over time and the importance of cleaning them in order to keep them functional.
Xbox One – Power Brick damaged!?
What happens first?
Finally we have time to play again. Everything is fine and we want to turn on the console.
Unfortunately, nothing happens when you turn on the controller.
So we try to power-on by touching the touch sensor on the front of the console.
Nothing stirs here, too. Maybe you can hear a quiet “ping” or the hard disk is briefly triggered. Then there is silence again!
Suggested Solution 1
Now there’s a good solution from Microsoft that you should try first!
1. Unplug the power supply from the power socket and
2. then also unplug it from the Xbox.
If the LED on the power supply is still lit, wait for it to turn fully extinguished and then for another 10 seconds.
Geekstyle Knowledge
This process completely discharges the components in the power supply and the device does a “power supply reset”. Due to the possibility of operating the power supply with different voltages, it adjusts itself automatically when connecting to power. Now, an overvoltage in the power grid can cause a bit of confusion for it. The result is: It doesn’t want to do his duty. Quote>
Now that the power supply is completely de-energized, we try once again to get used to our power grid.
3. Plug the power adapter into the socket first.
4. Now pay attention to the status LED. It should be consistent orange .
If it flashes red or blinks then it needs an exchange, according to Microsoft.
. 5. Now connect the power adapter plug to the Xbox One console.
Now there are 2 possible scenarios:
Option 1: The status LED is still orange.
In this case, the console turns on again. The power supply LED should now switch to white and the Xbox is useable.
Congratulations! The console is “repaired”
If the error occurs frequently or at each start, then a defective power supply is to blame. In that case you should continue reading.
Option 2: The status LED goes off immediately after plugging into the console.
In this case it seems to be a defect of the power supply. In rare cases, however, it is also an error on the console itself.
Now it will be something “legal”, but we have to hedge ourselves
Opening the device voids the guarantee. You have to deal with a soldering iron and have to know the appropriate safety regulations and observe. We completely exclude any liability for damage to man or machine! If there is still warranty for your device, first get in touch with the customer service. They will replace the device in case of non-self-inflicted damage. Outside the warranty, a replacement part can be purchased from the manufacturer or a retailer. You should read the manual carefully before you start.
Troubleshooting
First we open the case of the power supply. This is fixed with 4 screws on the bottom. To get to the screws, the rubber-plates must be removed. These are very difficult to remove. The rubber plates are connected to a plastic ring. This fits exactly into the screw hole.
To save time, I cut off the plates and levered the plastic ring out.
After removing the screws, we can easily open the case. There are no unnecessary clips or bonds.
When you lift the lid, you see a cable connection. This connects the board with the fan in the upper housing part. The cable from the fan can be easily removed, because it is only attached with a plug connector. It can simply stripped off.
Now that the lid has been completely removed and set aside, wehave the opportunity to take a closer look at the component-side of the power supply board. It should look like this or at least very similar to this.
The actual power supply can now be easily removed from the lower housing part. Again, there are no screws, clips or glue used.
First we check the electrolytic capacitors on the component side. Depending on the model of the power supply, there are different positions and/or numbers of it. To check it is easy: You will recognizes defective electrolytic capacitors by a curvature on the top.
Here’s a picture comparing new and broken
The malefactors should be found quickly. If it’s not up to the electrolytic capacitors, we’ll have to use a multimeter to measure the resistance of the resistors and. Even the diodes can be checked quickly – it may not lock anymore.
For me there were three Elkos with 16v / 2200μF which have the “spirit abandoned”. Easily recognized by the curvature at the top.
Make sure you only use Elkos that have the same capacity value.
The value of Volt can be higher. For example, I have installed 25V / 2200μF. These were also a little longer and bigger than the built-in parts.
To get to the bottom of the board, the shield must be removed. This is soldered and must first be soldered off with the soldering iron at the two connection points.
Find the solder points that belong to the defective components. Also pay attention of the polarity of electrolytic capacitors and diodes. Notice, mark or note the position of the minus pole. On the board this should usually already been marked!
Now we completed the checking and start to replace the parts.
Work very clean and tidy when soldering. Never hurt or damage any other components. Remember that lead-free solder is used and you need to adjust the soldering temperature accordingly. Pay attention to the tracks made of solder! It quickly happens to make a connection accidentally, which you don’t want to have.
Also pay attention to the length of the wire legs of your components. Shorten these after soldering and pay attention to a clean positioning on the board.
It was bad as this happens to me.
In this context:
After being heated the solder seems to “peel off” slightly . These solder sheets behave “sticky” and stick to components or the board. Apparently they like to connect the “solder-tracks” and can not be easily removed.
Cleans the board after work or blows it off (not by mouth) or whatever your preferred method is.
Remember A short is the end for your power supply – and in the worst case the end of life for your console!
In the end you need to fix the cover of the bottom again.
Now that you have replaced the components, you should take a minute for the upper power supply cover. Unscrew the fan and clean it. Many users report that the power brick makes loud noises. Especially after a few years of use and depending on the place of installation (for example, a room with carpet), the fan is full of dust and dirt. To prevent another reopening, you should take the time to clean it.
Remember to reconnect the fan to the board.
I have already written that my capacitors are slightly higher and bigger than the original parts were. I couldn’t close the lid of the case completely.
The plastic-parts in it, which direct the flow of air through the housing and around the components, were pushing to the capacitors. My solution: I simply sanded the bars down a bit with a “Dremel”.
Do not forget the small optical fiber that sits on the status LEDs and guides the light out of the case.
Knight Rider Soundtrack (Turbo Boost Edition) on Spotify Download 145.3 kb
After you have properly locked the power supply, we can start to test it:
First reconnect the power supply to the power socket and pay attention to the status LED. This should shine orange throughout.
Then you can connect the power supply with the console. Now the LED should continue to glow orange and the Xbox can be turned on.
After the console is switched on, it should start again as usual and change the status LED on the power supply to white.
We hope you are happy again. Have fun playing!
So you have finished reading the how to open an xbox one power brick topic article, if you find this article useful, please share it. Thank you very much. See more: xbox one power brick orange light, how to fix xbox one power brick, power brick xbox one, xbox one power brick replacement, xbox one power brick amazon, xbox one s power brick, xbox power brick not working, xbox one power pack