
You are looking for information, articles, knowledge about the topic nail salons open on sunday near me how much should a bug out bag weigh on Google, you do not find the information you need! Here are the best content compiled and compiled by the https://chewathai27.com team, along with other related topics such as: how much should a bug out bag weigh bug out bag checklist excel, best 3-day bug out bag, go bag food ideas, suburban bug out bag, bug out bag sleep system, minimalist bug out bag list, are bug out bags necessary, bug out bag weight calculator
Thru-hikers and backpackers use the general rule that your pack should be no more than 1/4 of your body weight. But backpackers don’t need to flee, run, or hide. So, a Bug Out Bag should be even lighter! I was able to get my Bug Out Bag down to just 22lbs without having to sacrifice any comfort or gear.COLORS FOR BUGGING OUT
If you live in an urban area, you want your pack to look like everyone else’s, preferably like an ordinary backpack. Color isn’t usually as much of an issue for go bags, but with EDCs, it’s always a good idea to stay under the radar by sticking to black, dark green, or brown.Most people end up with a bag in the 40-55 liter range (2,450-3,350 cubic inches). For the vast majority, over 65L is unnecessary and under 35L is too limiting. If you don’t know the size of a bag you already own, try to stuff it with blankets/pillows and measure the outside dimensions.
Contents
What is the best color for a bug out bag?
COLORS FOR BUGGING OUT
If you live in an urban area, you want your pack to look like everyone else’s, preferably like an ordinary backpack. Color isn’t usually as much of an issue for go bags, but with EDCs, it’s always a good idea to stay under the radar by sticking to black, dark green, or brown.
What is the best size for a bug out bag?
Most people end up with a bag in the 40-55 liter range (2,450-3,350 cubic inches). For the vast majority, over 65L is unnecessary and under 35L is too limiting. If you don’t know the size of a bag you already own, try to stuff it with blankets/pillows and measure the outside dimensions.
What is the difference between a go bag and a bug out bag?
A bug out bag is typically kept at home, in a place that’s easy to grab and go in case of an emergency, while a get home bag is something you typically take with you, to keep either in your office, or inside your car.
Should I make a bug out bag?
Bug out bags can be a very important and useful part of your emergency plans. By creating a bug out bag that is actually useful, you’ll be prepared at a moment’s notice for any emergency. A bug out bag is a portable emergency kit that should last you for 72-hours.
How many Litres should a bug out bag be?
Water is an absolute must have in your bug out bag. One litre minimum, per day, per person is highly recommended.
Why is it called a bug out bag?
Why is it Called Bug Out Bag? A bug out bag is called this because it derives from the bail-out bag emergency kit that is carried by military aviators. This bag will contain everything that you need to survive on your own for at least 72 hours.
What should a Bugout bag contain?
Bug-out bags vary among survivalists, but in general, bug-out bags will carry key essential items such as a first aid kit, chargers, a water bottle, and a survival knife for protection in a wide range of emergency scenarios.
What food should you have in a bug out bag?
- Dry Pastas. Dry pasta weighs almost nothing and only requires boiling water. …
- Dehydrated Foods. Any of the “just add water” sorts of foods will work well in the BOB. …
- Peanut Butter. …
- Meat Pouches. …
- Rice. …
- Dried Fruits and Nuts. …
- Caffeine & Sugar.
Should everyone have a Go Bag?
In the event of an emergency that requires you to evacuate, everyone in your household should have a Go Bag packed and ready to go. Your Go Bag should be a sturdy and easy to carry backpack or duffle bag containing things you would want to have with you if you have to leave in a hurry.
Is it better to buy in or bug-out?
Bugging in simply means sheltering-in-place, likely at home, while bugging out means leaving your home.
What should I put in my child’s bug out bag?
Put some snacks, a water bottle, small toys, games, an extra set of clothes, diapers (if needed), wet wipes, and as they get older, maybe a couple of practical items that would be in an adult bug out bag, like a flashlight or a wooden practice knife.
What food should you have in a bug out bag?
- Dry Pastas. Dry pasta weighs almost nothing and only requires boiling water. …
- Dehydrated Foods. Any of the “just add water” sorts of foods will work well in the BOB. …
- Peanut Butter. …
- Meat Pouches. …
- Rice. …
- Dried Fruits and Nuts. …
- Caffeine & Sugar.
What should you put in a go bag?
- Water (one gallon per person per day for several days, for drinking and sanitation)
- Food (at least a several-day supply of non-perishable food)
- Battery-powered or hand crank radio and a NOAA Weather Radio with tone alert.
- Flashlight.
- First aid kit.
- Extra batteries.
- Whistle (to signal for help)
What do you put in a survival go bag?
- Water: one gallon per person, per day (3-day supply for evacuation, 2-week supply for home)
- Food: non-perishable, easy-to-prepare items (3-day supply for evacuation, 2-week supply for home)
- Flashlight.
- Battery-powered or hand-crank radio (NOAA Weather Radio, if possible)
Cut Weight from Your Bug Out Bag with These Tips
- Article author: www.primalsurvivor.net
- Reviews from users: 4696
 Ratings
 - Top rated: 3.3
- Lowest rated: 1
- Summary of article content: Articles about Cut Weight from Your Bug Out Bag with These Tips Updating …
- Most searched keywords: Whether you are looking for Cut Weight from Your Bug Out Bag with These Tips Updating Every ounce counts when packing your survival backpack. Learn how to cut weight from your backpack without sacrificing gear or comfort.
- Table of Contents:
The Ideal Bug Out Bag Weight
Every Ounce Counts!
You Don’t Need that Many Clothes
Pack the Right Survival Food
Swap Your Tent for a Tarp
Choose Multi-Function Gear
Knowledge Instead of Gear!
Get Home Bags vs. Bug Out Bags. What are the Differences? – Survival Sullivan
- Article author: www.survivalsullivan.com
- Reviews from users: 38793 Ratings
- Top rated: 4.2
- Lowest rated: 1
- Summary of article content: Articles about Get Home Bags vs. Bug Out Bags. What are the Differences? – Survival Sullivan Updating …
- Most searched keywords: Whether you are looking for Get Home Bags vs. Bug Out Bags. What are the Differences? – Survival Sullivan Updating Although most people know what a bug out bag is, many get confused when it comes to get home bags (GHBs for short). They are not the same thing! So what’s
- Table of Contents:
You won’t be able to get these critical items post-collapse
What’s in your Get Home Bag vs your Bug Out Bag
Final Words
Latest YouTube Videos
how much should a bug out bag weigh
- Article author: www.thereadystore.com
- Reviews from users: 49309 Ratings
- Top rated: 3.1
- Lowest rated: 1
- Summary of article content: Articles about how much should a bug out bag weigh Updating …
- Most searched keywords: Whether you are looking for how much should a bug out bag weigh Updating
- Table of Contents:
how much should a bug out bag weigh
- Article author: survivalbeacon.com
- Reviews from users: 43093 Ratings
- Top rated: 4.7
- Lowest rated: 1
- Summary of article content: Articles about how much should a bug out bag weigh Survival bags can weigh anywhere from ten to twenty to fifty pounds or more. You need to know that you’re ability to carry a survival pack that heavy, … …
- Most searched keywords: Whether you are looking for how much should a bug out bag weigh Survival bags can weigh anywhere from ten to twenty to fifty pounds or more. You need to know that you’re ability to carry a survival pack that heavy, …
- Table of Contents:
How Your Bug Out Bag Will Kill You: Hard Proof. – Readyman
- Article author: www.readyman.com
- Reviews from users: 18823 Ratings
- Top rated: 4.1
- Lowest rated: 1
- Summary of article content: Articles about
How Your Bug Out Bag Will Kill You: Hard Proof. – Readyman
Updating … - Most searched keywords: Whether you are looking for
How Your Bug Out Bag Will Kill You: Hard Proof. – Readyman
Updating We’re getting set to commit suicide by backpack. Thanks to a 2013 study, we now know that those who carry more weight—even when they stick to US Army backback standards—are setting themselves up to die strapped to their Bug Out Bags. It doesn’t matter how tough you are. It doesn’t matter how mean you are. If your pack - Table of Contents:
How To Cut Out The Weight Of Your Bug Out Bag – Ask a Prepper
- Article author: www.askaprepper.com
- Reviews from users: 24968 Ratings
- Top rated: 4.7
- Lowest rated: 1
- Summary of article content: Articles about How To Cut Out The Weight Of Your Bug Out Bag – Ask a Prepper Ideally, a bug out bag should weigh about 20% of your body weight. But there’s a catch to that. That 20% figure is based on lean weight. So you … …
- Most searched keywords: Whether you are looking for How To Cut Out The Weight Of Your Bug Out Bag – Ask a Prepper Ideally, a bug out bag should weigh about 20% of your body weight. But there’s a catch to that. That 20% figure is based on lean weight. So you …
- Table of Contents:
Make Redundancy Work For You
How Heavy Was That
Get The Right Pack
Pack It Right
Try It Out
Error 403 (Forbidden)
- Article author: www.quora.com
- Reviews from users: 10287 Ratings
- Top rated: 3.5
- Lowest rated: 1
- Summary of article content: Articles about Error 403 (Forbidden) Updating …
- Most searched keywords: Whether you are looking for Error 403 (Forbidden) Updating
- Table of Contents:
Bug out bag weight | Survival Worx
- Article author: survivalworx.com
- Reviews from users: 9154 Ratings
- Top rated: 4.2
- Lowest rated: 1
- Summary of article content: Articles about Bug out bag weight | Survival Worx Updating …
- Most searched keywords: Whether you are looking for Bug out bag weight | Survival Worx Updating
- Table of Contents:
8 Common Bug Out Bag Mistakes That You Must Avoid – The Provident Prepper
- Article author: theprovidentprepper.org
- Reviews from users: 36178 Ratings
- Top rated: 3.9
- Lowest rated: 1
- Summary of article content: Articles about 8 Common Bug Out Bag Mistakes That You Must Avoid – The Provident Prepper Updating …
- Most searched keywords: Whether you are looking for 8 Common Bug Out Bag Mistakes That You Must Avoid – The Provident Prepper Updating Written by Guest Author, Peter Betts of The Survival Hacks The bug out bag is basically a portable kit that contains all the necessary items…
- Table of Contents:
Why should you have a bug out bag
8 of the Most Common Bug Out Bag Mistakes
Mistake #1 – Selecting the Wrong Bug Out Bag
Mistake #2 – Purchasing a Bag that Does Not Blend In or That Stands Out
Mistake #3 – Packing Unnecessary Equipment and Items
Mistake #4 – Packing Too Little Food or Water
Mistake #5 – Forgetting Important Documents
Mistake #5 – Lack of Hands-On Training
Mistake #7 – Failing to Pack Supplies to Repair the Bug Out Bag
Mistake #8 – No Proper First Aid Kit or Medical Supplies
Takeaway
About Us
Legal Info
Sign-up for Our Newsletter
You have Successfully Subscribed!

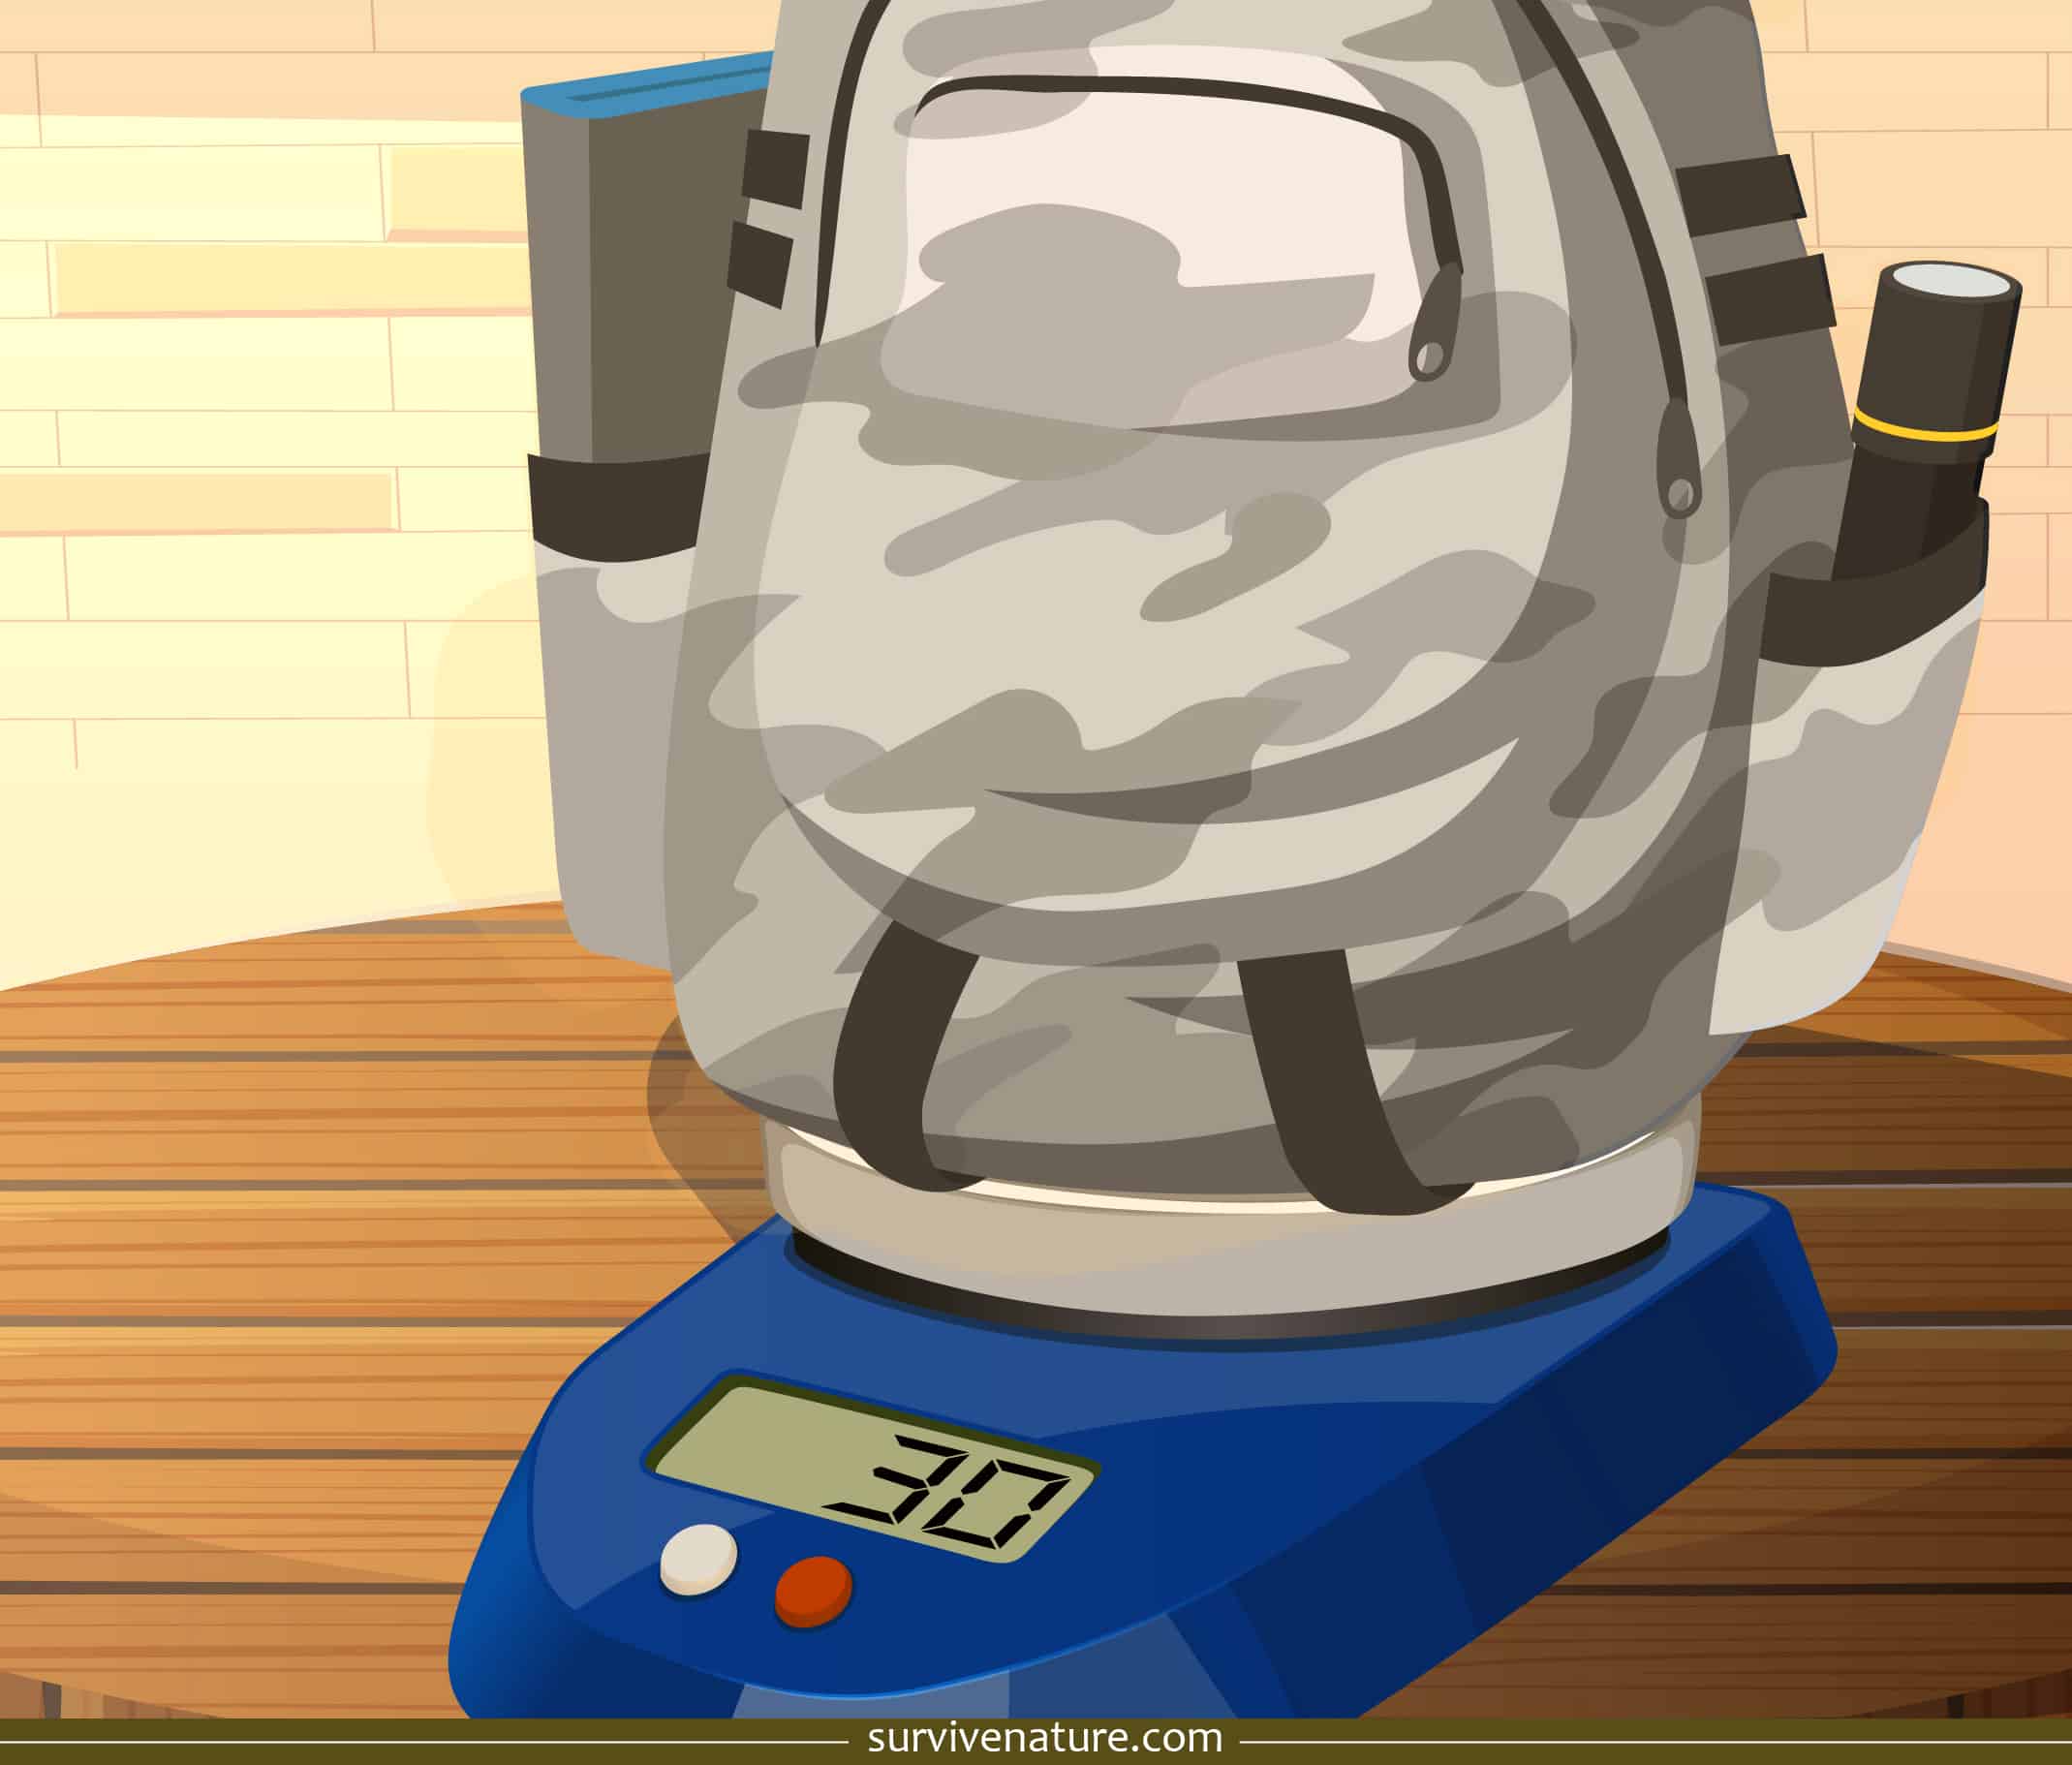
Bug Out Bag Weight: It Can Add Up Fast – Survive Nature
- Article author: www.survivenature.com
- Reviews from users: 13429 Ratings
- Top rated: 3.3
- Lowest rated: 1
- Summary of article content: Articles about Bug Out Bag Weight: It Can Add Up Fast – Survive Nature Updating …
- Most searched keywords: Whether you are looking for Bug Out Bag Weight: It Can Add Up Fast – Survive Nature Updating Do you think it is essential to understand bug out bag weight? Because we do! A backpack can contain your survival gear, clothes, food, water, ammo, and much
- Table of Contents:
How Far Is Your Planned Bug Out
First Decide On What A Bug Out Bag Is Really For
Ten Handy Tips On Reducing Your Backpack Weight And Saving Space
FAQs
Your Backpack is WAY Too Heavy – Here’s Why…
– Ultimate Survival Tips
- Article author: ultimatesurvivaltips.com
- Reviews from users: 46743 Ratings
- Top rated: 3.5
- Lowest rated: 1
- Summary of article content: Articles about Your Backpack is WAY Too Heavy – Here’s Why…
– Ultimate Survival Tips
Updating … - Most searched keywords: Whether you are looking for Your Backpack is WAY Too Heavy – Here’s Why…
– Ultimate Survival Tips
Updating Are you serious? 55, 80 or 100 pound backpack or bug out bag!? It’s crazy, insane and sometimes stupid how much weight we think they are going to be able to carry for a weekend, or (even worse) during a life or death emergency, where we have to flee on foot. So I did some research (added in some personal experience) an - Table of Contents:
Leave a comment
Get Survival Tips Special Deals + Giveaways
– Ultimate Survival Tips
See more articles in the same category here: https://chewathai27.com/toplist.
Cut Weight from Your Bug Out Bag with These Tips
1120 shares 372
748
It is exciting to pack your first Bug Out Bag. You know that you are taking steps to secure your and your family’s safety. Pat yourself on the back! You should feel good about what you are doing!
But let’s get serious for a minute: the contents of your bag are what you will be relying on in an emergency survival situation.
If just one item is missing, it could mean death. But, if you pack too much, it could make your pack too heavy and slow you down… which could be a disaster in itself.
That is why this post is going to be about how to cut weight from your survival backpack.
The Ideal Bug Out Bag Weight
When you first pack your survival bag, it might seem small and lightweight. But I urge you to carry that pack around with you for 5 hours.
Does it still feel light?
Now I encourage you to put it on and try to run with it. How is that going for you?
Thru-hikers and backpackers use the general rule that your pack should be no more than 1/4 of your body weight.
But backpackers don’t need to flee, run, or hide. So, a Bug Out Bag should be even lighter!
I was able to get my Bug Out Bag down to just 22lbs without having to sacrifice any comfort or gear.
Here are some tips on how you can get your pack lighter too.
Every Ounce Counts!
Growing up, my dad always took us backpacking. To cut back on weight, he cut the handle off of his toothbrush. At the time, I thought he was crazy. It wasn’t even an ounce! But now I realize that there are just 16 ounces in a pound. If you cut one ounce from 16 items, you’ve shed a pound from your survival pack!
Here are some of the ways you can shave ounces from your gear:
Cut off your toothbrush handle or buy a camping toothbrush
Use toothpaste powder instead of toothpaste
Cut the edges off of your maps
Cut the labels off your clothes and gear (seriously! This all adds up!!!)
Tear covers off of any guide/survival books you carry
Remove the cardboard from toilet paper
Repackage sunblock, bug spray, etc in plastic bags or smaller containers
Repackage medications in plastic bags instead of the prescription bottles
DRILL HOLES IN STUFF. Seriously. If you can drill a hole in something without destroying its functionality, do it!
You Don’t Need that Many Clothes
I’ve seen some people who pack 3 days’ worth of clothes in their survival bags. I know that we sometimes call them “72-hour bags,” but it doesn’t mean you’ve got to have clothes for 3 days!
All you need is ONE CHANGE OF CLOTHES. And this is only in case your original set of clothes gets wet. You aren’t going to die if you wear the same underwear for 3 days in a row.
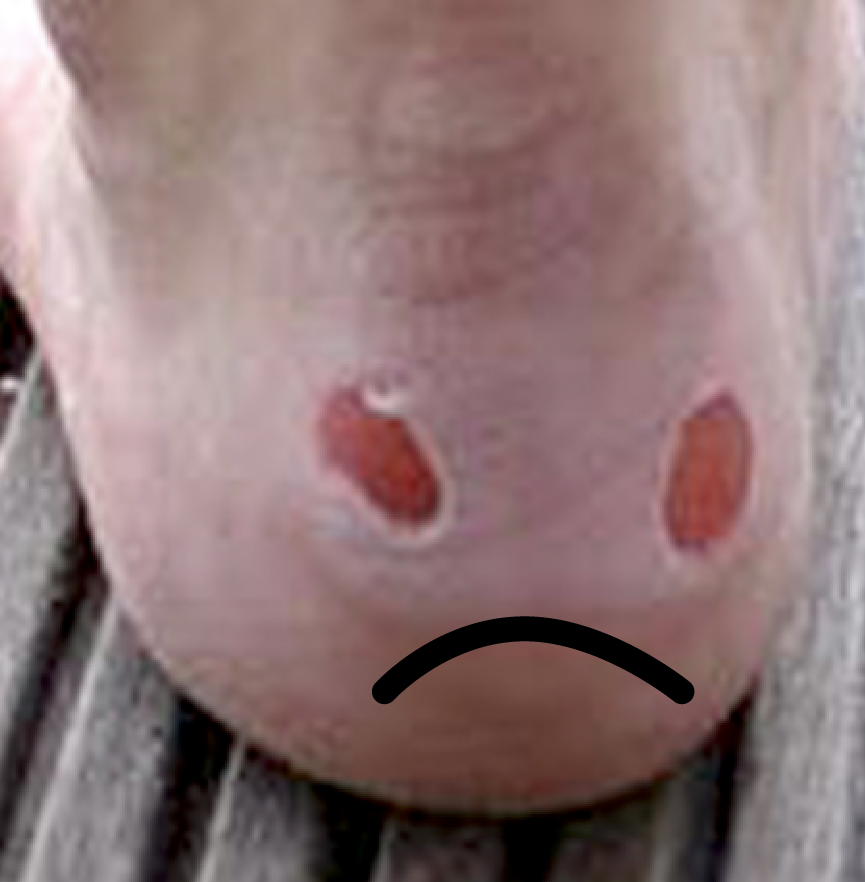
The one exception to this rule is socks. I always bring an extra pair of socks with me.
Having wet feet means you are going to get blisters.
Blisters mean you won’t be able to stay mobile well.
Immobility could be your death.
So I pack two pairs of wool camping socks (or other fast-drying socks) in my survival bag.
Recommended Reading – Best Survival Socks For Your Bug Out Bag
Pack the Right Survival Food
One of the biggest mistakes that I see with Bug Out Bags is that people load them with canned food. Yes, canned food does have the benefit of being nonperishable, but it is heavy as heck! It is also usually loaded with water, which means lots of extra weight.
A 16oz (1lb) can of beans only has about 300 calories, which is only about 1/6 of what you should consume in a day. You’d have to pack 18 cans of beans – 18 lbs – to feed yourself on canned food for 3 days.
First off, let me clarify that YOU DON’T REALLY NEED FOOD IN YOUR SURVIVAL BAG! The human body can go up to a month without food.
But no one wants the stress of being hungry when SHTF, so go ahead and pack some survival food in your pack. Just make sure you pack the right stuff!
When choosing survival food, look for these qualities:
Caloric Density: Divide the number of calories by the number of ounces. You want to find the foods with the most calories per ounce. Nuts are particularly good. So is jerky.
Divide the number of calories by the number of ounces. You want to find the foods with the most calories per ounce. Nuts are particularly good. So is jerky. Dehydrated or Freeze-Dried Food: Did you know that you can dehydrate foods like refried beans, pasta sauce, and even marmalade? With the moisture removed, you can really carry a lot of dehydrated food without a lot of weight.
Did you know that you can dehydrate foods like refried beans, pasta sauce, and even marmalade? With the moisture removed, you can really carry a lot of dehydrated food without a lot of weight. Fast Cooking: If food has to cook for a long time (like dried beans or rice), then you will have to carry more fuel and need more water. Instead, choose foods that can be made instantly. Like these instant survival meals (Amazon Link) which are cooked in the pouch by just adding boiling water.
Here’s a list of 50+ food ideas for your survival bag.
And here’s some more in-depth information on emergency food.
Swap Your Tent for a Tarp
A tarp is my ultimate favorite multipurpose survival item. With just a tarp and some paracord, you can make a survival shelter. Want to learn how? Read this post about survival shelter designs.
A tarp can also be used for multiple other purposes, like collecting water, making a stretcher, as a signal… You can even throw out your backpack (which probably weighs 5+ pounds) and make a Yukon Pack out of your tarp instead!
Read about the many survival uses for a plastic tarp here.
Simply by swapping your tent for a tarp, you could save 1-6 pounds from your pack (depending on the weight of your tent).
Choose Multi-Function Gear
Do you really need a spoon and a fork when you could just pack a spork? (Amazon link)
Today, there are all sorts of multi-function survival gear available.
For example, don’t bring an emergency radio, flashlight, and charger when a gadget like this (Amazon link) will do all three things.
Knowledge Instead of Gear!
With the right knowledge, you won’t even need any gear to survive in the wilderness or a disaster situation.
Don’t wait until a disaster happens to learn survival skills.
Now is the time to learn skills like how to make your own water filter, how to make a lean to shelter, how to identify edible plants, how to eat bugs for survival….
How much does your bug out bag weigh? Let us know in the comments.
Best bug out bag survival backpack – The Prepared
There are a ton of backpacks on the market — so how do you know which one to buy and depend on in a survival or bug out situation? Preparedness and backpack experts with decades of experience have spent months reviewing hundreds of bags to shortcut your shopping.
Last Updated: January 18, 2020
Picking the best survival backpack is often more challenging than picking most of the stuff that goes inside the bag.
Even when you set aside personal preferences like fit and color, there are tons of considerations that matter in an emergency context: what kind of organizational layout is best for common gear, how well does a bag balance blending in vs. tactical features, weight vs. durability, and so on.
More: Bug out bag checklist and first aid kit checklist
To make matters worse, the market is flooded with options. It’s so easy for companies to make small changes that they can crank out a ton of different models, see what works, and iterate. And since everyone has their own personal quirks when it comes to backpacks, companies rise to meet the demand for so many fragmented choices.
Even in the course of writing the original draft of this guide, between the time we started collecting bags and publication, manufacturers would change things up too quickly for us to keep track.
So this is more of a purchasing guide to help you zero in on the right companies and products, rather than a contest where we pick the single best bug out bag backpack.
There’s a lot of theory down the page — so you can learn and be a better shopper at any time — plus recommendations for popular brands and specific bags we think fit the criteria.
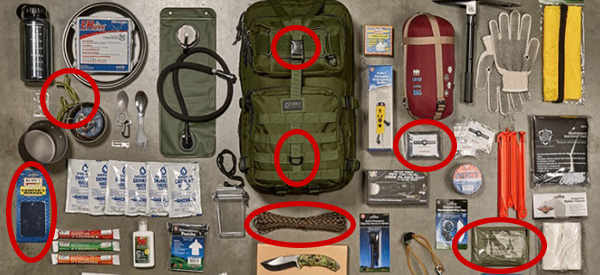
In addition to hands-on reviewing, every bag tested was packed according to our recommended loadout so we could see how well it held common gear. The gear in this kit is pretty close to what we used.
The most important tips, whether you’re considering repurposing a bag you already own or shopping for a new one:
Two-strap backpacks are the only acceptable type of bag in this role.
There are no bags we recommend with new MSRP prices under $70 — the quality just isn’t good enough.
The sweet spot for most people tends to be in the $125-$300 range.
If you’re on a tight budget, it’s better to buy a better but gently-used bag than a cheaper new one. Check your local craigslist.
Most people end up with a bag in the 40-55 liter range (2,450-3,350 cubic inches). For the vast majority, over 65L is unnecessary and under 35L is too limiting.
If you don’t know the size of a bag you already own, try to stuff it with blankets/pillows and measure the outside dimensions. Then multiply for a rough idea of cubic inches, eg. 9” x 14” x 22” = 2,772.
Backpack fit matters a lot — stop by a local sporting goods store if you want help figuring out your size.
Have a rough understanding of what you plan to put inside and outside the bag. eg. Are you building a small evacuation bag or a full SHTF bag?
The best type of bags tend to be mild versions of technical or tactical bags, ie. not too extreme in either direction.
People who favor comfort and blending in tend to favor more technical bags, while people who value durability and customization tend to lean more tactical.
You want your bag to blend in regardless of type, so avoid camo, bright colors, too much MOLLE/PALS webbing, etc. and consider the norms around you.
You want a balanced mix of large main compartments, smaller interior pockets, and external pockets. Only 1-2 large compartments (and nothing else) or lots of smaller specialized compartments are bad.
Front-loading bags (ie. “panel loaders”) and hybrid types with multiple access points are much better than top-only loaders that require you to dig everything out to get to what you’re looking for.
Any bag over 30-35L should have a hip belt because you shouldn’t carry heavy loads just on your shoulders.
Contribute! Comment with bags you’ve tried and what you thought. We’ll update this list over time.
Best budget backpacks (< $125) < 35L: 35-45L: 45-55L: > 55L:
Best mid-tier backpacks ($125-$300)
< 35L: 35-45L: 45-55L: > 55L:
Best premium backpacks (> $300)
< 35L: 35-45L: 45-55L: > 55L:
Why you can trust this review
Besides decades of combined experience as preparedness teachers and outdoor product reviewers, we have 10+ years of experience living out of backpacks for long stretches of time in the military and while traveling, including in places like North Korea and Iraq.
We’ve interviewed various backpack experts, including designers and product managers at top manufacturers, bag repair shops, outfitters, and SERE instructors.
With over 150 hours of total work: We researched and built a spreadsheet of over 500 bags to narrow down the top ~100 for deeper evaluation.
Be prepared. Don’t be a victim. Want more great content and giveaways? Sign up for The Prepared’s free newsletter and get the best prepping content straight to your inbox. 1-2 emails a month, 0% spam. Subscribe Leave this field empty if you’re human:
Backpacks are best for survival
The whole point of a primary bug out bag is to be able to survive on foot. Which means you’ll have at least 20-40 pounds of gear that you need to be able to carry over unpredictable terrain and distances — possibly more if you pick up stuff along the way (eg. water or food).
The best way to do that is the humble backpack.
One of the main reasons this method has stood the test of time is that your hips are the best part of your body to hold weight without constant muscle activation. And the best way to hold weight on your hips is a fanny pack backpack.
Price tiers and brands
Within the realm of backpacks that are relevant to prepping (ie. excluding things like a basic school backpack), the new market generally breaks down this way:
Under $75: Not good enough to depend on
$75-$125: There are winners, but they’re hard to find
$125-$300: Middle of the bell curve, most common
$300-$500: Premium, worthwhile step up in quality
Over $500: A few winners, but mostly starting to pay for the brand name
Although some brands will have products across a wide price range, you can generally sort common companies by tier.
Budget brands:
Mid-tier brands:
Premium brands:
What you get when you spend more
Backpacks are definitely one of those “you get what you pay for” categories — although you start seeing diminishing returns for each extra dollar once you go over $400 or so, depending on the brand name.
The biggest areas where you’ll see differences based on what you spend:
General build quality, durability, and lifespan
Warranties and customer service
Stitching
Zippers and buckles
Materials
Water and tear resistance
Ergonomics
More personalized fit adjustment
Adaptability and custom configurations
Made in the US/EU vs. made in China/Mexico
Cheaper bags mean companies have less margin to invest in other things like proper customer service, warranty, and build quality. Osprey, for example, is famous for their comprehensive any-reason lifetime warranty. Random Chinese knockoff brands who only sell on Amazon/eBay might not be around in three years, and even if they are, they won’t care about you. Be skeptical if a brand doesn’t have their own dedicated website and support contact.
Cheaper bags will either skip hip belts entirely or include a bare-minimum strip of thin fabric. Similarly, cheaper bags will cut corners on the padding in shoulder straps, again sometimes having nothing more than a thin strip and/or using low-quality cushions that deflate quickly. Premium brands invest in higher-quality cushion materials that will still be springy years from now.
One of the most common problems with cheap bags is poor stitching that falls apart from stress. When evaluating a bag, look at how serious the stitching is around those critical seams and joints. Premium bags will also vary the angle of the doubled and tripled stitching to better hold against forces coming from different angles.
Another common way companies save money is by chain stitching the zippers. Which becomes a problem is one part of that chain breaks, which can pull apart the entire length of the zipper.
Budget brands cut costs through cheaper zippers and buckles. You may not notice the difference at first, but since these are the biggest wear parts, you will as you use the bag more. The zipper should feel substantial, smooth, and solid with no hiccups or snags, no matter what speed you use.
According to expert Luke Fowler, who repairs bags and helps companies like Triple Aught Design create better ones, one of the easiest ways to tell a cheap bag from a quality one is if they have branded zippers (usually “YKK”, the most famous zipper maker).
Premium bags will be more thoughtful with zipper design and placement, too. We love bags with four zippers on the main compartment because you can open little access holes wherever you need them, such as slinging a bag around on one shoulder and accessing from the side while on the move.
Intelligent designers will put zippers in areas less likely to be directly hit with rain — such as not having any zippers that face straight upward — since the zipper and seams around it are the most common entry point for water.
Besides using better materials that won’t fall apart, more expensive buckles are also easier to use. We particularly like the “Osprey-style” adjustment buckles where you pull the tail end of the strap forward / away from your body to tighten the hip belt, which is a much easier motion than trying to pull the tail end backward past your hips.
The higher price tier you buy, the more likely the bag has been intelligently designed for customization. Many brands will also offer in-house pouches and other adaptable gear as part of an overall system.
More expensive packs have attachment points so you can add/remove complimentary packs, which can serve as extra storage when attached or as smaller day packs when you want to leave the big bag behind on a scout. Higher-tier brands often make compatible accessories for their bags so you can kit it out Gucci-like.
If you’re on a tight budget
The backpack might seem like a good place to save a few bucks — especially since the stuff that goes inside the bag will cost at least a few hundred dollars.
But if you are depending on a backpack to survive, that means things are bad and you don’t want the single container that carries all of your critical stuff to fall apart when you need it most — and cheap backpacks will fall apart.
We wish there were no-brainer options under $75, but there just aren’t.
Tips on saving money:
You can find high-end packs that are used and significantly discounted, but because they’re a premium product, they’re often still more than fine for a bug out bag. Many enthusiasts will upgrade their bags every few years then sell their still-great outgoing model on Craigslist, Facebook Market, local swap meets, etc.
Buy after the end of a season, whether it’s back to school season, hunting season, etc.
If you live in an area where outdoor recreation is popular, there may even be physical stores for second-hand gear or repair shops with leads.
Check your local Play It Again Sports and Goodwill.
Size and shape
To keep things easy and consistent, we think about bag sizes in tandem with our bug out bag checklist, which is broken down into three prioritized levels depending on how big/advanced you want to get with your kit.
Using the gear in that list, we’ve packed the various levels into dozens of bags to figure out what sizes fit what levels. Roughly speaking — design can make a big difference here — minimum bag sizes for able-bodied adults are:
Level 1 > 25 liters
Level 2 > 45 liters
Level 3 > 50 liters
Most of you should end up with a bag in the 45-55 liter range — the size of common airplane carry-ons — which is enough to carry the most popular and critical supplies without overloading, assuming one or two of the bigger items like a sleeping pad are strapped to the outside.
Size considerations:
One of the most common mistakes we see is going too big. Do not buy a bag over 65 liters unless you already have backpacking experience with those loads.
You can get a basic kit into small 25-35 liter bags, but frankly we’d never personally use a bag smaller than ~35L. Although smaller bags are obviously easier to carry and blend in better, you probably want some extra volume in your bag so you can add supplies that you find during an emergency.
If you do go under 35L, then it should be a very “gray man” bag because that’s one of the main reasons to sacrifice and go small.
If you live in colder climates, you need a little more room for bulky insulated clothing.
Most people fill the space they have, which can lead to overpacking. Be disciplined.
Even though our gear list adds 10 pounds of bulky gear from Level 2 to 3, the bag size doesn’t need to get proportionally bigger because some of that advanced gear gets strapped to the outside of a pack (eg. a tent or sleeping pad).
How a bag is designed makes a big difference in these rules of thumb. For example, some 60 liter bags couldn’t hold the exact same gear we got into other 50 liter packs simply due to organizational layout.
You’ll often see bags labeled as 24 hour, 72 hour, 3-day assault, etc. This is branding shorthand for roughly how large they are for a common three day loadout in a military context. Similarly, labels like “assault pack” generally mean the one backpack a soldier would take with them on a three-day mission, which is a decent proxy for the kind of loadout you’ll have in your BOB.
But those labels don’t mean much in the end, are not standardized, and can trick you. For example, even though both bags have the “24” branding in the name, LA Police Gear’s 24 hour pack is 52L while the 5.11 Rush24 is 37L.
Shape considerations:
Stick with basic box or tube shapes. Pyramids, ovals, and other designs sacrifice too much storage space.
You generally want the fully-loaded pack to fit within the area between your shoulders, neck, and hips. It shouldn’t stick way out in any direction.
Go too tall and you won’t be able to tilt your head back, or it’ll snag on stuff along the way.
Go too wide and you’ll snag, have trouble getting in vehicles, through crowds, etc.
Bags that are too deep — where they stick out far away from your back — don’t carry loads as well because the center of gravity is pulled away from your body.
We love bags that can stand upright on their own on a flat floor. Avoid curvy bottoms.
Importance of fit
A backpack works best when it can direct the force of weight to the right spots and in the right proportions (eg. at least 60% on your hips).
But since your body is different than mine — even if we’re both generally a Medium — how a bag sits on the top of my hip bone or curves with my shoulders could be very different than yours.
The better the bag fits on your body, the more weight you can carry for longer and further. That might really matter in an emergency.
Which means pack fit is just as important of a criteria as any other. If you’re deciding between bag A and B, and A is overall slightly more awesome or cheaper but doesn’t fit as well as B, go with B.
Tip: Like buying shoes, sometimes you just won’t know until you try it on. Almost all ecommerce vendors will let you return a bag you bought online, but if you want to save yourself that step, pop into a local outdoor store and try some on. Employees in bag departments at stores like REI and Cabellas are trained to help you find the right fit (just like good shoe salespeople). Be sure there’s some weight in the bag when you do — they often have sandbags near by just for that.
Cheaper or smaller backpacks tend to have more universal sizing (and a lack of fine-tuning customization features) since the designers assume the bag will have lighter loads and only be used for short bursts.
Larger or higher-quality bags tend to include more of those fine-tuning features, such as adjustable spine heights or sternum straps with vertical adjustments.
Women’s backpacks
Unless a bag is specifically labeled with a gender, you should assume it’s unisex or cut for men.
Some women don’t care. Others do. Roughly speaking, the curvier and/or bustier you are, the less comfortable a non-female bag will be.
One of the most common areas where companies tweak designs for women is in the shoulder and sternum strap. Designers assume women have narrower shoulders and wider hips than men of the same general size, for example. The straps themselves will also have different curves or positions to accommodate bras and breasts.
A growing number of companies are adding dedicated Women’s versions to their product lines. Sometimes they’ll keep the same model name and add “- Women” to the end, such as the Kelty Coyote. Sometimes they make slightly different model names, such as Osprey’s similar Ather for men and Ariel for women.
The most popular brands for women’s backpacks:
Internal vs. external frame
Backpacks need a rigid frame in order to properly direct weight to the right spots. Without a frame, a backpack has no built-in form and hangs like an empty sack.
Most people end up with an internal frame, which means the structure is either sewn into the fabric and/or has removable inserts (ie. “stays”) stored in the interior (usually a fabric compartment along the spine). Just look around your local store and you’ll likely find 10-20 internal frame models for every external frame.
Stick with internal unless you know you have a specific reason to use externals and/or are already comfortable with them through time in the military.
Pros and cons:
External frames are often a separate piece you need to buy and combine. Besides extra cost, this adds the complexity of matching bags and frames — and manufacturers don’t always make it easy to figure that out.
External frames are generally more rigid than internals, which means they can carry weight more comfortably (especially heavy loads). The famous ALICE pack used in the military is a great example.
Internal packs tend to move better with your body when you’re moving in ways other than just normal standing/walking.
Internal packs are typically lighter.
Some external frames act as a customization platform, giving you more room to tweak things your way. For example, some have “shelf space” between the frame and fabric bag where you can carry an ammo can, water jug, or game carcass.
External packs have more airflow around your back because the frame holds the pack an inch or so out.
Some external frames even have a flip-down seat built in — picture the seats people bring and lay on top of benches at sports games or concerts — so you can have a place to rest against the weight of your pack while waiting in hours-long refugee lines and so on.
Types: tactical vs. technical vs. travel/EDC
Very few manufacturers make bags specifically marketed for emergency preparedness. Which means you’re usually shopping among these categories:
Technical bags are what you’d find at a sporting goods store or on a hiking trail
Tactical bags are built for military and law enforcement scenarios
Travel bags cover a range from everyday carry to “backpacking through Europe”
Technical and tactical bags are usually better than travel bags because the latter, while great for blending in and EDC/travel, often don’t add any other value as a bug out backpack over the former. The travel bag category is evolving more quickly than the other two, though, so perhaps that will change in a few years.
Storage compartments can sometimes be too big on technical packs and too small on tactical packs.
Technical bags are often just a few large compartments, sometimes even just one large “bucket” compartment with no other pockets or features. They’re designed this way because the company assumes you won’t be going in and out of your bag quickly and frequently to pick and use one piece of gear — rather, they assume you’re carrying recreational gear on a trail and you’ll dump everything out all at once.
On the other hand, some EDC-oriented or tactical bags can get too crazy with micro pockets and overly-optimized organization. You might enjoy specialized individual pockets on your daily work commute for your sunglasses, pencil, pen, business cards, wallet, phone, and bicycle helmet, but that can be too limiting in a BOB.
We tend to dislike compartments that are too big because there’s no inherent organization, especially when you’ve been on foot and things jumble around or get squished.
Some packs have added a feature to minimize this problem: a removable, horizontal divider that creates a “shelf” somewhere in the main compartment, splitting the big compartment into two more manageable areas.
Technical packs often lack external pouches.
In addition to the same reasoning as the big main compartment, designers also try to keep the exterior smooth so there are fewer snag points in the wilderness. That might add a small stretch pocket for a water bottle, but even those aren’t good enough to hold a proper bottle in many cases.
We strongly prefer having at least a few external pockets for things you might frequently want to use without digging into the main pack, such as a canteen, compass, map, knife, multitool, flashlight, etc.
Technical packs are usually more comfortable and ergonomic.
Military grunts are told to “embrace the suck” while consumers looking at a weekend-warrior pack are more picky about comfort. Technical pack designers tend to be more thoughtful about comfort to meet that demand.
Higher-end technical packs will often have preformed hip belts, adjustable lumbars, adjustable spine heights, more cushion on the surface that rests on your back, extreme curves, and mesh webbing to create airflow gaps.
Tactical packs generally have better external attachment points.
You want the ability to attach gear to the outside of your pack. Yet bags intended for everyday carry and activities like day-trip hiking tend to have smooth exteriors. Sometimes it’s just for the sleek look, and sometimes it serves a purpose to reduce snag points when on a trail.
Even when a technical bag does have attachment points, because there’s such a wide range of recreational activities and specialized gear, you may end up with features that looked “attachey” at first glance in the store but were only meant for hanging an ice pick or something else not relevant to prepping.
On the other hand, tactical designers assume tactical people want to add stuff and you essentially only ever see two options: MOLLE or velcro.
Review: US Marine’s ILBE pack
“Gray man” and blending in with your environment
The punchline is easy: You want the ability to blend in with your surroundings when you’re in a situation that requires a go-bag. You don’t want a target on your back when people around you are panicking, nor do you want to draw suspicion from someone like a National Guardsman loading you onto an evac bus that you’re someone who’d have weapons in their bag.
What that means in practice is not so simple.
Consider that even just having a pack at all will in some cases be enough to make you stick out! It could even be the case that what makes you stick out like a sore thumb in one area is what helps you blend into another.
But, like all things, there’s a balance — and we think some people have taken the gray-man goal too far. We’ve seen people use a children’s school backpack (Hello Kitty!) or work briefcase, for example, which sacrifices too much functionality for the sake of blending in.
Think about what “average” means for the people around you.
If you live in lower Manhattan, the chances are higher that the people around you when SHTF will be carrying smaller day packs, professional work gear made of black/brown leather, and so on. A black bag with a sleek exterior will blend in better.
If you live in Bozeman, Montana, the people around you are more likely to be carrying an outdoor technical pack than a leather messenger bag. A green hunting pack may blend in better than a sleek black bag.
It’s easy to see that what even counts as “blending in” greatly depends on the people and norms around you — there is no universal answer.
Avoid camo and bright colors. Stick with solid, neutral earth tones.
Camo is a perfect example where there’s more risk than benefit. Even if you need to hide your bag, you can use materials found around the area, the tarp you’ll have in your bag anyway, etc.
Technical packs often come in bright colors. You may be in a situation where you want to be seen, but the backpack is not the right way to accomplish that.
You want external attachment points without glaring MOLLE/PALS fields.
MOLLE is an attachment system originally used in the military that has since spread into tactical consumer gear. PALS, sometimes used interchangeably with MOLLE, is the webbing weave that MOLLE gear attaches to.
Which is why most people will assume a bag with lots of conspicuous PALS webbing is more of a target than a plain bag. That’s caused some preppers to avoid any and all MOLLE.
We strongly recommend having the ability to attach stuff to the outside of your bag. You’ll likely want to carry your sleeping pad, bag, and/or tent on the outside of your pack. And you may want to add additional pouches, water holsters, and other modular accessories.
The problem is that some manufacturers — especially cheaper brands trying to make their junk seem cooler than it is — will slap as much MOLLE webbing around a pack as they have space for.
So when you’re shopping, be thoughtful about the amount and placement of the PALS fields. How many things do you expect to attach, and where? Is it overkill?
Prime spots for webbing are the bottom (to attach sleeping gear) and sides (for extra side pouches). It’s rare you’ll add something big to the main outward face of the pack, so only a few rows towards the top of that face will be fine for most people.
Some companies have started to include MOLLE attachment points that blend in better with the bag. The most popular version is “laser cut”, where the webbing is cut out of the core pack fabric rather than sewing extra material on top. Look for laser cut MOLLE that has some kind of reinforcement around the cuts so the attached gear doesn’t pull it apart over time.
Morale patches are another “tactical” signal.
Morale patches and other external decorations are common in the military and have spread into prepping circles. They’re fun, and we have plenty ourselves — my favorite is a Pickle Rick patch — but on a bug out backpack they’ll do more harm than good. Leave the “Death From Above” decal on your range bag.
Materials
Besides cost and how you generally get better materials the more you pay, the main spectrum in bag materials is between low weight and high durability. Go too light and your bag can tear from something like a passing tree branch. Go too durable and you’re carrying unnecessary weight.
Denier is a common fabric measurement. The higher the number, the thicker (and presumably more durable) the fabric strands. Silk is 1D while a human hair is 20D, for example.
Tactical packs tend to be in the 500-1000D range, reflecting thicker fibers that take more abuse, while technical packs are usually 210D, 420D, or a patchwork mix (eg. tougher strands on bottom, lighter strands on top) to cut down on weight. Technical designers assume it’s no big deal if you tear a bag on a camping trip, while tactical designers know a bag falling apart on a mission is a quick way to lose contracts.
Although you’ll be okay with anything in the 400-1000D range, current research suggests the sweet spot is around 500-600D. The market seems to be settling in this direction, to the point 1000D bags can come across as trying too hard.
More: Contributing expert Luke Fowler shares a deep Denier test he did on various bag fabrics.
Nylon is the best common material, and Cordura is a special form of nylon with high abrasion resistance.
Avoid polyester in bags over $100 (it’s unavoidable in many cheaper bags) — even if it’s labeled “tactical” or “ballistic” polyester, which is usually a nonsensical marketing label used by cheap brands.
Just like the tarp you’ll carry in your go-bag, a transparent polyurethane (PU) coating is applied at the factory. But the coating is more for seam integrity than for waterproofing — any coating will wear down from water exposure over time.
Cheap coatings will get cloudy, crack, or peel. Pay extra attention to this when buying used.
Other bag features
Common features you should avoid:
Laptop sleeves are generally a waste of space because you won’t have a laptop or anything of similar size/shape that justifies its own compartment.
Hydration reservoirs are a similar story — you shouldn’t use a bladder in your go-bag anyway, and there’s nothing else worth having that dedicated pocket for (although it’s usually less wasteful than a laptop sleeve).
Built-in raincovers aren’t horrible, and it’s fine if you find a great bag with one that isn’t too intrusive. But they’re often too bulky and waste space. You will have a tarp and other rain cover gear if needed.
Buy front-loading bags (or hybrids), not just top-loaders.
One of the most common problems with technical backpacks is the top-loading design, which means the only access hole to the main compartment is at the top of the bag (often hidden under the lid, as in the following picture), looking down to the floor.
Do not buy a technical-style pack without knowing how you get into the compartments. As of this writing, for example, REI’s website has only two out of 72 total bags that can load from the front, and only one out of 72 is even close enough to be a candidate.
That’s fine for hiking and does reduce water penetration (since the entry points are usually hidden), but it sucks in an emergency — you want to be able to access the specific gear you need without having to dig through or dump out everything.
Thoughtful attachment points for shelter/sleeping gear.
Unless you’re carrying a minimalist bag, you’ll probably want to carry a few items on the outside, namely some or all of your sleeping pad, sleeping bag, and tent. They take up too much room on the inside of the pack and there’s no harm in carrying them outside.
We strongly favor packs where the designer considered this and built thoughtful attachments, straps, or other ways to carry that gear in proper spots.
For example, we like when there are built in straps near the bottom but not on the bottom. When the only place you can strap a tent or sleeping bag is underneath the pack, you can’t easily set the pack down on the ground. Straps that hold the gear just off ground level make this easy, and the extra gear even helps stabilize the bag while standing upright on its own.
Removable sub-packs that can also serve double duty.
Technical packs sometimes feature a removable top “lid”, the compartment that sits over top of the bag’s main compartment access. Some models even include an extra strap or two so you can turn the separate lid into a smaller day pack or shoulder sling.
These types of areas are also nice because it’s another space where you can lay bulky external items like rope, sleeping pads, sleeping bags, or rain jackets and then cinch them down between the top lid and main body, holding them flat on top of the bag instead of strapped to a side.
High-visibility interior colors help you find what you’re looking for.
Unlike the exterior, we like bright colors on the inside of pockets because it helps create contrast against your gear. Imagine digging through a solid black bag’s main compartment, at night, looking for your all-black flashlight.
Get Home Bags vs. Bug Out Bags. What are the Differences?
Although most people know what a bug out bag is, many get confused when it comes to get home bags (GHBs for short). They are not the same thing!
So what’s the difference between a bug out bag and get home bag?
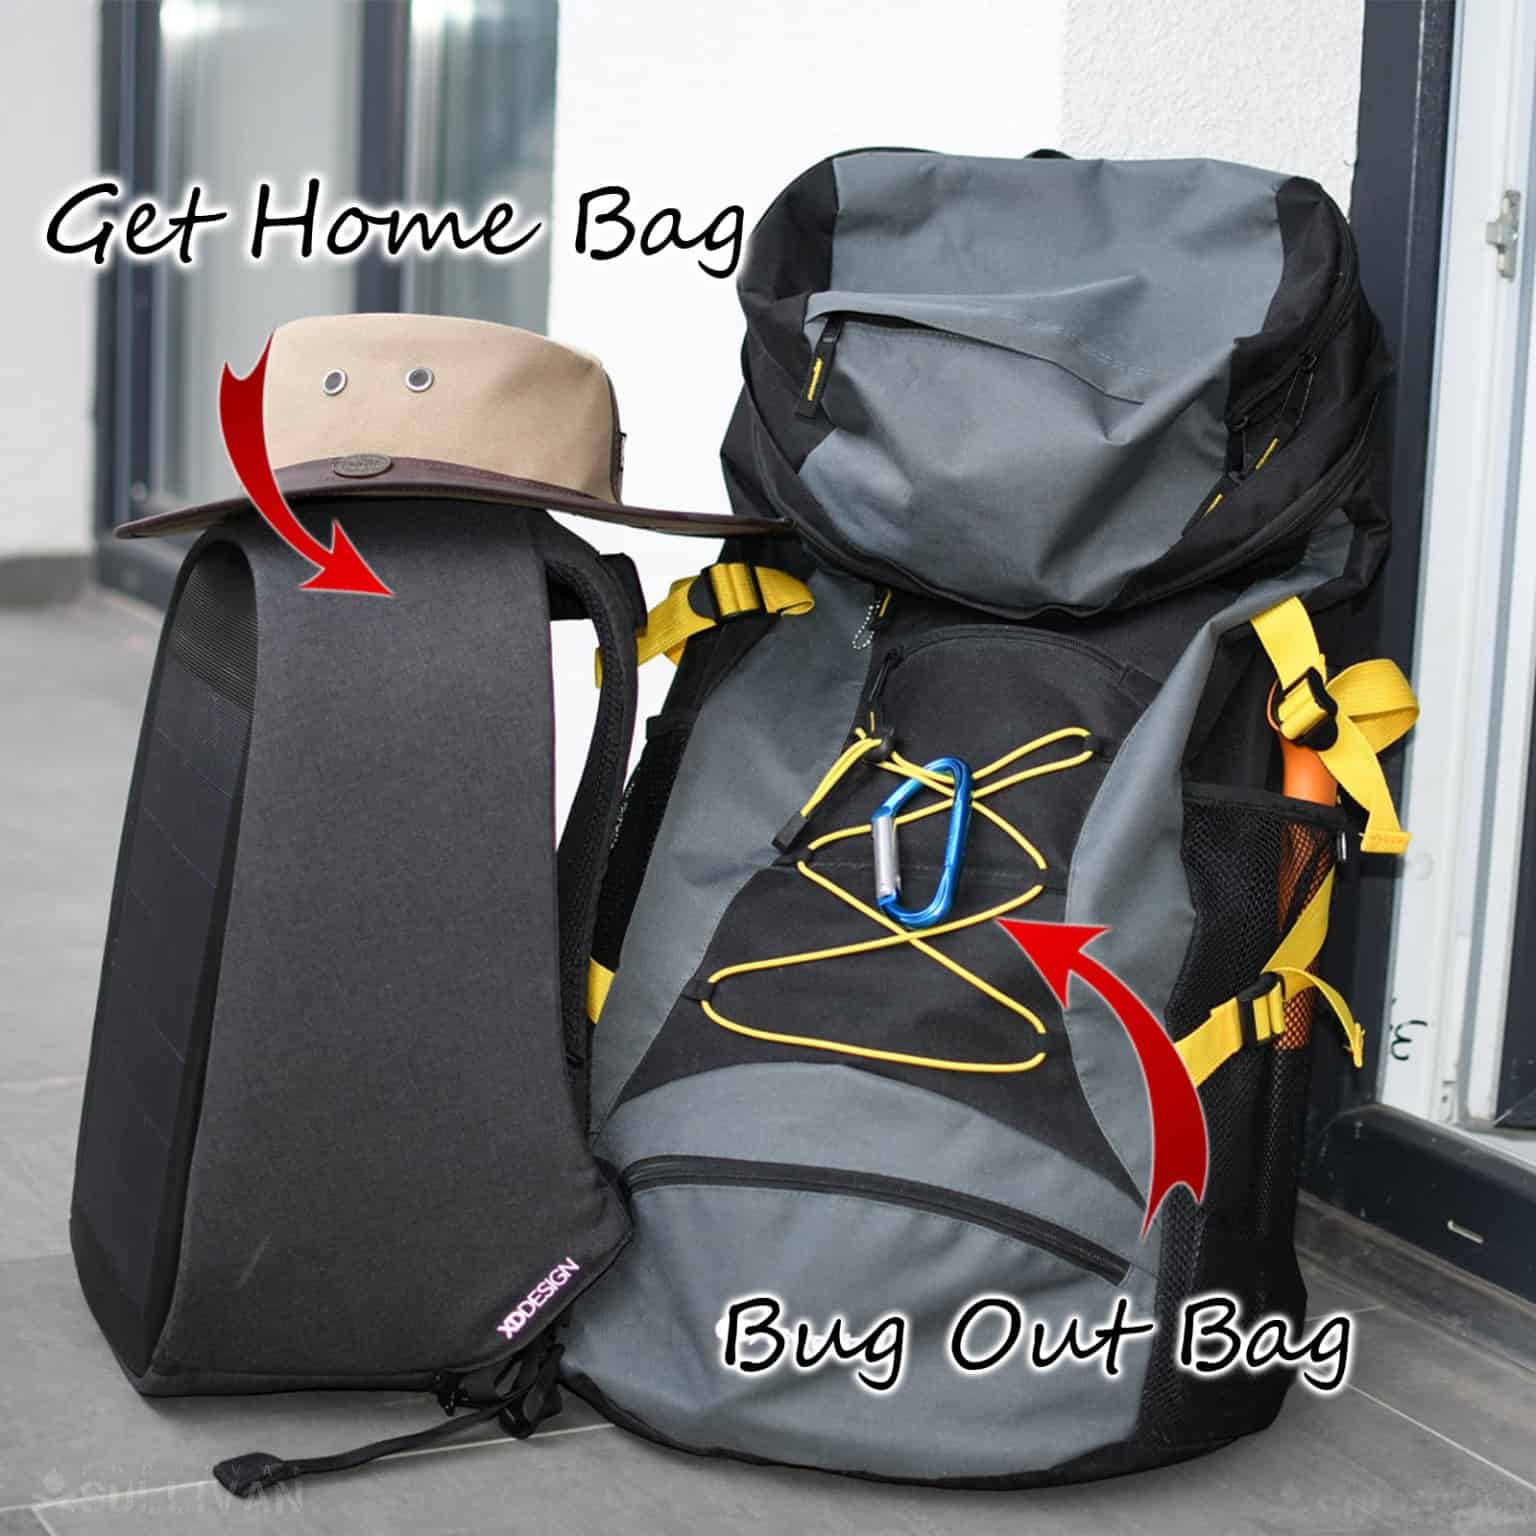
A bug out bag is a solid backpack designed to help you survive away from home for up to a week, while a get home bag is a lighter bag designed to get you home in an emergency, which hopefully won’t take you more than a few hours.
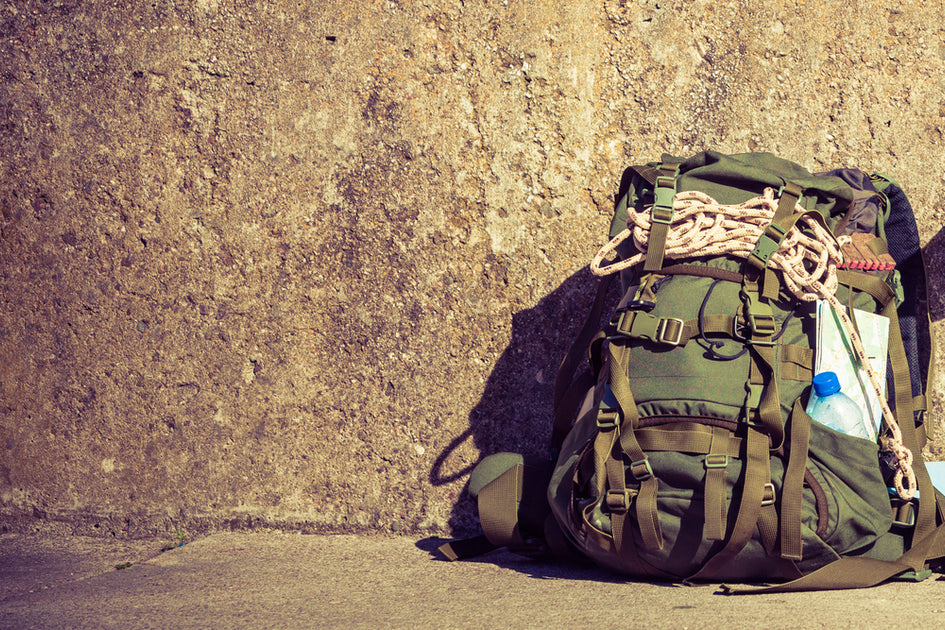
A get home bag next to a bug out bag backpack.
A bug out bag (BOB for short) typically weighs around 20 to 40 pounds (more or less around 10 to 15 kilograms), although the less the better, because it will be heavy to carry on your back. A get home bag typically weighs half as much as a get home bag.
A bug out bag is typically kept at home, in a place that’s easy to grab and go in case of an emergency, while a get home bag is something you typically take with you, to keep either in your office, or inside your car.
Let me put things into perspective with this comparison table that highlights the differences between the two:
Get Home Bag (GHB) Bug Out Bag (BOB) 10 – 20 lbs 20 – 40 lbs helps you survive for a few hours helps you survive up to a week 0.5 liter water bottle 1 liter water bottle very little food more food, more diverse food no need to acquire extra food need some means to acquire more food and water small first aid kit medium-sized first aid kit lightweight shelter options (tarp, poncho) better shelter options (tent) one folder knife folder plus a solid survival knife or machete no need for bartering items should have a few bartering items
To make things clearer, below we’ll detail the different items you should consider packing for each.
What’s in your Get Home Bag vs your Bug Out Bag?
The basic items you need to get home from wherever you may be when a disaster hits are in the GHB. It’s a plain backpack, messenger bag, or laptop bag, no bright colors or camouflage print.
It won’t draw attention and announce your bag full of supplies to everyone you see. You look like just a normal guy trying to get home from work, not GI Joe on a mission.
Unlike the GHB, your BOB should contain everything you need for at least 3 or 4 days. If you have room to include most of the items on this 154 bug out bag essentials list that’s great too.
This is the large carry-everything-bag you grab and take with you when SHTF and you are forced to leave your home and travel to a pre-determined bug out location (BOL)
Food
In your Get Home Bag:
For your GHB, think quick, easy foods you can eat while on the move if need be. Items that don’t need heated and yet still provide the protein and calories you need are good.
Your GHB is a great place to have granola bars, energy bars, or even a candy bar if weather is not hot. Throw in an MRE ration or some pemmican, a small bag of nuts, and a foil pouch of tuna with crackers.
Remember you can survive up to 3 weeks without food, so though uncomfortable, you can certainly go 24 hours without eating. Your priority is to get home, meet up with family, and either fortify your home to bug in or move on to your bug out location (BOL). You won’t be stopping to cook meals.
In your Bug Out Bag:
Your BOB should be light enough to carry for long periods, but this is where you carry foods that require cooking as well as food you can eat quickly if need be. Ramen noodles, rice, peanut butter, and bouillon cubes are great to have. Don’t forget a stainless steel pot for boiling water, camp stove, a can opener, metal eating utensils.
Water
In your Get Home Bag:
Carry a small water bottle and a LifeStraw filter if you can. Purified water is okay but has more added chemicals. Save the bottles to refill if needed before you reach home.
Remember, your GHB is only designed to get you from wherever you are to home, so worst case is an overnight trip if you have to travel on foot.
In your Bug Out Bag:
Your bug out bag should also have a personal water filter, plus at least 1 liter of water, preferably kept in a stainless steel water bottle.
Disclosure: This post has links to 3rd party websites, so I may get a commission if you buy through those links. See my full disclosure for more.
For your BOB, in case you need to refill, water purification tablets work on most things in about 15 minutes. For cold, dirty water, wait up to 4 hours before drinking. A 4 way sillcock key (to open water valves and faucets on buildings) is handy.
First Aid and Clothing
In your Get Home Bag:
A small first aid kit with Band-Aids, antibiotic cream, aspirin, and maybe some sunscreen will work here. A jacket, a rain poncho, and sunglasses to protect you from the weather.
Carry a change of clothes in case you do get wet and warm gloves and a hat in the winter season. A pair of tennis shoes or hiking boots and extra pair socks in case you are wearing dress clothes when SHTF.
In your Bug Out Bag:
Your BOB first aid kit will be larger and include any items you can get for trauma, surgery, or stitches and any medications you or your family members need long term.
It’s a good idea to include an EPI pen in case of an allergic reaction and an anti-diarrhea medicine. In your BOB, you will need duplicates of the clothing already in your GHB but include several sets of clothes and several pair of warm socks.
Important Documents
In your Get Home Bag:
It’s a good idea to include recent photos of each family member in the event someone is lost during the chaos and you need the photo for a search.
In today’s age of smart phones, a written list of emergency and family phone numbers in case your cell phone is dead will be crucial. A piece of paper and pen or pencil for writing a note or writing directions may be helpful.
In your Bug Out Bag:
Your bug out bag (BOB) is the place to keep copies of all your important documents. This includes copies of birth certificates for each person as well as copies of insurance documents.
Cherished family photos, any other valuable items, and a written inventory of household items with serial numbers go here as well. A topographical map and compass will help you navigate unfamiliar territory.
Shelter
In your Get Home Bag:
A plastic tarp, a rain poncho, or a Mylar emergency blanket in your GHB is smart. Remember you are trying to get home, meet up with your spouse and children, not sleep in the woods. You need to travel light and will only need shelter if weather is bad or it takes you a lot longer to get home than you expect.
In your Bug Out Bag:
It’s not always practical to carry a tent unless you can find a small pop up that is light and folds small. Your BOB will carry all the tools you need to build a shelter if needed.
Include the basic tarp or plastic sheeting and paracord, as well as an axe or handsaw for cutting down limbs. Mylar emergency blankets are a good backup, at least one for each family member.
Protection
In your Get Home Bag:
A good survival knife. Even if you already carry an EDC knife on your person, one in your GHB follows the two is one and one is none philosophy.
For most people, your EDC pistol and ammo will be in your GHB or car unless you work somewhere that still allows you to carry it on your person. Pepper spray, OC spray, or wasp spray are alternatives for those who don’t carry a gun.
In your Bug Out Bag:
Your best survival knife, your extra gun and extra ammunition and a good folding knife should be at home in your BOB. It’s also a good idea to include protective gear such as N-95, N100, or R95 respirator masks for each family member. At least one good pair of safety googles and a pair of work gloves are helpful to prevent blisters and other injuries.
Communications and Bartering
In your Get Home Bag:
An old cell phone, fully charged for dialing 911 is great to have in your GHB. Include a portable phone charger with multiple options so you can plug in to either a car cigarette lighter, the wall (if power is on), or even hand crank to charge if needed to communicate with family members.
Twenty dollars or more in small bills and change to use in vending machines is a good idea. Some waterproof matches, several lighters and a small personal hygiene kit with a toothbrush, deodorant, and wet wipes are great additions too. Being able to wash your face after hours of traveling on foot can be refreshing and help keep you going.
In your Bug Out Bag:
Your BOB is the place for an emergency or weather radio that can be solar powered. This will help you keep track of what’s happening around you during a long term crisis. A pair of handheld radios or walkie-talkies with long range will help you communicate with family members if your group is separated.
Items for bartering such as alcohol or coffee for bartering with as well as cash and your silver coins if you choose to stockpiles those, should be in your BOB.
You’d be surprised at what some people will trade for coffee in a crisis. Your BOB needs several ways to start a fire such as lighters, waterproof matches, flint and magnesium rod as well as your fishing kit and snare wire.
Other Items
In your Get Home Bag:
If there is room in your GHB, a bandana has many, many uses. It can keep sweat from your eyes, filter water, or protect your nose and mouth from debris.
Keep a whistle around your neck or in your GHB so you can get the attention of loved one in a crowd. A flashlight and batteries, a screwdriver or multi-tool, some duct tape, and a can of fix-a-flat will come in handy for any minor repairs.
In your Bug Out Bag:
A battery operated flashlight that can be powered multiple ways and a headlamp for each person. Add scissors, a sewing kit, extra batteries in varying sizes, a high quality multi-tool, and several yards of duct tape. Include a folding shovel and a small gas can if you have room.
Lightweight books or a kindle with info on edible plants and plant healing uses and some on tree identification are valuable in the woods.
Final Words
In the end, items in your GHB may overlap with your BOB but basically your GHB is for short-term twenty-four hours or less. It’s the bag you always have within reach and it’s the one you will use until you get home safely or get to your BOB.
The bug out bag is the end-all-be-all bag. This is the bag that you invest in, the items in this bag are ones your life will depend on in a long-term crisis.
updated 09/20/2019 by Dan F. Sullivan
So you have finished reading the how much should a bug out bag weigh topic article, if you find this article useful, please share it. Thank you very much. See more: bug out bag checklist excel, best 3-day bug out bag, go bag food ideas, suburban bug out bag, bug out bag sleep system, minimalist bug out bag list, are bug out bags necessary, bug out bag weight calculator