
You are looking for information, articles, knowledge about the topic nail salons open on sunday near me how to make solid group in sketchup on Google, you do not find the information you need! Here are the best content compiled and compiled by the https://chewathai27.com team, along with other related topics such as: how to make solid group in sketchup Check solid sketchup, Make solid in Sketchup, Component and group in sketchup, Convert surface to solid sketchup, sketchup make solid from faces, Make object solid sketchup, Cut group sketchup, sketchup make solid plugin
In SketchUp, a solid is any 3D model (component or group) that has a finite closed volume. A SketchUp solid cannot have any leaks (missing faces or faces that do not meet at an edge).
- Open SketchUp.
- Create two separate grouped objects:
- Click on a Group and open the Entity Window by clicking Window>Entity Info. …
- Move the groups together so that they intersect each other. …
- Select both groups and CTRL+click on them. …
- Select both Groups and CTRL+click.
- With the Select tool ( ), select all the entities you want to include in your group.
- Select Edit > Group from the menu bar. Or context-click the selection and choose Group from the menu that appears. Everything in the selection becomes grouped within a bounding box.
Contents
What is a solid group in SketchUp?
In SketchUp, a solid is any 3D model (component or group) that has a finite closed volume. A SketchUp solid cannot have any leaks (missing faces or faces that do not meet at an edge).
How do I make a group in SketchUp?
- With the Select tool ( ), select all the entities you want to include in your group.
- Select Edit > Group from the menu bar. Or context-click the selection and choose Group from the menu that appears. Everything in the selection becomes grouped within a bounding box.
Why is my object not a solid SketchUp?
In order for SketchUp of any version to consider something a solid, it must be a group or component. The group or component must contain only geometry–no other groups or components–and every edge in the group or component must be shared by exactly two faces. No more and no less.
How do I know if a SketchUp model is solid?
The only way currently to verify “solid” in the web version is to make your object a group/component as is usual. Hi everyone, As of today, subscribers can use Solid Inspector in SketchUp for Web to review groups and components, examine errors in solid geometry, and automatically fix some problems.
How do you combine objects in SketchUp?
Select the Join tool ( ), which you find on the default toolbar or by selecting Tools > Join. Click an edge in each piece with the Join tool cursor. A blue outline flashes as you click, and the shape begins to inherit the fill color of the first shape that you click.
How do you fill an object in SketchUp?
- With the Select tool ( ), select the shape in the drawing area.
- Open the Shape Style panel by clicking its title bar. …
- Click the Fill option, which becomes highlighted, as shown in the following figure. …
- Click the color well next to the Fill option.
How do you add a geometry group in SketchUp?
Open the group for editing and add the geometry. If you’ve already created the geometry, select it, use Edit>Cut to cut it to the clipboard. Then open the group for editing (right click on it and choose Edit Group) and then use Edit>Paste in place. FWIW, nothing in SketchUp gets added to a layer (or tag in 2020).
What is the difference between make group and make component in SketchUp?
Groups are used for sets of objects that you will never duplicate or make copies of. Components are used for sets of objects that you will be duplicating or using multiple times in the model. From a usage standpoint, it’s safest to just create everything as a component.
Modeling Complex 3D Shapes with the Solid Tools | SketchUp Help
- Article author: help.sketchup.com
- Reviews from users: 1671
 Ratings
 - Top rated: 4.0
- Lowest rated: 1
- Summary of article content: Articles about Modeling Complex 3D Shapes with the Solid Tools | SketchUp Help Updating …
- Most searched keywords: Whether you are looking for Modeling Complex 3D Shapes with the Solid Tools | SketchUp Help Updating With SketchUp’s Solid tools, you can create new shapes by combining or cutting one shape with another, making it easy to model an outer shell or joinery.
- Table of Contents:
Warning message
Need Help Fast
How to Make Objects Solid in Sketchup – YouTube
- Article author: www.youtube.com
- Reviews from users: 46677 Ratings
- Top rated: 4.9
- Lowest rated: 1
- Summary of article content: Articles about How to Make Objects Solid in Sketchup – YouTube Updating …
- Most searched keywords: Whether you are looking for How to Make Objects Solid in Sketchup – YouTube Updating In this SketchUp tutorial for beginners, we cover how to make solid groups or solid components in SketchUp.Software and/or plugins used in this tutorial:Sket…Sketchup tutorials, 3D Modeling, Architecture, sketch up, sketchup, google, tutorial, how to, 3d, sketchup tutorial, beginner, sketchup tutorial for beginners, software, design, tips, training, tricks, designer, how to make, tips and tricks, google sketchup, tutorial sketchup, sketchup pro
- Table of Contents:

Grouping Entities | SketchUp Help
- Article author: help.sketchup.com
- Reviews from users: 22824 Ratings
- Top rated: 4.3
- Lowest rated: 1
- Summary of article content: Articles about Grouping Entities | SketchUp Help Updating …
- Most searched keywords: Whether you are looking for Grouping Entities | SketchUp Help Updating In LayOut, groups are a way to keep related elements organized in the drawing area. Groups can also make selecting and copying multiple elements easier. For example, if you know you’ll always want to select a text box and a shape together, make it a group so you just need to select it once. Under the hood, a group is an entity that holds other LayOut entities. You can nest a group within a group to create hierarchies of groups.
- Table of Contents:
Warning message
Need Help Fast
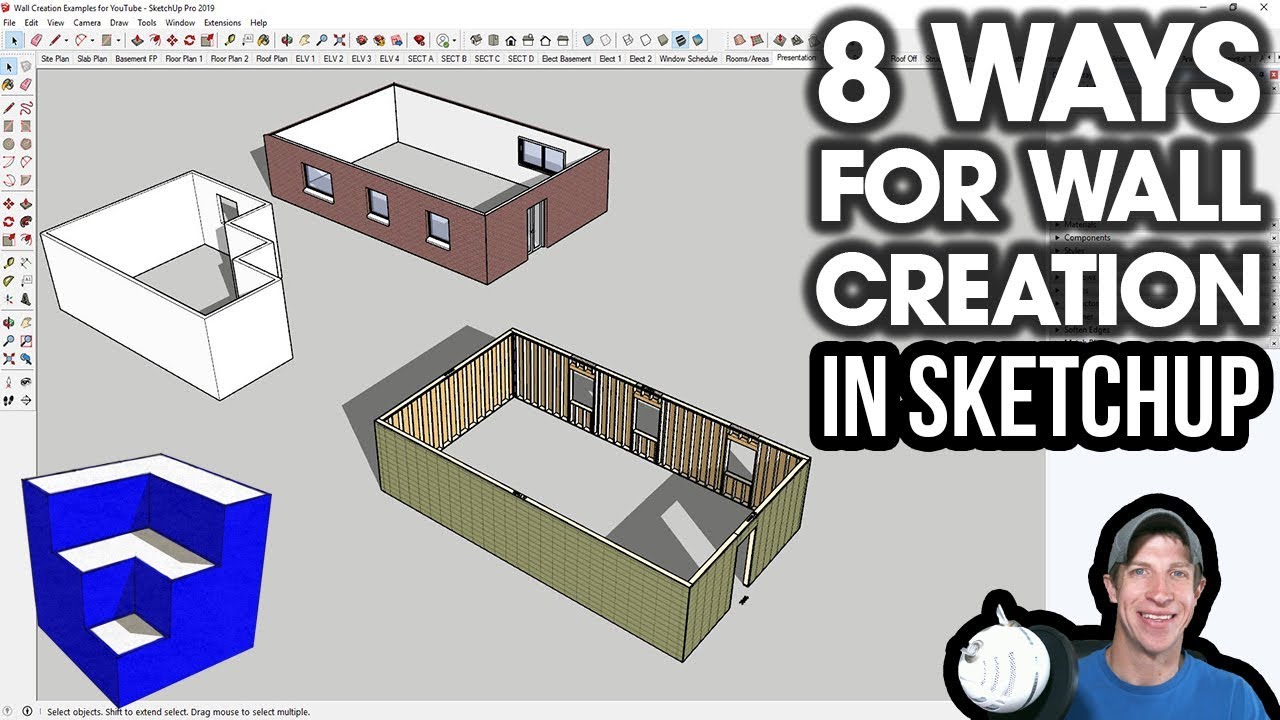
8 Ways to CREATE WALLS in SketchUp – YouTube
- Article author: www.youtube.com
- Reviews from users: 42387 Ratings
- Top rated: 3.1
- Lowest rated: 1
- Summary of article content: Articles about 8 Ways to CREATE WALLS in SketchUp – YouTube Updating …
- Most searched keywords: Whether you are looking for 8 Ways to CREATE WALLS in SketchUp – YouTube Updating In today’s video, learn several different ways to create walls in SketchUp at varying levels of detail – from simple placeholder walls to detailed walls with…thesketchupessentials, the sketchup essentials, thesketchupessentials.com, sketchup tutorials, sketchup lessons, sketchup modeling, sketchup 2018, architecture, sketchup tutorial, justin geis, sketchup, sketchup window, sketchup walls, sketchup framing, sketchup plusspec, sketchup medeek wall, sketchup profile builder, sketchup 1001bit tools, sketchup framing tutorial, sketchup wall tutorial, sketchup framing wall tutorial, sketchup walls plugin, sketchup framing walls
- Table of Contents:
‘Making Structures Solid’- A Sketchup Tutorial by Paul Childerhouse | 3DPRINTUK
- Article author: www.3dprint-uk.co.uk
- Reviews from users: 28033 Ratings
- Top rated: 3.2
- Lowest rated: 1
- Summary of article content: Articles about ‘Making Structures Solid’- A Sketchup Tutorial by Paul Childerhouse | 3DPRINTUK Hover the cursor over the other group to be merged. The cursor shows 2 and the Entity Info box shows ” 2 Sol Groups”. Click on the second … …
- Most searched keywords: Whether you are looking for ‘Making Structures Solid’- A Sketchup Tutorial by Paul Childerhouse | 3DPRINTUK Hover the cursor over the other group to be merged. The cursor shows 2 and the Entity Info box shows ” 2 Sol Groups”. Click on the second …
- Table of Contents:

How to create a solid block on sketchup?
- Article author: groups.google.com
- Reviews from users: 2655 Ratings
- Top rated: 4.4
- Lowest rated: 1
- Summary of article content: Articles about How to create a solid block on sketchup? No, you cannot create full volumes, but if your hollow shapes are manifold, SketchUp Pro can perform boolean operations on them as if they were sol … …
- Most searched keywords: Whether you are looking for How to create a solid block on sketchup? No, you cannot create full volumes, but if your hollow shapes are manifold, SketchUp Pro can perform boolean operations on them as if they were sol …
- Table of Contents:
how do you make an object solid in sketchup – Google Search | Objects, Solid, Motion
- Article author: www.pinterest.com
- Reviews from users: 16864 Ratings
- Top rated: 4.3
- Lowest rated: 1
- Summary of article content: Articles about how do you make an object solid in sketchup – Google Search | Objects, Solid, Motion Sep 29, 2020 – In this SketchUp tutorial for beginners, we cover how to make sol groups or sol components in SketchUp.Software and/or plugins used in … …
- Most searched keywords: Whether you are looking for how do you make an object solid in sketchup – Google Search | Objects, Solid, Motion Sep 29, 2020 – In this SketchUp tutorial for beginners, we cover how to make sol groups or sol components in SketchUp.Software and/or plugins used in … Sep 29, 2020 – In this SketchUp tutorial for beginners, we cover how to make solid groups or solid components in SketchUp.Software and/or plugins used in this tutorial:Sket…
- Table of Contents:

How do I make a group solid in SketchUp? – Theburningofrome.com
- Article author: www.theburningofrome.com
- Reviews from users: 41168 Ratings
- Top rated: 4.7
- Lowest rated: 1
- Summary of article content: Articles about How do I make a group solid in SketchUp? – Theburningofrome.com Making Your Model Sol. Open SketchUp. Create two separate grouped objects: Click on a Group and open the Entity Window by clicking … …
- Most searched keywords: Whether you are looking for How do I make a group solid in SketchUp? – Theburningofrome.com Making Your Model Sol. Open SketchUp. Create two separate grouped objects: Click on a Group and open the Entity Window by clicking …
- Table of Contents:
How do I make a group solid in SketchUp
What is a manifold solid in SketchUp
Does SketchUp have to be solid to print
Post navigation
SketchUp Plugins | PluginStore | SketchUcation
- Article author: sketchucation.com
- Reviews from users: 15696 Ratings
- Top rated: 4.6
- Lowest rated: 1
- Summary of article content: Articles about SketchUp Plugins | PluginStore | SketchUcation Tries to fix problems with groups that are supposed to be sols but don’t show up as sol … Doubleclick will make its group. …
- Most searched keywords: Whether you are looking for SketchUp Plugins | PluginStore | SketchUcation Tries to fix problems with groups that are supposed to be sols but don’t show up as sol … Doubleclick will make its group. sketchup plugins, sketchup extensions, plugin, plugins, sketchup, trimble, installing plugins, free sketchup plugins, free sketchup extensions, sketchup plugin tutorials, sketchup extension tutorialsSketchUp Plugin and Extension Store by SketchUcation provides free downloads of hundreds of SketchUp extensions and plugins
- Table of Contents:
See more articles in the same category here: 670+ tips for you.
SketchUp
Solid Models in Sketchup
solid
watertight
manifold
Entity Info
Window>Entity Info
Making Your Model Solid
Open SketchUp
Create two separate grouped objects:
Click on a Group and open the Entity Window by clicking Window>Entity Info . Right now each group is solid.
Move the groups together so that they intersect each other. You may need to scale one of your groups
Select both groups and CTRL+click on them. Select Intersect Faces>From Selection from the Context Menu :
Select both Groups and CTRL+click . Select Make Group from the Context Menu . Open the Entity Info > you’ll see that your model is no longer solid:
CTRL+click on the Group of groups and select Explode from the Context Menu :
Select the ring:
CTRL+click on your selection and choose Make Group from the Context Menu :
CTRL+click on this group and select Edit Group from the Context Menu
If your ring doesn’t look like this:
Go to View>Component Edit> and select Hide Rest Of Model
Select the entire ring:
From Edit menu select Copy
Click outside of the grouped box to bring the other entities back. Select the ring group and hit DELETE to erase it:
CTRL+click on another entity and select Edit Group from Context Menu :
Select Paste in Place from the Edit menu:
Select the interior of the ring:
Delete the interior
Click outside the box and CTRL+click on the other Group . Select Edit Group from Context Menu :
Again, select Paste in Place from the Edit menu:
Delete the unwanted faces:
Click outside the group. Select both groups and CTRL+click on them and select Explode from the Context Menu :
CTRL+click on them and select Make Group from the Context Menu :
Open Entity Window . You should see that you now have a Solid Group :
Now what?
Create a solid model with a series of grouped objects.
In order to 3D print your models, they must be. The model must not have any extra lines or faces. If you make your object into a group or component, Sketchup will let you know if it’s solid by opening thedialog box. Click on your model and open
Modeling Complex 3D Shapes with the Solid Tools
With SketchUp’s Solid tools, you can create new shapes by combining or cutting one shape with another, making it easy to model an outer shell or joinery.
Note: The Solid Tools are also included with a Go subscription in SketchUp for Web. To learn more about the features in the Go subscription, see The Solid Tools are also included with a Go subscription in SketchUp for Web. To learn more about the features in the Go subscription, see SketchUp for Web: Free vs. Go
In SketchUp, a solid is any 3D model (component or group) that has a finite closed volume. A SketchUp solid cannot have any leaks (missing faces or faces that do not meet at an edge). The following image contains several solids.
Tip: To check whether your group or component is a solid entity, context-click it and choose Entity Info. In the Entity Info dialog box that appears, the upper-left corner indicates if the selection is a solid, as shown in the figure. If you’re having trouble identifying leaks that prevent your model from working as a solid entity, try searching the Extensions Warehouse for a third-party plugin designed to help with this problem.
Tip: To check whether your group or component is a solid entity, context-click it and choose Entity Info. In the Entity Info dialog box that appears, the upper-left corner indicates if the selection is a solid, as shown in the figure. If you’re having trouble identifying leaks that prevent your model from working as a solid entity, you can use Solid Inspector (a utility available for paid subscribers) to inspect and fix solid modeling problems..
Check out the following table for a quick introduction to the Solid Tools, including what the tool does and whether it’s available in SketchUp Free.
Tool Name What It Does Included in SketchUp Free? Outer Shell Leaves only the outer faces of overlapping solids. Yes Union Combines two or more solids into a single form. Paid subscriptions only Subtract One solid removes part of another and is deleted. Paid subscriptions only. In SketchUp Free, use Intersect with Model. Trim One solid trims another but remains in the model. Paid subscriptions only Intersect Leaves only the intersecting geometry. Paid subscriptions only Split Splits solids along intersecting geometry. Paid subscriptions only
To find the Solid Tools, look in the following parts of the SketchUp interface:
SketchUp Pro
Solids toolbar
Tools menu (Select Tools > Outer Shell or Select Tools > Solid Tools and select the other tools from a submenu)
or Select and select the other tools from a submenu) Tool palette (macOS)
SketchUp for Web
Solids toolbar in the left-hand tray
Solid Inspector utility in the right-hand panel
In the following video, you see examples of the Solid tools in action. In the following sections of this article, you will find steps and details about using each tool. (Note, however, that you can’t place SketchUp models in Google Earth anymore.)
Creating an outer shell
The Outer Shell tool ( ) removes geometry inside overlapping groups or components, leaving only the outer faces.
Tip: Because an outer shell reduces a model’s geometry, creating an outer shell is helpful when you need to boost SketchUp’s performance.
For example, say you have two models: One is a detailed interior and exterior building model. The other model illustrates the building in a street view that shows surrounding buildings, streets, and landscaping. You can import the detailed building model into your street view. However, all that geometry might slow down your street view model and isn’t necessary. In your street view, creating an outer shell of the building eliminates the interior geometry you don’t need so that your street view model is lighter and renders faster as you work on it.
To create an outer shell from overlapping groups or components, follow these steps:
SketchUp Pro
With the Select tool ( ), select all the intersecting groups or components you want to include in your outer shell. Context-click your selection and choose Outer Shell from the menu that appears, as shown in the figure. The outer faces remain.
Or, you can create an outer shell as follows:
Select the Outer Shell tool ( ). Tip: Until you hover over a solid group or component, you see an arrow cursor with a circle and a slash. When your cursor hovers over a solid group or component, the red circle and slash change to a black 1 inside a circle, and you see a Solid Group or Solid Component ScreenTip. Click to select the first group or component in your outer shell. Click the second group or component. SketchUp combines your selections into an outer shell so that only the outer faces remain. (Optional) Continue clicking additional groups or components to add them to your outer shell, as shown in the figure.
SketchUp for Web
Select the Outer Shell tool ( ) from the left hand tool tray. Tip: Until you hover over a solid group or component, you see an arrow cursor with a circle and a slash. When your cursor hovers over a solid group or component, the red circle and slash change to a black 1 inside a circle, and you see a Solid Group or Solid Component ScreenTip. Click to select the first group or component in your outer shell. Click the second group or component. SketchUp combines your selections into an outer shell so that only the outer faces remain. (Optional) Continue clicking additional groups or components to add them to your outer shell, as shown in the figure.
Note: The result of an outer shell is similar to the result of a union. However, the result of an outer shell contains only external faces, whereas a union can also contain internal geometry. The following figure shows two square tubes on the left, a union of the tubes in the center, and an outer shell of the tubes on the right.
Uniting solids into a single form
A union merges two or more solid entities into a single solid.
The result of a union is similar to the result of an outer shell. However, the result of a union can contain internal geometry whereas an outer shell contains only external faces. (See the preceding figure for an example.)
Here’s how to use the Union tool to combine solid entities:
Select the Union tool ( ). Tip: Until you hover over a solid group or component, you see an arrow cursor with a circle and a slash. When your cursor hovers over a solid group or component, the red circle and slash change to a black 1 inside a circle, and you see a Solid Group or Solid Component ScreenTip. Click to select the first group or component for the union. Click the second group or component. The resulting union of the geometry remains. (Optional) Continue clicking additional groups or components to add them to the union, as shown in the figure, which uses X-Ray view so that you can see the geometry within each solid.
Tip: Instead of following the preceding steps, you can preselect the groups or components with the Select tool, context-click your selection, and choose Solid Tools > Union from the menu that appears.
Subtracting one solid from another (or use Intersect Faces with Model)
With the Subtract tool, you can use one solid entity to cut another solid entity. Your original solid entity is then subtracted from the model. For the subtraction to work, the two solids need to overlap.
Tip: When you use the Subtract tool, the order in which you select each solid entity matters. To remember which solid to select first, just think, “Use this to cut that.” In other words, the first solid you select is your cutting tool. The second solid you select is the thing that is cut.
To perform a subtraction, follow these steps:
Select the Subtract tool ( ). Tip: Until you hover over a solid group or component, you see an arrow cursor with a circle and a slash. When your cursor hovers over a solid group or component, the red circle and slash change to a black 1 inside a circle, and you see a Solid Group or Solid Component ScreenTip. Click to select the cutting group or component. In the example shown here, select the peg first to make a hole in the board. After you make a selection, the 1 next to the cursor becomes a 2.
Click the group or component that you want to cut. The cutting group disappears, but makes a hole in the second selection. In this example, you see a peg-sized hole in the board.
Tip: Instead of following the preceding steps, you can preselect your solid entities, context-click the selection, and choose Solid Tools > Subtract from the menu. SketchUp uses the order in which you select each solid entity to determine which is the cutting entity and which entity is cut.
If you’re using SketchUp Free, you can create the effect of a subtraction by using the Intersect with Model command. When you use Intersect with Model, the two shapes don’t need to be solid entities. (In fact, Intersect with Model applies a different effect if your shapes are solids, as explained a little later in this section.) However, when you create a subtraction with the Intersect with Model command, the process requires a few more steps than the process with SketchUp Pro’s Subtract tool.
Here’s how to create a subtraction with the Intersect with Model command:
Create two distinct volumes, such as a box and a cylinder. (See Drawing Basic Shapes and Pushing and Pulling Shapes into 3D for help.) With the Select tool ( ), triple-click the first volume, which will be your cutting object. In this example, the cutting object is the cylinder, as shown in the figure.
Move and rotate your cutting shape so that it intersects with the shape you’d like to cut. (See Moving Entities Around and Flipping and Rotating for help.) Leave your cutting shape selected, as shown in the figure.
Context-click the cutting shape, and choose Intersect Faces > With Model from the menu that appears. The command tells SketchUp to create edges where the two shapes intersect. With the Eraser tool ( ), erase or move the geometry that you don’t want to keep. In the following figure, you see how the box shape is changed after the cylinder is erased. Tip: Remember you can hold down the scroll wheel on your mouse to temporarily switch to the Orbit tool, so you can orbit around and find all the geometry you want do delete. (See Remember you can hold down the scroll wheel on your mouse to temporarily switch to the Orbit tool, so you can orbit around and find all the geometry you want do delete. (See Erasing and Undoing for details about the Eraser tool.)
Intersect with Model creates edges in the current context. If your shapes are groups or components, you can create the intersecting lines either within the group or outside it. When you create the intersecting lines outside a group’s context, you can easily separate your original shapes from the edges that SketchUp creates, as shown in the following figure. See Organizing a Model for details about groups and Adding Premade Components and Dynamic Components for an introduction to groups and components, respectively.
Trimming one solid with another
With the Trim tool, you cut one solid entity with another, just like a subtraction. However, when you use the Trim tool, the cutting solid remains in the model. So, if you use a peg to trim a board, the peg remains after it cuts the board. Like all the Solid tools, the Trim tool works only if two solid entities overlap.
Tip: When you use the Trim tool, the order in which you select each solid entity matters. To remember which solid to select first, just think, “Use this to cut that.” In other words, the first solid you select is your cutting tool. The second solid you select is the thing that is cut.
To perform a trim, follow these steps:
Select the Trim tool ( ). Tip: Until you hover over a solid group or component, you see an arrow cursor with a circle and a slash. When your cursor hovers over a solid group or component, the red circle and slash change to a black 1 inside a circle, and you see a Solid Group or Solid Component ScreenTip. Click to select the cutting group or component. In the example shown here, select the peg first to make a hole in the board. After you make a selection, the 1 next to the cursor becomes a 2. Click the group or component that you want to cut. The cutting group remains, but makes a hole in the second selection. The result is hard to see at first (refer to Callout 1). However, move the peg out of the hole, as shown in Callout 2, and you see the hole in the board.
Leaving only the intersecting geometry
With SketchUp Pro’s Intersect tool ( ), you select two or more overlapping solid entities, and only the intersecting geometry is left behind.
To perform an intersection, follow these steps:
Select the Intersect tool ( ). Tip: Until you hover over a solid group or component, you see an arrow cursor with a circle and a slash ( ). When your cursor hovers over a solid group or component, the red circle and slash change to a black 1 inside a circle, and you see a Solid Group or Solid Component ScreenTip. Select a solid entity that you want to use in the intersection. Select one or more additional solids that overlap your initial selection. The resulting intersecting geometry remains. In this example, the intersection of the box and the sphere (Callout 1) creates a point with a rounded base (Callout 2).
Tip: Alternatively, you can preselect the solids you want to intersect. The context-click your selection and choose Solid Tools > Intersect from the menu that appears.
Splitting solids
With the Split tool ( ), you can divide overlapping solid entities along their intersecting edges. To perform a split, follow these steps:
Select the Split tool ( ). Tip: Until you hover over a solid group or component, you see an arrow cursor with a circle and a slash. When your cursor hovers over a solid group or component, the red circle and slash change to a black 1 inside a circle, and you see a Solid Group or Solid Component ScreenTip. Click a solid entity. Click another solid entity that intersects your first selection. SketchUp splits all the geometry along the edges where the selected solids intersect. For example, in the figure, the two groups shown on the left split into 3 groups, as shown on the right.
Fixing models with Solid Inspector in SketchUp Web
As geometry gets more and more complex, small errors may prevent models from being manifold. Solid Inspector in SketchUp for Web is a utility that helps you prepare models for 3D printing by finding and fixing problems that prevent SketchUp from classifying your model as a solid. This inspection is also useful for fixing 3D models for Solid Tool operations.
Note: Solid Inspector is available for paid subscribers. In SketchUp Pro, the Solid Inspector extension performs a similar function.
Activate Solid Inspector
Find the Solid Inspector utility at the bottom of the right-hand panel menu in SketchUp for Web. When you activate the utility, you’ll be prompted to select a group or component. With a selected object, click Run Inspector to proceed. When an error is identified, click on its name to learn more about it; use arrow icons to fly the SketchUp camera to the individual problems in your model.
Note: ungrouped geometry cannot be inspected.
Automatically Fixable Errors
Several errors that Solid Inspector detects can be fixed automatically. Solid Inspector errors are identified by red-highlighted geometry, so that you can take a closer look before giving Solid Inspector the ‘okay’ to automatically fix errors. Automatically fixable errors include:
Reversed faces: Solid Inspector is also a handy utility for making sure that face normals are facing outwards.
Stray edges: Surplus edge geometry that does not define any face.
Internal and external faces: Stray geometry on the inside or outside of your model.
Face Holes: A hole in an exterior face. Easy fix for Solid Inspector.
Manually Fixable Errors
Some errors cannot be automatically fixed by Solid Inspector, and must be manually repaired using SketchUp’s drawing (or Eraser) tools. After fixing a few manual errors, it’s a good idea to re-run the Inspector to see if your changes have cleaned up the model enough for automatic fixing to take over. Manually fixable errors include:
Border holes: These holes share at least one edge with the surface of a solid. These errors can be manually fixed by drawing over or erasing the highlighted geometry. As you go, try re-running the inspector to see if you’ve done enough repair go for Solid Inspector to automatically fix the rest of the model.
Nested groups/components: Nested objects in groups or components can lead to confusing STL exports for 3D printers. Solid Inspector won’t fix these automatically, but you can use the Inspector to look at each nested instance and decide whether to delete it or explode the geometry into your model.
Image entities: Images imported into SketchUp can’t be exported to an STL file and also inhibit Solid Tool operations. Solid Inspector will prompt you about these errors, but you’ll need to delete them manually. Consider making Image entities into components. They are easy to temporarily delete from your model in this respect. Also, painting a face with an image texture doesn’t impact Solid-ness.
Short edges: Very small geometry can cause problems in 3D prints or solid operations. Since these problems are unpredictable — and short edges do not disqualify objects as solid in SketchUp — Solid Inspector will not fix these errors automatically. However, Solid Inspector is a great way to find and evaluate these problem areas.
Show Errors
When you have multiple errors that cannot be fixed automatically, it’s useful to use the “Show Errors” command to navigate between individual problems that you’ll need to manually fix. Use the left and right arrows to cycle through all the errors of a certain type that Solid Inspector has identified; the SketchUp camera will zoom to the problem area.
Tip: It may be helpful to change Style or Display options as you work. Switch to an X-ray style, or turn on Hidden Geometry to aide your model repair.
Grouping Entities
In LayOut, groups are a way to keep related elements organized in the drawing area. Groups can also make selecting and copying multiple elements easier. For example, if you know you’ll always want to select a text box and a shape together, make it a group so you just need to select it once.
Under the hood, a group is an entity that holds other LayOut entities. You can nest a group within a group to create hierarchies of groups.
Under the hood, a group is an entity that holds other LayOut entities. You can nest a group within a group to create hierarchies of groups, or “nested groups.” Going even further, entities within groups can be assigned to different layers. This gives you the convenience of groups, but with the organizational control of layers. It’s important to note, however, that groups on shared layers can’t be included with groups that use regular/non-shared layers. Don’t worry, though, LayOut will warn you if you try to do that.
To create a group, follow these steps:
With the Select tool ( ), select all the entities you want to include in your group. Select Edit > Group from the menu bar. Or context-click the selection and choose Group from the menu that appears. Everything in the selection becomes grouped within a bounding box.
To edit a group, double-click the group entity with the Select tool or select it and press Enter. All entities outside the group’s context appear faded. If you have nested groups, you can continue double-clicking to open the group that you want to edit. When you’re done editing the group, click anywhere outside the group’s context.
If you no longer need a group, select the group entity and choose Edit > Ungroup from the menu bar. Or context-click the selection and choose Ungroup from the menu that appears. Everything in the group becomes a separate entity again.
Note: Creating a group changes how LayOut’s inference cues work. After you create a group, the group geometry loses access to some inference cues. However, the following inference cues remain at your service:
The center grip can still inference other entities, and you can move the center grip to any point in your group. (See Arranging, Moving, Rotating, and Scaling Entities for details about inference cues and moving the center grip.)
External edges of the group continue inferencing other entities.
The group can inference the document’s red and green axes. Creating a group changes how LayOut’s inference cues work. After you create a group, the group geometry loses access to some inference cues. However, the following inference cues remain at your service:
Tip: After you group entities, you can continue drawing inside a group with the drawing tools.
So you have finished reading the how to make solid group in sketchup topic article, if you find this article useful, please share it. Thank you very much. See more: Check solid sketchup, Make solid in Sketchup, Component and group in sketchup, Convert surface to solid sketchup, sketchup make solid from faces, Make object solid sketchup, Cut group sketchup, sketchup make solid plugin