
You are looking for information, articles, knowledge about the topic nail salons open on sunday near me how to release a recurve bow on Google, you do not find the information you need! Here are the best content compiled and compiled by the Chewathai27.com team, along with other related topics such as: how to release a recurve bow how to aim a recurve bow, archery recurve bow, how to release a bow string, traditional archery release techniques, archery release types, archery release training, proper recurve release, how to improve archery release
Contents
How can I improve my recurve release?
- Ashe Morgan looks at a few different ways to improve the most important part of your shot.
- #1 – Improve your bow fitness.
- #2 – Create the string connection.
- #3 – Forget about back tension.
- #4 – Teach the body how to release.
- #5 – Improve alignment.
- #6 – Get to ‘real’ full draw.
Do you use a release with a recurve bow?
While most recurve archers don’t use a release aid when they shoot their bows, there are some archers who prefer using releases even with recurve bows. Recurves were designed to be shot with the fingers, but there are many different reasons that some people may still use a release instead of shooting with the fingers.
How one should release the bowstring?
The process of releasing the bowstring is much more than merely opening the fingers. The bowstring must be allowed to leave the finger tips cleanly and it is important to note that you are trying to allow the string to come off of your fingers straight in-line with the arrow.
Do Olympic archers use releases?
USA Archery lets you compete in recurve or compound divisions, but only recurves are allowed at the Olympics. Under USA Archery rules, you cannot use electronics or a release aid when shooting recurves. You can use a sight, stabilizer and clicker.
How do archers release arrows?
Most compound-bow archers use a release aid, often simply referred to as “a release,” to draw back their bowstring. Hinge releases and trigger (thumb or index finger) releases are two main types of release aids on the market today for compound archers.
Is a bow release necessary?
Modern compound bows are designed with release aids in mind. Most compound archers today use release aids, but there are still some compound archers that shoot compounds with their fingers. One reason release aids work well with compound bows is that they prevent target panic in a lot of archers.
Can you use mechanical release on recurve?
you may shoot “Off the shelf” or elevated rest with a mechanical release aid, too. there is no reason you may NOT use a mechanical release aid to shoot a recurve or longbow.
What is the purpose of recurve bow?
In archery, a recurve bow is one of the main shapes a bow can take, with limbs that curve away from the archer when unstrung. A recurve bow stores more energy and delivers energy more efficiently than the equivalent straight-limbed bow, giving a greater amount of energy and speed to the arrow.
Do recurve bows have sights?
Bow sights are extremely popular on all types of bows, even recurves. Shooting a recurve with sights is generally much more accurate than shooting without.
How do archers release arrows?
Most compound-bow archers use a release aid, often simply referred to as “a release,” to draw back their bowstring. Hinge releases and trigger (thumb or index finger) releases are two main types of release aids on the market today for compound archers.
How do you let go of arrows?
Relax all three fingers at once and let the string jump forward by itself. You don’t need to do anything but let go—the energy stored in the limbs at full draw will pull the string forward with great force, so there’s nothing you need to do.
Do Olympic archers use releases?
USA Archery lets you compete in recurve or compound divisions, but only recurves are allowed at the Olympics. Under USA Archery rules, you cannot use electronics or a release aid when shooting recurves. You can use a sight, stabilizer and clicker.
What changes immediately after the arrow is released?
When an arrow is released from a bow, potential energy changes into kinetic energy.
How to learn a proper recurve archery release – YouTube
- Article author: www.youtube.com
- Reviews from users: 12105
 Ratings
 - Top rated: 4.3
- Lowest rated: 1
- Summary of article content: Articles about How to learn a proper recurve archery release – YouTube Updating …
- Most searched keywords: Whether you are looking for How to learn a proper recurve archery release – YouTube Updating World Archery Excellence Centre director Juan Carlos Holgado talks us through three exercises that will help you learn and maintain an effective release when…Archery;, World, Archery, Cup;, shoot;, bow;, arrow;, olympic;, Target
- Table of Contents:

How To: Archery Release – YouTube
- Article author: www.youtube.com
- Reviews from users: 19880 Ratings
- Top rated: 4.5
- Lowest rated: 1
- Summary of article content: Articles about How To: Archery Release – YouTube Updating …
- Most searched keywords: Whether you are looking for How To: Archery Release – YouTube Updating This guide shows you the correct way to release a bow in archery by Olympic reserve Michael Peart.Watch this and other related films here: http://www.videoju…videojug video jug, Video Jug, Howto, How To tips, advice, tips & tricks, instructions, tutorials, advice videos, step by step, guide, how to bow release, how to release a bow, how to release an arrow, how to shoot an arrow, how to shoot a bow, how to release a recurve bow, how to release a compound bow
- Table of Contents:
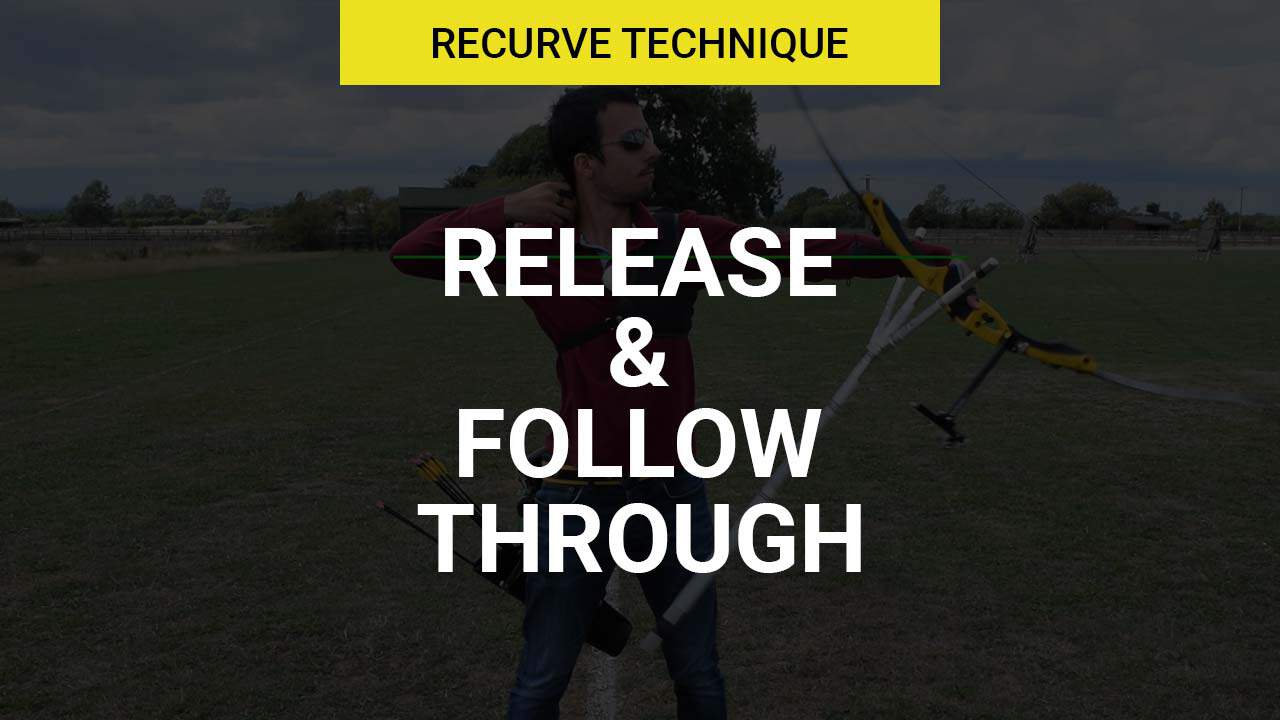
Release & Follow Through – Recurve Archery – Online Archery Academy
- Article author: www.onlinearcheryacademy.com
- Reviews from users: 33551 Ratings
- Top rated: 3.2
- Lowest rated: 1
- Summary of article content: Articles about Release & Follow Through – Recurve Archery – Online Archery Academy The release is normally only thought of as the motion of the draw hand fingers leaving the string. However, it also includes the direction and movement of the … …
- Most searched keywords: Whether you are looking for Release & Follow Through – Recurve Archery – Online Archery Academy The release is normally only thought of as the motion of the draw hand fingers leaving the string. However, it also includes the direction and movement of the … In recurve archery, the release & follow through is the final, most important stage of the shot. Everything up to now has been done to make a good release.
- Table of Contents:
CONTENT LINKS
INTRODUCTION
THE MOVEMENT OF RELEASE
THE FOLLOW THROUGH
LEARNING THE RELEASE
How to Release Your Arrow | The Complete Guide to Archery
- Article author: www.completeguidetoarchery.com
- Reviews from users: 4655 Ratings
- Top rated: 3.7
- Lowest rated: 1
- Summary of article content: Articles about How to Release Your Arrow | The Complete Guide to Archery And that describes the first part of the release: when you’re ready to shoot, you simply release the tension in your bow string fingers, and let the arrow fly. …
- Most searched keywords: Whether you are looking for How to Release Your Arrow | The Complete Guide to Archery And that describes the first part of the release: when you’re ready to shoot, you simply release the tension in your bow string fingers, and let the arrow fly.
- Table of Contents:
Can you shoot a recurve bow with a release? – ImproveYourArchery.com
- Article author: improveyourarchery.com
- Reviews from users: 38526 Ratings
- Top rated: 4.7
- Lowest rated: 1
- Summary of article content: Articles about Can you shoot a recurve bow with a release? – ImproveYourArchery.com Yes, you can safely use a release a on your recurve bow. There are no technical aspects of the bow, which make it impossible to shoot with a release a. You … …
- Most searched keywords: Whether you are looking for Can you shoot a recurve bow with a release? – ImproveYourArchery.com Yes, you can safely use a release a on your recurve bow. There are no technical aspects of the bow, which make it impossible to shoot with a release a. You …
- Table of Contents:
Your anchor point
Your draw
Your draw length
Your plunger
Your sight
Will I shoot more accurate with a release
Does the archer’s paradox change
How to choose the right release
Should you adjust the tiller
Do you have a question that is unanswered
6 Replies to “Can you shoot a recurve bow with a release”
See more articles in the same category here: https://chewathai27.com/toplist.
Six ways to improve your recurve release
Ashe Morgan looks at a few different ways to improve the most important part of your shot.
The release is the most important part of your recurve shot; consistency here will skyrocket your performance, and even minor errors can drop your score.
When I talk about the release I’m not referring to the action of the draw fingers alone. I’m talking about the movement of your whole body whilst the arrow is being launched from the bow.
This combines the “draw-side” release with the “bow-side” release and any other movements. You might have the best release since Park Sung-Hyun on one side of your shot, but collapse on the other half and you will be stuck with low scores forever. For now, I’ll focus on the key aspects of the draw-side release.
#1 – Improve your bow fitness
This is something of an elephant in the room. Let’s be honest, this is the simplest and most frequently ignored cause of a sloppy release.
A good release is simply not possible if you are overbowed. The end. Using an overly heavy bow will force you to use the wrong muscles (and the wrong technique) in a futile attempt to wrestle your body into position. What fun is it shooting like this? I’d save yourself the low scores and potential injury by switching to a suitable poundage.
It’s also a bit of a truism, but any serious archer must also do a gym program and bow training of some sort – it’s that simple. Full draw holds are good to start with, and you can do these with your fingers (Fig. 1a) and with a Shot Trainer (Fig. 1b).
Using the Shot Trainer or other Formaster-like devices also helps you learn how to maintain the string connection (see below) as you lift the bow.
During any bow training, it’s hugely important to maintain form. Start with a band or light bow first and increase gradually, you will still benefit massively. Technique is king.
Now I’ve got that out of the way, let’s focus on the technical stuff!
#2 – Create the string connection
The way your fingers leave the string during your release is greatly affected by how you position them. However, the importance of the hook extends far beyond this simplification.
This part of your shot is one of only two permanent contact points with the bow, and your technique here affects how well you can connect the draw arm to the scapula. This then affects your ability to open the bow properly, get into alignment and expand smoothly through the clicker. As you can see, it’s kind of important.
The first piece of the puzzle is to understand the correct draw arm positioning. The best way to do this is to use an exercise I call the “Draw Arm Connection Drill”.
Place the first finger pads of your hooking fingers on each hand together (Fig. 2a), but don’t go deeper than the first finger joint. Then, simply bring your hands out in front of your chest so that you can look down at them easily.
First, pay attention to the shape of the fingers and hand. Excessive tension should be avoided here, so the back of your hand shouldn’t look and feel as if you’re gripping on for dear life. If you feel like this, allow the fingertips to open very slightly to help you get a more relaxed position.
Next, look at the wrist and forearm angle. You should be able to form a straight line starting from your fingers, going through your wrist and forearm and connecting to your elbow (Fig 2b, green line). The wrist should be neutral or slightly past this line, but not over exaggerated (Fig 2b, orange circle).
Crucially, it should feel like your elbow and hook are connected and functioning as one unit. Try applying more pressure through your hook fingers; you should feel like you are directing the movement from your draw elbow, and you should also feel a connection to the lower part of your draw scapula.
Applying this to your shooting is simple: you must create this connection during your set position on every single shot. Practice this with a light bow before moving to your normal bow at 30m or closer.
For the hook, you should place the string in the groove of the top and middle finger and slightly in front of the groove on the bottom finger (Fig. 3).
To improve your release, you must maintain the connection between the hook, elbow and scapula through your whole shot.
#3 – Forget about back tension
To create a good release it’s essential to have continuous movement through your expansion. The core issue with advising archers to think about back tension is a fundamental one: it is least effective for those archers that struggle the most with their release.
Instead of thinking of tension, think about movement. Kim Woojin, one of the all-time greatest Korean recurve men, when asked about the recurve release, said: “It’s all in the movement of the shoulders”.
Your body understands movement much more naturally than tension. When you do a bicep curl with a weight, do you think about contracting your biceps and relaxing your triceps? Or do you just think about moving the hand closer to the shoulder? The answer is obvious.
The reason back tension can be destructive is because it’s so easy to misunderstand. Most archers lose their movement when they feel like they are using back tension.
They feel as if they are squeezing the shot through the clicker, but they are normally just overly tensing the upper traps and neck. This is exactly the opposite of what we want. It leads to fatigue, inconsistency, and a sloppy release. And it makes you more injury-prone.
A great way to think about movement instead is by doing the Elbow Direction Drill in Fig 8. As you’re coming into your anchor position, get a friend or coach to lightly push an arrow against the back of your elbow. Focus on pushing against this arrow through the rest of your shot, whilst maintaining a feeling of space around the shoulder joint and neck. This will encourage the correct use of your back.
I’m not saying that thinking about back tension is wrong, but it’s a much more advanced skill. To continue our gym analogy, an advanced bodybuilder might benefit from focussing on specific muscles, because they fully understand the basic movements.
Also, you definitely do want to use the large muscles of the back; they are among the strongest in your body and using them is essential to correct technique. But there is a key difference between the normal muscle engagement needed to move your shoulders and shoot, and exaggerated muscle tension that harms your shot.
This is why I prefer to think in terms of using the back muscles rather than creating tension.
Only once you have good alignment, shoulder movement, and the skill to keep expanding through the shot should you start thinking about back tension. That way you can be sure you are using it properly.
#4 – Teach the body how to release
The recurve release is not a skill that people develop in day to day life and the key to learning it is to teach yourself properly. Trying to learn the release by just picking up a bow and shooting is slow and haphazard.
Imagine attempting to hit a golf ball without first learning how to grip the club or swing properly. Madness.
There are lots of great drills that can quickly improve your release and teach you the correct motion and feeling. One such example is the Finger Release Drill (Figs. 4 A,B and C), which teaches you to avoid deliberately opening the fingers.
To do this, hook your hands together and position them at your anchor position, then increase the pressure quite strongly whilst keeping your hook. Finally, quickly allow the fingers to slip away, creating a snappy, short release.
The Release Follow Through Drill (Fig 5) is great to prevent the draw hand flying out as you release. You simply bring the hand to your anchor position and slowly move it back whilst keeping the fingers touching the neck at all times.
It should feel as if you are almost scratching your neck. You should lead this movement from the draw elbow and you should feel the elbow moving around the body.
This is a great way to teach your body the correct hand, arm and shoulder movement and also improve your flexibility.
#5 – Improve alignment
This is a key ingredient to a great release that is, for some very bizarre reason, normally ignored. Your alignment can be understood best when viewed from above (Fig 6a/b). The left image shows good alignment, and the right shows poor alignment.
The impact this will have on the release is huge. If you are in line, the forces of the bow line up with your bone structure, which means you don’t need to use much muscle tension to hold the bow or expand through the clicker. As a result, your expansion will be stable and you can continue your movement more easily. This will result in a clean release that stays close to the neck.
If you are out of line (Fig 6b), the force of the bow will constantly try to collapse you during the shot. It will be hard to expand in the right direction and you will probably have lost the string connection you worked so hard for earlier.
Rather than allowing the fingers to be pushed out of the way, you will probably open them to release the string. The net result: a softer, more outward release.
In Fig 6b, notice how far away the draw elbow is from in alignment. Getting it closer to the line of the arrow (Fig 6a) will make a dramatic difference to your release. Some people argue that they simply can’t achieve this, and I used to be one of those people. But this is just an excuse. Almost everyone can get into alignment with hard work and perseverance. And your release will thank you for it.
To work on your alignment, do draw ups with a band or light bow and use feedback. Trying it with your bow straight away is unlikely to be useful and could lead to injury. Ideally, overhead video feedback is the best, but facing into a mirror is also good. Getting the dots as close to the two straight lines (as shown in Fig 6a) is what you want to focus on achieving.
It’s important to maintain your posture too, as losing this will compromise your shoulder movement.
#6 – Get to ‘real’ full draw
An archer may appear to be at full draw by opening the bow and bringing their hand to the neck. However, this is not ‘real’ full draw; it’s simply coming to your anchor position. Real full draw is achieved when you move fully into alignment and feel the force of the bow through your bone structure and shoulders.
It differs from general shoulder alignment in that it is best described as a feeling, rather than an absolute position. Achieving good alignment feels like you are in a strong position, whereas getting to real full draw feels like you’ve fully braced yourself inside the bow and are ready to explode into your release. It is not a feeling of tension in any way, but more a feeling of being in the right position to finish your shot and release confidently.
Reaching real full draw is much more likely if you have good shoulder alignment and have your draw elbow behind the arrow line, but there’s more to it than that.
You need to find a repeatable movement or sensation to bring yourself from anchor to real full draw. Focussing on moving the draw elbow around the body is an example of a motion that works for many archers.
Using an “Arrow In Elbow” expansion trainer device (Figs 7a and 7b) – which places your focus on squeezing the arrow between your upper and lower arm – this will also provides great feedback to teach you about reaching real full draw. This is used by young Korean archers in training.
When done correctly, a great release transforms your shot into a dynamic movement that is aggressive, yet elegant. It’s a beautiful skill that can take an incredible amount of work to develop, but there are ways to fast-track your progress.
I’ll also let you in on a secret: every stage of the shot is only there to maximise your chances of executing a clean release. But let’s keep that between us!
Ashe Morgan is a founder of onlinearcheryacademy.com
How to Shoot a Recurve Bow with a Release
While most recurve archers don’t use a release aid when they shoot their bows, there are some archers who prefer using releases even with recurve bows. Recurves were designed to be shot with the fingers, but there are many different reasons that some people may still use a release instead of shooting with the fingers.
Different archers will use release aids for their own individual reasons. From injuries to personal preference, a release might just feel more comfortable to some archers.
Before we even get started, if you’re new to archery, you need to pick up one of these before you even shoot your first arrow. Trust me, you’ll thank me later – I speak from personal experience.
And if you’re looking into use a release because of an injury – go for it! To anyone who criticizes you shooting a recurve with a release, you could remind them that it’s actually a bit more difficult to shoot this way. As I already mentioned, recurve bows were made to be shot using the fingers.
Whatever the reason you’re interested in shooting your recurve with a release, the tips below should get you on the right path.
Modern releases were designed to be used when shooting modern style compound bows. The compound bows made years ago were designed to be shot with the fingers, until more recently when modern releases showed an improvement in accuracy for compound archers.
Because they were designed with compound bows in mind, most release aids are made to hold the decreased draw weight of a compound bow at full draw. When you pull a recurve bow back to full draw, you’re holding back the full draw weight for that bow.
For Example: With a 100 pound compound bow pulled back at full draw, you may only have to hold back 10 pounds of draw weight because of the cams and the pulley system of a compound bow.
But when you pull back a 50 pound recurve bow to full draw you’ll have to hold back the full 50 pounds, that’s not easy to do for very long.
Holding a recurve bow at full draw for as long as it takes to line up the perfect shot would put a lot of stress on your draw muscles. When shooting recurves with heavier draw weights, you could risk injury if you overdo it.
Also, as most modern releases were designed for compound bows, they’re not intended to hold back larger draw weights for very long. You will want to keep this in mind when you’re shopping for a release. Releases made for higher draw weights will help with this, but it’s still a good idea not to spend too long lining up your shots.
WARNING: You need to always keep in mind that releases that aren’t intended for shooting heavier draw weights could cause an unintended release. That means the arrow being shot accidentally.
Never aim any bow at another person, not even for a second. Safety is always priority number one in archery!
Releases When Shooting in Competitions
If you’re thinking about using your release when competing in any tournaments, there will be some issues with competition rules. Some may not let you compete with a release, or you might end up shooting in a different class.
For example, in both USAA and NFAA tournaments, if using a release you would have to shoot in either the freestyle or bowhunter classes. The problem with that is that instead of competing against other recurve archers – you’d have to compete against mostly compound archers.
They’ll also be using bow sights, stabilizers and all of the high tech modern gear used in target archery. That would put you at a disadvantage if you wanted to use a release in those competitions.
This is almost the same in IBO rules as well. Their rules state that you are only allowed to use a tab, shooting glove or just your fingers if you want to compete in the traditional class. Again, using a release aid would mean that you would have to compete in the compound class.
So shooting recurve bows with release aids in most tournaments and competitions would put you at a disadvantage. If you’re using a release aid because of an injury, this may not apply to you.
There are different classes that may still allow you to compete against other recurve and longbow archers, even if you are using a release. Check the rules of any competitive shoots or tournaments that you’re thinking of competing in before you register.
Releases Alter the Archers’ Paradox
When you release an arrow by shooting with your fingers, the arrows quickly bends back and forth horizontally – from side to side. This makes it possible for the fletchings of the arrow to leave the bow without touching the bow very much.
If you were to use a release aid to shoot the bow, the arrow will bend up and down vertically, instead of side to side. This will mean that the fletchings of the arrow will make a lot more contact with the shelf of the bow. This normally means a lot less accuracy in your shots.
You will need to change your shooting style in order to compensate for this.
One way to lessen the contact of the fletchings with the bow is to use an elevated rest on the shelf of your bow. By twisting the nock on the arrow slightly, the arrow should then be able to leave the bow with less contact.
Another thing that will help you improve accuracy when shooting a recurve with a release is to tune your bow differently. You’ll want to tune your recurve bow as much like a compound bow as possible. Your local archery shop should be able to help you with that, just explain that you want to use a release to shoot your bow.
Also, be sure to pick up one of these to keep your bow tuned up correctly – without having to keep going back to your archery shop all the time.
You probably need to change the arrows that you’re shooting with, too. The arrows that are made for shooting with a recurve bow won’t usually shoot well when using a release.
You may find that you need to shoot heavier arrows when shooting with a release aid. Again, your local archery store should be able to help you figure that out.
Maybe this article has seemed negative when it comes to shooting your recurve with a release, that’s not the idea though. I simply want you to have all of the information before you go out a buy an expensive release that you may not end up using.
The good news is that once most archers get used to shooting their recurve with a release – they get more accurate. They tend to find that their groups get far tighter and that they have more control over where the arrow lands.
You’d be best off to start by using a trigger style release (this one is pretty cheap if you just want to pick one up to try them out). One of the things you’ll probably face is that it’s difficult to find a good anchor point, especially if you’ve been shooting your recurve with your fingers.
You’ll also have to deal with the intense shock of the bowstring slapping back when you release the arrow. Release aids release the string much faster than if you were to use your fingers. Even though it may not seem like much of a difference to you, those milliseconds make a big difference.
This can cause a lot of shock to hit your bow hand with each arrow. Depending on the bow, this could be anywhere from minimal and subtle – to completely aggravating.
The bow will also be much louder due to the extra quick release. Installing some string silencers on your bowstring may help to improve the loud sound, but it could still be pretty loud. Again, this will depend on the specific bow you’re shooting.
Ancient Releases
If you find that a modern release just doesn’t seem to working for you, you do still have some other options for using a release.
Years ago, before compound bows had even been invented, there were lots of archers that used releases. While you may be able to get a hold of a 1950’s or 1960’s type of release, they can be pretty hard to find these days.
You could also try some of the ancient releases that were used by archers hundreds of years ago. There were leather strap style releases, where a leather strap wraps across the bowstring, one end of the strap is attached to a band around your wrist.
You simply hold the leather strap between your thumb and index finger, draw back the bow and let go of the strap to release the arrow. You may be able to buy these online, and there should be some information online if you’re looking to make one on your own.
In Asia, the horse archer’s centuries ago used thumb ring style releases to shoot their horse bows. They are still known today for how accurate they were. The thumb ring was just that, a ring worn around the thumb with a large flat area sticking out from the side.
A loop is tied on to the bowstring at a chosen nocking point. The large flat area of the thumb ring goes through the loop on the bowstring and is pulled back to draw the bow.
To release the arrow, the thumb is simply pulled back and out from the loop on the bowstring.
Just use caution with these other types of releases. Again, safety first in archery at all times.
Either of these types of release aids will allow you to use a release aid – without it releasing the string as fast a modern compound bow release. This should significantly cut down on all of the various issues there are when using modern releases with recurve bows.
The Mechanics
Many archers say that they can easily shoot any arrow using a modern release with a riser that’s cut past center. It’s said that when using a bow that’s not cut to center, you’ll have to shoot weak arrows.
Again this is because of how the archers’ paradox is thrown out of whack when using a modern release. I haven’t tested this myself, so I can’t say for sure if that’s the case.
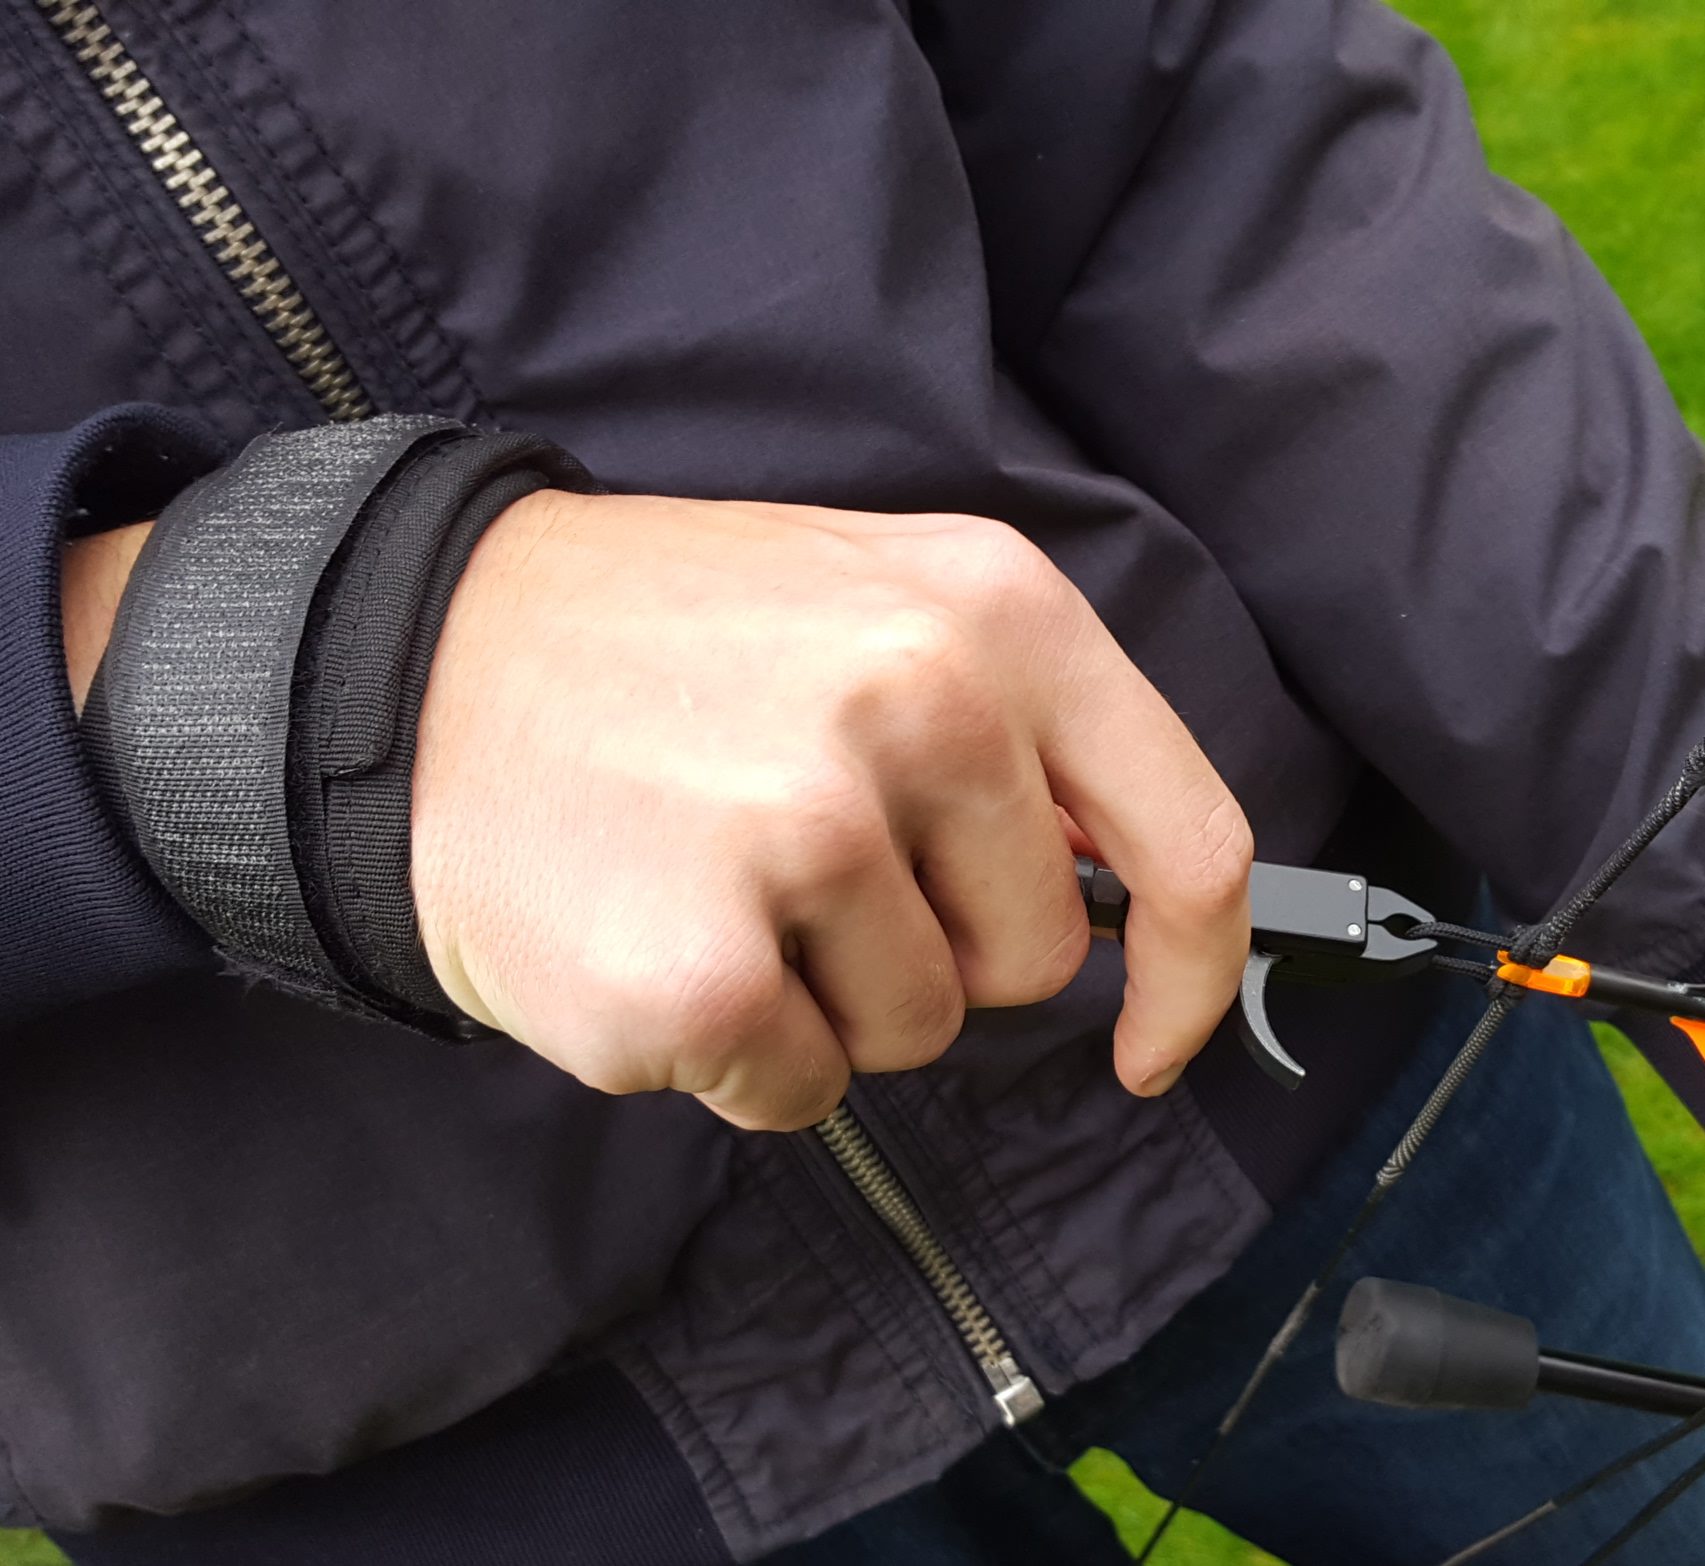
If you’re used to shooting using your fingers (either split finger or three under), it’s a good idea to attach the release to the bowstring around an inch and a half below the nock of the arrow.
This allows you to get the same (or very similar) sight picture that you would have had when shooting with your fingers.
Be sure to keep your trigger finger behind the trigger. His helps to insure that you don’t accidentally hit the trigger and release the arrow before you’re ready. Once you’ve aimed and are ready to release the arrow, slowly put your trigger finger over the trigger and fire the arrow.
Keep in mind to bring the bowstring back to a full draw, take a breath and lock in on your aiming point. When you’re ready, release the arrow.
Getting a good shot sequence memorized so well that it becomes second nature is important for becoming consistently accurate in archery, whether you’re using a release aid or not.
I hope that this guide has given you enough information to at least get started shooting with a release aid, whether it’s a modern one, a vintage one from the 50’s or one of the ancient releases that have been used throughout history.
Since most release aids weren’t meant for use with recurve bows, there’s a lot of trial and error when it comes to figuring it all out for each individual bow. There are so few recurve archers out there using releases that there’s a lack of enough good information on the subject.
While things like arrow lengths and weights will vary from bow to bow, so will which bowstrings are best to use with release. There are so many factors that can alter how the bow shoots, a little change can make a large difference in your shot.
The long and short answer is that you’re just going to have to test out a lot of things for yourself before you find out exactly what works best for you. Good luck in your quest and as always, get out there and get shooting!
Mastering the Recurve Release
Honing and perfecting the recurve release requires hours of training on the range.
Period.
No shortcuts will help you achieve the perfect recurve release, but let’s discuss some tips and my insights into the “deep hook,” the technique that built my reputation. An ideal release is repeatable and relaxed. Relaxed shots are much easier to replicate than shots requiring exact amounts of unnatural tension.
Mastering the recurve release starts with good alignment and as little tension as possible through the wrist. Every archer approaches that differently, but I strive to align my wrist directly behind the arrow after hooking my fingers onto the bowstring.
Some archers say they must flex their forearm to achieve exact alignment, but it’s possible to perform that motion with little forearm tension. By keeping your wrist relaxed during the process, you properly use your back through the shot. That also minimizes the tendency to squeeze through the clicker with your fingers or flex your hand inward from the wrist.
The next step is to efficiently hook onto the bowstring with your fingers, which means using minimal effort for the hook while keeping your hand as relaxed as possible. That’s best achieved with a deep hook, with the bowstring sitting on the flat part of the finger past the first knuckle (the middle phalanx). The deep hook creates less work for your main knuckle, thus requiring less effort to hold the string. Yes, more of your finger must now clear the bowstring upon release, but your hook will be more relaxed; in turn, your fingers will be more relaxed and more easily pushed away by the string upon release.
Once you figure out how to hook the string, various exercises will help you develop a more relaxed release without shooting a bow at full poundage. One helpful exercise involves shooting a low-poundage stretch band. You might find you’re trying to open your fingers instead of relaxing your fingers to let them open naturally. I’ve found that this exercise forces me to control my fingers, and makes me relax so that the band pushes my fingers open.
Once you conquer the stretch band, pick up a low-poundage bow and try shooting consistent groups while feeling your relaxed fingers slipping off the string. Shooting a higher-poundage bow – or even your normal poundage – might not reveal the small inconsistencies in your release.
After you work on relaxing your fingers off the bowstring, try keeping your string hand close to your neck during your follow-through. That’s a vital part of mastering the recurve release. It guarantees the path your fingers take off the string will remain the same after each shot and a good place for your string fingers to end up is directly behind your ear. If your follow-through takes your hand to random points away from your neck, you’ll endure frustrating inconsistencies because your arrows won’t group well.
Ultimately, your release must be consistent and it must be your own. What works for some archers might not work for others and you must find what works best for you. After all, you must be able to execute your release in high-stress situations with little deviation.
So you have finished reading the how to release a recurve bow topic article, if you find this article useful, please share it. Thank you very much. See more: how to aim a recurve bow, archery recurve bow, how to release a bow string, traditional archery release techniques, archery release types, archery release training, proper recurve release, how to improve archery release