
Contents
Macbook Pro M1 EP3 วิธีติดตั้ง font ลงบนเครื่อง
นอกจากการดูบทความนี้แล้ว คุณยังสามารถดูข้อมูลที่เป็นประโยชน์อื่นๆ อีกมากมายที่เราให้ไว้ที่นี่: ดูเพิ่มเติม
ติดตั้งfont ติดตั้งฟอนต์ installfontติดตั้งรูปแบบตัวอักษร macbookprom1
ในคลิปนี้จะเป็นการนำวิธีการติดตั้งรูปแบบตัวอักษรที่เราไปดาวน์โหลดมา เพื่อจะใช้รูปแบบตัวอักษรที่เราต้องการในการใส่ตัวอักษรน่ารักๆลงในการตัดต่อคลิปวีดีโอ ซึ่งวิธีการที่เราได้นำมาบอกมีทั้งหมด 3 วิธีนะคะ

ติดตั้งฟอนต์ Font ใน Windows 7
ติดตั้งฟอนต์(Fonts) สำหรับ Windows 7 , Windows 8.1 และ Windows 10
อ่านเพิ่มเติมได้ที่ : http://goo.gl/syrDhD
วิธีการติดตั้งฟอนต์ และแก้ไขฟอนต์ลงไม่ได้
วิธีการติดตั้งฟอนต์ และแก้ไขฟอนต์ลงไม่ได้
สำหรับ windows 10
หากท่านผู้ชมมีข้อสงสัยหรืออยากทำคลิปสอนเกี่ยวกับอะไรสามารถคอมเม้นใต้คลิปได้เลยนะครับ
ขอบคุณที่รับชมครับหากมีข้อผิดพลาดประการใดก็ต้องอภัยด้วยนะครับ
Soundtrack : 샛별 Lemon Cake [ cute bgm daily ]

How to Install Fonts in Windows 7
How to Install Fonts in Windows 7?
For More Windows 7 Tips and Tricks Be Sure to Subscribe to Our YouTube Channel and Visit Our Website: https://www.a2zhow.com
How Do I Install Fonts in Windows 7?
1. Open Your Favorite Browser.
2. Go to Google.com and Search free Fonts.
3. Open Any One of the Search Result.
4. Click on the Download Button.
5. Wait for the Download to Complete.
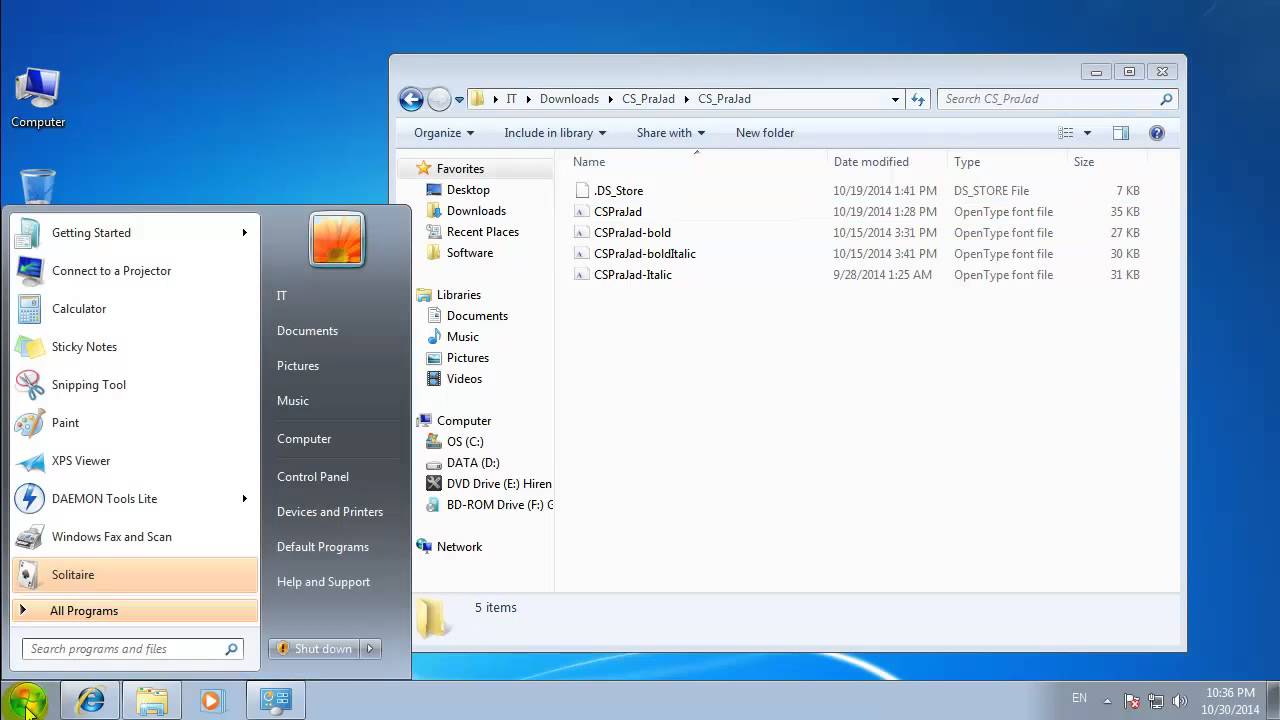
6. Now, Navigate to the Downloaded Location.
7. Extract the Files.
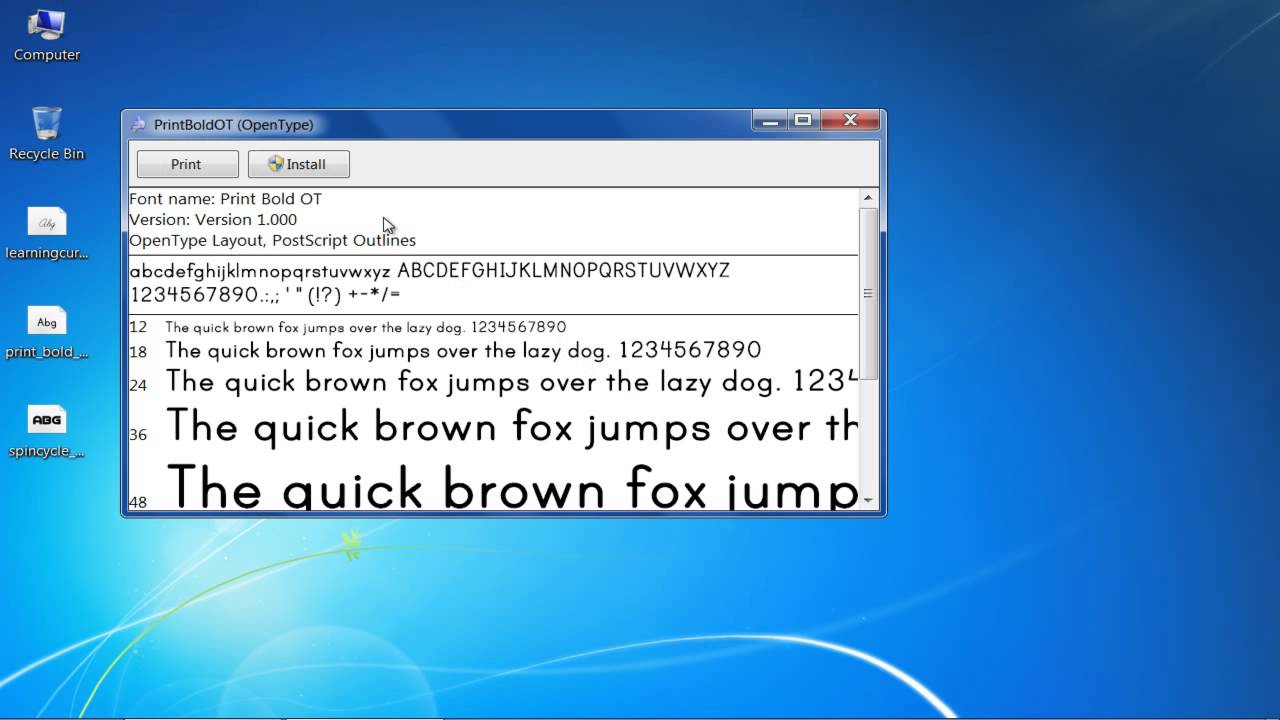
8. Navigate to the Font Folder and Double Click on the.ttf File.
9. Click the Install Button.
10. Repeat the Same Procedure With the Other Downloaded Font.
11. Now, Open Program Such as \”Microsoft Word\” to Check Whether the Fonts Are Properly Installed.
12. Type Some Text and Try Change the Text Font With Newly Installed Fonts.
13. As You Can See, Both Fonts Has Been Properly Installed.
This Is How You Can Install Fonts in Windows 7
Disclaimer
a2zhow warrants that the content in this video is provided on an \”as is\” basis with no express or implied warranties whatsoever. Any reference of any third party logos, brand names, trademarks, services marks, trade names, trade dress and copyrights shall not imply any affiliation to such third parties, unless expressly specified. Some contents are used for educational purpose under fair use. Copyright Disclaimer Under Section 107 of the Copyright Act 1976, allowance is made for \”fair use\” for purposes such as criticism, comment, news reporting, teaching, scholarship, and research. Fair use is a use permitted by copyright statute that might otherwise be infringing. Nonprofit, educational or personal use tips the balance in favor of fair use. All credit for copyright materiel used in video goes to respected owner.
Windows 7 Tips and Tricks
Audio Credits:
• Jason Farnham (Locally_Sourced) : http://www.jasonfarnham.com/
Image Credits
• Image courtesy of [stockimages] at FreeDigitalVideos.net
Previous Videos
https://www.youtube.com/watch?v=SG7ETMG8Vc
https://www.youtube.com/watch?v=6ZRusGoptw
Windows7 Fonts Microsoft Install

How to Install Fonts in Windows 7
In this tutorial, we will help you to learn how to install different downloaded fonts in Windows in order to use them in different applications.
Don’t forget to check out our site http://howtech.tv/ for more free howto videos!
http://youtube.com/ithowtovids our feed
http://www.facebook.com/howtechtv join us on facebook
https://plus.google.com/103440382717658277879 our group in Google+
Fonts play a very important part in the overall usage and performance of Windows. If you wish to add more fonts in your computer, you can simply download them from the Internet and install them instantly. In this tutorial, we will teach you how to install font in Win 7 by adding the font directly in the Windows directory. Follow this step by step guide to learn how to install fonts in Windows 7.
Install fonts using the Windows Install Option
Step 1 Install fonts by using Windows Install Option
In the first step of learning how to install fonts in windows 7, we will use the simple installation option provided in Windows by default. For this purpose, right click on a downloaded font file and select the \”Install\” option from the menu. This will simply install your selected font in your computer.
Install fonts using the Windows Font Viewer
Step 1 Install Fonts using the Windows Font Viewer
Now in the next step, you can also install a font into your computer system by using the Windows 7 new feature named as the Windows Font Viewer. For this purpose, right click on a downloaded font file and select the \”Open With\” option from the menu.
Step 2 Choose Windows Font Viewer to Open with
In the next step, a small window will open which asks you to select an application to open the font file with. Now click on the \”Windows Font Viewer\” application from the menu and click on the \”OK\” button to open the font file with it.
Step 3 Install Fonts in your Computer
Once the font file has opened in Windows Font Viewer application, click on the \”Install\” button which is located at the top left corner of the window. This will install the selected font file in your computer system.
Install fonts using Copy/Paste in Windows Fonts Directory
Step 1 Copy the Font File
Another way to install font in Win 7 is to copy and paste it in the Windows Font’s directory. For this purpose, right click on a downloaded font file and select the \”Copy\” option from the menu.
Step 2 Paste into the Font’s Directory
Once you have copied the selected font file, go to the Control Panel and open up the \”Fonts\” directory located in it. Once the font’s directory has opened, right click on an empty space and select the \”Paste\” option from the menu to paste the Font File in it.
นอกจากการดูหัวข้อนี้แล้ว คุณยังสามารถเข้าถึงบทวิจารณ์ดีๆ อื่นๆ อีกมากมายได้ที่นี่: ดูวิธีอื่นๆWIKI