
Contents
รีวิว ปากกาไอแพด Goojodoq รุ่น 12th ตัวล่าสุด แรเงา \u0026 วางมือได้ ปากกาสไตลัส applepencil 2 Stylus pen
นอกจากการดูบทความนี้แล้ว คุณยังสามารถดูข้อมูลที่เป็นประโยชน์อื่นๆ อีกมากมายที่เราให้ไว้ที่นี่: ดูเพิ่มเติม
รีวิว ปากกาไอแพด Goojodoq รุ่น 12th ตัวใหม่ล่าสุด ปากกา สำหรับ iPad Air 4 / iPad Pro ปากกาสไตลัส applepencil 2 Stylus pen
มีคำถาม คอมเม้น หรือทักมาสอบถามทีมงานเพิ่มเติมได้ที่
https://bit.ly/3hsApiN
Line : @bankgagdet
สั่งซื้อผ่าน Shopee
https://bit.ly/3yhJLmS
สั่งซื้อผ่าน Lazada
https://bit.ly/3ylcZ4g
ติดตามเพจ Facebook ร้านได้ที่
https://bit.ly/3r9aEGO
หรือ Bank_ITshop
ติดตามTiktok ร้านได้ที่
https://vt.tiktok.com/ZSJf2tANr/
ติดตามความรู้ดีใน instragram
https://bit.ly/3hmsKlL
หรือ bankitshop
iPadair4 ipadpro ipadpro2018 ipadpro2020 ipadpro2021 ปากกาipad applepencil ปากกาไอแพด styluspen applepencil2 ปากกาสไตลัส stylus

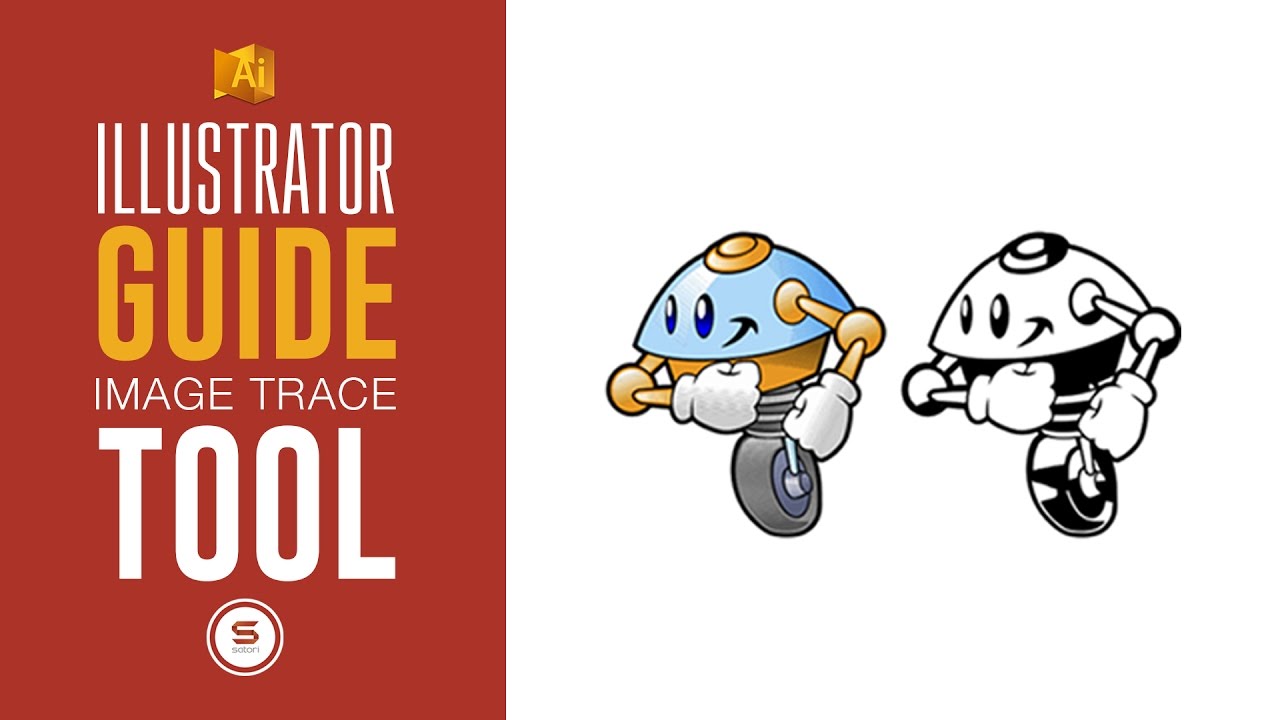
HOW TO TURN ANY IMAGE INTO A VECTOR – Illustrator Live Trace Tool Guide
Today I will show you how to turn any image into a vector using my illustrator live trace tool guide. I will do this in under 4 minutes using Illustrator and the Illustrator live trace tool. This will save you heaps of time as a designer and you will be able to change any image into a vector graphic using the Illustrator trace tool. This is a step by step and easy to follow Illustrator live trace tool guide perfect for any level of graphic designer, beginner or advanced. So lets get into the tutorial and learn how to live trace any image!
🔴 Script Satori FONT DOWNLOAD:
➤➤ https://www.satorigraphics.net/typographyebookdownload/scriptsatorifontdownload
CHECK OUT MY GRAPHIC DESIGN DIGITAL DOWNLOADS:
➤➤ https://www.satorigraphics.net/typographyebookdownload/
The camera I used to record this video
➤➤ https://amzn.to/2qo8k0o
ESSENTIAL Graphic Design Book ‘Do’s and don’ts’
➤➤ https://amzn.to/2GOL1r1
Affordable and Neat Drawing Tablet!
➤➤ https://amzn.to/2qoyPD5
Reliable External Hard Drive
➤➤ https://amzn.to/2GRuQVV
Welcome back to another graphic design tips video, It’s Tom here with Satori graphics. Today using the live trace tool in Illustrator and how to turn any image into a vector with my illustrator live trace tool guide.
I will be showing you how to use the live trace tool in Illustrator which is easily accessed via the Window tab and then scrolling down to ‘image trace’ With this cool trick you will be abel to turn any image into a vector within a matter of seconds in Illustrator.
I walk you through the settings in the live image trace tool window, what each different setting does and what you may want to select for your image. So if you have asked yourself how to live trace in illustrator, look no further as I have all of the answers for you in this live trace tool guide.
From there I show you how to access your new vector image in Illustrator and then how to edit it to separate each part of the vector path.
This Illustrator live trace tool guide is super easy to follow and you will be able to turn pretty much any image into a vector format within seconds once you learn how to do it properly. You can choose to convert your image into a black and white vector or a coloured vector.
I hope this graphic design tutorial was helpful, if it was then please drop a like and let me know in the comments section. Subscribe to stay updated to all of my uploads, until next time design your future today, peace!
Until next time design your future today, peace!
Any ideas for future videos?? Comment in the comment section and I will look into it.
Intro music by Joakim Karud https://soundcloud.com/joakimkarud/va
Adventures by A Himitsu https://soundcloud.com/ahimitsu
Creative Commons — Attribution 3.0 Unported— CC BY 3.0
http://creativecommons.org/licenses/b…
Music provided by Audio Library https://youtu.be/MkNeIUgNPQ8
Check out my playlist of speed art speed paint videos
https://www.youtube.com/playlist?list=PLc9Rq56P4KmnuZZ4CGYzBu3y2yUCV3ko
Here is my speed art time lapse video playlist
https://www.youtube.com/playlist?list=PLc9Rq56P4KmnuZZ4CGYzBu3y2yUCV3ko
Check out this typography digital time lapse video
https://youtu.be/qqi5O5AaNk
My most recent graphic design tutorial:
https://www.youtube.com/watch?v=OIhtdpE2pog\u0026list=PLc9Rq56P4KnD4ODvtbC6fD4jZ5Ng1I
Check out my most recent speed art video here:
https://youtu.be/wdGJFl7n_QM
SOCIAL NETWORKS
▶ TWITTER: https://twitter.com/satorigraphic2k
▶ INSTAGRAM: https://www.instagram.com/satori_graphics/
▶ PINTEREST: https://uk.pinterest.com/satorigraphics/
▶ Copyright
The work is protected by copyright. This is applied to the video recording of itself as well as all artistic aspects including special protection on the final outcome. Legal steps will have to be taken if copyright is breeched. Music is used from the YouTube audio library and thus copyright free music.
Please help me out by commenting, and subscribing it really really helps me out a lot!
https://youtu.be/VPQ8i5BQaDE
graphicdesign satorigraphics illustrator vector
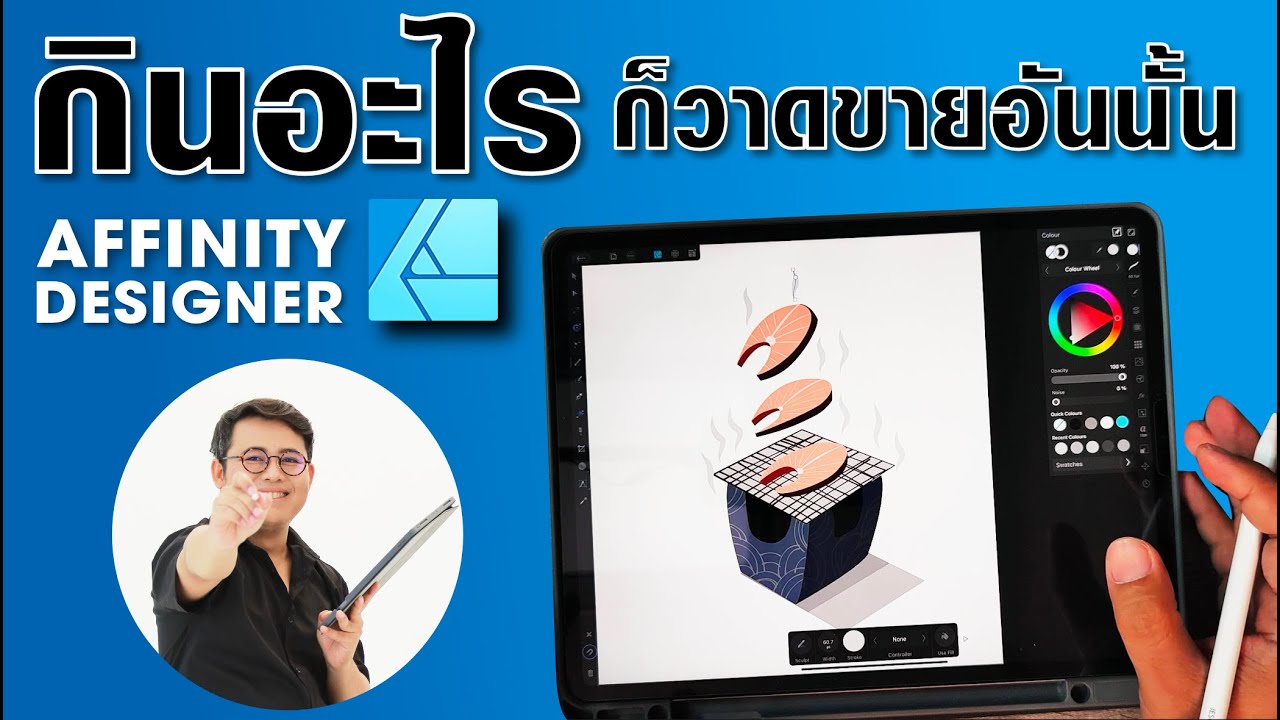
กินอะไรก็วาดอันนั้น สอนวาดอาหารเป็น vector ส่งขายด้วย Affinity Designer
Affinity 2in1 วาดภาพขายด้วย iPAD
เรียนรู้ในทุกมิติทั้งการส่งภาพเวกเตอร์ด้วย Affinity Designer และการแต่งภาพเพื่อส่งขายด้วย Affinity Photo
สุดคุ้มสมัคร 1 ครั้งได้เรียนเจาะลึกถึง 2 คอร์สเรียนได้ตลอดชีพ
ไม่จำเป็นต้องมีพื้นฐานมาก่อน
เรียนรู้ทุกเรื่องเกี่ยวกับการสร้างงานเพื่อส่งขายตั้งแต่เริ่มต้นจนคุณสามารถส่งภาพเวกเตอร์และสามารถแต่งภาพขายออนไลน์โดยใช้เพียง iPAD เครื่องเดียว
ภาพเวกเตอร์คืออะไรและเราจะขายอย่างไร?
ภาพเวกเตอร์ คือ ภาพที่มีความคมชัดทั้งสีและเส้นสามมารถปรับแต่งได้หลายหลายหรือขยายได้หลายขนาดโดยที่ไฟล์นั้นไม่แตกและไม่ลดรายละเอียดต่างๆลงจึงเป็นที่นิยมใช้งานกันอย่างแพร่หลายทั้งในวงการโฆษณาและการโปรโมทสินค้าในรูปแบบต่างๆ
ข้อได้เปรียบในการส่งขายงานเวกเตอร์ออนไลน์ คือ
1 สามารถสร้างชิ้นงานได้หลากหลายตามจินตนาการแบบไม่มีขีดจำกัด
2 มีโอกาสขายได้แม้จะเป็นเพียงเส้นขาวดำหรือภาพที่วาดไอคอนง่ายๆก็สามารถขายได้
3 เนื่องจากความต้องการของตลาดมีมากและต้องปรับเปลี่ยนไปตามกระแสความนิยมในแต่ละช่วงส่งผลให้ภาพเวกเตอร์ยังมีโอกาสที่จะขายได้เรื่อยๆมีโอกาสที่จะได้โหลดที่ต่อเนื่อง
4 ภาพเวกเตอร์สามารถสร้างได้สะดวกรวดเร็วด้วย iPAD ไม่ต้องเสียเวลาจัดพร็อปหรืออุปกรณ์เหมือนการถ่ายภาพซึ่งจะช่วยลดเวลาในการทำงานได้มากและจะเพิ่มโอกาสในการผลิตผลงานได้มากขึ้นเช่นกัน
สิ่งที่คุณจะได้รับจากการเรียนคอร์สนี้
“ เรียนรู้คอร์สนี้สามารถเริ่มต้นสร้างงานจนสามารถส่งงานขายได้ทันที ”
1 เรียนรู้การใช้งาน Affinity Designer ทั้งสำหรับ iPAD และสำหรับ PC และ Mac อย่างละเอียด
2 เรียนรู้การใช้งาน Affinity Photo ทั้งสำหรับ iPAD และสำหรับ PC และ Mac อย่างละเอียด
3 สามารถเรียนรู้วิธีสมัครและส่งภาพขายในเว็บต่างๆอย่างละเอียด
4 เรียนรู้ตั้งแต่หลักการพื้นฐานจนสามารถสร้างงานได้อย่างมืออาชีพทั้ง พื้นฐานการวาด,ทฤษฎีสี,การจัดองค์ประกอบ,การแต่งภาพ,การPainting ต่างๆ
5 พื้นฐานจากคอร์สนี้สามารถปรับใช้งานได้หลากหลายทั้งการสร้างงานแอทโฆษณาต่างๆรวมทั้งการออกแบบ
แพคเกจสินค้าสำหรับผู้ที่เป็นเจ้าของกิจการได้อีกด้วย
6 สำหรับท่านที่ถ่ายภาพสามารถเรียนรู้การแต่งภาพ ปรับสี ใส่เอฟเฟกต่างๆเพื่อท่านจะไม่ต้องทิ้งภาพถ่ายที่ท่านถ่ายไว้เอามาปรับแต่งเพื่อส่งขายเพื่อเพิ่มโอกาสให้แก่พอร์ทงานของท่านได้อีกหนึ่งช่องทาง
คอร์สนี้เหมาะกับใคร?
1 สำหรับผู้ที่ไม่มีพื้นฐานและต้องการเริ่มต้นสร้างงานเพื่อส่งขายออนไลน์ในเว็บขายภาพต่างๆ
2 สำหรับผู้ที่ต้องการสร้างงานทั้งงานเวกเตอร์และงานแต่งภาพถ่ายในลักษณะต่างๆอย่างสร้างสรรค์
3 ผู้ที่ใช้ iPAD และต้องการจบงานต่างๆด้วย iPAD แบบ100%
4 เจ้าของกิจการหรือผู้เริ่มต้นทำกิจการสามารออกแบบโฆษณาได้ด้วยตัวเองเพื่อลดต้นทุนในการเริ่มต้นกิจการของท่านได้
5 สำหรับนักเรียนนักศึกษาหรือผู้ที่ต้องการต่อยอดงานด้าน Graphic Design ไปสู่ระดับมืออาชีพและสามารถสร้าง Protfolio เพื่อสมัครงานได้
เรียนที่ไหนอย่างไร?
เป็นการเรียนออนไลน์ผ่าน Facebook กลุ่มปิด
และมีกลุ่มไลน์ไว้ให้คำปรึกษาตลอดการเรียน
สามารถเข้าเรียนจากวิดีโอบทเรียนตั้งแต่พื้นฐาน
จนสามารถสร้างงานได้รวมถึงสามารถเลือกเวลาเรียนได้เอง
และสามารถกลับมาทบทวนบทเรียนได้ตลอดเวลาที่ต้องการ
ยินดีให้คำปรึกษาจนกว่าท่านที่ลงเรียนจะสามารถสร้างผลงาน
และส่งขายได้เป็นผลสำเร็จ
ราคาและการสมัคร
ปรกติสองคอร์สราคาเต็ม 5,500 บาท
💥 พิเศษสุด!!!! 3,900 บาท 💥
สนใจสมัครได้ทาง Line officail
Line@jaydaijaidee
ติดตามคลิปสอนดีๆได้ทาง FB นะครับ
https://www.facebook.com/Jaydijaidee
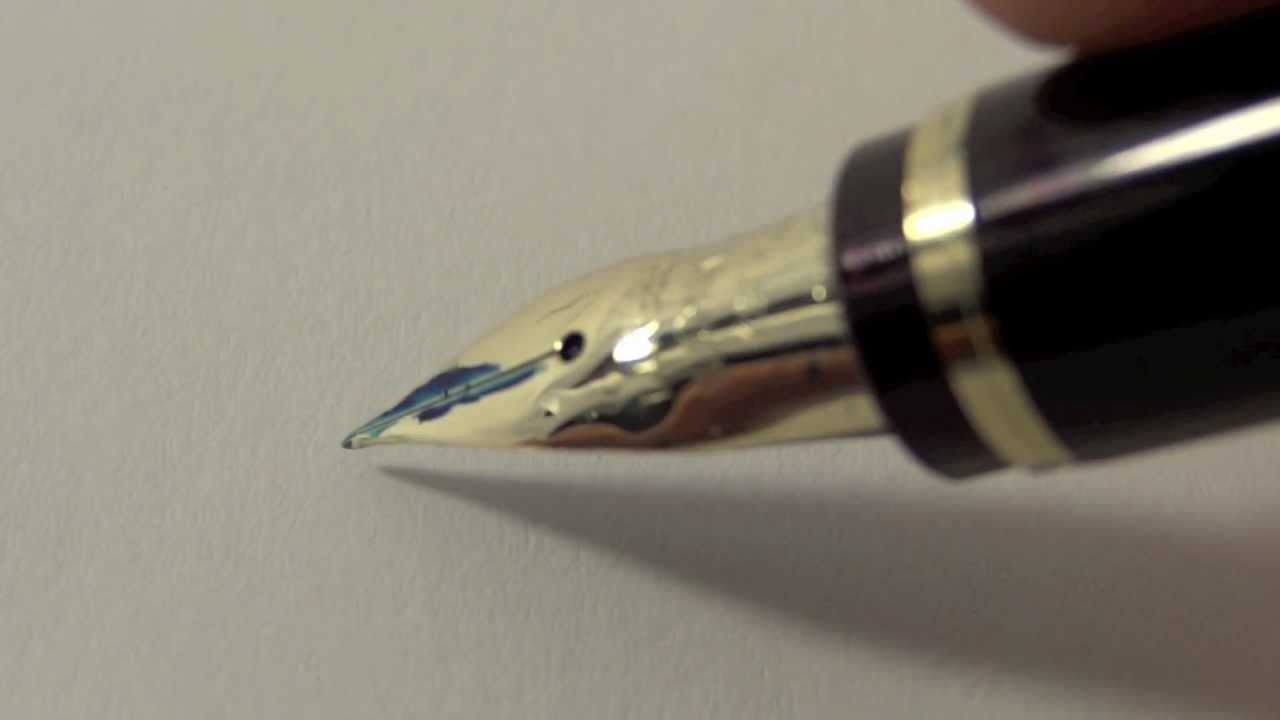
Custom Namiki Falcon Resin Fountain Pen
My favorite fountain pen, the Namiki Falcon, modified by John Mottishaw at www.nibs.com . You can find the regular version here: https://amzn.to/3mWxbmW
The ink is Iroshizuku Tsukiyo Night Sky (Greenish Deep Blue) which shades wonderfully on Bristol Board. You can find it here: https://amzn.to/36cmgyV
I had this nib specially modified by John Mottishaw. He ground the nib extra fine and added flex to it (the Spencerian customization).
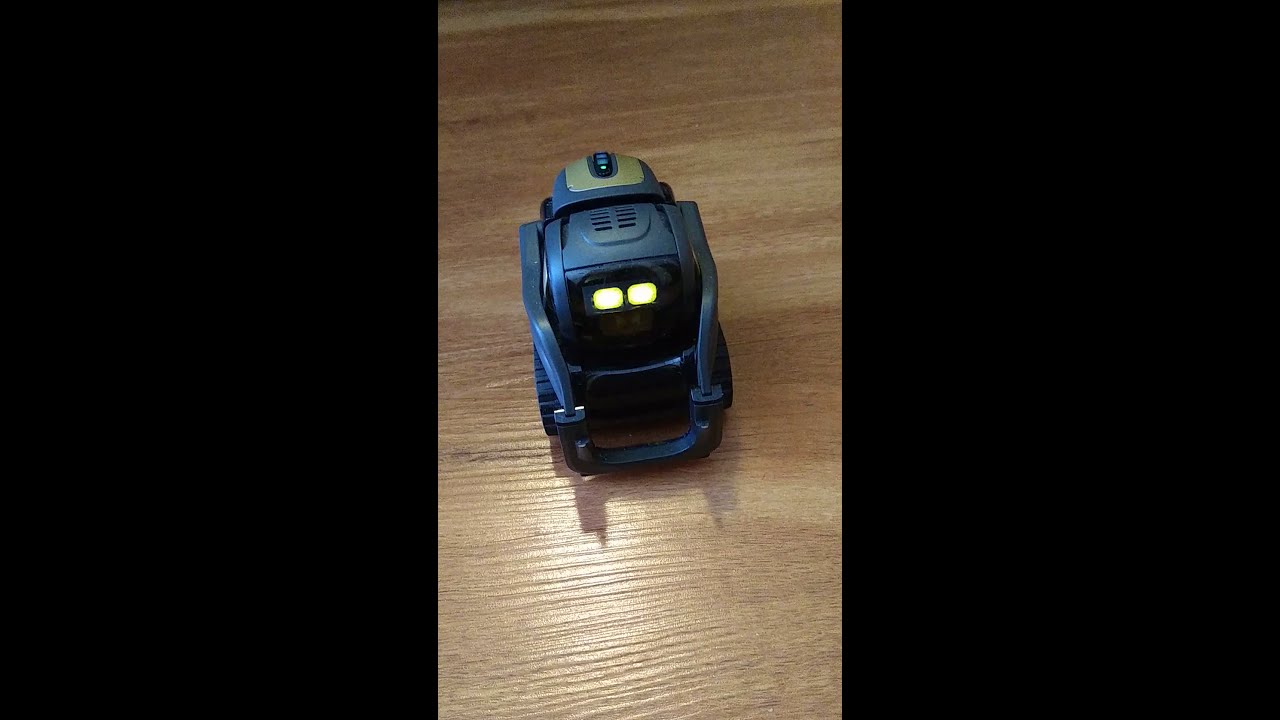
#หุ่นยนต์#vector#รีวิว#review
เรามารีวิวศักยภาพของหุ่นยนต์เพื่อนใหม่ด้วยการถามคำถามดูว่าจะสามารถตอบได้แค่ไหนไปชมกันเลยครับ
นอกจากการดูหัวข้อนี้แล้ว คุณยังสามารถเข้าถึงบทวิจารณ์ดีๆ อื่นๆ อีกมากมายได้ที่นี่: ดูวิธีอื่นๆCUISINE