
You are looking for information, articles, knowledge about the topic nail salons open on sunday near me dojima roll cake on Google, you do not find the information you need! Here are the best content compiled and compiled by the Chewathai27.com team, along with other related topics such as: dojima roll cake dojima roll recipe, japanese roll cake, lawson roll cake, dojima roll near me, terrine cake, roll cake recipe, buttermilk pantry, strawberry roll cake
Contents
Japanese Strawberries and Cream Roll Cake| Dojima Roll | 堂島ロール – Buttermilk Pantry
- Article author: buttermilkpantry.wordpress.com
- Reviews from users: 18675
 Ratings
 - Top rated: 3.7
- Lowest rated: 1
- Summary of article content: Articles about Japanese Strawberries and Cream Roll Cake| Dojima Roll | 堂島ロール – Buttermilk Pantry Updating …
- Most searched keywords: Whether you are looking for Japanese Strawberries and Cream Roll Cake| Dojima Roll | 堂島ロール – Buttermilk Pantry Updating It’s that time of the year again, the festive holiday season that has manage to pull me out of that dreaded lockdown slump and feeling like life might just about go back to being normal again. And this means I am pushing myself to get more content to you 🙂 And nothing says Christmas more…
- Table of Contents:
The Cake
The Egg – Whites and All
Oil Me Up Baby
Moist is my favourite word
Strawberries and Cream
One size fits all
You spin me right round baby right round
Before eating
Post navigation
3 Comments
Add yours

Dojima roll / Swiss roll cake & kardinal slice @RatiRati – Pantai Indah Kapuk – Jakarta Indonesia | Kardinal
- Article author: www.pinterest.com
- Reviews from users: 24523 Ratings
- Top rated: 3.7
- Lowest rated: 1
- Summary of article content: Articles about Dojima roll / Swiss roll cake & kardinal slice @RatiRati – Pantai Indah Kapuk – Jakarta Indonesia | Kardinal Updating …
- Most searched keywords: Whether you are looking for Dojima roll / Swiss roll cake & kardinal slice @RatiRati – Pantai Indah Kapuk – Jakarta Indonesia | Kardinal Updating 2015 Jun 14 – Dojima roll / Swiss roll cake & kardinal slice @RatiRati – Pantai Indah Kapuk – Jakarta Indonesia
- Table of Contents:

Dr.Kitchen Dojima Roll Cake 몽슈슈 도지마롤 80g | KEPLE X MONCHOUCHOU — bluebasket
- Article author: bluebasket.com
- Reviews from users: 27928 Ratings
- Top rated: 4.9
- Lowest rated: 1
- Summary of article content: Articles about Dr.Kitchen Dojima Roll Cake 몽슈슈 도지마롤 80g | KEPLE X MONCHOUCHOU — bluebasket Updating …
- Most searched keywords: Whether you are looking for Dr.Kitchen Dojima Roll Cake 몽슈슈 도지마롤 80g | KEPLE X MONCHOUCHOU — bluebasket Updating MONCHOUCHOU from Osaka! Enjoy healthy & sweet dessert 🍰 # Feel free to enjoy whole piece of cake, only 4g of sugar # Carefully selected raw materialsKorean Domestic fresh cream more then 34%Antibiotic-free Certified farm’s grade 1 egg [Serving Guide] – Defrost in fridge one day before consume – Try with fresh str
- Table of Contents:
Customer Reviews
Checkmark icon
Added to your cart

dojima roll cake | raonjena coffee&dessert
- Article author: www.raonjena.org
- Reviews from users: 42031 Ratings
- Top rated: 4.3
- Lowest rated: 1
- Summary of article content: Articles about dojima roll cake | raonjena coffee&dessert Updating …
- Most searched keywords: Whether you are looking for dojima roll cake | raonjena coffee&dessert Updating This week’s flavors – plain, mocha(8-inche long)*Write down the flavors you want on the request (or at random)Items and flavors will be updated on the website, Instagram and Facebook every Monday.
- Table of Contents:
dojima roll cake | raonjena coffee&dessert
- Article author: www.tripadvisor.com
- Reviews from users: 42768 Ratings
- Top rated: 3.3
- Lowest rated: 1
- Summary of article content: Articles about dojima roll cake | raonjena coffee&dessert Updating …
- Most searched keywords: Whether you are looking for dojima roll cake | raonjena coffee&dessert Updating This week’s flavors – plain, mocha(8-inche long)*Write down the flavors you want on the request (or at random)Items and flavors will be updated on the website, Instagram and Facebook every Monday.
- Table of Contents:
See more articles in the same category here: Top 975 tips update new.
Japanese Strawberries and Cream Roll Cake| Dojima Roll | 堂島ロール
It’s that time of the year again, the festive holiday season that has manage to pull me out of that dreaded lockdown slump and feeling like life might just about go back to being normal again.
And this means I am pushing myself to get more content to you 🙂
And nothing says Christmas more than red and white and my mind immediately goes to strawberries and cream and roll cakes.
Now who wouldn’t love that combination?
Lightly sweet, tart, creamy, refreshing. All in the right balance.
So whilst the Japanese strawberry shortcake has my heart when it comes to all things dessert related to strawberries and cream, I just had to do a roll cake recipe given log cakes are the thing during this period.
Now, as always, we are going to have a short “chat” on some additional details. So let’s begin shall we?
Before we begin, I would like to preface that the texture of this sponge is what I would like to best describe as the softest memory foam that will melt in your mouth.
There are many types of roll cakes out there and each have their own textures. Because of how cream heavy this cake is, I like the slight resistance you get from it as it contrasts well against the soft cream in the cake.
Some other roll cakes filled with buttercream might have extremely light and fluffy bubbly aerated sponges, and in that instance when the filling is made with buttercream, such a texture would work best well the density of butter cream. But I personally do not like that consistency of that sponge when filled with whipped cream as I feel it lacks a little substance.
In short, I just wanted to explain the type of sponge this is so as to allow you to decide on your preference for yourself.
The Cake
There’s a few points to take note of, the consistency of the batter will reflect the final product you get. Fluffier final batter = fluffier product.
And the main deciding factor is the egg whites – how much you use and how well it is whipped.
The Egg – Whites and All
The only “lift” this cake is getting is from the egg whites and to ensure we do not lose too much air, we will be whisking it until they form stiff peaks. This way, the air will be a little more stable.
However, you do run the risk of finding it hard to incorporate it into the yolk batter. To make life easier, I use a whisk. Usually I’d use a whisk until the end after which I switch out with a spatula just to be certain that no dense yolk batter is sticking to the bottom or sides of the bowl.
If you are afraid of your egg white/meringue splitting due to over whisking, I suggest whisking at a lower speed (medium) once you get to soft peaks. It’s always hard to do multiple angels of camera shots whilst whisking but hopefully the video gives you an indication of the consistency you are going for.
As mentioned above, this cake doesn’t have any leaveners in it beyond the eggs so be sure to get the egg whites nice and whipped until stiff (just do not over whip as you might split it)
Too Eggy
Now this might be a concern for some. “My roll cakes always seems to eggy”
And to be honest, it happens if there’s too much well, egg, in it.
Egg yolks to be precise.
Not all eggs are made the same just like us humans so the best way is to weigh it out.
I unfortunately didn’t weigh the yolks out but in previous batches I did weigh the whites and it average around 112g of egg whites.
If you wish for a less “eggy” cake, cut back on the yolk and use whites as a replacement. But do keep in mind it changes the flavour and texture. You might get a springier cake with more egg whites whereas yolks would make it more tender. But beyond that, yolks actually gives the cake flavour too.
I find the balance of flavour in this particular recipe that I am sharing to be rather nice when paired with the cream and strawberries but it ultimately is up to you to make it your own.
Oil Me Up Baby
Let’s talk fat. And no, no one is body shaming here. I’m talking about oil vs butter
We are using oil instead of butter as it keeps the cake tender. It’s pretty simple if consider the consistency.
Oil in the fridge won’t be as firm as butter in the fridge and both affect the cake slightly differently. Butter will hands down beat oil in flavour but it’s a compromise we make.
On the other hand, oil can have a rather neutral flavour which allows the other flavours in the sponge to stand out (in this instance it’s the egg. See where I’m going with this? :))
So to prevent a one dimensional egg forward sponge, we are going to add a couple of other “aromatics” to it to help give it a little more depth.
This is the addition of the not so surprising vanilla extract and probably more surprising touch of toasted sesame oil.
Why sesame oil?
It has a lovely savoury aroma. Just a few drops will do because you don’t actually want it to be obvious. We just want that nutty savoury aromatic flavour. You won’t know it’s there post bake just like how a touch of vanilla extract won’t be too noticeable but it does make a subtle difference.
You can definitely leave this out and add a touch more vanilla extract instead, it’s not a critical component as opposed to more of a flare, a spark of fun.
Moist is my favourite word
It’s not my favourite word, but no one is going to be upset over a moist cake and everyone will cry at a dry cake.
Now, one of the most often asked questions I get when I was testing this recipe is… how do you roll the cake? Is it hard? I can never roll my roll cakes.
Well, hopefully this recipe fixes that for you.
This cake will flip flop and roll however you want it to, it’ll bend over backwards to make you a happy camper.
And all of this is due to the way we let it cool. Sure, the sponge itself is a component but the way we let it cool is a bigger component to me.
To keep things moooooist, we are going to wrap the cake up in cling wrap whilst it’s still hot and let it cool in the cling wrap.
To prevent a “soggy” sponge (because whilst we love moist cakes we don’t like a soggy wet mess), all you have to do is to be sure it’s wrapped with the cling wrap touching the surface of the sponge. That’s all there is to it. Big gaps will cause condensation which might end up dripping onto the cake thus causing it to be “soggy”. We then cool the cake whilst wrapped until it is ready to be filled. Because of how thing roll cake sponges are, it cools really quickly.
To those who do not love cling wrap, you can leave the baking paper on the sponge and cover the other side with baking paper too and let it rest. Some moisture will escape but it’ll still trap most in. Otherwise simply cover it with a tea towel. It will allow for ventilation but it still traps moisture in. Because of how soft the sponge it, I don’t like moving it around too much whilst hot if I can avoid it.
Baking paper visuals
One other thing to note with the baking paper is that it helps with removing the “brown” skin as then baking paper likes clinging onto it. It’s not necessary when cooling your cake to use a baking paper for the top as it’s mostly a visual thing, but definitely line your tray with baking paper prior to baking otherwise it won’t work out well.
Strawberries and Cream
For the most part many will say, just spread a layer of cream, add sliced strawberries and then roll it up.
This hasn’t changed but how you spread the cream and how you slice and lay the strawberries will affect both the final visuals with the way the strawberries sit when you slice into it and ease of rolling.
First off, pick good ripen sweet strawberries but aren’t too big. Medium small sized ones are good for such a cake. You want the strawberries to be sweet and aromatic and almost kind of on the softer side because it just compliments the whole cake better.
For the strawberries themselves we slice off the leafy top *and*, yes and, the base. Why?
Well, it just prevents someone from getting a slice which only has strawberry tips in it. You want everyone to have a nice amount of strawberry to cream to sponge ratio when you slice it.
This way, the strawberries can sit snugly back to back when you place them down. Alternatively you could just do 2 rows of small strawberries but be warned, my cake is a small roll cake so one was the right balance for me as I love cream in my cake.
Having too many strawberries just throws the balance off for me. If you want more strawberries, I suggest just adding a piece on top of each slice. It makes it both visually pretty and give you the optional additional of extra fruit.
We also lay the cream out in a trench type format in the top 1/3 of the sponge.
This allows you to lay the strawberries within to ensure the cream covers all sides and is for the most part soft of cantered within the roll.
Starting out your roll with a chunkier top will also make it easier to roll it nice and round, not essential to getting a round cake, just easier to roll. I’ll explain what affects the shape in the section below on ‘one size fits all’
One size fits all
I don’t want to force you to go out of your way to buy a pan. Especially since I know how having too make kitchen items is just too much of a waste if you don’t use them often.
So as such, I am giving you the weight of the batter in reference to my particular pan size. This way, you can scale it up and down as you see fit base off the surface area of your pan.
I.e: A 2×2” pan will have a surface area of 4, a 4×4” pan will have a surface area of 16. Which means you aren’t going to just “double” the batter simply because 4 is double of 2. Rather you should be quadrupling the batter quantity needed.
The pan I am using is quite thick but light in colour and has a base size of 25x25cm, a top size of 27x27cm and a height of 2cm.
For my pan I used 300g of cake batter for the thickness that I got. You just have to do some basic math and simply work backwards from there. 🙂
What I would suggest keeping in mind is:
Less batter = bakes faster. More batter in pan = baked longer.
An example is that if I scaled up the batter by 25% I would add another 2 mins of bake time. But the best way to test is simply to touch it. If it springs back it’s done.
An example is that if I scaled up the batter by 25% I would add another 2 mins of bake time. But the best way to test is simply to touch it. If it springs back it’s done. Light colour tin vs dark colour tin – dark colour will bake faster than light. Simply check it 1-2 mins prior to when it finishes baking. Because of how thin this cake is, if it is under bake I would suggest check back on it by touching the top every 1-2mins when it feels like it is almost done.
High rim vs low rim – higher rim blocks airflow so the way it bakes will be different. It might take a slightly longer time and side might bake faster than the middle.
Hopefully this has help you customise the recipe to your pan size.
Similarly for the cream filling, if you doubled your roll cake recipe I suggest doubling the cream just to be safe but you probably won’t need that much, maybe 50% would do the trick (I’m estimating here so don’t take my word for the volume unless you want to do the math ;))
The good thing is that this cake is so flexible that if you didn’t fill it up enough when you roll it, simply unravel and add more cream, it won’t break
Which brings me to the next point…
You spin me right round baby right round
A nice and round non-floppy roll.
In this instance for me, a firm cream helps make sure it sits in place and I don’t have cream flowing all over the place. But beyond that, having enough cream in it is key.
If your roll is half empty, you’ll either have to overlap the rolls to get it tight or it would simply just collapse on itself because there is nothing inside to support it.
So essentially, 2 key things. A firm enough cream that holds its shape and having enough filling to support the roll.
To make it tight, I use a ruler to fit under the roll and push against the roll whilst holding down on the baking paper. I do it a few times to ensure it’s nice and round and tight before covering the ends with cling wrap and refrigerating it.
When refrigerating the roll, i try to ensure the ends where the sponge meets is the base of the roll. This helps ensure it doesn’t unravel when I slice into it.
Troubleshooting the roll
If you are leaving finger indents that doesn’t bounce back on your roll when you are rolling it up – it is most likely under baked
If your roll cracks – it is most likely too dry and over baked or the sponge was deflated due to either under whipped eggs or knocking too much air out of it and thus dense.
If your roll is limp post rolling – it is either under filled or not rolled tightly enough
If your cream goes everywhere when you slice into it – it is either because your cream is under whipped and doesn’t have enough structure or you didn’t refrigerate it for long enough and thus loose.
Before eating
Do not slice immediately. This has to sit in the fridge for at least 2 hours to let the shape set. Please be patient, you’ve spent the time making it, you need to give it the time to set its shape.
Letting it sit overnight is my preference as you know you have given it ample time to rest and set but also this allows for the moisture in the cream to tenderise the sponge further as it seeps into the sponge.
Either way you choose, be it 2hrs minimum or overnight, it will both be good (I have tried it both ways).
Lastly, before slicing into your cake, be sure to wipe and cream clinging to your knife between slices for a clean cut.
I hope you enjoy this recipe and happy baking!
Japanese Strawberries and Cream Roll Cake
Makes 1 x 25cm roll cake
What you’ll need
Cake – Yolk Base
3 large egg yolks
11g caster sugar
30g oil
40g milk, full cream
1/2 tsp vanilla extract
Small pinch of fine sea salt
54g cake flour, sifted if lumpy
2 drops – 1/8 tsp sesame oil (optional)
Cake – White Meringue Base
3 large egg whites
40g caster sugar
Filling
300g heavy/thickened cream, cold
30g caster sugar
1 tsp vanilla extract
Medium sized strawberries as needed
Making it
Preheat your oven to 180C fan forced
Prepare your roll pan by lining it with baking paper and set aside. (I used a light colour roll cake pan that is 25x25cm at the base and 27×27 on top with a 2cm height)
Place the ingredients for the cream filling (minus strawberries) into a bowl and whisk until almost stiff peaks. Refrigerate and set aside. (This filling is enough for a roll cake of my pan size, if you are using a bigger pan, please increase the cream accordingly.
In another bowl, place your egg yolks and sugar together and whisk by hand until pale and aerated. Add the salt, vanilla extract, oil and milk and whisk to combine.
Add the flour and whisk until there are no longer any pockets of flour and it looks smooth. Set aside.
In a clean bowl, whisk with an electric hand mixer or in a stand mixer until egg whites are foamy before slowly adding the sugar.
Whisk the egg whites until they are stiff. You need to ensure you have beat sufficient air into your egg whites (see further notes above on this), you can also have a look at the video for a visual reference. But take care not to over whisk it otherwise it will split and you will need to start over.
Now gently take a portion of the egg whites and fold the egg whites into the yolk mixture. I fold them in 3-4 batches taking around 1/4 of the egg whites each time and folding it into the yolk mixture. I usually use a whisk to fold the whites in at the start and swap to a spatula at the end.
You want to retain as much air in the batter as possible so be gentle.
Once all the egg whites has been incorporated, pour 300g of the batter into the prepared roll cake pan. I am using only 300g of batter (you should have a minimal amount left over) for my desired sponge thickness for my pan size but I am providing the weight to allow you to adapt and calculate the amount needed for your pan. Give the pan a few taps on the bench top to knock out any big air bubbles.
Bake the sponge for 11min until it springs back when you lightly press on the top (or a toothpick comes out clean)
Remove the cake from the oven and immediately flip the cake out of the pan onto a baking paper with the exposed side touching the fresh sheet of baking paper.
Peel off the old baking paper that is attached to the sponge (the one that was lining the pan originally) to get a nice smooth surface and immediately cover and wrap the sponge with cling wrap touching the surface of the sponge to lock the moisture in and set aside to cool.
You can cover it with a tea towel or baking paper instead but be sure it touches the surface of the cake. I find that cling wrap works best for me.
Whilst that is cooling, prepare your strawberries.
Wash and dry your strawberries. Slice off the top and tips of the strawberries (as illustrated in the video) and set aside.
Once your sponge has cooled to room temperature (it needs to be fully cooled otherwise it will make the cream really soft) take the whipped cream out of the fridge.
Give it a few good whisk just to get it firm again and it’s time to assemble.
Remove your sponge from the cling wrap and place it onto a long sheet of baking paper (one that is at least 1.5x the length of the sponge).
With the smooth/pretty side facing down onto the baking paper, peel off the baking paper on the other side. This should help remove the browned skin that was exposed when you baked the sponge. But if it doesn’t all come off, simply remove as much of the brown “skin” on the sponge by using your fingers to gently rub it off (please wear gloves) otherwise use a bread knife to tenderly slice it off. This is optional but it makes for nicer clean looking sponge without a brown rim on the inside when you go to roll it.
Picking the ugliest edge, slice the edge of the sponge on a 45 degree angle. This will be the end of the roll. (Feel free to “taste test” the scraps that you have sliced off ;))
What you should have right now is a sponge that is on a baking paper with the “pretty” side facing down on the baking paper and the 45 degree edge facing away from you.
Spread a thin layer of cream on the sponge.
Take the remaining 2/3 of the cream and form a small mount parallel to the edge nearest to you leaving a clearance of 1″ (please reference the video for a better visual)
Make a trench in the mount and line your strawberries in it having them touch one another to top to tip. Be sure to form a line that reaches the edges.
Cover the top of the strawberries with the rest of the cream filling in the gaps as much as possible.
Now it’s time to roll.
Your sponge should be really soft and easy to roll if you had used all of the cream and had made a line of strawberries. This cake should roll to be a nice round.
Lifting the edge of the baking paper that is nearest your body, begin to roll the cake away from you towards the 45 degree sliced edge.
Try to help it along by rounding it with your fingers (you shouldn’t need to apply pressure).
To ensure the roll is tight, use a ruler and slide it under the cake on a slight angle and push the ruler towards you to tighten the roll whilst pulling the bottom baking paper away from you. This will create tension and help tighten the roll.
Once the roll is tight and round, tape the baking paper up to keep it tight. You can then cover the exposed ends with some cling wrap to prevent it from drying out or use baking paper to cover it. (If tape doesn’t stick to your baking paper you can use a string or do what I did in the video with some paper)
Refrigerate for at least 2 hrs or overnight (I prefer overnight) to allow the cream to firm back up and for the roll to set. The moisture from the cream as it sits overnight will also leech into the sponge which will soften it further. But I have eaten them after 2 hrs and when I have done an overnight rest in the fridge and they are both just as good.
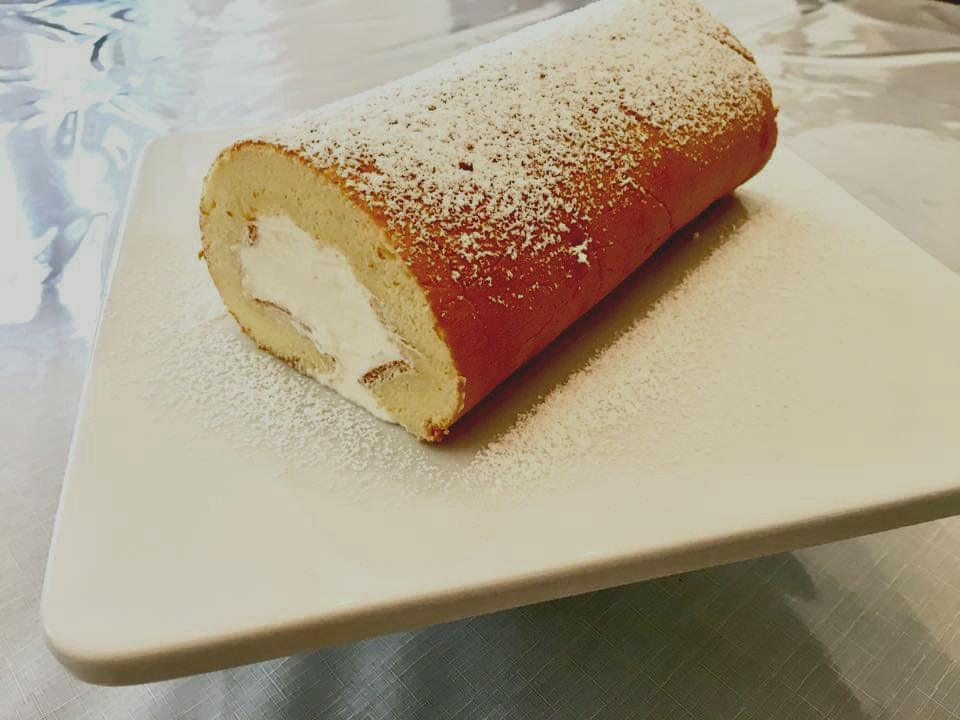
Once the cake has set, slice off the messy ends to get a nice looking roll (treat this as a little snack for you ;)). Dust with icing sugar and portion as you see fit. Be sure to wipe the knife between slices to ensure clean cuts.
This cake is best enjoyed cold.
So you have finished reading the dojima roll cake topic article, if you find this article useful, please share it. Thank you very much. See more: dojima roll recipe, japanese roll cake, lawson roll cake, dojima roll near me, terrine cake, roll cake recipe, buttermilk pantry, strawberry roll cake