
You are looking for information, articles, knowledge about the topic nail salons open on sunday near me how do you test hydraulic brakes for leaks on Google, you do not find the information you need! Here are the best content compiled and compiled by the Chewathai27.com team, along with other related topics such as: how do you test hydraulic brakes for leaks brake pressure test kit, the low air pressure warning device should come on at about, hydraulic brake pre trip inspection, school bus hydraulic brake system, hydraulic brake test on school bus, the stop light switch, why should you back toward the drivers side, most of the brake fluid in hydraulic brakes is stored in the
If the vehicle has hydraulic brakes, pump the brake pedal three times. Then apply firm pressure to the pedal and hold for five seconds. The pedal should not move. If it does, there may be a leak or other problem.A spongy feel or increased pedal travel as you apply the footbrake could indicate a leak or air bubbles in the hydraulic brake system. Hydraulic pressure is passed down the brake pipes to each wheel. The master-cylinder reservoir keeps the pipes supplied with fluid.Often the only tests and actions performed on a hydraulic system involve changing the filters, sampling the oil and checking the oil level.
Contents
How do you find an air leak in a hydraulic brake system?
A spongy feel or increased pedal travel as you apply the footbrake could indicate a leak or air bubbles in the hydraulic brake system. Hydraulic pressure is passed down the brake pipes to each wheel. The master-cylinder reservoir keeps the pipes supplied with fluid.
Which three test would you perform on a hydraulic system?
Often the only tests and actions performed on a hydraulic system involve changing the filters, sampling the oil and checking the oil level.
What are the steps for inspecting brakes?
- Test drive the car. …
- Inspect the tires. …
- Check the vehicle’s suspension system. …
- Look for leaking, cracked or damaged hoses. …
- If needed, replace any leaking or damaged steel lines.
- Replace any leaking or damaged calipers. …
- Check brake master cylinder for leaks. …
- Test the brake pedal.
What is a simple test for locating leaks in an air brake system?
The NanoLeak Finder allows for easy connection to a vehicle’s main air-holding tank for the brake system. An automated, two-minute test is run to determine how much leak-down is occurring. If the system is losing more than 3 to 5 psi in 60 seconds, it is considered a failure.
How do you tell if brakes are leaking?
Brake fluid tends to have a light yellow to brownish color and leaves a slippery residue on your fingers when touched. If you can follow the path of the leak back to the brake lines or master cylinder under the center of the car or the rotors or drums near the wheels, brake fluid is likely leaking.
What are the four things that require testing in a hydraulic system?
When a hydraulic problem occurs, the machine is visually inspected for busted hoses, pressure on the gauge, low oil level and if the electric motor is tripped out. If nothing obvious is found, a parts-changing process begins.
How do you test hydraulic brakes for stopping action?
Test the hydraulic brakes (if equipped) by pressing the brake pedal three times, and then holding the pedal for 5 seconds; the pedal should not move. Move the vehicle forward and apply the parking brake. If the parking brake works, release it and test the service-brake stopping action.
How do you test hydraulic brakes for their stopping action?
Test the hydraulic brakes (if equipped) by pressing the brake pedal three times, and then holding the pedal for 5 seconds; the pedal should not move. Move the vehicle forward and apply the parking brake. If the parking brake works, release it and test the service-brake stopping action.
What safety precautions are required while working on hydraulic braking system?
Follow these rules for safe hydraulics operation. Always lower the hydraulic working units to the ground before leaving the machine. Park the machinery where children cannot reach it. Block up the working units when you must work on the system while raised; do not rely on the hydraulic lift.
In-Cab Air Brake Inspection | High Road Online CDL Training
- Article author: www.truckingtruth.com
- Reviews from users: 43885
 Ratings
 - Top rated: 4.1
- Lowest rated: 1
- Summary of article content: Articles about In-Cab Air Brake Inspection | High Road Online CDL Training Updating …
- Most searched keywords: Whether you are looking for In-Cab Air Brake Inspection | High Road Online CDL Training Updating In-Cab Air Brake Inspection will be covered on page 14 of The High Road Online CDL Training Program. Prepare for your CDL test now!
- Table of Contents:
Review Questions – Click On The Picture To Begin
Join Us!
Apply For Paid CDL Training Through TruckingTruth
About Us
Becoming A Truck Driver
Testing Hydraulic Brakes – YouTube
- Article author: www.youtube.com
- Reviews from users: 30918 Ratings
- Top rated: 4.9
- Lowest rated: 1
- Summary of article content: Articles about Testing Hydraulic Brakes – YouTube Updating …
- Most searched keywords: Whether you are looking for Testing Hydraulic Brakes – YouTube Updating Testing Hydraulic Brakes. Part of the series: Lessons from a Car Expert. Hydraulic brakes should always be properly tested to make sure they’re in proper wor…car tips, car tricks, car help
- Table of Contents:

Looking for leaks in the brake system | How a Car Works
- Article author: www.howacarworks.com
- Reviews from users: 43664 Ratings
- Top rated: 3.4
- Lowest rated: 1
- Summary of article content: Articles about Looking for leaks in the brake system | How a Car Works Updating …
- Most searched keywords: Whether you are looking for Looking for leaks in the brake system | How a Car Works Updating Spongy brake pedal? Discover how to find leaks in the brake system of a car and stop brake fluid leaking.
- Table of Contents:
Using a hose clamp
Checking wheel cylinders
Checking pipes and unions
Inspecting hoses
Checking the master cylinder
Checking disc-brake pistons
The Ultimate Car Mechanics video course
Super detailed explanations in the video course
The
video
course
Bonus Dismantling the engine
Engine Block
Crankshaft
Tools Using a tap set
Using an engine stand
The Pistons
Simple Tests to Increase the Reliability of Your Hydraulic Systems
- Article author: www.machinerylubrication.com
- Reviews from users: 20283 Ratings
- Top rated: 4.5
- Lowest rated: 1
- Summary of article content: Articles about Simple Tests to Increase the Reliability of Your Hydraulic Systems Updating …
- Most searched keywords: Whether you are looking for Simple Tests to Increase the Reliability of Your Hydraulic Systems Updating Often the only tests and actions performed on a hydraulic system involve changing the filters, sampling the oil and checking the oil level. As long as the system is operating, the mentality …
- Table of Contents:
Check the Oil Reservoir
System Cleaning and Flushing
Verify the Reservoir Heater Setting
Adjust Oil Level Switches
Check the Breather Cap
Set High-temperature Switch
Heat Exchanger Flushing and Cleaning
Pump Testing
Accumulator Testing
Check Hoses
Inspect Clamps
Valve Testing

How to fix a Shimano hydraulic brake without bleeding it. – YouTube
- Article author: www.youtube.com
- Reviews from users: 19017 Ratings
- Top rated: 4.2
- Lowest rated: 1
- Summary of article content: Articles about How to fix a Shimano hydraulic brake without bleeding it. – YouTube Updating …
- Most searched keywords: Whether you are looking for How to fix a Shimano hydraulic brake without bleeding it. – YouTube Updating How to fix a Shimano hydraulic brake without bleeding it. Is the brake lever touching the handlebar? It could be worn out brake pads or lack of fluid or air …Shimano, XT, disk brakes, hydraulic brakes, mountain bike, brake bleed, mineral fluid, mountain biking, disc brakes, disc brake, xc mtb, bleeding brakes, disc brake (invention), shimano brakes, shimano slx, bleed brakes, shimano disc brakes, worn brake pads, worn brake pads noise, worn brake pads sound, worn brake pads vs new, worn brake pads and rotors, replace brake pads and rotors, gravity bleed brakes, how to fill reservoir, air bubbles, br-m775
- Table of Contents:

How Do You Test Hydraulic Brakes For Leaks? – amortips.com
- Article author: amortips.com
- Reviews from users: 13929 Ratings
- Top rated: 3.2
- Lowest rated: 1
- Summary of article content: Articles about How Do You Test Hydraulic Brakes For Leaks? – amortips.com If the vehicle has hydraulic brakes, pump the brake pedal three times. Then apply firm pressure to the pedal and hold for five seconds. …
- Most searched keywords: Whether you are looking for How Do You Test Hydraulic Brakes For Leaks? – amortips.com If the vehicle has hydraulic brakes, pump the brake pedal three times. Then apply firm pressure to the pedal and hold for five seconds. If the vehicle has hydraulic brakes, pump the brake pedal three times. Then apply firm pressure to the pedal and hold for five seconds. The pedal should not How Do You Test Hydraulic Brakes For Leaks?Test for hydraulic leaks: If the vehicle has hydraulic brakes, pump the brake pedal three times. Then apply firm pressure to the pedal and hold for five seconds. The pedal should not move. If it does, there may be a leak or other problem.Which three test w
- Table of Contents:
How Do You Test Hydraulic Brakes For Leaks
Which three test would you perform on a hydraulic system
How do you test a hydraulic brake on a CDL
How do I know if my hydraulic brake system is bad
How do you test the foot brake on a hydraulic system
How do you do a DOT brake test
What is the 7 step air brake test
How do you check air leakage rates
What is stab braking method
What is a red triangle with an orange center
How do you test a hydraulic brake booster
What are the symptoms of a failure in the hydraulic brake booster
Why does my car smell like burning rubber when I brake
How much does it cost to fix hydraulic brakes
How do hydraulic brake systems work
What are the parts of hydraulic brake system
How is an applied leakage test performed
When inspecting the brake assembly you should ensure
What is the maximum leakage rate
How do you check an air brake governor
How do you do a pre trip air brake test
What is a simple test for locating leaks in an air brake system
What is snub braking
When should stab braking never be used
What is alcohol evaporator
What does a red triangle on the back of a vehicle mean
What does a red triangle mean
What does the triangle on a tractor mean
How do I know if my Hydrobooster is bad
How do I know if my brake booster or master cylinder is bad
How do I know if I have hydro-boost
How do you fix a hissing brake booster
What should be done if a hydraulic booster is found to be faulty
How do you test a brake booster check valve
What does burning rubber smell mean
School Bus Hydraulic Brake System simple test for leaksCDL
Post navigation
Post Most View
Popular Categories
How do you test hydraulic brakes?
- Article author: high-tech-guide.com
- Reviews from users: 41696 Ratings
- Top rated: 4.8
- Lowest rated: 1
- Summary of article content: Articles about How do you test hydraulic brakes? To test a vehicle equipped with hydraulic brakes for leaks in the brakes, first pump the brakes three times. Next, apply firm pressure to the brake pedal for … …
- Most searched keywords: Whether you are looking for How do you test hydraulic brakes? To test a vehicle equipped with hydraulic brakes for leaks in the brakes, first pump the brakes three times. Next, apply firm pressure to the brake pedal for …
-
Typical full-lock operating pressures on conventional OEM-style automotive hydraulic-brake systems are 9001,000 psi with manual brakes and 1,400-plus psi with power-assisted brakes. To check the pressure, you’ll need a simple brake-pressure gauge.
-
- Table of Contents:
How do you test hydraulic brakes
How do you test hydraulic brakes
How do you test hydraulic brakes for their stopping action CDL
Which three tests would you perform on a hydraulic brake system
How do you test a vehicle’s hydraulic brakes for leaks
Real 2022 DMV Questions
- Article author: www.dmv-written-test.com
- Reviews from users: 18845 Ratings
- Top rated: 4.6
- Lowest rated: 1
- Summary of article content: Articles about Real 2022 DMV Questions How can you check for a leak in hydraulic brakes? … Pump the brake pedal three times, then hold down the pedal for five seconds. If the pedal moves, there may … …
- Most searched keywords: Whether you are looking for Real 2022 DMV Questions How can you check for a leak in hydraulic brakes? … Pump the brake pedal three times, then hold down the pedal for five seconds. If the pedal moves, there may … How can you check for a leak in hydraulic brakes?
- Table of Contents:

How do you test hydraulic brakes for leaks? | Carguideinfo.com
- Article author: www.carguideinfo.com
- Reviews from users: 8019 Ratings
- Top rated: 4.3
- Lowest rated: 1
- Summary of article content: Articles about How do you test hydraulic brakes for leaks? | Carguideinfo.com You need to pump the brake pedal three times, and then apply a sol pressure to the pedal and then hold your foot in this position for about 5 seconds. The … …
- Most searched keywords: Whether you are looking for How do you test hydraulic brakes for leaks? | Carguideinfo.com You need to pump the brake pedal three times, and then apply a sol pressure to the pedal and then hold your foot in this position for about 5 seconds. The … how do you test hydraulic brakes for leaks;Hydraulic brakes use fluid containing glycol ether or diethylene glycol to transfer pressure from the control system to the braking system. When the fluid in your hydraulic brake system starts to leak, your safety as well as that of anyone in the car is at risk.
- Table of Contents:
Best DSG Transmission Fluid with Reviews Buying Guide and FAQs
Tesla Model 3 dominates small and midsize car market in the USA
Best Piston Ring Compressor with Reviews Buying Guide and FAQs
How Do You Test Hydraulic Brakes for Leaks
- Article author: hydraulooze.com
- Reviews from users: 39652 Ratings
- Top rated: 4.9
- Lowest rated: 1
- Summary of article content: Articles about How Do You Test Hydraulic Brakes for Leaks Hydraulic brakes are used in cars to stop the vehicle quickly. These brakes are very important because if there is a leak in the system then the car could. …
- Most searched keywords: Whether you are looking for How Do You Test Hydraulic Brakes for Leaks Hydraulic brakes are used in cars to stop the vehicle quickly. These brakes are very important because if there is a leak in the system then the car could. Hydraulic brakes are used in cars to stop the vehicle quickly. These brakes are very important because if there is a leak in the system then the car could
- Table of Contents:
When should hydraulic brakes be tested
Related Posts
How Do You Test Hydraulic Brakes For Leaks – Comprehensive Guide
- Article author: cargarageonline.com
- Reviews from users: 18791 Ratings
- Top rated: 4.3
- Lowest rated: 1
- Summary of article content: Articles about How Do You Test Hydraulic Brakes For Leaks – Comprehensive Guide Read more about the brake testing technique. Repairing old braking hydraulics is critical since ignored hydraulic components could lead to … …
- Most searched keywords: Whether you are looking for How Do You Test Hydraulic Brakes For Leaks – Comprehensive Guide Read more about the brake testing technique. Repairing old braking hydraulics is critical since ignored hydraulic components could lead to … This guide will demonstrate how do you test hydraulic brakes for leaks, such as assessing the liquid level and pressure, evaluating the p…..
- Table of Contents:

How do you test hydraulic brakes for leaks? – Study With Us!
- Article author: haren.in
- Reviews from users: 12760 Ratings
- Top rated: 4.5
- Lowest rated: 1
- Summary of article content: Articles about How do you test hydraulic brakes for leaks? – Study With Us! How do you test hydraulic brakes for leaks? (a) Measure the free play in the pedal with a ruler. … and see if it stops when the brake is applied. …
- Most searched keywords: Whether you are looking for How do you test hydraulic brakes for leaks? – Study With Us! How do you test hydraulic brakes for leaks? (a) Measure the free play in the pedal with a ruler. … and see if it stops when the brake is applied. How do you test hydraulic brakes for leaks? (a) Measure the free play in the pedal with a ruler. … and see if it stops when the brake is applied.Other
- Table of Contents:
Please log in or register to answer this question
1 Answer
Please log in or register to add a comment
Related questions
Categories
See more articles in the same category here: https://chewathai27.com/toplist.
High Road Online CDL Training
Step 7: Start Engine and Check Brake System
Test for hydraulic leaks:
If the vehicle has hydraulic brakes, pump the brake pedal three times. Then apply firm pressure to the pedal and hold for five seconds. The pedal should not move. If it does, there may be a leak or other problem. Get it fixed before driving.
If the vehicle has air brakes, do the checks described in sections 5 and 6.
Test parking brake:
Fasten safety belt.
Allow vehicle to move forward slowly.
Apply parking brake.
If it doesnʼt stop vehicle, it is faulty; get it fixed.
Test service brake stopping action:
Go about 5 mph.
Push brake pedal firmly.
“Pulling” to one side or the other can mean brake trouble.
Any unusual brake pedal “feel” or delayed stopping action may mean trouble.
Test electric brakes:
Set electric brake to maximum sensitivity (dial or box).
Drive forward, step on brakes.
Trailer brakes should engage before power unit brakes.
Important Note If you find anything unsafe during the pre-trip inspection , get it repaired immediately. Federal and state laws prohibit operating an unsafe vehicle.
Trip Inspection
Check the following regularly:
Instruments
Air-pressure gauge (if you have air brakes)
Temperature gauges
Pressure gauges
Ammeter/voltmeter
Mirrors
Tires
Cargo, cargo cover
If you see, hear, smell or feel anything that might mean trouble, check it out.
After-Trip Inspection
Drivers of trucks and truck tractors when transporting cargo must inspect the securement of the cargo within the first 25 miles of a trip and every 150 miles or every three hours (whichever comes first) afterward.
You may have to make a written report each day on the condition of the vehicle(s) you drove. Report anything affecting safety or possibly leading to mechanical breakdown.
The vehicle inspection report tells the motor carrier about problems that may need to be fixed. Keep a copy of your report in the vehicle for one day so the next driver will be aware of any problems you have found.
There may be a question on checking load securement. Make sure you memorize that loads need to be checked within the first 25 miles and then again every 150 miles or every three hours, whichever comes first.
Remember: You must perform a vehicle inspection daily.
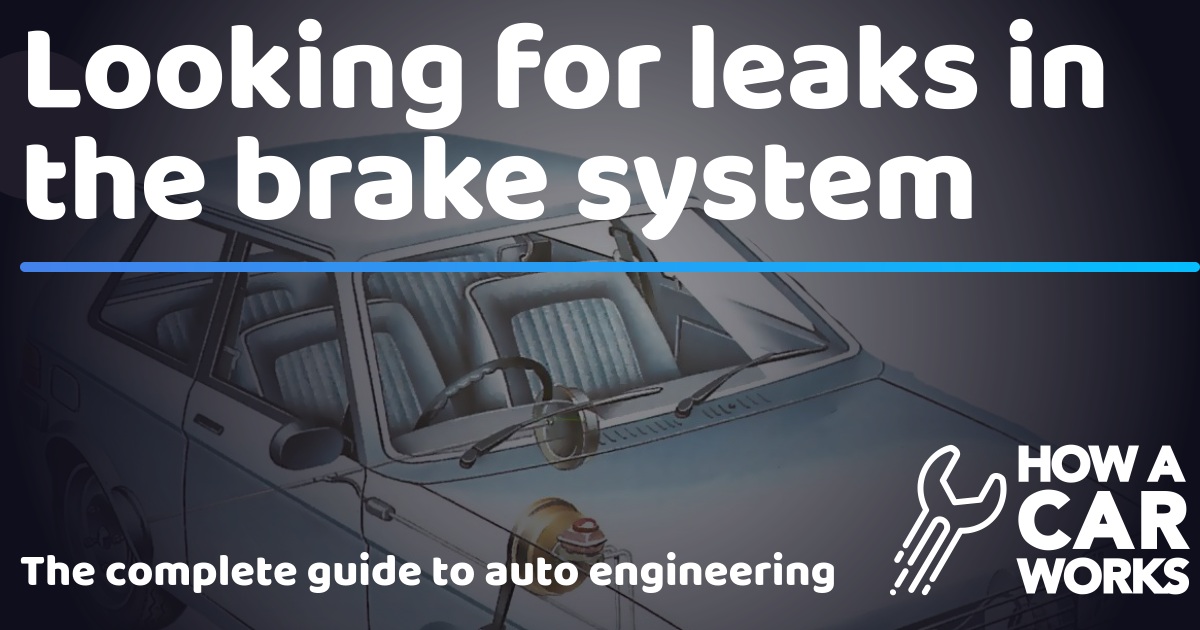
Looking for leaks in the brake system
A spongy feel or increased pedal travel as you apply the footbrake could indicate a leak or air bubbles in the hydraulic brake system.
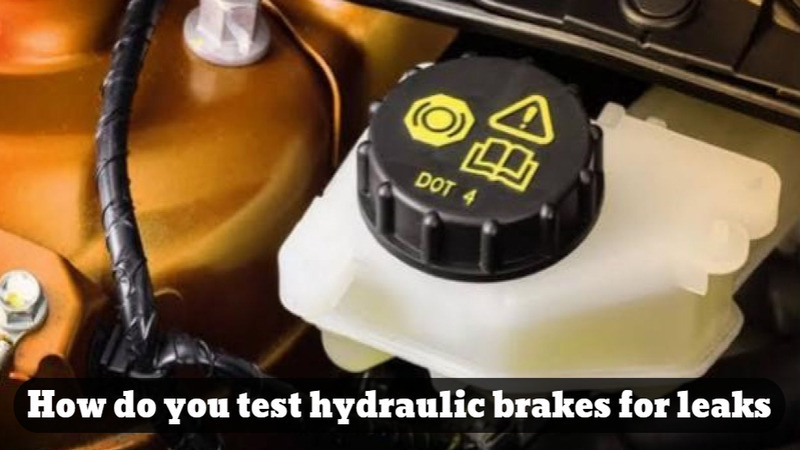
If the level is low in the master-cylinder reservoir , the problem is a leak.
The master cylinder is usually mounted on or near the bulkhead of the engine compartment. The recommended fluid level is marked by a line on the outside of the reservoir.
If the reservoir is made of plastic, the level of fluid inside is visible; if it is metal, unscrew the reservoir cap and look inside.
A regular inspection of the fluid level is advisable – it could be your first warning if the leak is only a slight ‘weep’ in the system.
Any brake-fluid leak must be traced and remedied as soon as possible. Most likely sources are the seals of the master cylinder or, in a drum brake, the wheel cylinder .
Less likely – but not unknown – is a leak past a piston seal on a disc-brake caliper .
Other possible sources include split or perished flexible hoses , cracked or rust-pitted brake pipes, or loose screw-in pipe unions.
These unions are used to attach the piping to various components of the system, such as the master cylinder or the disc-brake caliper.
Inspect them carefully and feel behind them, too, in case the weep is not visible from the front. Tighten the nut if there is any evidence of leaking.
Have a helper press hard on the brake pedal when you inspect the system again – the extra pressure may reveal a slight leak that would not show otherwise. If it does, the joint is damaged and must be repaired professionally at a garage – drive there slowly.
If you fail to find a leak (and if [[bleeding the system|Article:56]] does not cure the problem) suspect an internal seal leak in the master cylinder or one of the slave cylinders .
Brake linings that have been contaminated by leaking hydraulic fluid or grease must be renewed (See Renewing drum-brake shoes ). Do not attempt to clean them.
Furthermore, the linings on the opposite wheel must also be renewed, otherwise the stopping power of the two brakes will differ and you will have unbalanced, dangerous braking.
Brake shoes – or disc-brake pads – are always sold in ‘ axle sets’, for either the two front wheels or the two rear ones. Never renew just one.
A hose clamp can often be used to pinpoint obscure faults in brake pipes – when, for example, there is a spongy feel to the pedal but no visible cause.
Simple Tests to Increase the Reliability of Your Hydraulic Systems
Often the only tests and actions performed on a hydraulic system involve changing the filters, sampling the oil and checking the oil level. As long as the system is operating, the mentality of “if it ain’t broke don’t fix it” frequently prevails. However, on any given system in your plant, you should perform 15 to 20 regular reliability tests while the system is operating. There are also several checks and procedures that should be completed during shutdowns or down days. The following preventive maintenance and reliability tests can help improve the efficiency and operation of your hydraulic systems and machines.
An example of an oil reservoir in a hydraulic system
1 = Heater thermostat 2 = Suction strainer
3 = Switch settings 4 = Breather cap
5 = High-temperature switch 6 = Heat exchanger
Check the Oil Reservoir
A good time to check the oil reservoir is when your plant or system is down. Maintenance mechanics and electricians usually chuckle when I tell them that the reservoir should be cleaned at least once a year. One mechanic at a large wood products plant told me that the reservoir on one system hadn’t been cleaned since the mill started up 17 years ago.
Other than oil storage, the two main purposes of the reservoir are to dissipate heat and to allow contaminants to settle. If the reservoir is not cleaned, not only will its ability to dissipate heat be diminished, but it will act as a heat sink. Temperatures can easily soar well above the maximum recommended level of 140 degrees F. Oil will then start breaking down, leading to sludge and varnish in the system. If the contaminants are not removed from the reservoir, they will be drawn into the pump, causing premature failure of the system components.
Many reservoirs contain a suction strainer to keep large particles from entering the pump. Most suction strainers have a 74-micron rating, whereas the tolerances inside pumps and valves are typically 3 to 8 microns.
Always use a lint-free cloth when cleaning a reservoir. If a solvent is employed, be sure it is recommended for hydraulic systems. Even small amounts of the wrong solvent can impair certain additives.
System Cleaning and Flushing
When oil is removed from the reservoir, it should be filtered going into a storage tank with a flushing and filtering unit, which can remove solid contaminants and water. Use a quality, high-capture-efficiency filter (ISO 16889) that matches the target cleanliness level of the system. Unless the oil is severely degraded, it is not necessary or even desirable to change it.
After the reservoir is cleaned, run the oil through the filters while refilling. The entire system should then be flushed to clean the oil in the lines to the valves and actuators.
System flushing is done by connecting the inlet and outlet lines of the cylinders and motors. If possible, electrically or manually actuate the directional valves to allow the fluid to recirculate through the piping. If this is not possible, bypass the directional valves by connecting the pressure and tank lines to the outlet lines of the actuators. Utilize the machine’s existing pump to recirculate oil through the lines. Connect a high-velocity flushing unit so it recirculates oil in the reservoir through the filters during the flushing process. Allow the system to run for as long as possible.
Verify the Reservoir Heater Setting
Many times the heater is disconnected during the summertime or may have been omitted from the reservoir when it was initially built. Check the heater thermostat on the reservoir to confirm that it will turn on at a minimum of 70 degrees F. If the pump is mounted on top of the reservoir and the oil temperature drops below approximately 60 degrees F, then some cavitation of the pump may occur.
Adjust Oil Level Switches
Most reservoirs utilize two switch settings – warning and shutdown. The problem is that the difference between these two levels may be several hundred gallons of oil. By eliminating the warning switch and setting the shutdown at a higher level, oil loss will be minimal if a hose ruptures.
Check the Breather Cap
The breather cap is usually the most neglected component on the reservoir. Verify that the breather cap filter has a capture efficiency that matches the target fluid cleanliness. This is the first line of defense for contaminants entering the tank. Depending on the location, the breather cap may need to be changed a couple of times a year. Many breathers have a mechanical indicator that will provide a visual indication when the element is dirty. Other options include pressurizing the reservoir with an internal bladder or using a moisture-removal type of breather. Remember that money spent upgrading your breather cap is never wasted.
A flushing unit can be used to remove
solid contaminants and water from the oil.
Set High-temperature Switch
Mineral oil will begin breaking down at 140 degrees F, but many systems will not shut down the unit until the oil temperature reaches 160 degrees F. Hydraulic systems are designed to operate below 140 degrees F. For every 15 degrees F that the oil increases above 140 degrees F, the life of the oil will be cut in half. If the oil temperature rises above that level, then a problem exists in the system. This could be caused by a cooler malfunction or excessive bypassing at the pump. Set the high-temperature switch at 140 degrees F to shut off the pump, preventing oil breakdown.
Heat Exchanger Flushing and Cleaning
In a shell-and-tube type of heat exchanger, oil flows over the tubes. Water flow is ported through the tubes in the opposite direction. The heat in the oil is transferred from the oil to the water. To achieve the most efficient heat transfer, the water flow should be 25 percent of the oil flow. The water flow can be controlled by manual valves, a water-modulating valve or an electrical solenoid valve. Circulating hot wash oil or light distillate through the tube or shell side can effectively remove sludge or similar soft deposits. Soft salt deposits may be washed out by circulating hot, fresh water. A mild alkaline solution such as Oakite or a 1.5-percent solution of sodium hydroxide or nitric acid can be used. The tubes should be flushed in the opposite direction that the oil normally flows.
If an air cooler is employed, verify that the cooler fan is turned on at approximately 120 degrees F and turned off at about 105 degrees F. Keep the fins clean so daylight can be seen through them. If necessary, combs should be utilized to straighten the fins on the unit. When cleaning the fins with an air hose, care should be taken so as not to damage them.
Pump Testing
On variable-volume pumps, check the flow out of the case drain line by porting the line into a container and timing it. This test should be made with the outlet pressure at the maximum level. It is not recommended that the line be held during this test. Secure the line to the container prior to starting the pump. The normal case flow is 1-5 percent of the maximum pump volume. Vane pumps usually bypass more than piston-type pumps. If 10 percent of the maximum volume flows out of the case drain line, then the pump should be changed. An excellent method of monitoring the case drain flow while operating is to permanently install a flow meter in the case drain line.
Fixed-displacement pumps can be tested by checking the flow through the relief valve. Turn on the pump and record the flow out of the relief valve tank line for one minute. Next, reduce the setting of the relief valve to its minimum setting. There should be less than a 10-percent difference in flow rates between the two tests. If a pump is badly worn, the flow will be considerably less at the highest pressure.
Oil purity is shown for a system before
it was flushed (left) and then after one,
four and 16 hours. This particular
system had high water content prior
to flushing.
Accumulator Testing
An accumulator that is used for volume should be pre-charged with dry nitrogen to one-half to two-thirds the pump’s compensator setting. When the hydraulic system is turned off, a charging rig with a gauge can be utilized to check the pre-charge level.
To confirm an accumulator is operating properly, check the side of the shell with a temperature gun or infrared camera. The bottom half should be hotter than the top half. If heat is only indicated at the bottom, the accumulator may be overcharged. If there is no heat, the bladder may have ruptured, the piston seals may be bad, the pre-charge may be above the compensator setting or all the nitrogen may have leaked out. If heat is felt all the way to the top, the accumulator is undercharged.
Another check that can be made is to watch the system pressure gauge while the system is operating. The pressure should not normally drop more than 100-500 pounds per square inch (PSI) when the accumulator is properly pre-charged.
If piston accumulators are used, the charging rig should be installed when the system is down and the oil bled off the top of the piston. With the pump on and the bleed valve open, there should be little or no flow out of the bleed valve. Care should be taken so all personnel are away from the bleed valve prior to turning on the pump. If there is continuous flow, the piston seals or barrel may be worn. If no flow exists, recharge the accumulator to the proper dry nitrogen level.
Test a fixed-displacement pump by turning on the pump and
recording the flow out of the relief valve tank line for one minute.
Check Hoses
Check all system hoses for the proper length and wear. Hoses rarely burst due to the rated working pressure being exceeded but rather because of a poor crimp or rubbing on a beam, another hose, etc. Hose sleeves are available from a variety of manufacturers if rubbing cannot be avoided. Hoses generally should not exceed 4 feet in length unless they move with the machine.
Also, examine the system piping to verify that a hose is installed prior to connecting to a valve bank or cylinder. The hose will absorb the hydraulic shock generated when the oil is rapidly deadheaded. One exception to this rule is that hard piping should be used when connecting to a vertical or suspended type of load. Pilot-operated check valves and counterbalance valves can be employed to hold the load in the raised position.
Continuous flow out of a bleed valve
may indicate worn piston seals.
Inspect Clamps
Inspect system clamps to confirm they are the correct type for hydraulic lines. Beam and conduit clamps are not acceptable, as they will not absorb the shock generated in the piping or tubing. Clamps should be spaced approximately 5 feet apart and installed within 6 inches of the pipe or tubing termination point.
Valve Testing
On any system, one or more valves will be closed while the system is operating. These include relief valves used with pressure-compensating pumps, air bleed valves and accumulator dump valves. The tank lines of these valves should be checked regularly with a temperature gun or infrared camera to verify that the valves are closed and no oil is being lost back to the reservoir.
A reliability and preventive maintenance schedule should be developed for each of the hydraulic systems in your plant. By performing these tests, your systems will operate safer and at maximum efficiency while reducing unexpected downtime.
Read more on hydraulic system best practices:
How Do You Know if You’re Using the Right Hydraulic Oil?
Top 5 Hydraulic Mistakes and Best Solutions
11 Simple Steps for Flushing a Hydraulic System
10 Hydraulic Reliability Checks You Probably Aren’t Making
About the Author
So you have finished reading the how do you test hydraulic brakes for leaks topic article, if you find this article useful, please share it. Thank you very much. See more: brake pressure test kit, the low air pressure warning device should come on at about, hydraulic brake pre trip inspection, school bus hydraulic brake system, hydraulic brake test on school bus, the stop light switch, why should you back toward the drivers side, most of the brake fluid in hydraulic brakes is stored in the