
You are looking for information, articles, knowledge about the topic nail salons open on sunday near me how loud should you record on Google, you do not find the information you need! Here are the best content compiled and compiled by the https://chewathai27.com team, along with other related topics such as: how loud should you record how loud should instruments be in a mix, how loud should the beat be when recording, how loud should vocals be compared to instrumental, how loud should the beat be in a mix, what level should vocals be recorded at, best db level for recording, how to record rock vocals, how loud should rap vocals be
What dB should vocals be recorded at? You should record vocals at an average of -18dB for 24-bit resolution. The loudest parts of the recording should peak at -10dB and be lowest at -24dB. This is to keep an even balance on the level of the vocals without distortion.It is better to record loud audio since it makes the sound more distinct and clear. In contrast, recording quiet audio creates muffled and unclear output. However, one must take measures to prevent distortion or clipping when recording loud.For the most part, your ideal audio level is between -10db to -20db. Your audio should peak around -6db. Never go above 0db, as your audio will distort or “clip.”
Contents
Is it better to record loud or quiet?
It is better to record loud audio since it makes the sound more distinct and clear. In contrast, recording quiet audio creates muffled and unclear output. However, one must take measures to prevent distortion or clipping when recording loud.
How loud should a voiceover be?
For the most part, your ideal audio level is between -10db to -20db. Your audio should peak around -6db. Never go above 0db, as your audio will distort or “clip.”
How quiet should a recording studio be?
A recording studio should be very quiet, only as loud as 25 to 30 decibels or as loud as a library or chapel. A sound studio can minimize the amount of random noise recording equipment picks up when creating sounds for media content. Soundproofing the room can lessen this interference.
How many decibels is recording?
25 – 30 decibels
In a studio environment, this allows for a dry, clinical sound, and a clean recording.
How loud should my vocals be in a mix?
Here’s how loud your vocals should be in a mix: Your vocal level should be lower than the drums, but louder than the instrumentation. Vocal mixing to a professional level, however, requires more nuanced decisions than that to get your vocals to sit right.
Should I record as loud as possible?
If recording at a 24 bit depth (as you should be) aim for your average level to be -18 dBFS – this way you have 18 dB of headroom for any peaks that may occur – without causing clipping. You should be recording no louder than -6 db. Rule of thumb is between -12 and -6 db always.
What level should audio be recorded at?
According to Pike, your audio level should stay on the negative side of the number scale and never go above 0. Anything above this results in distortion, which will make your audio torture to listen to. He suggests keeping your level at around -10 to -12, but this can vary depending on your project and your subject.
How loud should my master be?
Quick answer: RMS levels for loud, in your face tracks, should range between -7dBFS and -12 dBFS. For more subdued music, go lower at -16dBFS. The minimum we recommend going is -18dBFS.
How many dB Should music be?
Experts recommend keeping sound levels at somewhere between 60 and 85 decibels to minimize the damage your ears are exposed to. If you are listening to music at around 100 decibels, restrict your usage to within 15 mins.
How many dB is a quiet room?
To qualify for the Quiet Room® label the airborne sound insulation between rooms must be between 52 dB and 62 dB.
How loud is too loud for background noise?
common noise levels – how loud is too loud? Continued exposure to noise above 70 dBA (adjusted decibels) over time will cause hearing loss.
What dB level should YouTube videos be?
Currently, YouTube videos normalise their full audio mix (all audio combined) between -12db to -20db. By having your audio between this benchmark, it will improve the quality of your video, the overall watch time and user experience for your viewers.
How many dB should a mastered song be?
How loud should your master be? Shoot for about -23 LUFS for a mix, or -6db on an analog meter. For mastering, -14 LUFS is the best level for streaming, as it will fit the loudness targets for the majority of streaming sources, but it’s okay to go louder (-7 to -10) so that your music stacks up well on other mediums.
Why don’t my vocals sound professional?
If your vocal is dynamic in volume, the compressor may have to work hard to level things out. When a compressor is working too hard, it can cause your vocal to sound “squashed.” If this is the case, you may need to ride the volume of your vocal to reduce the amount of hard peaks in volume.
How loud should my melody be?
The ideal listening range for most home studios is around 73-76dB SPL. But mixers have no control over how loud people listen to music. Only how loud each element is in the track. That’s why it’s crucial to make sure that your mix is balanced and each instrument is at the proper level relative to the other channels.
Do records get quieter over time?
Some records that have been played hundreds of times become quiet over time. This is common with original pressings from many years ago. When a record is ‘played out’ it is not only much quieter, but the sound suffers as well.
Why are some records so quiet?
Because vinyl records are a physical medium of recorded audio waveforms, the record itself is going to have some natural limitations on how loud it can be pressed before the needle has difficulty tracking the record.
Is It Better To Record Loud Or Quiet Audio? – Home Studio Expert
- Article author: homestudioexpert.com
- Reviews from users: 49906
 Ratings
 - Top rated: 3.9
- Lowest rated: 1
- Summary of article content: Articles about Is It Better To Record Loud Or Quiet Audio? – Home Studio Expert Updating …
- Most searched keywords: Whether you are looking for Is It Better To Record Loud Or Quiet Audio? – Home Studio Expert Updating Several factors go into recording audio, such as the type of microphone, your position in relation to the mic, and the distance between you and the mic.Several factors go into recording audio, such as the type of microphone, your position in relation to the mic, and the distance between you and…
- Table of Contents:
What Are the Ideal dB Levels for Recording My Audio
Should the Beat Be Louder Than the Vocals
How Do I Get the Best Sound When Recording
Conclusion
Sources
LEGAL INFORMATION
How to Do Voice Over Like a Pro: The Complete Guide | The TechSmith Blog
- Article author: www.techsmith.com
- Reviews from users: 21823 Ratings
- Top rated: 3.7
- Lowest rated: 1
- Summary of article content: Articles about How to Do Voice Over Like a Pro: The Complete Guide | The TechSmith Blog Updating …
- Most searched keywords: Whether you are looking for How to Do Voice Over Like a Pro: The Complete Guide | The TechSmith Blog Updating Learn to create voice overs that grab the audiences attention. A complete guide to mastering the art of a video voice over.
- Table of Contents:
The Easiest and Fastest Way to Record and Edit Voice Over Audio!
What is a voice over
Why is a good voice over important for your video
The essential elements of a good voice over
The Easiest and Fastest Way to Record and Edit Voice Over Audio!
How can I make my voice sound better on voice overs
How to record a voice over
The Easiest and Fastest Way to Record and Edit Voice Over Audio!
Don’t forget the captions and audio transcription
How’s it feel to be a voice over pro
The Easiest and Fastest Way to Record and Edit Voice Over Audio!
Post navigation
Subscribe to TechSmith’s Newsletter
How Quiet Should A Recording Studio Be? – Home Studio Expert
- Article author: homestudioexpert.com
- Reviews from users: 7578 Ratings
- Top rated: 3.9
- Lowest rated: 1
- Summary of article content: Articles about How Quiet Should A Recording Studio Be? – Home Studio Expert Updating …
- Most searched keywords: Whether you are looking for How Quiet Should A Recording Studio Be? – Home Studio Expert Updating A recording studio is an integral part of making TV, music, podcasts, and radio shows. All the music you like, your favorite cartoon or soap opera, and evenA recording studio is an integral part of making TV, music, podcasts, and radio shows. All the music you like, your favorite cartoon or soap…
- Table of Contents:
What Is a Recording Studio
Noise Limit in a Recording Studio
How To Soundproof a Room for a Recording Studio
Conclusion
Sources
LEGAL INFORMATION
Acceptable Sound Levels Explained | Lighthouse Acoustics
- Article author: www.lighthouseacoustics.co.uk
- Reviews from users: 32541 Ratings
- Top rated: 3.5
- Lowest rated: 1
- Summary of article content: Articles about Acceptable Sound Levels Explained | Lighthouse Acoustics Updating …
- Most searched keywords: Whether you are looking for Acceptable Sound Levels Explained | Lighthouse Acoustics Updating Lighthouse Acoustics’ useful little guide to recommended sound levels in a number of public and private environments.
- Table of Contents:
How Loud Should Vocals Be In A Mix? Simple Steps To A Pro Vocal Sound
- Article author: www.whippedcreamsounds.com
- Reviews from users: 28884 Ratings
- Top rated: 4.0
- Lowest rated: 1
- Summary of article content: Articles about How Loud Should Vocals Be In A Mix? Simple Steps To A Pro Vocal Sound Updating …
- Most searched keywords: Whether you are looking for How Loud Should Vocals Be In A Mix? Simple Steps To A Pro Vocal Sound Updating Learn how loud your vocals should be in a mix, to get the most cohesive sound possible. This article will cover everything you need to know.
- Table of Contents:
What dB Should Vocals Be in A Mix
How Loud Should My Vocals Be Compared To My Beat
How Do Professionals Mix Their Vocals (Quick Steps)
1 How Should I Record My Vocals
2 How Do You Set EQ for Vocals
3 How Should I Compress Vocals
4 Using Sidechain to Create Vocal Space in a Busy Mix
5 What Reverb Should You Use on Vocals
6 Should I Use Echo on Vocals
7 Should I Use Delay on Vocals
Summary

Proper audio recording levels: how loud should I record?
- Article author: www.mixinglessons.com
- Reviews from users: 6375 Ratings
- Top rated: 3.5
- Lowest rated: 1
- Summary of article content: Articles about Proper audio recording levels: how loud should I record? How loud should you record to achieve proper audio recording levels? … So whats the answer? Well, it’s a great ea to try and reintroduce the … …
- Most searched keywords: Whether you are looking for Proper audio recording levels: how loud should I record? How loud should you record to achieve proper audio recording levels? … So whats the answer? Well, it’s a great ea to try and reintroduce the … Confused by all of the conflicting info online? This article takes away the confusion and tells you exactly how to achieve proper audio recording levels
- Table of Contents:
Signal to noise ratio
Noise Floor
So where does the notion that we need to record as loudly as possible without clipping come from
The risk of recording too hot
There’s really no benefit to recording so hot if you want to set proper audio recording levels
How loud should you record to achieve proper audio recording levels
Get the best results from EQ compression vocals & drums with the FREE ‘Home Studio Bundle’

How loud or Hot should I record? – Gearspace.com
- Article author: gearspace.com
- Reviews from users: 36045 Ratings
- Top rated: 4.2
- Lowest rated: 1
- Summary of article content: Articles about How loud or Hot should I record? – Gearspace.com You should be recording no louder than -6 db. Rule of thumb is between -12 and -6 db always. Recording at -4 Is going to cause you serious … …
- Most searched keywords: Whether you are looking for How loud or Hot should I record? – Gearspace.com You should be recording no louder than -6 db. Rule of thumb is between -12 and -6 db always. Recording at -4 Is going to cause you serious … How loud or Hot should I record?, gearspace, gearspace.com, gearslutz, gearslutz.com, recording, studio, microphone, mic pre, compressor, equalizer, pro tools, DAW, Cubase, SSL, Neve, Helios, review, reviewsOriginally Posted by thehightenor Personally I aim for peaks at -18dBFS on my HEDD 192 meters at tracking. Limiters and compressors in the tracking cha
- Table of Contents:
Similar Threads
RME Fireface UFX
Evaluating ADDA loops by means of Audio Diffmaker
Audio Interface – Low Latency Performance Data Base
Gear discussed
on this page
in this thread

How Loud Should a Vocal Be In a Mix [Right dB Level]
- Article author: blacktidemusic.com
- Reviews from users: 13600 Ratings
- Top rated: 4.9
- Lowest rated: 1
- Summary of article content: Articles about How Loud Should a Vocal Be In a Mix [Right dB Level] Thus, it is best to record vocal renditions with an average of -18 dB, assuming you are using the standard definition 24-bit. However, louder … …
- Most searched keywords: Whether you are looking for How Loud Should a Vocal Be In a Mix [Right dB Level] Thus, it is best to record vocal renditions with an average of -18 dB, assuming you are using the standard definition 24-bit. However, louder … In the question of what dB should vocals be, you should understand that the average decibels will be the “golden mean”.
- Table of Contents:
Should vocals be louder than the beat
In comparison to instrumental music how loudly should vocals be
Do vocals have any specific frequency ranges
How do I mix vocals properly
![How Loud Should a Vocal Be In a Mix [Right dB Level]](https://blacktidemusic.com/wp-content/uploads/vocal-in-a-mix.jpg)
Error 403 (Forbidden)
- Article author: www.quora.com
- Reviews from users: 40526 Ratings
- Top rated: 4.9
- Lowest rated: 1
- Summary of article content: Articles about Error 403 (Forbidden) NEITHER! You should always try to get your levels to the maximum without distortion. If you record too loud, then there is nothing that you do later to fix … …
- Most searched keywords: Whether you are looking for Error 403 (Forbidden) NEITHER! You should always try to get your levels to the maximum without distortion. If you record too loud, then there is nothing that you do later to fix …
- Table of Contents:
What DB Level Should I Record Vocals? – Music Studio Insights
- Article author: musicstudioinsights.com
- Reviews from users: 37429 Ratings
- Top rated: 3.7
- Lowest rated: 1
- Summary of article content: Articles about What DB Level Should I Record Vocals? – Music Studio Insights When recording vocals you should be aiming for -18dB to -6dB. … Listening to the vocals too loud or too quiet may cause you to incorrectly … …
- Most searched keywords: Whether you are looking for What DB Level Should I Record Vocals? – Music Studio Insights When recording vocals you should be aiming for -18dB to -6dB. … Listening to the vocals too loud or too quiet may cause you to incorrectly … Vocals can often play such an important part of any type of recording. As a producer or artist, it is crucial that you know the right decibel levels to
- Table of Contents:
What Is The Best Decibel Level To Record At
What is Mixing and Why is it Important
The Importance of Mastering
Recording Tips To Get The Best Sound Possible
What Is Audio Clipping and Why Do We Want To Avoid It
Related Questions
Top Articles

See more articles in the same category here: https://chewathai27.com/toplist.
What dB Should Vocals Be Recorded at and Why? – Musicians HQ
When you’re recording vocals, the level of decibels (dB) you record at is important. If you record the vocals at a level that is too quiet, they will not be understood over the other tracks on the mix, such as the instrumentals or the backbeat. If you mix them too loudly, they will stick out.
What dB should vocals be recorded at? You should record vocals at an average of -18dB for 24-bit resolution. The loudest parts of the recording should peak at -10dB and be lowest at -24dB. This is to keep an even balance on the level of the vocals without distortion.
Why is decibel range so important when it comes to recording vocals? Read on to find out more about what decibels actually are and how their levels affect sound recording quality.
What Are Decibels in Vocal Recordings?
A decibel (dB) is an extremely varied unit of measurement, but when it pertains to acoustics such as those used in vocal recordings, a decibel refers to a unit of sound pressure level.
While the decibels in a sound are what determine how loud it is to the human ear, decibels are not actually a measurement of something’s loudness. In music, decibels are not only used to describe aural sound levels, but also voltage and power in musical and recording electronics.
A decibel is a different unit of measurement than a hertz (Hz), which you will often see in relation to sound engineering. As opposed to decibels, a hertz describes the frequency of a sound, rather than its loudness.
Decibels are important as a unit of sound measurement because the human range of sensitivity to sound is very wide, which means it is easy for some background sounds to drown out the sound you want to be heard most clearly on your recording.
What is Bit Depth and Resolution in Vocal Recordings?
In digital sound engineering, bit depth refers to the number of bits of information present in each audio sample. In 24-bit resolution, there are 24 bits of information in each audio sample.
An example of this in recording is the difference between compact discs (which record at 16-bit resolution) and Blu-ray discs (which records at 24-bit resolution).
Bit depth affects audio resolution, which in turn affects how clear and defined an audio sample sounds to the ear. 24-bit resolution is considered “high definition” resolution in recording both audio and video. It also refers to a higher than 44.1 kHz sample rate.
Why Is It Preferable to Record Vocals at 24-Bit Resolution?
Because of the precision of high definition recording, with 24-bit resolution you can record at -12dB or -14BdB and even when you raise the level (if you have to) the amount of noise in the noise floor you’ll add is negligible.
Recording at lower levels of bit resolution gives the sound engineer less wiggle room to work with, and these recordings are more inclined to noise floor issues and audio clipping at the lowest and highest levels of the recording range.
Balance Is Important in Determining Decibel Levels for Vocal Recording
The reason decibel levels are important for vocal recording is because sound engineering is about achieving balance for the best aural experience.
You don’t want the decibel levels so quiet that you don’t have enough gain to work with when mixing, but you also don’t want the decibel levels so high you’re hitting the ‘red’ every time, as this can cause audio clipping.
Sound Engineering Concepts and Vocal Recording
There are a couple of concepts with regards to sound engineering that you need to grasp in order to understand why vocal recordings should be done at a certain level of decibels. These concepts consist of the following:
Noise floor
The noise floor is the quietest region of audio tracks where all you can hear is the hiss and hum of the recording equipment. These portions of an audio track are muted when mixing the master tape.
Noise floor can be caused by a number of different things such as thermal noise, black body, cosmic noise, atmospheric noise, and electromagnetic incompatibilities. To lower the noise floor, recording equipment should be cooled to reduce thermal noise.
To reduce noise floor, vocalists recording in their home studio often record in vocal tents that muffle reverberation and ambient noise. Compression also makes the noise floor higher so if you are compressing vocal tracks during input, keep it light.
On vocals, the noise floor will usually not be an issue unless you’re recording a very soft and sparse ballad or are trying to record a vocalist who doesn’t project very well.
Distortion ceiling
The distortion ceiling is the opposite of the noise floor and is the loudest region of audio tracks. It is called the distortion ceiling because this is where your audio clipping is most likely to occur.
Every component in a speaker or recording system will change the audio signal and add its own form of distortion along the way. Distortion becomes a serious problem even at levels below 1%, as human ears are receptive to a wide range of sound frequencies.
Not only that, the human brain is designed to seek out patterns and distortions break the patterns in a sound in a way that distracts the brain from the vocalist. This is one of the primary reasons for poor sound quality in relation to recording.
Dynamic range
The dynamic range of an audio track is the range of decibel levels that fall between the distortion ceiling and the noise floor. The dynamic range of a vocal recording should peak at -10dB and be lowest at -24dB (best level is -18dB).
Dynamic range compression (known more commonly as just compression) is the process of reducing the decibel levels of loud vocals and amplifying soft vocals that reduces or compresses the dynamic range.
In recording vocals, compressing the vocals to fit an ideal decibel range can help make the vocals more clearly audible, but can also introduce distortion.
Hot recording vs. cold recording:
When sound engineers talk about hot recording versus cold recording, they are talking about the balance between recording a sample at decibel levels that are too high versus decibel levels that are too low.
If you record your vocals too cold (or quiet), you will have to raise the audio levels later in mixing and this, in turn, will introduce background noise in the noise floor that you don’t want on your track. If you record your vocals too hot (or loud), you risk audio clipping.
Headroom
Headroom is the range that sound engineers attempt to allow in the upper decibel levels of a dynamic recording range in order to account for the varying volumes of vocals or musical instruments.
Not leaving enough headroom in your decibel levels is what leads to audio clipping. Think of it as leaving enough extra range in the top for when the vocals get louder than usual in the track.
Gains
On a mixer board, the gain is the first control that the raw mic signal sees. Gain occurs before any other effects processing and will boost the original signal to a sufficient level for the rest of the controls on a mixer board to work properly.
Gain should be set at a high enough level to bring up the signal, but not so high as to create clipping or distortion.
Why are these concepts important in vocal recording? The vocals are arguably the most important part of a record track, whether you’re recording a narration or someone singing over instrumentals.
That’s why it’s crucial to have your decibel levels and gain set correctly so that the vocal recording is neither too soft to hear properly nor breaking up with distortion from being recorded too loudly.
How Loud Should Vocals Be in A Recording Mix?
Because the vocal track of a song is usually the most important element, the lead vocal should be moderately loud and the loudest element in a mix next to the drums.
How loud the vocals in a recording mix are will depend on the type of vocals and the style of music you are creating Some styles of music require that the vocalist’s voice be more forward than the background instrumentals, while other types of music are instrument-centric, and the voice is considered the background.
The loudness of the vocals is also dependent on the timbre of the singer or speaker’s voice. Some vocalists have a powerful timbre and naturally project with a forceful tone, whereas others are more soft-spoken and the levels of their vocal recordings will need to be turned up.
Before doing a serious audio take, try to take some sample clips of a vocalist’s speaking or singing voice and use them to gauge the gains you need to set for the true recording.
What Is Audio Clipping in Vocal Recording?
Audio clipping is when a vocal recording is created at too high a level of decibels, and the vocals therefore become distorted. This is known in the sound engineering industry as audio clipping, and it is one of the biggest things sound engineers strive to avoid when recording, because there is nothing you can do to fix this in the mixing process.
Audio clipping is a form of waveform distortion caused when an amplifier is pushed to deliver an output voltage higher than its maximum capability. In visual terms, this is when a sine wave hits its ceiling and becomes a square wave.
When recording vocals, you should generally not allow the recording to reach -0.1dB, as this is the range that risks audio clipping.
Is Audio Clipping Always A Bad Thing in Vocal Recordings?
Some sound engineers feel that some digital audio clipping is not a terrible thing and that it’s better to rely on your ears to determine whether audio is distorting or not, rather than the meter.
To avoid possible distortion though, it’s always better to give yourself plenty of headroom so that you don’t have to worry about it at all. In vocal recording, clipping should be avoided as much as possible, as you don’t want any distortions that will make the sound of the vocal track less clear.
If you find yourself consistently in the red when recording vocals, you might need to choose speakers able to recreate the levels desired and then match the speakers with an amplifier powerful enough to drive the speaker system.
It would potentially be a significant financial investment, but higher quality amplifiers are designed to provide peak power quickly. This ensures accurate playback and quality recordings.
Proper Gain Setting and Recording Vocal Tracks
Learning correct gain staging for all of your personal gear (analog and digital) is critical for getting good recordings and mixes. One way to set your gains without actually recording vocals is to set your gains via test tones.
By using test tones, you can determine at what point your equipment will begin to clip. You can also watch an oscilloscope to see exactly where the sound wave “squares out.”
This is the point that the sine waveform is lopped off on the top and causes the sound wave to be clipped off. Proper gain setting is important to avoid clipping.
How to Record Good Vocals
There are a few steps you can take along with adjusting your decibel levels to ensure that you get a good vocal recording. Here are some of the things you can do to make your vocal recording as clear and precise as possible:
Choose a room with good acoustics
This means choosing a room that doesn’t have too many reflective surfaces to cause reverberation, as well as a room that is not too muffled.
Reverberation makes pitch corrections more difficult and can make post-production dynamic processing sound unnatural, while too much sound absorption in a room leads to muffled highs and unnatural sound.
Good acoustics require a mix of these two factors, so experiment with your recording equipment and find an area that yields good balanced results.
Microphone position is important
Do not position your microphone in the center of a room to avoid the build-up of standing waves that can cause distortion in the sound.
Instead, position the microphone as far from reflective surfaces (such as walls) as possible, just off-center in the room.
Evaluating the Rough Vocal Mix Recording
When you’re evaluating a rough vocal mix, listen to the mix with your eyes closed to check the levels from an aural standpoint.
It can be overwhelming to try and track vocal recording quality with the mixing board, but the most important thing about a sound recording is what it sounds like, so use your ears and listen carefully to assess the sound quality as well as the decibel level of the recording.
Closing your eyes can shut out alternative sensory input and can increase your ability to hear background noise.
Once you have evaluated the rough vocal mix yourself, bring in someone that hasn’t heard the vocal recording before and have them listen with their eyes closed to check the decibel levels.
How to Adjust Levels on a Rough Vocal Mix
If you evaluate your rough vocal recording and you can’t hear the speaker/singer or find yourself straining to listen to them, drop the background music levels down 2dB and then listen again.
Repeat this process until the vocal recording plays back at a desirable decibel level without being drowned out by other tracks on the recording.
This process is the reason that leaving both headroom and space above the noise floor in your sound recording is important.
If you record your vocals too quietly, you will have difficulty hearing them without quieting the other tracks, which can introduce unwanted noise at the noise floor if you have to turn them down too low.
Learning to Listen to Vocal Tracks is Key
Along with choosing correct decibel levels for vocal recording, it’s important to learn how to listen to vocal tracks to figure out how to incorporate the elements in those tracks you’d like to emulate in your own.
Listen critically to vocal records you’d like to imitate, even if you only listen for a single element of the track. If you listen to some of your favorite records on high-quality headphones or monitor speakers, you’ll notice that the noise floor in some of the most legendary vocal tracks in history is fairly high.
Just because a track has a high noise floor doesn’t mean it won’t sound good, and it’s better to have a high noise floor than record too hot and experience audio clipping, which never sounds good if it is perceivable to the ear.
Decibels are Not an Exact Science
While it is easy to give an average level of decibels for you to record vocals at, the range of the human voice and the range of sound recording equipment available means that the optimal dynamic range for recording can change a lot depending on what equipment you’re using.
You should aim for an average of -18dB for a vocal recording to avoid both clipping and a loud noise floor, but the most important things for successful vocal recordings are to know your equipment well and to provide the vocalist with a recording studio that features good acoustics.
Is It Better To Record Loud or Quiet Audio?
Several factors go into recording audio, such as the type of microphone, your position in relation to the mic, and the distance between you and the mic. However, it is often debated whether the loudness of recorded audio affects its quality. So, is it better to record loud or quiet audio?
It is better to record loud audio since it makes the sound more distinct and clear. In contrast, recording quiet audio creates muffled and unclear output. However, one must take measures to prevent distortion or clipping when recording loud.
This article will explain the benefits and drawbacks of recording loud or quiet audio and recommend the ideal volume for recording audio. Read on for more details and tips on getting the best audio quality when recording.
What Are the Ideal dB Levels for Recording My Audio?
Whether you’re recording a video or audio, one of the critical things to consider is the volume level. If it’s too loud, it can distort the sound and make it difficult to hear. On the other hand, it can be hard to hear what’s being said if it’s too quiet. So what’s the ideal dB level for audio?
-12 to -6dB are the ideal dB levels for recording your audio. Recording at these levels will ensure your recording sound is clear and easy to understand. Besides, they will also help prevent distortion and clipping.
However, there may be times when you need to adjust the volume depending on the situation. For example, if you’re recording a video of a live concert, you may want to boost the volume so that the audio is louder than the ambient noise.
On the other hand, if you’re recording an interview, you may want to lower the volume so that the person’s voice is the dominant sound.
Recording Loud Audio: Pros and Cons
Since you already know the ideal volume for recording audio, let’s look at the pros and cons of recording loud audio. After all, just because the volume is turned up doesn’t mean it will automatically be better quality.
Pros
Loud audio is easier to hear and understand. This is especially true if you’re recording in a noisy environment.
This is especially true if you’re recording in a noisy environment. Loud audio is more distinct. When audio is recorded at a higher volume, the sound waves are more distinct. This makes it easier to identify different sounds, such as footsteps or doors closing.
When audio is recorded at a higher volume, the sound waves are more distinct. This makes it easier to identify different sounds, such as footsteps or doors closing. Loud audio has less background noise. Since loud audio is more dominant, the background noise is less likely to be heard.
Cons
Loud audio can distort the sound. If the volume is turned up too high, it can cause the sound to distort. This makes it difficult to understand what’s being said.
If the volume is turned up too high, it can cause the sound to distort. This makes it difficult to understand what’s being said. Loud audio can be overwhelming. In some cases, loud audio can be so overwhelming that it’s unpleasant to listen to.
Recording Quiet Audio: Pros and Cons
Although I’ve mentioned, you should record at a higher volume to get better audio quality. But what would happen if you record at a lower volume instead? To understand this, let’s look at the benefits and drawbacks of doing so.
Here are the pros and cons of recording quiet audio:
Pros
Quiet audio is more intimate. Recording audio at a lower volume creates a more intimate feeling. This can be beneficial if you’re trying to evoke a certain mood or atmosphere.
Recording audio at a lower volume creates a more intimate feeling. This can be beneficial if you’re trying to evoke a certain mood or atmosphere. Quiet audio is less likely to distort. Since the volume is turned down, there is less of a chance that the sound will distort.
Since the volume is turned down, there is less of a chance that the sound will distort. Quiet audio can be more relaxing. In some cases, quiet audio can be more relaxing than loud audio. That’s because it’s not as overwhelming to listen to.
Cons
Quiet audio can be difficult to hear. If the volume is too low, it can be hard to hear what’s being said.
If the volume is too low, it can be hard to hear what’s being said. Quiet audio can be muffled. When audio is recorded at a lower volume, the sound waves are more likely to be muffled. This makes it difficult to understand what’s being said.
When audio is recorded at a lower volume, the sound waves are more likely to be muffled. This makes it difficult to understand what’s being said. Quiet audio can have more background noise. Since quiet audio is less dominant, the background noise is more likely to be heard.
Should the Beat Be Louder Than the Vocals?
The beat shouldn’t be louder than the vocals in general. This is to ensure the words being uttered are clear and understandable. However, if the vocals are too loud, they can start to sound harsh and overdone.
Therefore, it’s important to find the right balance between the two. If you’re unsure how loud the vocals should be, start by recording them at a moderate level and then adjust accordingly.
How Do I Get the Best Sound When Recording?
Many people believe that getting great sound when recording is all about the equipment. While it is true that high-quality gear can make a difference, several other factors also play a role in getting great sound. So, how do you get the best sound when recording?
Here are a few ways to get the best sound when recording:
Get a quality microphone.
Use an acoustic treatment.
Record in a quiet environment.
Eliminate background noise.
Experiment with different recording techniques.
I’ll describe each of these below:
Get a Quality Microphone
If you’re serious about getting great recordings, you need to invest in a quality microphone. A good microphone will capture all the detail and subtleties of your performance, giving you a rich, full sound.
It’s also important to make sure that the microphone is positioned correctly. For example, if you’re recording vocals, you’ll want to place the mic close to the mouth but not so close that it picks up breath noise.
You’ll also want to experiment with different microphone techniques, such as using a pop filter or adjusting the mic’s angle. By getting a good quality recording, your music will sound its best.
Use an Acoustic Treatment
Most people don’t think about acoustic treatment when recording, but it’s one of the most important aspects of getting good sound. Acoustic treatment helps reduce reflections and absorb unwanted noise, resulting in a cleaner recording.
There are a variety of acoustic treatments available, so it’s important to choose the right one for your needs. For example, if you’re recording in a small room, absorption panels can help control noise levels. If you’re recording outdoors, windscreens can help reduce wind noise.
By choosing the right acoustic treatment, you can get the best sound possible when recording.
Here’s an excellent primer on how to acoustically treat a room:
Record in a Quiet Environment
It’s important to record in a quiet environment to get the best sound quality for your recording. Background noise can distract from the primary sound source and make it difficult to hear the nuances of the recording.
Additionally, ambient noise can cause clipping and other distortions that can reduce the quality of the recording. For the best results, find a room or space that is acoustically treated or otherwise free from excessive noise.
Eliminate Background Noise
Eliminating background noise is another sure-fire way to get the best sound possible when recording. This noise can come from traffic, air conditioners, and even noisy appliances in your own home.
Here are a few easy ways to eliminate background noise:
Use a noise gate.
Move the microphone closer to the sound source.
Record in a quiet environment.
Use a windscreen when recording outdoors or in windy locations. I recommend this Mudder Foam Mic Cover from Amazon.com. It comes with thick, soft, and elastic foam for a snug fit on most microphone sizes. Besides, it protects your microphone from damage, moisture, and dust.
Mudder 5 Pack Foam Mic Cover Handheld Microphone Windscreen (5 Pack) Microphone cover set: 5 pieces foam mic cover, 2.9 x 2.5 inches, caliber size is 1.4 inches, suitable for most standard handheld microphone, not for headset mic
Thick and soft foam: the ball-type foam microphone windscreen is soft and thick, has good elasticity and shrinkage, convenient to set on the microphone
Widely application: the foam ball windscreen for microphone is suitable for ktv, dance ball, conference room, news interviews, stage performance and other places
Last update on 2022-07-21 / Affiliate links / Images from Amazon Product Advertising API
Experiment With Different Recording Techniques
Finally, don’t be afraid to experiment with different recording techniques. There are various ways to set up your equipment, so it’s important to find the method that works best for you.
For example, if you’re recording a solo instrument, you may want to try using a stereo mic technique. It involves placing two microphones around the instrument, one on each side. Doing this will give you a more natural sound—closer to how the equipment would sound in a live setting.
There are many other recording techniques you can experiment with, so it’s important to find the ones that work best for you and your music. By taking the time to experiment, you can get the best sound possible when recording.
Pro Tip: Besides the above techniques, I recommend investing in a decent digital audio workstation, such as Pro Tools, and a quality laptop. This article provides in-depth information on the best laptops for this DAW.
Conclusion
It’s better to record loud audio as it enables you to get a clean recording with minimal distortion. It’s also important to use an acoustic treatment, record in a quiet environment, and eliminate background noise.
Finally, don’t be afraid to experiment with different recording techniques. By taking the time to find the method that works best for you, you’ll be able to get the best sound possible when recording. Good luck recording!
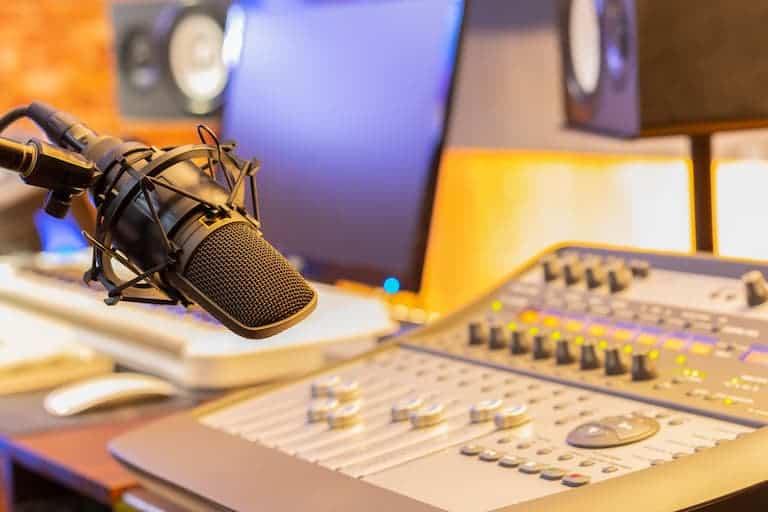
How to Do Voice Over Like a Pro: The Complete Guide
If you make videos — especially how-to and explainer videos — you will almost certainly need to record voice overs. In fact, depending on how many videos you create, you may have to do a lot of voice over work.
For many people, the thought of recording their voice and sharing it with the world is horrifying. Or at least genuinely uncomfortable.
But it doesn’t have to be difficult or stressful!
So how do you record voice overs that grab and keep your audience’s attention?
You’re about to find out!
Here’s what you”ll learn:
The Easiest and Fastest Way to Record and Edit Voice Over Audio! Audiate makes recording and editing your voice as simple as editing text in a document. Try Audiate for Free
What is a voice over?
A voice over recording (often just “voice over”) is a person speaking (but not seen) during a video — often describing, highlighting, explaining, or providing additional context to what a viewer sees.
It’s often confused (or equated) with narration. And, while they are similar, they are not quite the same thing.
Narration is a specific type of voice over that describes all of the on-screen action, often telling a story based on what’s happening.
Non-narration voice overs are more common with instructional, informational, and educational videos, while narration is more commonly used for entertainment.
An easy way to think about it: All narration is a voice over, but not all voice overs are narration.
Why is a good voice over important for your video?
Some might think that the audio portion of a video is less important than the visual portions, but that’s not true.
Most video watchers say they are more likely to stop watching a video with bad audio vs. lower-quality video.
In fact, a recent TechSmith study of video viewing habits showed that more than 25% of video viewers watched a video all the way through because the audio was good — more than those who said professional video style was most important.
It’s really not that surprising. While the on-screen elements of your video are what makes it a video, in many cases, it’s the voice over that helps people truly understand what’s being shown.
Muddy, muffled, or otherwise garbled or difficult-to-understand audio tracks are frustrating to viewers. And, for people who are blind, but still need the information your video provides, good audio is absolutely essential for their consumption.
So great audio isn’t just important. It’s necessary to keep an audience interested and engaged — and to ensure they learned what they needed to.
Do I need a professional voice talent for great voice over?
The short answer: No.
Just because quality voice over is important for the success of your video, that doesn’t mean you need to go to great lengths to get it.
A lot of people think you need to have one of those super-snazzy radio voices to do good voice overs for your videos.
That just isn’t true. Sure, if you have the budget and you’re making professional videos, you can hire professional voice over talent But it’s really not necessary.
Using the tips in this guide, you’ll discover that most videos don’t need professional voice over. You can do it yourself!
So, how can you record your voice over a video?
It helps to know what good voice over is.
The essential elements of a good voice over
When most of us think of great video voice overs, we probably think of great actors like Morgan Freeman or James Earl Jones. We tend to associate voice over with having a really great voice. And, while that can help, it’s not necessary.
In fact, with practice, nearly anyone can do professional-quality voice over work.
Great video voice audio over comprises several elements:
Audio clarity and volume
Pacing
Vocal tone and inflection
Pronunciation
1. Audio clarity and volume
The clarity of your voice and a comfortable volume may be the most essential parts of great audio. If your voice over recording is fuzzy or muddy sounding, it will be difficult for people to understand. Audiences will be distracted and unable to absorb the information or may simply move on. Either way, they miss your message and you miss an opportunity to share what your knowledge.
Similarly, if your audio’s volume is too low, it may be difficult for people to hear. Too loud and you risk annoying distortion.
Luckily, there’s a pretty solid sweet spot for volume. See the section on recording your voice over for more information on audio levels.
2. Pacing
Ever talk with someone who has a really exciting story to tell, but they’re so excited about it that they rush through it and when they’re done you can’t even remember what they were talking about? Or, someone who drones on and on with no end in sight, threatening to put you to sleep?
This is pacing. Too fast and your audience won’t know what hit them. To slow and they’re likely to get bored. The best voice overs have a natural and deliberate pace. Start with a script and practice it before you record to help you speak at a more natural pace.
And remember, pacing also includes things like pausing occasionally to take a breath, for effect, or just to give them listener a break to process important information.
3. Vocal tone and inflection
Like pacing, vocal tone and inflection refer to ensuring you speak in a natural and pleasant manner. You want to be friendly and engaging, but not so much that you sound fake.
No one wants to sound like a game show host. But, you also want to avoid monotone robot voice which, like pacing that’s too slow, can be boring and off-putting for listeners.
4. Pronunciation and enunciation
The final element of great voice over work is ensuring that you pronounce each word correctly and that you speak clearly enough to be understood. Avoid mumbling — but don’t shout or over-enunciate, either.
Be mindful of your regional accent (yes, we all have them) and pronunciations as they relate to your audience. While it’s perfectly acceptable to “warsh” your hands in Missouri or have a great “idear” in New England, those pronunciations may confuse people from other locations.
Don’t worry, though. No one expects you to sound like a professional voice actor. The best thing you can do is speak naturally and clearly and the rest will follow with practice.
The Easiest and Fastest Way to Record and Edit Voice Over Audio! Audiate makes recording and editing your voice as simple as editing text in a document. Try Audiate for Free
How can I make my voice sound better on voice overs?
This is the number-one issue most people bring up when they have to do voice over work for their video.
Let’s face it. Most of us rarely have to hear our own voices in audio recordings. We’re used to the rich, warm sound of our own voices in our own ears. There’s no way around the fact that you sound different on recording that you do to yourself.
So how do you stop hating the sound of your own voice?
The answer, unfortunately, is that you just have to get used to it.
Think of it this way: Your voice on recordings is how you actually sound to everyone around you. When you speak to others, that’s what they hear. the only one who hears a difference is you.
So, there’s really nothing to be embarrassed about, is there?
In all seriousness, though, everyone who does voice work has to overcome this hurdle. Luckily, like most things, it gets easier the more you do it. Do enough voice over work and soon your voice on recordings will sound almost as natural to you as the one you hear in your ears.
If you simply can’t get over it, though. You can always enlist the help of another person. You can grab a friend or colleague, or you can even hire a professional to do the work for you.
How to record a voice over
1. Preparing to record
Not all videos need a ton of preparation. Quick one-off screencasts or a fast demonstration of a new user interface for a colleague probably can be done mostly on the fly.
But, for videos where you want a more polish or that need to cover more information, a bit of preparation goes a long way.
Find a quiet place to work
I’m sure you’ve seen what a typical recording studio looks like. Professional voice over artists typically have a room somewhere with walls covered in sound-absorbing foam, a fancy microphone setup with a pop screen and a computer workstation that looks like it could be straight out of NASA’s Mission Control.
Luckily, you don’t have to go that far to achieve great results. You can create a great voice recording space with minimal effort and very little expenditure.
Most importantly, you want a space free of distracting noises and where you aren’t likely to be interrupted. Most decent microphones pick up even faint ambient sounds, and those sounds will ultimately make it into your recording.
If your space is at work, avoid areas where you can hear your coworkers conversing, etc. Or, plan to record when no one else is in the office.
Wherever you are, be mindful of the sounds of your heating and cooling system. If you can’t find a spot where you can’t hear air rushing through your ducts, you may want to shut down your furnace or AC for the duration of your recording.
If your recording space is near a window, listen for sounds from outside, such as wind, birds chirping, dogs barking, etc. Be especially mindful of traffic sounds — especially loud delivery trucks. They will definitely show up in your recording.
No place is totally silent, so find the best place you can — even if that means thinking outside the box.
I have a friend who regularly records his podcast in his car. He lives in a small house with dogs and kids, so there really isn’t anywhere else quiet enough. He takes his laptop and mic out to his driveway, shuts himself in the car and records. The results are surprisingly good!
Choose a microphone
Next, you need a decent microphone. I won’t go too in-depth with this, but my colleague Matt Pierce did an amazing post on choosing a good mic.
That said, if at all possible, try not to record your voice over using your laptop microphone. While built-in mics are fine for Skype meetings and the like, you will get much better results with even a low-cost external microphone.
Even your smart phone’s earbuds will give you a better sound than just your computer’s built-in mic.
You don’t need to spend hundreds of dollars, either. You can get a very nice USB microphone for between $50-$100. If you will be doing a lot of voice over work, it’s well worth the investment.
If you intend to use an external mic, I also recommend investing in a pop filter. They’re cheap and they help minimize the distracting sounds caused by hard consonants such as “p” and “b.”
Choose your audio software
There’s no shortage of audio recording software on the market and most of them do relatively the same things.
But, for most of us, these will be far too complicated and will have too high a learning curve to to be of practical use.
That’s why I highly recommend TechSmith Audiate.
TechSmith Audiate
TechSmith Audiate takes voice over recording and editing to an entirely different level by transcribing your voice in real time — as you record.
There are no unnecessary settings to figure out, no confusing and complicated interface.
Just click the record button and start talking. It’s really that simple.
Then, you can literally edit your audio just like you would edit text in a document.
So, rather than staring at a wave form and trying to figure out exactly what you said and where, you can see it right on your screen.
And check out this game-changer: Audiate even automatically flags all your “ums,” “uhs,” and other hesitations so you can easily find and delete them.
You can even delete them all at once.
The Easiest and Fastest Way to Record and Edit Voice Over Audio! Audiate makes recording and editing your voice as simple as editing text in a document. Try Audiate for Free
But Audiate’s simplicity doesn’t mean you lose out on power or control. You can do finer edits and adjustments, too.
Already have a voice over recorded? That’s no problem. Import your recording into Audiate and it will transcribe it for you.
When you’re done, save your audio file and import it into Camtasia. You can even export the edited text as a transcript or as an SRT file for captions.
I’ve been doing video and audio recording work for years and I’m quite comfortable using professional audio recording software. But if I’m doing voice over work, you can bet I’m using Audiate because it’s the best and easiest way to record voice overs.
TechSmith Camtasia
Camtasia has an audio recorder built in that will allow you to record your voice as you record your screen when appropriate. You can also record your voice over by itself. You can even edit your audio right in the Camtasia editor.
2. Write a script
Having a script is probably the single most important thing you can do to ensure your voice over sounds professional. Nothing ruins a good voice over faster than a lot of hemming and hawing or 23 umms in a row as you try to remember what you wanted to say next.
The best scripts will include word-for-word everything you intend to say. Taking the time to write this out before recording helps ensure that you will cover everything you want to without the danger of meandering off into unrelated topics.
Outline the points you want to make and then write the full script based on that outline.
A script also gives you a chance to practice.
Read your script aloud several times before you record. Be mindful of words or phrases that may feel awkward or difficult to say. A script often sounds and feels different when read aloud vs. in your head.
Then adjust your script as necessary and you’re ready to record.
This great blog post will give you more information on writing your script.
3. Do a test recording
Now that all the essential tools are in place, it’s time to record your voice over!
Before you get down to the real thing, though, do a test recording to ensure your equipment works properly and your audio levels are good.
Even if nothing has changed from the last time you did a voice over, it’s still a best practice to test first. I’ve skipped this step myself and then discovered after my recording was finished that something wasn’t set up properly and I had to go back and do it again.
You don’t need to record the entire script for your test recording, but a few paragraphs will give you enough to ensure that the audio is clear, at an appropriate level, and doesn’t include any stray or ambient noises.
Important: When you listen back to your test recording, use headphones to check the audio quality. Your computer speakers will not be good enough for this. Headphones allow you to listen closely to ensure clear audio — especially for things like weird room noises and such.
Obviously, you want the audio to sound good on even the cheapest speaker, but you (and your audience) will be much happier if you use headphones to check for quality.
Remember, a good portion of your video viewers will listen via headphones, so you want to be sure they’ll have an optimal experience.
Microphone placement
You also want to consider where to place your microphone. Too close to the person speaking and it will be subject to all kinds of weird mouth noises and air puffs. Too far away and it may sound lost in a large room.
Ideally, place the microphone about six to eight inches from the person’s mouth, and slightly below their chin.
If you’re using a LAV (clip-on mic), make sure it’s about six to eight inches below the speaker’s mouth.
Be mindful, too, of the surface where you place your mic. Some microphone stands will be quite susceptible to picking up noises from the desk or table they’re sitting on. Listen for those types of sounds on your test recording.
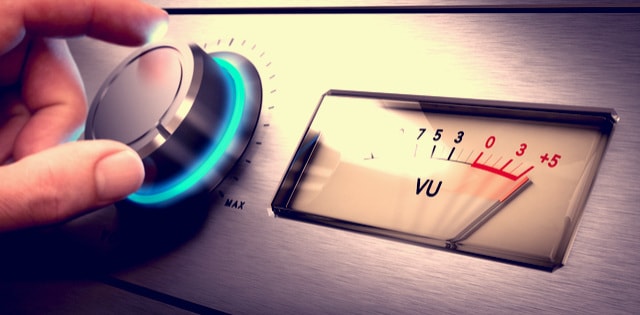
Check your volume levels
Proper volume level for your audio ensures that it’s easily heard and not distorted. Too low and people will have trouble hearing what you say. Too high and you risk garbled audio or blowing out your viewers’ ear drums.
While you can adjust levels as necessary when you edit your audio, starting with the best possible audio level as you record is always your best bet.
The folks over at Premium Beat have a great post on recommended audio levels settings, but here are a few basics.
Audio levels are measured in decibels (db). In audio editing, 0db is actually the maximum you want to achieve. Weird, eh? For the most part, your ideal audio level is between -10db to -20db. Your audio should peak around -6db. Never go above 0db, as your audio will distort or “clip.”
Most audio recording software will have indicators that let you know when your audio is in danger of being too loud and clipping.
The image above shows the TechSmith Camtasia interface with the waveform (a graphical representation of your audio recording) on the left and the level indicator on the right.
The indicator shows that the audio peaked at just under -6db and is well within the acceptable levels.
4. Record your voice over
Once you’re satisfied with your microphone placement and audio test, you’re ready to record your voice over!
Seriously! Do it!
With Audiate, it’s as simple as clicking the record button and speaking.
As you record your script, remember these key tips for ensuring a great voice over:
Speak slowly and clearly. Enunciate each word, but don’t concentrate on it so much you sound like a robot.
Consider your tone. You want to sound pleasant, but not overjoyed or overly excited. Pro tip: Smiling while you read your script can help you sound happier and more natural.
Don’t stop if you make a mistake or misspeak. You don’t have to start over! You can always fix it when you edit. Just go back a sentence or two in your script and start again. Pro tip: Remember, with TechSmith Audiate, you’ll be able to see and edit your voice over s text, so you can easily go back and fix any mistakes when you’re done.
If you struggle with the script or it just gets too hard to keep going, pause your recording and take a break. Rewrite any parts of the script that may be giving you too much trouble and try it again.
As with anything, voice overs get easier the more you do them. Don’t give up if it’s not perfect the first time!
5. Edit your audio
When you finish recording, it’s time to edit. Even if you made no mistakes, there are likely a few things to fix. At the very least, you’ll want to trim the beginning and end to remove any dead space.
Again, Audiate makes it so easy to edit. The video below gives a great overview of how to work in Audiate.
With traditional audio software, you have to hunt through your recording to find your mistakes and edit them out individually. Even a short video could take an hour or more to edit depending on how complicated your edits were.
Traditional audio software only displays your recording as an audio wave, making it much more difficult to edit your audio.
But with Audiate, you can just read the text and highlight and delete any mistakes you find.
With Audiate, you can still edit with the wave form if you like but you can see that the text is displayed, allowing you to more easily see where to make your edits.
Also notice that the Audiate interface is so much less complicated and than in the first example.
When I edit my voice over audio, I like to listen to the entire recording from start to finish before I start making any changes.
I may make notes here and there to remind myself of something I want to go back and edit, but this time through I really just want to concentrate on the overall pacing and tone of the recording.
Does it sound like I hoped? Did I rush or speak too slowly? Did I flub any words, or did I mumble or misspeak? Are there weird silences or unknown or errant sounds?
Next, go back to the beginning and start editing out your mistakes. I also like to edit out any abnormally long silences between sentences or statements and any weird sounds that don’t belong.
Remember, though, that pauses are ok (and even necessary) to help break up the audio and make it feel more natural and conversational.
To learn more about this, check out this cool post on reducing audio noise in your recordings.
6. Import your audio into your video editor
In Camtasia, importing and working with audio is as simple as a couple of clicks. For more information, check out this post on syncing audio and video in Camtasia.
That’s it! You’ve successfully recorded your voice over!
Don’t forget the captions and audio transcription
I noted above that a large portion of your audience will listen to your video via headphones. But, what if I told that there’s a high likelihood that a large number may watch your video with no sound at all?
And, there will always be viewers who are deaf or hard of hearing.
This is why captioning your video and providing an audio transcription are so important. For those who can’t or otherwise won’t listen to the audio elements of your video, captions and transcriptions give them the opportunity to get all of the information your video provides.
And it’s another reason that TechSmith Audiate is such a helpful tool.
With other audio tools, you would likely have to send your audio out to a professional transcription service to have your audio file transcribed and timestamped. Even if you typed out a full script, it won’t have the necessary time stamps to be used as a captions file.
But with Audiate, the transcription happens automatically, complete with time stamps for captions.
Once you’ve recorded and edited your voice over, you can export that transcription as a caption (.SRT) file and import it directly into Camtasia. Camtasia then automatically inserts the captions into your video.
How’s it feel to be a voice over pro?
Recording voice overs like a pro is easy when you know how to do it and you have the right tools.
Taking the proper steps before you hit the record button and then taking the time to edit your audio appropriately will go a long way to ensuring your voice overs sound professional and engaging.
And remember, practice makes perfect! The more you do it, the more natural it will become.
The Easiest and Fastest Way to Record and Edit Voice Over Audio! Audiate makes recording and editing your voice as simple as editing text in a document. Try Audiate for Free
Do I need a professional recording set up to do voice overs? No! You can do great voice over work with minimal investment. You’ll want a microphone and audio recording software to start. How do I improve the sound of my voice? The short answer is you just have to get used to it. But, there are a few things you can do to improve the overall sound of your voice, including speaking from your diaphragm rather than at the top of your throat. Also, be sure your vocal cords are hydrated. Keep water handy for when you’re recording. What software works best for voice over recording? There are a lot of options available for audio recording, but if you only need to record voice overs, TechSmith Audiate is your best bet. Will my laptop microphone be ok for recording voice overs? Not likely. While a laptop mic is fine for calling into a Zoom meeting, you’ll want an external microphone for your voice over recording. But, the good news is that you can pick up a really decent microphone for between $50-$100. Do I need to hire a professional to get great voice over? No! You can do it yourself with great results. You just need the right tools and a little practice.
Note: This post was updated in October 2020 to include new information.
So you have finished reading the how loud should you record topic article, if you find this article useful, please share it. Thank you very much. See more: how loud should instruments be in a mix, how loud should the beat be when recording, how loud should vocals be compared to instrumental, how loud should the beat be in a mix, what level should vocals be recorded at, best db level for recording, how to record rock vocals, how loud should rap vocals be