
You are looking for information, articles, knowledge about the topic nail salons open on sunday near me how to adjust parking brake on 2014 ram 1500 on Google, you do not find the information you need! Here are the best content compiled and compiled by the https://chewathai27.com team, along with other related topics such as: how to adjust parking brake on 2014 ram 1500 2014 ram 1500 parking brake replacement, dodge ram parking brake release handle, 4th gen ram parking brake adjustment, 2015 ram 1500 parking brake cable sagging, dodge 3500 parking brake adjustment, 2016 ram 1500 parking brake replacement, 2014 ram 1500 parking brake diagram, ram 2500 parking brake replacement
Contents
Where is the adjustment for the parking brake located?
The brake cable adjuster is usually located in one of two different places: either under the car about midway between the front and the rear, or attached to the parking brake lever.
How do I adjust my park brake manually?
Pull the handbrake lever ‘on’ until slight resistance is felt at the lever; then try turning each rear wheel. Each should turn with equal resistance. If they do not, tighten the cable on the slacker side until both feel equal. Tighten the locknuts.
How much does it cost to adjust parking brake?
Answer provided by
We’re glad your car didn’t roll away because that’s a possibility when your parking brake fails to engage. Generally speaking, it will cost between $250 to $290 to fix your parking brake depending on your vehicle. You should do this as soon as possible if you notice a problem.
How do I know if my parking brake cable is stretched?
Sometimes, a stretched, loose, misaligned or snagged cable affects the feel of your handbrake. For example, it might feel stiffer than usual when you move the handle up or down. Or, the handle might feel loose and wobbly. You might need to put more effort into locking it into its on or off positions.
What is parking brake cable?
In road vehicles, the parking brake, also known as a handbrake or emergency brake (e-brake), is a mechanism used to keep the vehicle securely motionless when parked. Parking brakes often consist of a cable connected to two wheel brakes, which is then connected to a pulling mechanism.
How do you change a parking brake cable?
- Insert the front end of the cable in the hole in the body and push.
- Using the screwdriver, pry the cable clip up and in until it locks in place.
- Slide the new cable into the groove on the pedal assembly and seat firmly.
- Pulling the slack out of the cable as you go, re-secure all clips and clamps previously removed.
Why is my emergency brake not holding?
If the parking brakes won’t hold the car, then you need to check the following: Parking brake lever/pedal out of adjustment or stuck. Parking brake cable stretched. Rear brake shoes/pads worn out.
How much does it cost to adjust parking brake?
Answer provided by
We’re glad your car didn’t roll away because that’s a possibility when your parking brake fails to engage. Generally speaking, it will cost between $250 to $290 to fix your parking brake depending on your vehicle. You should do this as soon as possible if you notice a problem.
How do I know if my parking brake cable is stretched?
Sometimes, a stretched, loose, misaligned or snagged cable affects the feel of your handbrake. For example, it might feel stiffer than usual when you move the handle up or down. Or, the handle might feel loose and wobbly. You might need to put more effort into locking it into its on or off positions.
How tight should parking brake?
With the vehicle stopped, fully apply the parking brake. Full engagement should take place near or less than ½ the parking brake’s travel. If the parking brake travels more than half the distance, it could be too loose. If the parking brake fully engages in less than ¼ travel it could be too tight.
Parking brake adjust how-to basics. 2014 Dodge Ram 2500 – YouTube
- Article author: www.youtube.com
- Reviews from users: 25761
 Ratings
 - Top rated: 4.5
- Lowest rated: 1
- Summary of article content: Articles about Parking brake adjust how-to basics. 2014 Dodge Ram 2500 – YouTube Updating …
- Most searched keywords: Whether you are looking for Parking brake adjust how-to basics. 2014 Dodge Ram 2500 – YouTube Updating Parking brake adjust how-to basics. 2014 Dodge Ram 2500Dodge 2500, Dodge ram 2500, Parking brake adjust, Parking brake adjustment, Parking brake just how to, 2014 ram parking brake adjustment, Dodge ram Cummins 2500, Road traveler
- Table of Contents:

How to Adjust a Parking Brake Shoe | YourMechanic Advice
- Article author: www.yourmechanic.com
- Reviews from users: 30594 Ratings
- Top rated: 4.7
- Lowest rated: 1
- Summary of article content: Articles about How to Adjust a Parking Brake Shoe | YourMechanic Advice Updating …
- Most searched keywords: Whether you are looking for How to Adjust a Parking Brake Shoe | YourMechanic Advice Updating
- Table of Contents:
$9499 – $11499
Part 1 of 4 Lifting your vehicle
Part 2 of 4 Relaxing the parking brake cables
Part 3 of 4 Adjusting the parking brake shoes
Part 4 of 4 Adjusting the parking brake cables
Next Step
YourMechanic Auto Repair
Experienced Mechanic
$70hr
Recent Parking brake won’t engage Inspection reviews
$9499 – $11499
How can we help
Fixing the 4th Gen Dodge ram sagging parking brake cable. (2009-2021) – YouTube
- Article author: www.youtube.com
- Reviews from users: 40283 Ratings
- Top rated: 3.8
- Lowest rated: 1
- Summary of article content: Articles about Fixing the 4th Gen Dodge ram sagging parking brake cable. (2009-2021) – YouTube Updating …
- Most searched keywords: Whether you are looking for Fixing the 4th Gen Dodge ram sagging parking brake cable. (2009-2021) – YouTube Updating Hey everyone, So I had the what appears to be common, 4th gen Dodge Ram sagging parking brake cable. I attempt a quick fix and show you how to do it. Spoiler…dodge, ram, dodge ram, parking brake, parking brake cable, sagging, sagging cable, 4th gen ram, 2014 dodge ram, 2015 dodge ram, 2016 dodge ram, 2017 dodge ram, 2018 dodge ram, 2019 dodge ram, 2020 dodge ram, 2021 dodge ram, ram truck, sagging parking brake, cable, stuck parking brake, break, parking break
- Table of Contents:

Adjusting the handbrake | How a Car Works
- Article author: www.howacarworks.com
- Reviews from users: 43975 Ratings
- Top rated: 3.7
- Lowest rated: 1
- Summary of article content: Articles about Adjusting the handbrake | How a Car Works Updating …
- Most searched keywords: Whether you are looking for Adjusting the handbrake | How a Car Works Updating A weak handbrake on an older vehicle can be caused by a stretched handbrake cable. This article shows how to tighten the handbrake cable to ensure the handbrake works correctly.
- Table of Contents:
Adjusting twin cables
Screwed sleeve adjuster
Bowden cable adjustment
Adjusting primary and secondary cables
Equalising cable
Disc-pad handbrake
The Ultimate Car Mechanics video course
Super detailed explanations in the video course
The
video
course
Bonus Dismantling the engine
Engine Block
Crankshaft
Tools Using a tap set
Using an engine stand
The Pistons
How do I tighten the parking brake? | DODGE RAM FORUM – Dodge Truck Forums
- Article author: www.ramforum.com
- Reviews from users: 13135 Ratings
- Top rated: 5.0
- Lowest rated: 1
- Summary of article content: Articles about How do I tighten the parking brake? | DODGE RAM FORUM – Dodge Truck Forums The adjustment is at the rotor for each wheel. It is basically a drum brake that res on the inner se of the rotor. There is a dust cap on … …
- Most searched keywords: Whether you are looking for How do I tighten the parking brake? | DODGE RAM FORUM – Dodge Truck Forums The adjustment is at the rotor for each wheel. It is basically a drum brake that res on the inner se of the rotor. There is a dust cap on … My driveway is pretty steep. So before I put it in park, I like to apply the PB to avoid putting the weight of the truck on the tranny. But it’s beginning…
- Table of Contents:
How to adjust the park brake – easy – Dodge Diesel – Diesel Truck Resource Forums
- Article author: www.dieseltruckresource.com
- Reviews from users: 5196 Ratings
- Top rated: 3.9
- Lowest rated: 1
- Summary of article content: Articles about How to adjust the park brake – easy – Dodge Diesel – Diesel Truck Resource Forums 3rd Generation Ram – Non Drivetrain – All Years – How to adjust the park brake – easy – I adjusted mine yesterday, from fairly useless parking brake to … …
- Most searched keywords: Whether you are looking for How to adjust the park brake – easy – Dodge Diesel – Diesel Truck Resource Forums 3rd Generation Ram – Non Drivetrain – All Years – How to adjust the park brake – easy – I adjusted mine yesterday, from fairly useless parking brake to … How,adjust,park,brake,easy, How to adjust the park brake – easy, dodge diesel,dtr,diesel truck resource,dodge diesel forum,dodge diesel forums,cummins turbo diesel,bhaf,diesel truck,diesel forums,exhaust brake,banks,cumminsforum,cummins forum,turbo diesel,turbo diesel register,compd,competitiondiesel,dieselram,diesel ram,dodge ram,dodge cummins,smarty,smarty jr,quadzilla,diesel truck forums,powermax,dodge ram diesel,cummins forums,raptor fuel pump,dodge ram forum,dodge cummins forum,cumminsforum,smarty,smarty jr,smarty revolution, ram diesel, diesel ram, dieselram3rd Generation Ram – Non Drivetrain – All Years – How to adjust the park brake – easy – I adjusted mine yesterday, from fairly useless parking brake to full-on awesome. The passenger side is easy, pull the dust plug, and spin the star adjuster with a slot screwdriver until the brakes lock up the wheel, then back off…
- Table of Contents:
Adjust parking brake? – DodgeForum.com
- Article author: dodgeforum.com
- Reviews from users: 10201 Ratings
- Top rated: 4.4
- Lowest rated: 1
- Summary of article content: Articles about Adjust parking brake? – DodgeForum.com 2nd Gen Ram Tech – Adjust parking brake? – Can anyone give me some help on how to adjust my parking brake cable. It is a 98 1500. …
- Most searched keywords: Whether you are looking for Adjust parking brake? – DodgeForum.com 2nd Gen Ram Tech – Adjust parking brake? – Can anyone give me some help on how to adjust my parking brake cable. It is a 98 1500. 1500, 95, 98, adjust, brake, dodge, neon, parking, ram, stratus, tighten, Adjust parking brake?, dodge,forum,dodge forum,sale,parts,challenger,ram,diesel,dodge chat, dodge ram, dodge challenger, durango,truck,neon,viper,dodge viper,dodge suv,avenger,dart,journey,caravan2nd Gen Ram Tech – Adjust parking brake? – Can anyone give me some help on how to adjust my parking brake cable. It is a 98 1500. I read the manual but it didn’t make sense to me. Thanks.
- Table of Contents:
See more articles in the same category here: https://chewathai27.com/toplist.
How to Adjust a Parking Brake Shoe
Before you begin, it’s important to be familiar with your specific parking brake system. While all systems accomplish the same thing, the designs will vary from manufacturer to manufacturer. Some systems will have two or three points of adjustment, and others will have only one. Identifying the components of the system you have is important to a successful parking brake adjustment.
The parking brake shoes are part of a larger system known as the drum brakes. Drum brakes have been in use on automobiles for over 100 years. The shoe is the star of the drum brake system. It provides the friction against the drum that stops your car when you step on the brake pedal. Drum brake systems are only used on the rear wheels nowadays, as they are not as efficient and require more maintenance than the modern disc brake system. Even so, they are superior as a parking brake and remain in use for this reason.
The parking brake system is integrated into the drum brake system by the use of cables reaching to the front of your vehicle. The cables are attached to a lever that you step on or pull. When this lever is engaged, it expands the brake shoes in the drum and wedges themselves in place. This wedging creates a strong force that will not allow the rear wheels to spin.
The terminology describing this system is often confusing – sometimes the brake is called an emergency brake, and other times it is called the parking brake. Some will argue this point, but at the end of the day, this system can be used for both. If the hydraulic system of your disc brakes were to fail, the mechanical connection via the drum brake cables can be engaged to slow your vehicle to a stop, hence the term “emergency brake” or “E-brake.” At the same time, this system is used to keep a vehicle from rolling away while parked. This is particularly necessary with vehicles that have manual transmissions.
Parking brake shoes are designed to self-adjust, but the self-adjusting system can often fail. The brake shoe is housed in the drum and experiences lots of heat and brake dust that eventually leads to wear and tear. Eventually, it requires manual adjustment, either because the brake shoes need to be replaced, or because the self-adjusting mechanism has become gummed up or worn out. This tutorial will instruct you on both brake shoe and parking brake adjustment, since they are integrated components and should be serviced at the same time.
Part 1 of 4: Lifting your vehicle
Materials Needed
Step 1: Park the car on a flat, level surface, and loosen the tire lug nuts. Place the wheel blocks around the tires. Then, loosen the lug nuts so you can take the wheel off later if need be.
Step 2: Locate the lifting points for your vehicle and raise the vehicle with your floor jack. Kneel down and look under your car at the point where the front wheels and the front passenger or driver door meet.
Usually, there is something there that makes the lifting point obvious, but not always. If you are unsure of where to properly lift your vehicle, you will need to refer to your owner’s manual or a shop manual.
Place the floor jack under the lifting point and carefully lift the vehicle until the jack stands will fit underneath.
Step 3: Place the jack stands under the car. The best spot to place jack stands under your car is at a frame section.
Before placing a jack stand, be sure the spot you choose to place the jack stand is solid enough to support the weight of the entire car. If you can’t find a frame section to place the jack stand, you can place it under a solid rear axle, a trailer hitch or the lip that runs from the front wheels to the rear wheels under the doors.
With your jack stands in place, slowly lower the car onto the stands and remove the floor jack.
Warning : Do not use a floor jack to support the car; it is only for lifting. It is not safe to be under the car without a jack stand.
Note: Refer to your owner’s manual if you are not certain about jack stand placement.
Part 2 of 4: Relaxing the parking brake cables
Step 1: Locate the brake cable adjuster. The brake cable adjuster is usually located in one of two different places: either under the car about midway between the front and the rear, or attached to the parking brake lever.
The parking brake lever can be foot-actuated and mounted to the driver’s left, or hand-actuated and mounted at the driver’s right in the center console. These are by far the most common placements for brake levers, but some manufacturers will put them in other areas.
Step 2: Turn the self-adjuster counterclockwise. Most of the time – but not always – you will want to turn the nut counterclockwise to provide slack in the cable system.
You do not want the cables to become slack and loose. You only need enough slack in the cable system so that they are not pulling on the rear shoe parking brake adjuster.
Note: If this step is not performed, you may not be able to adjust the brake shoes properly.
Step 3: Refer to your shop manual for auto-adjuster methods, if needed. Most auto-adjusters are integrated into the lever assembly. Some are completely maintenance-free, and others require resetting when adjusting the parking brake.
Each one will be different so refer to the appropriate shop manual for location and procedures.
Note: Auto-adjusters are not very common.
Part 3 of 4: Adjusting the parking brake shoes
There are three main types of parking brake systems in use today.
The most common is the brake shoe system that has been in use for decades.
Rear disc brakes with a drum cast into the rotor. The parking brake part of this system is a drum brake system.
The disc brake only system. The only part of this procedure that applies to disc-only systems is the adjustment of the cable system.
Warning: Improperly adjusted parking brakes can lead to premature shoe failure, drum or rotor warping, and the distinct possibility of a fire at the rear wheels. The vehicle may also cease moving forward. Keep in mind, if you are new to this sort of repair it will take significantly more time to accomplish in comparison to a technician with years of experience. But don’t let that discourage you. Give yourself plenty of time and manage your frustration.
Step 1: Remove the wheel, if needed. Sometimes the wheel must be removed in order to access the star adjuster.
This adjuster may be accessible through a hole in the brake drum backplate.
Step 2: Shorten the star adjuster by turning it in the correct direction. You will need to turn the star adjuster in a different direction depending on what side of the car it is mounted on.
Just a few clicks should do the job here.
Check your owner’s manual if you cannot tell which direction tightens the adjuster.
A flat head screwdriver or brake spoons can be used to turn the star adjuster. Brake spoons have bends in them of various types that allow you to turn the star adjuster in hard-to-reach spaces.
Step 3: Center the brake shoes. Once the star adjuster has been shortened, you may need to move the shoes around to fit the drum on.
Brake shoes float on the backing plate so they can center themselves in the drum. With the drum off, shoes can be moved side to side and up and down.
Often a couple of large flathead screw drivers will work, or maybe just your hands. Depending on the kind of vehicle you are working on, using a couple of small pry bars may be the easiest option if you have them available.
Step 4: Install the brake drum. Install the drum over the brake shoes and use two lug nuts to make sure it is flush with the wheel hub mounting.
If it isn’t square on the hub, you won’t be able to achieve a proper shoe adjustment.
Step 5: Turn the drum. Turn the drum and listen for a rubbing sound. It should be consistent and the drum should turn easily.
Note: If you have a rear wheel drive vehicle, this step is a bit more difficult. As well as turning the drum, you will be turning the rear drive line and both the rear wheels. This means you will need to have the vehicle in neutral and the front wheels will need to be blocked to keep the vehicle from rolling away while you are working on it. In addition, because you will be turning both axles, you will have only one drum installed while turning and adjusting. If you have both drums installed on a rear wheel drive vehicle, you will not know which side is creating drag.
Step 6: Expand the star adjuster. Remove the drum and expand the star adjuster as needed. Re-install the drum with two lug nuts.
Note: Drum brakes have a backing plate adjustment hole on the backside, but it can be cumbersome to make large adjustments. At this point, it will likely be most efficient to remove the drum to turn the star wheel until you hear rubbing when turning the wheel. The backing plate adjustment hole should have a rubber plug installed in it. You will remove it to access the star adjuster with the brake spoons for fine tuning.
Step 7: Center the shoes in the drum. Once you hear the rubbing of the shoes against the inside of the drum on both sides, you will need to step on the brake pedal very hard. This will continue the process of centering the shoes in the drum.
Warning: Be sure both drums are installed before stepping on the brake pedal. If the drums are not installed, you will push the pistons in the wheel cylinders out of their bores and create a large brake fluid leak.
Step 8: Expand the star adjuster more, as needed Continue expanding the star adjuster by removing the drum or utilizing the backing plate adjustment hole.
Step 9: Repeat Steps 4-7 until proper shoe-to-drum pressure is achieved. The goal of adjusting a drum brake system is for the shoes to lightly drag on the drums when the drums turn. It should not be difficult to turn the drums by hand.
Larger vehicles may be difficult to judge because of their larger mass and increased contact area. If the shoes are adjusted too tightly in the drum, this will result in excessive heat that can warp the drums, cause brake fade, and possibly even a fire. As long as you can easily turn the drums with a light dragging sound from the shoes, everything will be fine.
Part 4 of 4: Adjusting the parking brake cables
Step 1: Install the rear wheels. Mount the rear wheels, then install and tighten the lug nuts until snug.
Do not torque the lug nuts while the vehicle is still lifted.
Step 2: Turn the cable adjuster nut clockwise. Go back to your brake cable adjuster nut that you loosened earlier.
Turning the nut on the cable adjuster clockwise will shorten the cable assembly, making it taut. Do this in a few increments at a time, as you don’t want to tighten the cable so much that it makes the shoes drag against the drum.
You only want the shoes to engage when the parking brake lever is engaged.
Step 3: Engage the brake lever. Pull or step on the parking brake lever to engage the brake shoes.
The lever should stop firmly about halfway through its travel.
If the lever goes all the way to the floor, or pulls up really high in the case of a hand-actuated lever, you should turn the cable adjuster nut more.
Step 4: Check for correct parking brake adjustment. Attempt to turn the rear wheels, if you have a rear wheel drive vehicle.
You should not be able to turn them at all. Remember, the parking brake needs to keep your heavy car from rolling. If you can turn the wheels, then you will need to tighten the cables more – but you don’t want to tighten them so much that the shoes will drag heavily in the drums.
Step 5: Release the parking brake lever. There shouldn’t be any extra drag on the rear wheels beyond the rubbing from the brake shoe adjustment. If there is an increased drag, you will need to back off the cable adjuster until the only drag you feel is created during the shoe adjustment.
Step 6: Lower the vehicle and go for a test drive. Place the floor jack back under the lifting point and raise the car up enough to remove the jack stands. Carefully lower the car back to the ground.
Make sure to torque the lug nuts on any wheels previously removed to the manufacturer’s specifications.
Warning: Until you are certain that you have correctly adjusted your parking brake shoes, test drive your vehicle in a safe area such as a deserted parking lot.
It can be very easy to become confused when adjusting your drum brake shoes and the parking brake cables. There are many different brake system designs on the road today. For this reason, it is highly advised that you identify each component of your specific system before you begin. In every case, the shoes should be adjusted first, followed by the parking brake cables.
The main indicators of a properly adjusted drum and parking brake system are the brake pedal and the parking brake lever. If the brake pedal goes further towards the floor than usual, this means the system components have to travel too far before the shoes are completely contacting the inside of the drum. Centering of the brake shoes is paramount to a successful brake shoe adjustment.
The same standard should be applied to the parking brake lever. If it travels to the end of its range, the shoes or the cables are not adjusted correctly, and each step should be revisited to find where extra play in the system exists. In both cases, the goal is for the shoes and or cables to travel as little distance as possible before they begin to slow or lock the wheels.
If you have any difficulty during the process of adjusting your parking brake cable, adjusting your parking brake shoes, or if you find that your parking brake won’t function correctly after making adjustments yourself, don’t hesitate to contact a certified mechanic. One of our mobile mechanics here at YourMechanic will be happy to come out to your home or place of business to get your parking brake working again.
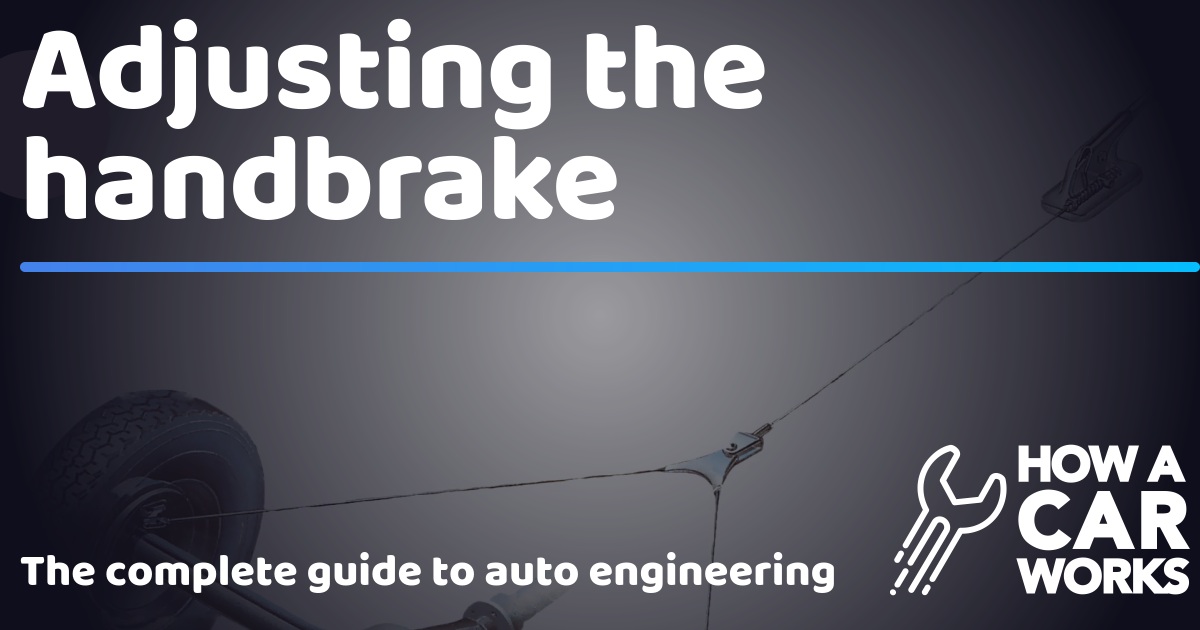
Adjusting the handbrake
If you have tightened the brake shoes so that there is no excess travel before they come on, yet the handbrake lever still pulls up a long way, the cable has probably stretched and must be adjusted.
The handbrake The handbrake provides some braking effect if the hydraulic system fails, but it is primarily a parking brake. It acts on the same brake drums or discs as the hydraulic system, but separately, and it must be adjusted separately. Some systems have a primary and a secondary cable. On this one the secondary cable operates the brakes through a yoke attached by a clevis pin to the primary cable.
There are many types of adjuster, but they all have the same effect that of shortening or lengthening the cable.
Disc brakes The handbrake pads on some disc brakes are separate from the pads operated by the hydraulic system. A single adjustment compensates for wear on separate pads and for cable stretch.
Some are inside the car, at the base of the handbrake lever. Most, however, are underneath the car – and are probably dirty and rusty. Whenever you work under the car, always put it on firm supports such as axle stands. Chock the wheels remaining on the ground . About two hours before you plan to do the job, squirt penetrating oil on to all the nuts and screw threads you will unscrew. This gives the oil time to free any seized parts.
Bowden cable The adjustment for the enclosed Bowden cable is located on a bracket.
Also lubricate with engine oil all the pivots and linkages that are operated when the handbrake is applied – they tend to seize due to road dirt, grit and corrosion. Make sure that the cable or rods move freely in their covering sleeves or gaiters.
How other systems work On some handbrake systems, a primary cable runs through a pulley on the rear axle to a relax lever, which operates the brakes through a secondary cable. It adjusts at the lever. Another type of handbrake has a single enclosed cable, called a Bowden cable, which runs directly to one brake drum and operates the other by means of a transverse rod.
Adjusting twin cables
Remove the rubber cover on the handbrake to reach the adjusters.
Raise the rear wheels clear of the ground and support them on axle stands. Chock the front wheels and fully release the handbrake. The adjusters are inside the car, at the lower end of the handbrake lever. Pull away the covering or carpeting.
Hold the adjuster nut with a spanner and slacken off the locknut a few turns.
The threaded end of each cable has one or two nuts. If there are two, grip each with a spanner and screw them apart, freeing the locknut. Hold the lower end of one rod with a pair of pliers to stop it turning, or fit a screwdriver into the front end of the rod if that is slotted. Turn the lower nut clockwise down the thread, drawing the rod forward. Stop turning when the handbrake lever can be pulled up only three to five ‘clicks’. Adjust the other rod by the same amount.
Grip the hexagon on the cable with pliers and adjust the adjuster nut, and tighten the locknut.
Pull the handbrake lever ‘on’ until slight resistance is felt at the lever; then try turning each rear wheel. Each should turn with equal resistance. If they do not, tighten the cable on the slacker side until both feel equal. Tighten the locknuts. Check that, with the handbrake released, both wheels turn freely. If not, ease back the adjustment and recheck.
Screwed sleeve adjuster
Slacken the locknut and tighten the nut on the sleeve adjuster.
Raise the rear wheels clear of the ground, and support them on axle stands. Chock the front wheels. The adjuster is underneath the car, in the centre and just in front of the rear wheels. Put the handbrake lever to ‘off’. Without pressing the release button, pull it on three clicks. Exact details of the adjuster vary considerably from car to car, but there is probably a pair of nuts on the adjuster rod – one an adjuster nut on a screwed sleeve, the other a locknut to hold it firmly. Loosen the locknut and screw it back three or four threads. Turn the adjuster nut clockwise until the raised wheel can be turned only with firm hand force . Apply the handbrake and check that the wheels do not bind when it is released. If they do, readjust. Tighten the locknut.
Bowden cable adjustment
Screw the adjuster nut along the cable casing until there is resistance.
Raise the wheels on which the handbrake operates clear of the ground, and support that end of the car on axle stands. Chock the other wheels. Pull the handbrake lever on three clicks. Loosen the locknut and screw it back along the threaded part of the outer casing a few turns. Screw the adjuster nut in the same direction until some resistance is felt on the cable. Turn a wheel – it should turn only with firm hand force. Move the adjuster again if necessary, until it does. When the wheel movement is correct, hold the adjuster nut with one spanner and tighten the locknut on to it with another.
Adjusting primary and secondary cables
Some systems have three cables, one from the handbrake and two going to the wheels, which are connected to an equaliser. All three can be adjusted.
Some cars have a pair of handbrake cables separated by a relay lever located under the car. A primary cable runs from the handbrake lever to the relay lever; a secondary cable goes from the relay lever to the brakes. Set the handbrake lever one or two clicks ‘on’. Jack up the car and support it securely on axle stands. Chock the unbraked wheels. Free any locknuts, then tighten the cable that has the most slack until it is taut. Repeat the procedure with the second cable, then tighten the locknuts.
Equalising cable
Pull out the split pin and remove the clevis pin to release the fork.
Sometimes the adjustment is on an equalising unit mounted on the rear axle, or on a fork at the end of a rod or cable just before it reaches the brake backplate. A clevis pin holds the fork to a lever on the backplate. Take out the split pin which holds the clevis pin: remove the clevis pin.
Screw back the adjuster nut behind the clevis-pin fork.
Pull the handbrake lever until it engages on the second notch. Loosen the locknut and screw back the adjuster nut until the clevis-pin holes in the fork are just in line with the hole in the lever on the backplate. Tighten the locknut and refit the clevis pin with a new split pin.
Disc-pad handbrake
After adjusting, hold the adjuster nut steady while tightening the locknut.
How do I tighten the parking brake?
Don’t make the adjustment to the cable halfway under the truck. That only adjusts the pull on each of the wheels and should only be adjusted if one side is pulling more than the other. I made this mistake on my 2006 Ram and eventually I didn’t have any parking brake.
The adjustment is at the rotor for each wheel. It is basically a drum brake that rides on the inner side of the rotor. There is a dust cap on the inside of the backing plate that you pull off and adjust it using a screwdriver to move the star wheel.
If you are unsure of how to adjust a drum brake just search for it on youtube. You may even find how to adjust the parking brake as well.
So you have finished reading the how to adjust parking brake on 2014 ram 1500 topic article, if you find this article useful, please share it. Thank you very much. See more: 2014 ram 1500 parking brake replacement, dodge ram parking brake release handle, 4th gen ram parking brake adjustment, 2015 ram 1500 parking brake cable sagging, dodge 3500 parking brake adjustment, 2016 ram 1500 parking brake replacement, 2014 ram 1500 parking brake diagram, ram 2500 parking brake replacement