
You are looking for information, articles, knowledge about the topic nail salons open on sunday near me how to assign baseline in p6 on Google, you do not find the information you need! Here are the best content compiled and compiled by the https://chewathai27.com team, along with other related topics such as: how to assign baseline in p6 how to remove baseline in primavera p6, p6 relationships, p6 baseline dates incorrect, how to detach baseline in p6, how many baselines can be created in primavera, how to copy a project in p6, tracking progress in primavera p6, p6 videos
Once your baselines have been defined, you can assign them to the four baseline slots in Primavera P6. To do this: Go to Project > Assign Baselines: On the Assign Baselines screen, you will see four dropdowns for the Project Baseline, followed by Primary, Secondary, and Tertiary.Step 1: In the Menu bar, click on the ‘Project’ tab, select ‘Maintain Baselines’ and choose the baseline that will be updated. Click on ‘Update’ tab. Step 2: When the ‘Update Baseline’ screen appears, select the options required, and click on the run ‘Update’ tab to perform the update.Baselines are basically ‘snapshots’ of a project plan against which the project’s schedule (original dates, durations), costs and performance can be measured. It helps to establish the basis against which you are going to deliver your project and measure its success.
- Choose Project, Maintain Baselines.
- In the Maintain Baselines dialog box, select the baseline you want to copy.
- Click Copy.
Contents
How do I change baseline in Primavera?
Step 1: In the Menu bar, click on the ‘Project’ tab, select ‘Maintain Baselines’ and choose the baseline that will be updated. Click on ‘Update’ tab. Step 2: When the ‘Update Baseline’ screen appears, select the options required, and click on the run ‘Update’ tab to perform the update.
What is the use of baseline in Primavera P6?
Baselines are basically ‘snapshots’ of a project plan against which the project’s schedule (original dates, durations), costs and performance can be measured. It helps to establish the basis against which you are going to deliver your project and measure its success.
How do you copy a baseline in P6?
- Choose Project, Maintain Baselines.
- In the Maintain Baselines dialog box, select the baseline you want to copy.
- Click Copy.
How do you create a baseline?
- Right-click over a project hierarchy or project grouping and select Create Baseline. …
- In the Create Baseline dialog box, modify the properties of the baseline, as required. …
- Change the projects included in the baseline. …
- Publish the baseline to developers upon creation. …
- Create the baseline by clicking OK.
How do I remove an assigned baseline?
- In the Projects pane, right-click on the P6 project and select Clear Baseline.
- Select the P6 project in the Projects pane then, in the Get External Data From group, click Oracle Primavera > Clear Baseline.
How do I review a baseline schedule?
A baseline schedule review is performed by observing the entire schedule and determining if the schedule reflects a realistic, complete, and workable plan in accordance with the contract requirements to achieve successful project completion.
How do I restore my baseline?
Option 2: Restore the baseline
Go to menu Project -> Maintain Baselines. Select the baseline and click on the “Restore” button. Now go to the Project window. You will see the baseline become a normal project which you can open and update easily.
What is BL1 in Primavera?
If you assign your baseline as a Primary Baseline Primavera P6 will name it as BL1 (Baseline 1), a Secondary Baseline will be called BL2 (Baseline 2) and a Tertiary Baseline will be called BL3 (Baseline 3).
How do I create a schedule baseline?
- Identify Activities and Dependencies.
- Estimate Durations and Resource Needs.
- Create a Schedule Model.
- Seek Approval.
- Communicate the Schedule Baseline.
- Use and Maintain the Schedule Baseline.
What is a baseline example?
For example, a company that wants to measure the success of a product line can use the number of units sold during the first year as a baseline against which subsequent annual sales are measured. The baseline serves as the starting point against which all future sales are measured.
How do you manage a project baseline?
The key to working with baselines is to not adjust the baseline every time there is a slight change to the schedule. Ideally, once the project baseline is stored it should not be changed. However, it is sometimes inevitable to adjust it due to a new requirement that implies a major change to scope or cost.
How can I update my Primavera P6 schedule?
- Step 1: Assign a Baseline. …
- Step 2: Collect Progress Input. …
- Step 3: Enter the Progress. …
- Step 4: Schedule Based on New Data Date. …
- Step 5: Revise Schedule. …
- Step 6: Reporting. …
- Step 7: Analyse.
How do I send an Xer file?
- Open the project you want to export and email.
- Choose File, Send Project. The application creates an XER export file, automatically opens your email system, and attaches the XER file to the body of the email message. …
- Enter the email address and send the email.
How do you maintain and assign a baseline in P6?
Assigning Baselines
Once your baselines have been defined, you can assign them to the four baseline slots in Primavera P6. To do this: Go to Project > Assign Baselines: On the Assign Baselines screen, you will see four dropdowns for the Project Baseline, followed by Primary, Secondary, and Tertiary.
How do I restore my baseline?
Option 2: Restore the baseline
Go to menu Project -> Maintain Baselines. Select the baseline and click on the “Restore” button. Now go to the Project window. You will see the baseline become a normal project which you can open and update easily.
How can I update my Primavera P6 schedule?
- Step 1: Assign a Baseline. …
- Step 2: Collect Progress Input. …
- Step 3: Enter the Progress. …
- Step 4: Schedule Based on New Data Date. …
- Step 5: Revise Schedule. …
- Step 6: Reporting. …
- Step 7: Analyse.
How do you update a baseline in MS project?
- Select the new task you want to add to the baseline. …
- Click Project > Set baseline > Set Baseline, and then pick the baseline you want to update.
- In the Set Baseline dialog box, pick the baseline you want to update.
- Under For, click Selected tasks.
how to assign baseline in p6
- Article author: www.onepager.com
- Reviews from users: 15835
 Ratings
 - Top rated: 4.3
- Lowest rated: 1
- Summary of article content: Articles about how to assign baseline in p6 Updating …
- Most searched keywords: Whether you are looking for how to assign baseline in p6 Updating
- Table of Contents:
how to assign baseline in p6
- Article author: www.prescience.com.au
- Reviews from users: 30173 Ratings
- Top rated: 4.8
- Lowest rated: 1
- Summary of article content: Articles about how to assign baseline in p6 Updating …
- Most searched keywords: Whether you are looking for how to assign baseline in p6 Updating
- Table of Contents:
how to assign baseline in p6
- Article author: www.prescience.com.au
- Reviews from users: 49589 Ratings
- Top rated: 3.6
- Lowest rated: 1
- Summary of article content: Articles about how to assign baseline in p6 Updating …
- Most searched keywords: Whether you are looking for how to assign baseline in p6 Updating
- Table of Contents:
PPM P6 – 08 Maintain and Assign Baseline – YouTube
- Article author: www.youtube.com
- Reviews from users: 29733 Ratings
- Top rated: 5.0
- Lowest rated: 1
- Summary of article content: Articles about PPM P6 – 08 Maintain and Assign Baseline – YouTube Updating …
- Most searched keywords: Whether you are looking for PPM P6 – 08 Maintain and Assign Baseline – YouTube Updating In this video following things are discussed.. –) Introduction (Baseline) –) Features of baseline –) Create a baseline and assign a baseline to the projec…Baseline, maintain, assign, baseline, primavera, p6, features, project, managment, professional, define, date, PPM, EPPM
- Table of Contents:

PPM P6 – 08 Maintain and Assign Baseline – YouTube
- Article author: www.prescience.com.au
- Reviews from users: 15268 Ratings
- Top rated: 4.2
- Lowest rated: 1
- Summary of article content: Articles about PPM P6 – 08 Maintain and Assign Baseline – YouTube Updating …
- Most searched keywords: Whether you are looking for PPM P6 – 08 Maintain and Assign Baseline – YouTube Updating In this video following things are discussed.. –) Introduction (Baseline) –) Features of baseline –) Create a baseline and assign a baseline to the projec…Baseline, maintain, assign, baseline, primavera, p6, features, project, managment, professional, define, date, PPM, EPPM
- Table of Contents:
Primavera P6 Tutorial to Create, Maintain & Assign Project Baselines Schedules – PMA Technologies
- Article author: pmatechnologies.com
- Reviews from users: 38201 Ratings
- Top rated: 3.4
- Lowest rated: 1
- Summary of article content: Articles about Primavera P6 Tutorial to Create, Maintain & Assign Project Baselines Schedules – PMA Technologies Under the Project menu, select Assign Baseline. From this dialogue box, you can assign primary, secondary and tertiary baselines to the project. …
- Most searched keywords: Whether you are looking for Primavera P6 Tutorial to Create, Maintain & Assign Project Baselines Schedules – PMA Technologies Under the Project menu, select Assign Baseline. From this dialogue box, you can assign primary, secondary and tertiary baselines to the project. Do you know how to baseline a project schedule in Primavera P6? PMA’s Wayne Beauregard provides a Primavera P6 tutorial on creating, maintaining, and assigning baseline schedules. For those not familiar with the term project baseline schedules, it is simply a copy of your current schedule taken at a particular time. Project baselines are created at the point when you need a benchmark to compare future progress against, or you need to perform what-if scenarios. A good example is to baseline the initial schedule so you can measure performance as the project progresses through time
- Table of Contents:
Primavera P6 Tutorial to Create Maintain & Assign Project Baselines Schedules
Free 30-Day Trial Downloads
Stay Connected

Primavera P6 Baselines Explained – Ten Six Consulting
- Article author: tensix.com
- Reviews from users: 10600 Ratings
- Top rated: 3.4
- Lowest rated: 1
- Summary of article content: Articles about Primavera P6 Baselines Explained – Ten Six Consulting The baseline created can be assigned as a Project, Primary, Secondary or Tertiary baseline, depending upon your choice. Until you assign your … …
- Most searched keywords: Whether you are looking for Primavera P6 Baselines Explained – Ten Six Consulting The baseline created can be assigned as a Project, Primary, Secondary or Tertiary baseline, depending upon your choice. Until you assign your … Primavera P6 baselines are copies of your current schedule taken at a particular point in time. There are four types of Primavera P6 Baselines which P6
- Table of Contents:
Primary Sidebar
Footer
Assign a P6 Baseline to a P6 Schedule
- Article author: help.deltek.com
- Reviews from users: 46881 Ratings
- Top rated: 4.7
- Lowest rated: 1
- Summary of article content: Articles about Assign a P6 Baseline to a P6 Schedule In the Projects pane, right-click on the P6 project and select Assign Baseline. · Select the P6 project in the Projects pane and click Get External Data From > … …
- Most searched keywords: Whether you are looking for Assign a P6 Baseline to a P6 Schedule In the Projects pane, right-click on the P6 project and select Assign Baseline. · Select the P6 project in the Projects pane and click Get External Data From > … Assign a P6 baseline to a P6 schedule. Assigning a P6 baseline to a P6 schedule allows you to compare baseline data with the current schedule.
- Table of Contents:
How to Create Project Baselines in Primavera P6 Professional | Taradigm
- Article author: www.taradigm.com
- Reviews from users: 43628 Ratings
- Top rated: 3.3
- Lowest rated: 1
- Summary of article content: Articles about How to Create Project Baselines in Primavera P6 Professional | Taradigm To create a new baseline in Primavera P6, select Project > Maintain Baselines. … The Maintain Baselines window will open. The top half of the … …
- Most searched keywords: Whether you are looking for How to Create Project Baselines in Primavera P6 Professional | Taradigm To create a new baseline in Primavera P6, select Project > Maintain Baselines. … The Maintain Baselines window will open. The top half of the … Primavera P6 Professional | Project Baseline | Maintain Baselines | Schedule Comparison | Data Date | Gantt Chart
- Table of Contents:
HOW DO WE USE BASELINES
CREATING A BASELINE
ADJUSTING BASELINE DETAILS
Subscribe To Our Newsletter
You have Successfully Subscribed!

Error 403 (Forbidden)
- Article author: www.quora.com
- Reviews from users: 16197 Ratings
- Top rated: 4.0
- Lowest rated: 1
- Summary of article content: Articles about Error 403 (Forbidden) After you have finalized your schedule, from the top menu, go to PROJECT >> MAINTAIN BASELINE. Click on ADD. · After finalizing your schedule, go to the projects … …
- Most searched keywords: Whether you are looking for Error 403 (Forbidden) After you have finalized your schedule, from the top menu, go to PROJECT >> MAINTAIN BASELINE. Click on ADD. · After finalizing your schedule, go to the projects …
- Table of Contents:
Schedule Baseline and User Baseline in Primavera P6 – projectcubicle
- Article author: www.projectcubicle.com
- Reviews from users: 5758 Ratings
- Top rated: 4.9
- Lowest rated: 1
- Summary of article content: Articles about Schedule Baseline and User Baseline in Primavera P6 – projectcubicle Now the schedule baseline is created in Primavera P6. We will assign it to the project. In order to assign, Select Project | Assign Baselines … …
- Most searched keywords: Whether you are looking for Schedule Baseline and User Baseline in Primavera P6 – projectcubicle Now the schedule baseline is created in Primavera P6. We will assign it to the project. In order to assign, Select Project | Assign Baselines … There are 2 baseline schedules used in Primavera P6 which are project user and user baselines. They are used to track the performance.
- Table of Contents:
Schedule Baseline Project Baseline and User Baseline in Primavera P6
Schedule Baseline and User Baselines in Primavera P6
Follow Us
Schedule Baseline and User Baseline in Primavera P6 – projectcubicle
- Article author: www.prescience.com.au
- Reviews from users: 28492 Ratings
- Top rated: 4.9
- Lowest rated: 1
- Summary of article content: Articles about Schedule Baseline and User Baseline in Primavera P6 – projectcubicle Step 1: In the Menu bar, click on the ‘Project’ tab, select ‘Maintain Baselines’ and choose the baseline that will be updated. Click on ‘Update’ … …
- Most searched keywords: Whether you are looking for Schedule Baseline and User Baseline in Primavera P6 – projectcubicle Step 1: In the Menu bar, click on the ‘Project’ tab, select ‘Maintain Baselines’ and choose the baseline that will be updated. Click on ‘Update’ … There are 2 baseline schedules used in Primavera P6 which are project user and user baselines. They are used to track the performance.
- Table of Contents:
Schedule Baseline Project Baseline and User Baseline in Primavera P6
Schedule Baseline and User Baselines in Primavera P6
Follow Us
See more articles in the same category here: https://chewathai27.com/toplist.
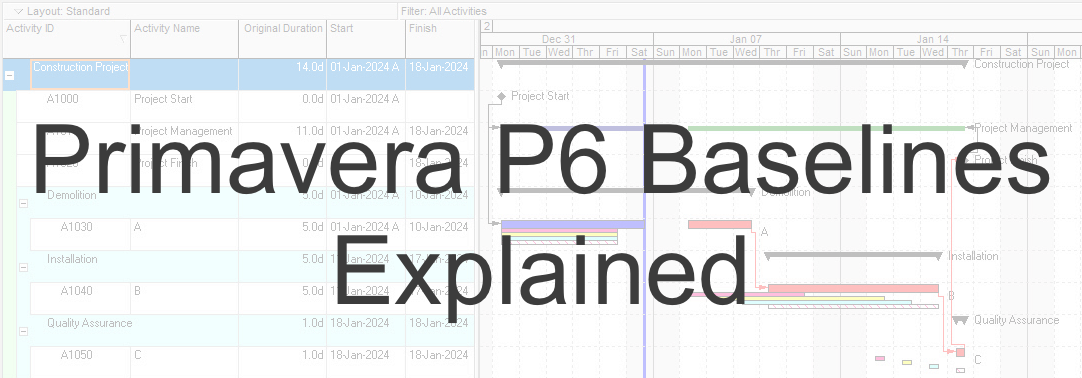
Baselines in Primavera P6
One of the most powerful features of Primavera P6 is its ability to track one or more baselines, which gives you an understanding of where your project is currently, compared to where it was when it first started, or perhaps at some other phase gate or key milestone.
This article will show you how to baseline your schedule in P6 so that you can refer to it later and compare it to how your schedule looks in the future.
Unlike Microsoft Project, which has a simple baseline that only tracks the start and finish dates of each task, baselines in Primavera P6 are much more robust. When you baseline a P6 schedule, you are not just tracking changes to dates; you are making a copy of your entire project, meaning that when you compare a P6 baseline to your current project, you will be able to see the differences between every aspect of your project, not just the dates.
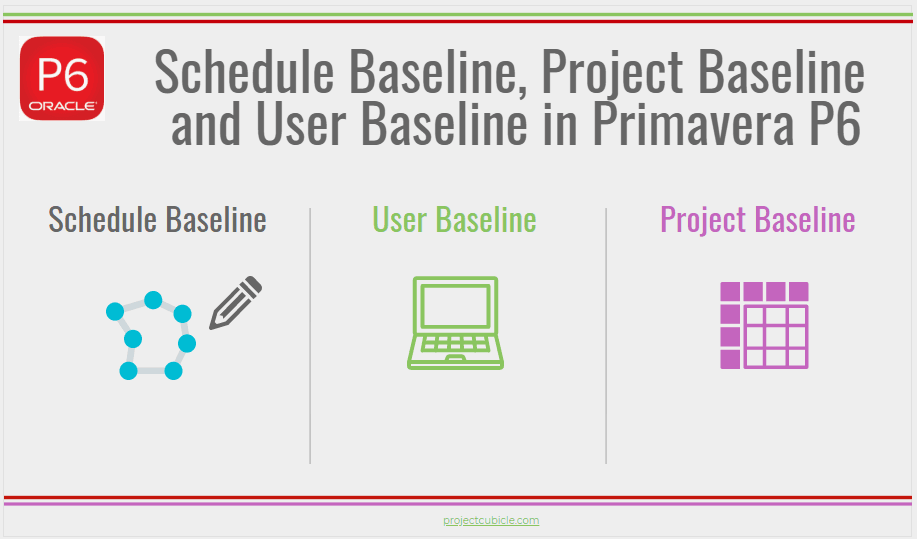
There is no practical limit to the number of baselines that you can create in Primavera P6, though each baseline can take up a considerable amount of space since it is truly a complete copy of the project. Furthermore, while you can create a lot of baselines in P6, you can only have four assigned baselines at a time: one project baseline and up to three user baselines.
Project Baseline
The project baseline in Primavera P6 is the official baseline for your project. It is usually something that is established at the very beginning of your project so that you can compare it to the current state of your project in the future. The project baseline is typically approved by all project stakeholders before your project begins, and is subject to strict change control rules, so should not be changed after it has been set.
User Baselines
User baselines are much less strict than project baselines, so can be created more frequently and with less oversight. Primavera P6 supports up to three official user baselines called Primary, Secondary, and Tertiary. As noted above, it is possible to have a large number of baselines, but only three of those can officially be designated as user baselines at a time.
Creating Baselines
Before you can designate a baseline as a Project Baseline or one of the three Primary, Secondary, or Tertiary User Baselines, you need to actually create the baseline itself. Remember that baselining in Primavera P6 tracks all aspects of the schedule, so when you create a baseline, you are literally making a copy of your project. Here’s how:
We’ll start with a simple P6 schedule. Here, we have activities, a WBS, dates, percent complete, and predecessors: To create your first baseline, go to Project > Maintain Baselines: On the Maintain Baselines screen, click Add and then choose to Save a copy of the current project as a new baseline. When you click OK, Primavera P6 will copy your current project and use that to create the new baseline: Once the new baseline has been added, click on it to select it and then give it a Baseline Name and a Baseline Type: Over time, you can add more baselines to your project in the same manner. Remember that you can have as many baselines in your project as needed, but you can only assign four baselines to the pre-defined slots at any given time.
Assigning Baselines
Once your baselines have been defined, you can assign them to the four baseline slots in Primavera P6. To do this:
Go to Project > Assign Baselines: On the Assign Baselines screen, you will see four dropdowns for the Project Baseline, followed by Primary, Secondary, and Tertiary. In our example, we’ve only defined one baseline so far, so we’ll assign it to the Project Baseline by clicking on the dropdown and selecting the baseline that we defined in the previous section: If you have already defined multiple baselines, you can assign them to the Primary, Secondary, and Tertiary baseline slots, as desired.
Displaying Baseline Dates
Once a baseline has been defined and assigned, you can show your baseline dates in the Primavera P6 Activities grid. To do this:
Right-click in the grid and choose Columns from the context menu: On the Columns screen, expand the Dates category. You will see a list of baseline-related date fields. Select the baseline fields that you need. You can select multiple columns at once by holding down the Ctrl key on your keyboard while left-clicking on multiple columns. In our example, if we want to show the dates associated with the Project Baseline, we should select the BL Project Start and BL Project Finish fields: Once your desired columns are selected, click the Add to List button to move them to the Selected Options list on the right-hand of the screen. Once the columns have been added, you can use the Up and Down buttons to re-order the columns as needed: Click OK, and you will see the newly-selected baseline columns appear in Primavera P6:
There are four baseline slots in Primavera P6, and there are four pairs of baseline columns that are associated with each of those slots. Depending on which baseline you are using, the columns that you need to add to the Primavera P6 activities grid will vary:
Primavera P6 Tutorial to Create, Maintain & Assign Project Baselines Schedules
In a recent PMA Consultants Knowledge Sharing Session, Wayne Beauregard discussed creating, maintaining and assigning baseline schedules in Primavera P6, and here is a condensed version of the tutorial.
You can find more tutorials on the following scheduling topics: Basic Guidelines for Quantity Tracking in P6, Managing Working Hours in Primavera P6, Identifying Longest Paths in Primavera P6, Importing Primavera P6 Schedule into NetPoint, and Successful Interactive Planning Sessions & Efficient Transition Between NetPoint and P6.
Project Schedule Baseline Definition & Background
For those not familiar with the term baseline schedules, it is simply a copy of your current schedule taken at a particular point in time. Baselines are typically created at the point during the project when you need a benchmark to compare future progress against or you need to perform what-if scenarios. A good example is to baseline the initial schedule so you can measure performance as the project progresses through time.
Although many baselines can be created for a project, only two can be used at any given time to display and compare data.
How to Baseline a Schedule?
The quickest way to create a baseline schedule is first to ensure there are no open projects by going under the File menu, selecting Close All and confirming that you want to close the project.
Next, you will need to display EPS structure. It should list all the projects assigned to that database. If the structure is not shown, go to the menu item Enterprise and select Projects.
Copying a Project
Now that your projects are shown, click once on the project you would like to copy then right click and select copy. Right click again and select Paste. To make an exact copy of the selected project except for the default options, click OK several times through the dialogue boxes until the project is created.
The project is typically created with a project ID displayed with a “-1”. You may change the project’s ID and name by clicking once on the project and then editing the ID or name. Press Enter to save the new ID or name.
Assigning & Maintaining a Baseline
Once the naming convention is set, you are ready to assign the baseline to your project of choice. Open the original project from which the copy was made.
Click once on the project, right click and select Open Project. Now under the Project menu, select Maintain Baseline. From here, you can add, delete, copy, update, or restore baselines for the open project.
Once you’ve made your selection, click OK and a dialogue box will open displaying the list of available projects from the EPS structure. Choose your project and click Select.
At this point, the baseline has been maintained or in other words, a copy of another schedule has been made available to this project. Now, close the active window.
The last step in the process is to assign your baseline to the project.
Under the Project menu, select Assign Baseline. From this dialogue box, you can assign primary, secondary and tertiary baselines to the project. At this step you have a few options. If you only are comparing one baseline to the current project, then assign that baseline as the project baseline.
If you want to compare more than one baseline then you would use one of the user baselines.
Reports & Comparisons
Once the above steps are complete, you will be able to run whatever reports and comparisons you need.
Please note: If you return to the project tab, you will notice that the file we created for the baseline is no longer available to view. That is why it is recommended you make a copy of the file before maintaining as a baseline. If you mistakenly maintain a file before copying it, you can always go back to maintain baselines under the Project menu to restore the file.
Disclaimer: This tutorial was created with P6 Version 15.1, so depending on your version of the software some of the screens may look slightly different but should function the same.
In a future training tutorial, we will cover how custom reports are created and used to compare data between project schedules.
Primavera P6 Baselines Explained
Primavera P6 baselines are copies of your current schedule taken at a particular point in time. There are four types of Primavera P6 Baselines which P6 supports: the Project Baseline and three User Baselines. The Project Baseline should be static, fixed by the shareholders at the start of the project, hence the title ‘Project Baseline’.
The three other User Baselines can be used at any time in your schedule to measure performance. Below is a diagram (taken from the Ten Six Primavera P6 training course) which highlights the four different Baselines, their relationship to the Current Project and addresses the data that can be captured.
Current Project
The Current Project is the updated schedule. Activities show the current status of the project and they are editable.
Project Baseline
The Project Baseline is the approved copy of the project schedule. It is created with the approval of the stakeholders and should remain static. The Project Baseline is typically maintained under strict version control and is only changed by going through a formal process.
Starting with a Baseline
To create a baseline in Primavera P6 Professional use the Maintain Baselines dialog as shown below:
The baseline created is a complete copy of the project stored in the database. The Project Baseline will not appear in the Project list as Primavera P6 labels it as a Baseline copy. In this example, a Customer Sign off Baseline is being created. However, this copy is only visible in the Assign Baselines dialog example below.
The baseline created can be assigned as a Project, Primary, Secondary or Tertiary baseline, depending upon your choice. Until you assign your baseline (as a Project, Primary, Secondary or Tertiary baseline) the ‘Current Project’ will act as a baseline. You can create any number of baselines within each Primavera P6 project and the tool does not limit this at all. It will take up space in your database though as each baseline is a full copy of your project.
User Baselines
User Baselines are the unofficial copies of a project schedule. While the Project Baseline acts as the control, User Baselines may be created during a project as a measure against the initial schedule. They are used to measure performance as your project progresses over time. A User Baseline is a snapshot taken at a period of time to be used as a benchmark to compare to future progress. They can be used internally to track and report the project performance for short and long term goals.
To create a user Baseline, use the Maintain Baselines dialog box and select the period you require, this can be a weekly snapshot, a monthly snapshot or maybe a What- If snapshot. Once you have created your baseline you will need to assign it to one of the three User Baseline options in the Assign Baselines dialog box. If you assign your baseline as a Primary Baseline Primavera P6 will name it as BL1 (Baseline 1), a Secondary Baseline will be called BL2 (Baseline 2) and a Tertiary Baseline will be called BL3 (Baseline 3).
If we return to the Assign Baselines dialog box you will notice that a Primary User Baseline is being created for a 1 month snapshot baseline. Once the assignment is completed, Primavera P6 will display the BL field values. The BL1 prefixed columns in the table will contain the dates which have been selected in the Assign Baseline dialog, in this case 1 month.
The Activities highlight the 1 month Primary User Baseline displaying the BL1 start and BL1 Finish dates. The BL2 (Secondary User Baseline) columns and the BL3 (Tertiary User Baseline) remain blank awaiting assignation.
The Gantt chart will offer a visual comparison of data between the Project Baseline and the User Baseline.
To display different baselines in the Gantt chart, select the Bars dialog and modify the Bar Style to your preference.
Summary
Baselines are a powerful feature in Primavera P6. They’re ideal for managing variance or if you need to perform ‘What-If’ scenarios. It’s a powerful capability and is frequently used by project managers.
However, don’t forget that creating a User Baseline creates a complete copy of your schedule for the period of time specified and this will take up room in your database. For example, if your project reaches the duration of six months, then a user baseline created maybe at three months or before can probably be deleted or backed up off line.
So you have finished reading the how to assign baseline in p6 topic article, if you find this article useful, please share it. Thank you very much. See more: how to remove baseline in primavera p6, p6 relationships, p6 baseline dates incorrect, how to detach baseline in p6, how many baselines can be created in primavera, how to copy a project in p6, tracking progress in primavera p6, p6 videos