
You are looking for information, articles, knowledge about the topic nail salons open on sunday near me how to attach wood planks to wall without nails on Google, you do not find the information you need! Here are the best content compiled and compiled by the https://chewathai27.com team, along with other related topics such as: how to attach wood planks to wall without nails how to attach wood to drywall without studs, how to attach wood to brick wall without drilling, best glue to stick wood to wall, peel and stick wood wall, how to attach mdf panels to wall, glue for walls removable, wall paneling without nail gun, shiplap wall without nail gun
Contents
How do you glue planks to the wall?
Apply in a ‘S’ pattern a generous bead of construction adhesive to the back of each plank using the caulking gun. Place the plank on the wall and wiggle it slightly to spread out the glue. Then pin nail the plank a few times. The pin nails are only meant to hold the piece in place until the glue sets in about 24 hours.
Can you install shiplap without nails?
Yep. You read that right. I just installed a shiplap accent wall without using a single nail. That means no filling a zillion nail holes and no sanding them before you can paint.
Do you glue or nail paneling?
You may apply panels with adhesive directly to surfaces that are level, sound and clean. Nail directly into the studs when installing your paneling over existing paneling, wallpapered walls or surfaces which will not support adhesive.
How do you stick wood to a wall without drilling?
The best way to attach wood to brick without drilling is to use a brick wall hook. These hooks are designed for brick walls, even slightly curved ones. They are removable, adhesive-free, and strong (holds up to 25 lbs). You can install them in seconds and most importantly: no holes to drill.
Can you glue wood planks to wall?
Adhesive may be used to apply planks directly to walls as long as the surface is level, sound and clean. Once the plank is fitted, apply beads of adhesive with a caulking gun in a continuous strip along the top, bottom and both sides of the plank.
Will Liquid Nails hold up shiplap?
How to hang shiplap without a nail gun? You can use liquid nails instead of using a nail gun. You might want to just tap one or two nails into each board.
Should I glue or nail shiplap?
For shiplap with a smooth prepainted surface, like our Timeless nickel gap shiplap, you’ll want to use adhesive and nails. Instead of nailing through the face of the board, you’ll only nail through the flange of each board to avoid any visible nail marks that will affect the overall look of your wall.
Can you use Command strips on shiplap?
Do Command strips work on shiplap? Command strips have a strong adhesive that holds well and comes off without leaving holes or removing paint. These strips work well on shiplap if the area is properly prepared before the strip is applied.
What is the best adhesive for wood paneling?
- Liquid Nails Heavy Duty Construction Adhesive. Considered somewhat of an industry-standard, Liquid Nails is an excellent latex-based construction adhesive for attaching wood paneling. …
- Gorilla Heavy Duty Construction Adhesive. …
- Loctite PL Premium Construction Adhesive.
What glue is best for wood walls?
- Gorilla Wood Glue: Best wood glue for an unbreakable bond. …
- Everbuild 502 All Purpose Weatherproof Wood Adhesive: Best wood glue on a budget. …
- Titebond lll Ultimate Wood Glue: Best wood glue for ultimate versatility.
What is the best adhesive for wood to drywall?
You will definitely want to choose a product that is made for drywall. Loctite PL 200 Projects Construction Adhesive fits the bill. This premium-grade adhesive provides a super strong bond to most building materials including wood, metal, concrete, or block.
DIY Accent wood wall, no Nails or Glue.|Paulstoolbox – YouTube
- Article author: www.youtube.com
- Reviews from users: 48710
 Ratings
 - Top rated: 3.1
- Lowest rated: 1
- Summary of article content: Articles about DIY Accent wood wall, no Nails or Glue.|Paulstoolbox – YouTube Updating …
- Most searched keywords: Whether you are looking for DIY Accent wood wall, no Nails or Glue.|Paulstoolbox – YouTube Updating Create a great looking shiplap wall with inexpensive plywood and NO GLUE or NAILS! Easy to install Accent walls that will give endless interior design option…accent wall ideas, diy accent wall, accent wall, interior design, wood wall, do it yourself, home decor, diy, interior design ideas, feature wall, how to, diy wood wall, woodworking, home improvement, living room ideas, wood, living room, living room makeover, accent wall ideas for living room, plank and mill, barn wood wall, accent, diy wood panel accent wall, diy room decor, room makeover
- Table of Contents:

Plank Wall Installation – Provincial Plank
- Article author: www.provincialplank.com
- Reviews from users: 11538 Ratings
- Top rated: 3.8
- Lowest rated: 1
- Summary of article content: Articles about Plank Wall Installation – Provincial Plank Updating …
- Most searched keywords: Whether you are looking for Plank Wall Installation – Provincial Plank Updating
- Table of Contents:
Provincial Plank™ Installation instructions
Staggered
Offset Staggered
Herringbone
Diagonal
Random
Simple Shiplap: How To DIY a Planked Wall with No Nails
- Article author: foxhollowcottage.com
- Reviews from users: 16510 Ratings
- Top rated: 4.0
- Lowest rated: 1
- Summary of article content: Articles about Simple Shiplap: How To DIY a Planked Wall with No Nails Updating …
- Most searched keywords: Whether you are looking for Simple Shiplap: How To DIY a Planked Wall with No Nails Updating Looking for an easy, low hassle was to add some cottage farmhouse charm to your home? Check out: Simple Shiplap: How To DIY a Planked Wall with No Nails
- Table of Contents:
What you’ll need for this project
How to install no-nail shiplap
Simple Shiplap How To DIY a Planked Wall with No Nails
How to Install Wood Paneling | 4 x 8 Sheets
- Article author: www.designthespace.com
- Reviews from users: 18370 Ratings
- Top rated: 4.5
- Lowest rated: 1
- Summary of article content: Articles about How to Install Wood Paneling | 4 x 8 Sheets Updating …
- Most searched keywords: Whether you are looking for How to Install Wood Paneling | 4 x 8 Sheets Updating Installing paneling is a lot like hanging wall paper. You will start at a corner of the wall and work your way around.Installation, paneling, how to, panel installation, acclimate, paneling adhesive, paneling guide
- Table of Contents:
Simple Shiplap: How To DIY a Planked Wall with No Nails
- Article author: foxhollowcottage.com
- Reviews from users: 29205 Ratings
- Top rated: 4.7
- Lowest rated: 1
- Summary of article content: Articles about Simple Shiplap: How To DIY a Planked Wall with No Nails Updating …
- Most searched keywords: Whether you are looking for Simple Shiplap: How To DIY a Planked Wall with No Nails Updating Looking for an easy, low hassle was to add some cottage farmhouse charm to your home? Check out: Simple Shiplap: How To DIY a Planked Wall with No Nails
- Table of Contents:
What you’ll need for this project
How to install no-nail shiplap
Simple Shiplap How To DIY a Planked Wall with No Nails
Alternatives to Nails in Wall: How to Attach Wood to Wall Without Nails
- Article author: www.nobroker.in
- Reviews from users: 47520 Ratings
- Top rated: 4.0
- Lowest rated: 1
- Summary of article content: Articles about Alternatives to Nails in Wall: How to Attach Wood to Wall Without Nails To attach wood to wall without nails, you can use epoxy glue. … You can also purchase constructive adhesive to attach the wooden planks. …
- Most searched keywords: Whether you are looking for Alternatives to Nails in Wall: How to Attach Wood to Wall Without Nails To attach wood to wall without nails, you can use epoxy glue. … You can also purchase constructive adhesive to attach the wooden planks. Alternatives to nails in wall: How to attach wood to wall without nails? You need to drill the wall to attach wood to the wall. This damages the wall and there… read more
- Table of Contents:
Get Your Real
Estate Report Copy Now
Contact Us
Register Now
Login
Lost Password
Add question
Login
Register Now
Register Now
Login
How to attach wood to wall without nails
Answer ( 1 )
Leave an answer
Didn’t find what your are looking for
Related Questions
Questions for you
Plank Wall Installation – Provincial Plank
- Article author: www.provincialplank.com
- Reviews from users: 566 Ratings
- Top rated: 3.3
- Lowest rated: 1
- Summary of article content: Articles about Plank Wall Installation – Provincial Plank Place the plank on the wall and wiggle it slightly to spread out the glue. Then pin nail the plank a few times. The pin nails are only meant to hold the piece … …
- Most searched keywords: Whether you are looking for Plank Wall Installation – Provincial Plank Place the plank on the wall and wiggle it slightly to spread out the glue. Then pin nail the plank a few times. The pin nails are only meant to hold the piece …
- Table of Contents:
Provincial Plank™ Installation instructions
Staggered
Offset Staggered
Herringbone
Diagonal
Random
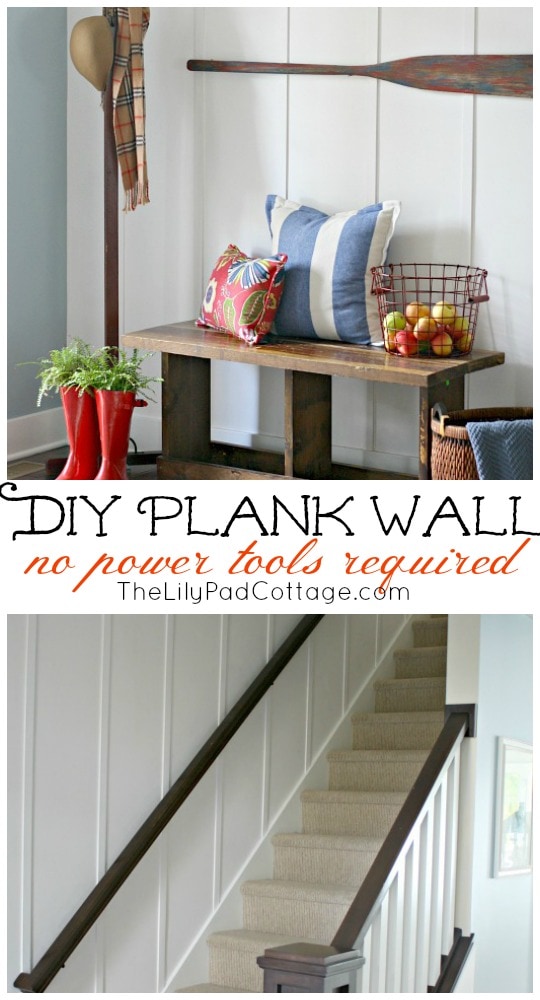
How to DIY a Plank Wall – no power tools needed! – The Lilypad Cottage
- Article author: www.thelilypadcottage.com
- Reviews from users: 15501 Ratings
- Top rated: 4.7
- Lowest rated: 1
- Summary of article content: Articles about How to DIY a Plank Wall – no power tools needed! – The Lilypad Cottage Easy DIY plank wall tutorial – no power tools needed! … Countersink your nails with the nail set and fill in the holes with wood putty. …
- Most searched keywords: Whether you are looking for How to DIY a Plank Wall – no power tools needed! – The Lilypad Cottage Easy DIY plank wall tutorial – no power tools needed! … Countersink your nails with the nail set and fill in the holes with wood putty. Easy DIY plank wall tutorial – no power tools needed! Add character to your home easily, with nothing more than a miter saw, liquid nails and some paint.
- Table of Contents:
Post navigation
Similar Posts
37 Comments
Comments navigation
Comments navigation
Search This Blog
How to install a plank wall…and how to avoid the biggest mistake EVER!!
|
My Love 2 Create
- Article author: www.mylove2create.com
- Reviews from users: 12327 Ratings
- Top rated: 3.2
- Lowest rated: 1
- Summary of article content: Articles about
How to install a plank wall…and how to avoid the biggest mistake EVER!!
|
My Love 2 Create
hardboard planks popping off of plank wall, securing with nails … the lignin’s in the wood which work as a natural adhesive to bind the fibers together. … - Most searched keywords: Whether you are looking for
How to install a plank wall…and how to avoid the biggest mistake EVER!!
|
My Love 2 Create
hardboard planks popping off of plank wall, securing with nails … the lignin’s in the wood which work as a natural adhesive to bind the fibers together. You don’t want to miss this tutorial on how to install a Plank wall…and how to avoid the biggest mistake EVER!!How to install a plank wall…and how to avoid the biggest mistake EVER!! - Table of Contents:
ABOUT AUTHOR
Follow us
Categories
Popular Posts
Privacy Policy
Quantcast
FOLLOW US @ INSTAGRAM
Popular Posts
Advertisement

|
My Love 2 Create
How To Install A Reclaimed Wood Wall – What You Need To Know
– Centennial Woods
- Article author: centennialwoods.com
- Reviews from users: 1225 Ratings
- Top rated: 4.6
- Lowest rated: 1
- Summary of article content: Articles about
How To Install A Reclaimed Wood Wall – What You Need To Know
– Centennial Woods Do not remove banding from material that you do not plan on installing that day. Reference line for installing a wood plank wall. … - Most searched keywords: Whether you are looking for
How To Install A Reclaimed Wood Wall – What You Need To Know
– Centennial Woods Do not remove banding from material that you do not plan on installing that day. Reference line for installing a wood plank wall. How to install a reclaimed wood wall with easy video and written instructions. Includes pro tips and a tool list. Featuring tutorials from She’s The Carpenter and Zac Builds. - Table of Contents:
Preparation
Reference line
Gaps
Construction Adhesive
Secure With Nails
Continue
Repeat Until Complete
– Centennial Woods
See more articles in the same category here: https://chewathai27.com/toplist.
Plank Wall Installation
Provincial Plank™ Installation instructions
Measuring Tape & Pencil
Mitre Saw
Level
Chalk Line
Hammer/Nail Gun
1” Pin Nails
Caulking Gun
Construction Adhesive – approx. 1 tube per carton of Provincial Plank™
Paint
Roller, Brush & Tray
Ladder
Staggered
Offset Staggered
Herringbone
Diagonal
Random
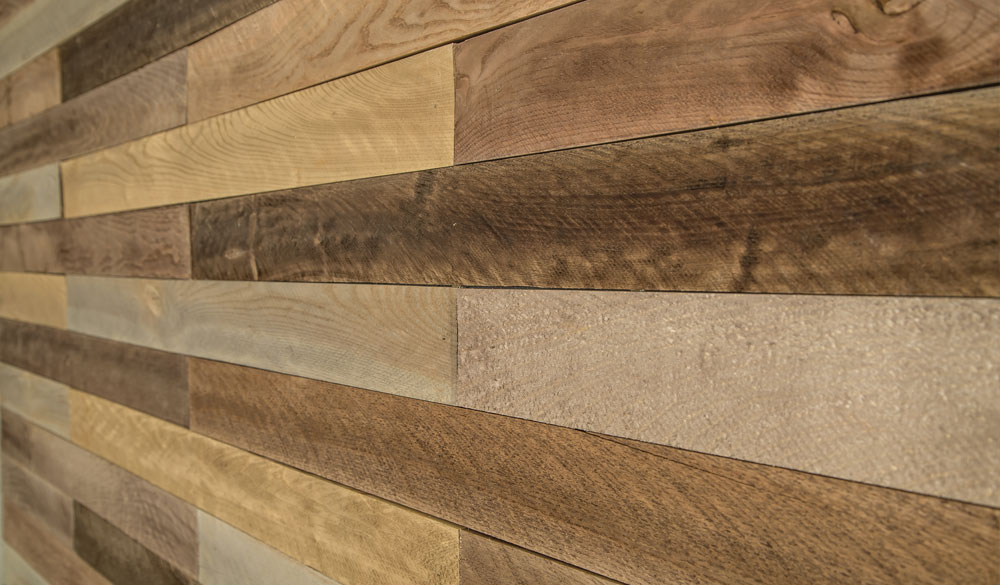
Provincial Plank™ must be inspected for quality prior to installation.Please address all issues prior to installation.If you suspect anything is incorrect with your product, DO NOT install.INSTALLATION IMPLIES ACCEPTANCE.Provincial Plank™ is to be used for interior applications onlyPlace Provincial Plank™ in the room where you plan to install. Allow 7 to 10 days for the wood to acclimatize. This is important – the wood needs to expand or contract based on the space’s relative humidity. Failure to do so may cause gaps to appear in the seams or lifting of the boards due to expansion once installed.After installation, Provincial Plank™ will expand and contract slightly. This is normal and should be expected – this is a natural product and so is not considered a manufacturer’s defect.Always wear proper safety glasses, hearing protection, dust mask and gloves when cutting or installing Provincial Plank™. Follow the proper safety procedures highlighted by the tool manufacturers.Install only one box at a time. Use all the pieces in this box before opening another. This will force you to use all the colours before moving on – and avoid the situation at then of the install of having enough pieces to finish, but only to find out they are all the same colour. Prior to placing the planks, consider the texture and colour of adjacent planks. Keep things varied by avoiding two of the same nearby.For outside corners and trim consider using Provincial Plank™ pieces. Use them as their full width, or rip them to a narrower size as you see fit. Perhaps install these first to act as a border.For adhesive, any construction adhesive will work but we recommend PL Premium. Adhesive tape (double sided tape) should never be used.A hammer and nails will work, but an air nail gun is much easier and faster.Measure the length and height in inches of your wall space. Multiply together and divide by 144. This will give you the square footage you need to cover. Add 5 to 10% for waste and off-cuts. Each carton of Provincial Plank™ covers 10 sqft.Remove any nails or other protrusions that may interfere with the proper laying of planks, including outlet covers. Clean the wall with TSP and rinse. Apply a coat of dark paint to offset any gaps that may appear between the planks. Ensure the paint is fully cured before starting plank installation.The choice is yours, and if you like it, you cannot be wrong. Here are some suggestions…Random will work well in a smaller space, perhaps under 6’ wide. Simply start off with your first piece and continue until you must cut the last piece in the row to fit. Keep this off-cut as it will be a starter piece for another row later.With the next row, cut the piece you want to install randomly so that the seam does not line up over the piece below. If you carry on this way, the seams will appear randomly throughout the wall.If you’re installing horizontal, start at the floor. Ensure your first row is level. If you’re installing Herringbone or Diagonal, snap a chalk line in the middle of the wall at the angle the pieces are to be installed. Then install the pieces with reference to this line.Apply in a ‘S’ pattern a generous bead of construction adhesive to the back of each plank using the caulking gun. Place the plank on the wall and wiggle it slightly to spread out the glue. Then pin nail the plank a few times. The pin nails are only meant to hold the piece in place until the glue sets in about 24 hours. Shoot the nails on a diagonal to help the temporary hold.If the piece has been measured and cut, dry fit to ensure your cut is accurate before applying the glue.If you’ve cut a piece and the end cut is exposed, purchase a similar colour stain (ie MinWax) to dab on the end. If the end cut cannot be seen, no stain is required.Check for level as you progress up the wall (or parallel if diagonal) and adjust accordingly. About 2/3 up the wall, measure to the ceiling. You may find even if you’re level, the distance at one end may be different than the other. This will allow you ample time to make slight adjustments so that your last piece is parallel with the ceiling.
Simple Shiplap: How To DIY a Planked Wall with No Nails
Simple Shiplap:
How To DIY a Planked Wall with No Nails
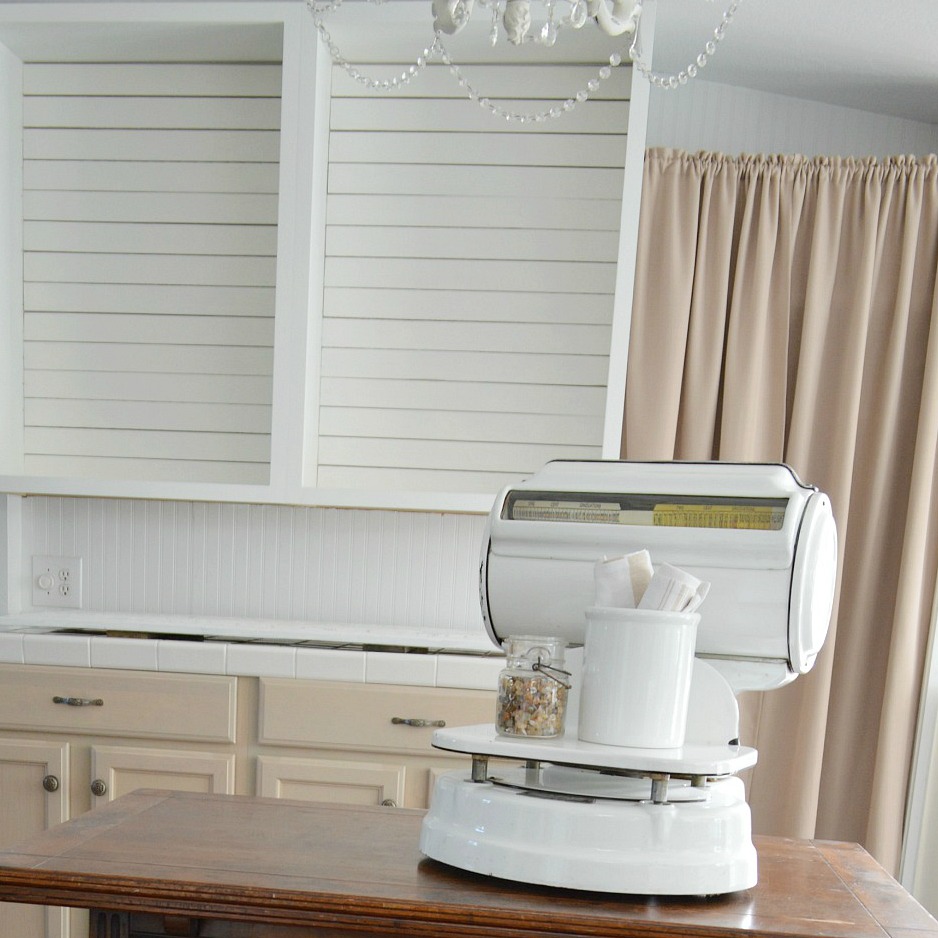
Yep. You read that right. I just installed a shiplap accent wall without using a single nail. That means no filling a zillion nail holes and no sanding them before you can paint.
After toying with the idea for a long time, I finally decided to add a wood plank, or shiplap, or shoplap… whatever you want to call it, accent feature to my open cabinets. So I wouldn’t have to drag the air-hose up a story, over the deck and in through the sun room door to use our pneumatic nailer, Jim picked up some mounting tape for me.
I’m going to tell you, I was really hesitant that this was going to work. I should have known with all my successful Command projects, that it would. I also should have had more faith in my hubby, because it worked awesome! And, I did it 100% myself while he was busy down in the workshop.
I’ll share the before & during now, and then I’ll share with you how easy it was to do.
Okay, half a before. I got eager.
It was so easy, and went so fast, I painted them the same day. Two coats and they were ready to go!
What you’ll need for this project:
(some affiliate links provided)
Wood [I used 1/4 inch, 3 inch Pine boards cut to length] [similar to this] Saw
Sanding Block, medium grit.
Level similar this one] It’s light and easy to use, even with one hand.
[find it here] for heavier boards up to 5 lbs try [ & 15 lbs [this] thi s] Mounting TapeScissors
Hammer [to burnish tape] I love my short hammer!
Two Quarters
TSP optional
How to install no-nail shiplap:
Make sure the area you will be working on is clean & dry.
My wall was painted in a matte finish paint, and free of dirt or oils due to it’s location. If you need to clean your walls I suggest wiping them down with a TSP solution.
Measure your work area and cut wood accordingly.
Use a sanding block to remove any rough edges.
Prepare your first board for installation by cutting 2 lengths of tape a bit shorter than the width of your board.
Remove tape backs and stick to board, vertically (up & down), a few inches from the end of the board. Place one piece on each side. Press firmly. I used a hammer head to apply pressure to the tape in the middle and along all edges.
Remove the second pieces of tape backing.
Check for level and install your first board, or first course (a run of boards covering one row of your surface) by pressing firmly with even pressure on both ends. Hold and push.
Repeat until complete, checking for spacing (you can use the quarters) and level with each board.
Since every surface area is different, you will need to figure out your cuts and board length/width for your particular project. Depending on the height of the project and how wide you want your boards, you may need to trim your last board.
I got super lucky, and with my spacing, was able to use full width boards all the way up! I also eye-balled it after the first few quarter spacers, but I’ll leave that one up to you! I’m a rebel. And lazy. And was feeling pretty good about how it was looking. You might be more precise.
I hope you liked my easy way to shiplap tutorial and that this might be something that could work for you! While mine was installed in a smaller space, I feel confident this would easily work on an accent wall, bathroom, above a fireplace, or even a whole room! I shared different strength mounting tapes in my “what you’ll need for this project” section.
I’m loving mine! It’s all painted & pretty & I can’t wait to decorate it. Just in time for the Autumn’s In The Air Fall home tour on Wednesday! See you all soon.
xo Shannon
How to Install Wood Paneling
Supplies and Tools Needed For Most Installations
How to Install Wood Wall Paneling – Printer Friendly Version
Tape Measure Putty Sticks & Wood Filler Level Adhesive Caulk & Caulking Gun Hammer Crayon or Lipstick Finishing/Paneling Nails Screwdriver Jig Saw 2-inch Foam Brush Shims Pencil Drill Stain or Paint
Tips … Be sure to wear safety glasses and ear protection while working on your project. While cutting and creating wood dust, wear a dust mask. For your protection and that of anyone near your work area, always think about what you are going to do before you take action.
Installing paneling is a lot like hanging wall paper. You will start at a corner of the wall and work your way around.
Estimate the number of panels needed by measuring the room circumference in feet and dividing by four. Cutouts for large openings (such as windows and doors) can often be used to panel small areas, such as above a window. Check the existing wall condition. You may apply panels with adhesive directly to surfaces that are level, sound and clean. Nail directly into the studs when installing your paneling over existing paneling, wallpapered walls or surfaces which will not support adhesive. Sand down any protrusions in the wall for a smooth fit.
There may be a need for some preparation. If one of the walls you are paneling has a doorway, remove the trim around the door by prying it off. Also pry off the baseboard from the walls you will panel.
5.2mm (1/4″) thick plywood paneling can be nailed directly to the studs to satisfy the code requirements. While not a code, we recommend using a vapor barrier between the studs and the plywood paneling if there is spray foam insulation, since it adds another element of protection and preventative measures always cost less than repairs. Spray foam insulation may contain some liquids or moisture that over time potentially could damage wood or promote the growth of mold.
If your walls are not plumb, add furring strips to create a level, grid-like surface. These steps will also provide additional rigidity to your wall. Use either 1″ x 2″ or 1″ x 4″ kiln-dried lumber of 1/2″ plywood strips cut 2″ wide. Starting at the top, space strips horizontally 16″ apart, using shims to line them up for the true vertical plumb. Add a strip at the base. Starting in the corner, place vertical strips every four feet between your horizontal furring.
Before you begin condition (acclimate) your panels to the room. With all panels in the interior space where they will be installed, stand them individually along the long edge or lay them flat with wood sticks spaced between them so that air circulates around each panel. Let stand for at least 24 hours if installation is above grade and at least 48 hours if installation is below grade level. For all below grade applications, always use a vapor barrier between the outside walls and the studs. Remove all trim. Turn off the electricity before removing all receptacle covers. Once the panels have been acclimated to the room, place your paneling around the room in an attractive arrangement of grain, pattern or color. Previewing this way is especially important when you usepanels with a definite direction in the pattern. Once you have a good aesthetic sequence, number the back of the panels in the order in which they will be attached to the wall.
TO BETTER HIDE JOINTS BETWEEN PANELS
Use a 2-inch foam brush to stain or paint the wall surfaces at the point where your panels will be joined, using a color which matches the edges or grooves of your panels. This will make the joints less noticeable. You will need to protect the floor from stain or paint.
TO LOCATE SWITCH AND OUTLET HOLE LOCATIONS
Double-check all measurements before cutting panels. Start your installation in the corner that you see first when entering the room. To cut around openings like electrical switches or outlets, turn off the power at the main panel and then remove the cover plate to the switch or outlet. You can wipe lipstick or a crayon around the rim of the box and then press the panel into place to dry fit the panel. As the panel makes contact with the box, an outline will be left on the panel from the lipstick or crayon. Place the face of the panel down and use a jigsaw to cut around the outline. Make sure that the panel opening is resting on the wall and not on the lip of the box. The cover plate will cover any gaps between the box and the opening in the panel.
TO ATTACH THE PANELING TO THE WALL
Secure the paneling to the wall with panel adhesive and finishing nails. Load a caulking gun with a tube of panel adhesive and apply a small dab of it on the wall about every 10 inches. Place the panel on the wall and press it into the adhesive. Pull the panel away from the wall and let the adhesive become tacky. Push the panel back on the wall and roll the panel with a rolling pin. This will make sure that the panel and the adhesive make good contact.
Finally, drive finishing nails into place at the top of the panel. Apply baseboard to hold the bottom in place. Follow the same procedure to hold the adjoining sheet of paneling, but make sure this is a small gap between the two sheets to allow for movement during seasonal changes (use a dime as a guide). The stain you placed on the wall will help hide the gap.
Colored putty sticks of wood filler can be used to fill in any holes or blemishes on the paneling. Install remaining molding and door trim.
So you have finished reading the how to attach wood planks to wall without nails topic article, if you find this article useful, please share it. Thank you very much. See more: how to attach wood to drywall without studs, how to attach wood to brick wall without drilling, best glue to stick wood to wall, peel and stick wood wall, how to attach mdf panels to wall, glue for walls removable, wall paneling without nail gun, shiplap wall without nail gun