
You are looking for information, articles, knowledge about the topic nail salons open on sunday near me how to build a redwood deck on Google, you do not find the information you need! Here are the best content compiled and compiled by the Chewathai27.com team, along with other related topics such as: how to build a redwood deck redwood deck stain, how to build a bench on an existing deck, redwood deck cost, cedar deck, built-in deck benches with backs, built-in deck benches with backs plans, best deck materials 2022, best composite decking consumer reports
Contents
Can I use redwood for deck framing?
Seasoned or unseasoned garden grades of redwood lumber are suitable and most affordable for decks and other outdoor projects.
Does redwood deck need to be sealed?
The application of sealants, paints or other finishes is not required to complete a redwood structure.
What kind of Redwood do you use for a deck?
Naturally robust California Redwood is a durable and sustainable decking material prized for its rich reddish-brown hues and tones.
How thick should redwood decking be?
| Decking Type | Actual Thickness (inches) | Suggested On Center Joist Spacing (inches) |
|---|---|---|
| Tropical Hardwoods 1x | 13/16” | 16” |
| Thermally-Modified 5/4 | 1” | 16” |
| Pressure Treated Pine 5/4 | 1” | 16” |
| Western Red Cedar 5/4 | 1” | 16” |
How much space should be between redwood deck boards?
The Sweet Spot – Most people agree that 3/16” is a good gap between boards. Going more than a ¼” may get a little too wide. The width of a nail head is just about right. Treated Lumber – Usually treated lumber will have some shrinkage so you can butt the boards almost right against each other during installation.
Can you use redwood for deck joists?
If the joist are 2-feet apart then 2×4 framing is needed. 2×6 decking will span up to 4-feet. By the way, if Redwood is the chosen material consider using Construction Heart Redwood. It’s desirability stems from the fact that is moderately priced and reasonably knot free.
What is the best size wood for a deck?
Width: Six-inch wide boards are ideal in most cases. Four inch wide material takes longer to install, creates more gaps and requires a lot more fasteners—but you can use it. Eight inch wide boards, because of their greater width, have more of a tendency to crack and cup; avoid using them.
Can I use 1×4 for decking?
Width of material: We recommend only 1×4, 5/4×4 or narrower boards. Never use 1×6 or 5/4×6 material in close to ground applications. Spacing between boards: You must allow space for your deck boards to expand when they take on moisture, as they will inevitably do when exposed to wet weather, rain or high humidity.
What are the disadvantages of redwood?
With time, redwood loses its vibrant contrast and becomes more of a medium brown color. Yearly maintenance is required to keep the color rich. During the deck maintenance process, you need to be especially careful with the soft redwood decking so as not to damage the wood under high pressure.
How long will redwood deck last?
Typically, redwood decks last for about 30 years. However, if homeowners skip out on refinishing and sealing on a regular basis, redwood can blacken and turn more silver-grey in color than reddish-brown. This is especially common in areas that receive a lot of harsh sunlight.
How long should you wait to stain a new redwood deck?
New wooden decks should always receive a coat of paint or stain. Generally, all new decks should dry out for at least 30 days before stain or paint is applied.
Does redwood need to be pressure treated?
Redwood specifically designed for structure use is still a natural wood, but pressure-treated wood contains harmful elements, such as arsenic, copper and chromium. Care must be taken when installing this type of wood by using face masks and gloves to reduce contact with these chemicals.
Is redwood good for outdoor use?
Redwood. Redwood is most commonly used in outdoor furniture due to its natural insect and moisture resistant qualities. Redwood’s structure has little pitch and resin, so it holds finishes extremely well.
Which is better cedar or redwood?
Durability
Redwood – with a janka rating of 450lbs – is about 23% stronger than cedar (janka rating of 350lbs). Whether or not the extra strength is necessary for your project is up to you, but clearly redwood is more durable than cedar in general.
Can redwood be used for deck joists?
For deck joist that are spaced 16-inches apart, 1×4 or 1×6 decking can be used. If the joist are 2-feet apart then 2×4 framing is needed. 2×6 decking will span up to 4-feet. By the way, if Redwood is the chosen material consider using Construction Heart Redwood.
Can redwood be used structurally?
Redwood was not being used for structural buildings anymore because of the advent of other woods, although it was still characterized as the ideal choice to make decks out of. The properties it once held were still present and beautiful decks could be built without worry of chemicals, rot, insect attack, or decay.
Is redwood good for structural?
Structural Beams
For a lodge design on an entryway or porch enclosures, or even for open-beam ceilings, there’s nothing like redwood beams. These large beams are structurally sound with excellent stability. They resist shrinking and will not twist or warp.
how to build a redwood deck
- Article author: www.mfp.com
- Reviews from users: 22584
 Ratings
 - Top rated: 4.0
- Lowest rated: 1
- Summary of article content: Articles about how to build a redwood deck Updating …
- Most searched keywords: Whether you are looking for how to build a redwood deck Updating
- Table of Contents:
Laying Redwood Decking – YouTube
- Article author: www.youtube.com
- Reviews from users: 17496 Ratings
- Top rated: 4.4
- Lowest rated: 1
- Summary of article content: Articles about Laying Redwood Decking – YouTube Updating …
- Most searched keywords: Whether you are looking for Laying Redwood Decking – YouTube Updating Bob confers with carpenter Cortney Lofton, as he lays the redwood decking for the back porch.video, chia sẻ, điện thoại có máy ảnh, điện thoại quay video, miễn phí, tải lên
- Table of Contents:

Redwood Maintenance | Humboldt Sawmill
- Article author: www.getredwood.com
- Reviews from users: 4443 Ratings
- Top rated: 4.7
- Lowest rated: 1
- Summary of article content: Articles about Redwood Maintenance | Humboldt Sawmill Updating …
- Most searched keywords: Whether you are looking for Redwood Maintenance | Humboldt Sawmill Updating Maintenance made easy
Finishing Your Redwood Structure
Humboldt Sawmill redwood can stand up to the elements for decades. The application of sealants, paints or other finishes is not required to complete a redwood structure. When left unfinished, Humboldt Sawmill redwood’s rich color evolves into a soft, gray patina that blends beautifully with surrounding outdoor landscapes.
- Table of Contents:
Top Menu
Main navigation
Finishing Your Redwood Structure
Allowing Redwood to Weather Naturally
Find a retailer or lumberyard near you
Read our Blog
Follow Us
Footer
Footer Bottom Menu
Main navigation
Top Menu
California Redwood Decking – The Decking Superstore
- Article author: www.thedeckingsuperstore.com
- Reviews from users: 46932 Ratings
- Top rated: 4.5
- Lowest rated: 1
- Summary of article content: Articles about California Redwood Decking – The Decking Superstore Updating …
- Most searched keywords: Whether you are looking for California Redwood Decking – The Decking Superstore Updating We regularly stock all grades and dimensions of California Redwood decking. Come visit our 2 acre warehouse and save time and money on your next order.
- Table of Contents:
What Are The Benefits Of California Redwood Decking
Why Choose Redwood Decking
Let us help you build your next project
How to Build a Redwood Deck: A Step-by-Step Guide from Start to Finish
- Article author: www.homedit.com
- Reviews from users: 11753 Ratings
- Top rated: 4.3
- Lowest rated: 1
- Summary of article content: Articles about How to Build a Redwood Deck: A Step-by-Step Guide from Start to Finish Step 1 – Remove Existing Concrete · Step 2 – Concrete-Mounted Frame · Step 3 – Install Deck Footings · Step 4 – Build Deck Frame · Step 5 – Install … …
- Most searched keywords: Whether you are looking for How to Build a Redwood Deck: A Step-by-Step Guide from Start to Finish Step 1 – Remove Existing Concrete · Step 2 – Concrete-Mounted Frame · Step 3 – Install Deck Footings · Step 4 – Build Deck Frame · Step 5 – Install … One of the best value-adds to your home and quality of life is a deck. If your home already has a deck, wonderful! Enjoy it. If, on the other hand, your
- Table of Contents:

How to Build a Redwood Deck – On the House
- Article author: onthehouse.com
- Reviews from users: 8244 Ratings
- Top rated: 3.7
- Lowest rated: 1
- Summary of article content: Articles about How to Build a Redwood Deck – On the House For deck joist that are spaced 16-inches apart, 1×4 or 1×6 decking can be used. If the joist are 2-feet apart then 2×4 framing is needed. 2×6 decking will span … …
- Most searched keywords: Whether you are looking for How to Build a Redwood Deck – On the House For deck joist that are spaced 16-inches apart, 1×4 or 1×6 decking can be used. If the joist are 2-feet apart then 2×4 framing is needed. 2×6 decking will span …
- Table of Contents:

how to build a redwood deck
- Article author: www.mfp.com
- Reviews from users: 47849 Ratings
- Top rated: 4.4
- Lowest rated: 1
- Summary of article content: Articles about how to build a redwood deck a grade of redwood lumber for any part of any deck—luxury decks … This booklet contains deck construction … The first step in building a deck is to sur-. …
- Most searched keywords: Whether you are looking for how to build a redwood deck a grade of redwood lumber for any part of any deck—luxury decks … This booklet contains deck construction … The first step in building a deck is to sur-.
- Table of Contents:
140 Best Redwood deck ideas | building a deck, deck design, deck
- Article author: www.pinterest.com
- Reviews from users: 16217 Ratings
- Top rated: 3.7
- Lowest rated: 1
- Summary of article content: Articles about 140 Best Redwood deck ideas | building a deck, deck design, deck Apr 13, 2019 – Explore josh&Karla silva’s board “Redwood deck” on Pinterest. See more eas about building a deck, deck design, decks and porches. …
- Most searched keywords: Whether you are looking for 140 Best Redwood deck ideas | building a deck, deck design, deck Apr 13, 2019 – Explore josh&Karla silva’s board “Redwood deck” on Pinterest. See more eas about building a deck, deck design, decks and porches. Apr 13, 2019 – Explore josh&Karla silva’s board “Redwood deck” on Pinterest. See more ideas about building a deck, deck design, deck.
- Table of Contents:

BUILD A REDWOOD DECK LIKE A PRO – Deseret News
- Article author: www.deseret.com
- Reviews from users: 18504 Ratings
- Top rated: 3.6
- Lowest rated: 1
- Summary of article content: Articles about BUILD A REDWOOD DECK LIKE A PRO – Deseret News The California Redwood Association has compiled 18 useful tips from the pros to help homeowners plan to build a quality deck project:1. …
- Most searched keywords: Whether you are looking for BUILD A REDWOOD DECK LIKE A PRO – Deseret News The California Redwood Association has compiled 18 useful tips from the pros to help homeowners plan to build a quality deck project:1. Whether it’s built by a professional or by a do-it-yourselfer, a good-looking, durable redwood deck addition gives an immediate return in outdoor enjoyment as well as increased property value. The California Redwood Association has compiled 18 useful tips from the pros to help homeowners plan to build a quality deck project:
- Table of Contents:

How to Build a Raised Redwood Deck
- Article author: charlesandhudson.com
- Reviews from users: 46333 Ratings
- Top rated: 3.0
- Lowest rated: 1
- Summary of article content: Articles about How to Build a Raised Redwood Deck Building a raised redwood deck is one of the most popular home improvement projects a homeowner can take on. They’re fast to build, redwood … …
- Most searched keywords: Whether you are looking for How to Build a Raised Redwood Deck Building a raised redwood deck is one of the most popular home improvement projects a homeowner can take on. They’re fast to build, redwood … Building a raised redwood deck is one of the most popular home improvement projects a homeowner can take on. They’re fast to build, redwood is affordable to buy, and they are always a beautiful addition to any yard.
- Table of Contents:
The Tools Needed to Build a Redwood Deck
Start with Redwood
Prepare the Deck Foundation and Surface
Layout and Square the Deck Frame
Add Deck Supports
Install Deck Boards
Sand and Seal Your Deck
Sit Back and Enjoy Your New Redwood Deck
Redwood Empire- How To Build The Perfect Redwood Deck | Buy Redwood
- Article author: www.buyredwood.com
- Reviews from users: 30805 Ratings
- Top rated: 4.9
- Lowest rated: 1
- Summary of article content: Articles about Redwood Empire- How To Build The Perfect Redwood Deck | Buy Redwood Design the deck on a sheet of gr paper using a scale that works with the size of your deck. Place 4 by 4 post every 10 feet to support the joist. Draw in … …
- Most searched keywords: Whether you are looking for Redwood Empire- How To Build The Perfect Redwood Deck | Buy Redwood Design the deck on a sheet of gr paper using a scale that works with the size of your deck. Place 4 by 4 post every 10 feet to support the joist. Draw in … A Redwood deck is an excellent extension for any home, particularly one who appreciates the outdoor ambience. Spending Time on the deck by your self or with family members and guests can be a lot of fun and relaxing all at the same time. Redwood is an ideal decking maternal for building a deck because it lasts a lifetime. A redwood deck can ensure moisture, rot, decay and
- Table of Contents:
800-800-5609
Redwood Naturally Elegant
You are here
Monthly archive
Pages
DIY Project Instructions
The Redwood Empire Desk
The Very Latest
What our Customers Say
See more articles in the same category here: Chewathai27.com/toplist.
Redwood Maintenance
Maintenance made easy
Finishing Your Redwood Structure
Humboldt Sawmill redwood can stand up to the elements for decades. The application of sealants, paints or other finishes is not required to complete a redwood structure. When left unfinished, Humboldt Sawmill redwood’s rich color evolves into a soft, gray patina that blends beautifully with surrounding outdoor landscapes.
Conversely, achieve a customized look by applying a paint or sealant to finish your Humboldt Sawmill redwood project. To keep the color and texture looking like new, a number of protective sealants are available to accentuate the wood’s characteristics. As weathering occurs to the finish, simply refinish the wood every few years to keep sealed or painted structures looking great.
Brochure
Allowing Redwood to Weather Naturally
With its inherent dimensional stability and decay resistance, redwood lumber is one of few wood species that can be allowed to weather naturally. This no-maintenance option results in a look often preferred for a rustic appearance.
Color Changes Due to Weathering
As redwood weathers over the years, several natural color changes take place and will vary from one climate to another. In a damp or humid climate, redwood lumber used outdoors will go through two stages, the first being a darkening of the wood. As time goes on, this darkening may be rinsed away by rain and the redwood will weather-bleach to a soft driftwood gray. A redwood structure sheltered from rinsing rains may remain dark throughout its lifetime. Therefore, the site of the structure plays an important part in the decision to leave the redwood unfinished. In drier climates, unfinished redwood may not darken. Instead, the wood will gradually turn a silvery tan, becoming lighter in color as the natural weathering continues.
Infinite Variations of Color
The effects of natural weathering will not be the same on all sides of a house. This is because redwood’s color changes are caused by sunlight and water, and different areas of a house usually are exposed to different amounts of each. Two boards installed side-by-side may also vary in color because of the infinite variations of color and texture offered by redwood lumber. This is one of the refreshing, inherent qualities of a natural material such as redwood, compared to the artificial uniformity of synthetic products.
Reversing Color Changes
These natural color changes, a result of the weathering process, are completely reversible. Color restoration or finishing are options if the natural weathering look is not preferred.
Cleaning Redwood
Cleaning redwood is simple and easy, no matter the type of project or structure. For day-to-day, surface-level dirt, grime, and debris, all you need for cleaning redwood is a garden hose – simply rinse off the affected area when you notice build-up. In some situations dirt and grime may collect and build up on your redwood structure. When a simple rinsing won’t quite do the trick, get a stiff-bristled brush and a bucket of warm water mixed with a mild detergent, and scrub the affected area. This should clean up most caked-on dirt and grime. Occasionally, mildew will build up on wood, especially in damper climates and where the wood surface remains out of direct sunlight. Mildew is identifiable as dark spots present on the wood surface. More severe cases can appear to be thickly black or gray. To treat milder instances of mildew build-up, simply treat the area as you would a caked-on area of grime, and scrub with warm water and mild detergent. Follow scrubbing by rinsing the affected area with household bleach, then with clean water. For more severe cases of mildew growth, begin cleaning redwood by scrubbing the area with a stiff-bristled brush and a solution. The solution should include one cup of liquid household bleach and one cup of trisodium phosphate (TSP) diluted in one gallon of warm water. Increase or reduce this amount as needed, but keep the proportions of the ingredients the same. Afterwards, rinse thoroughly. If needed, mix four ounces of oxalic acid crystals into each gallon of warm water. Use a non-metallic container and apply to the area with a gentle brush. After this solution dries, rinse the affected area with water. Your best defense against mildew growth is the application of a water-repellent sealant that contains a mildewcide.
Redwood Color Restoration
If left to weather naturally outdoors, redwood will change color over time. Fortunately, redwood color restoration is a fairly simple process. Start the process of redwood color restoration by determining the cause of the discoloration. A few common causes are mildew, extractive bleeding, and iron stains. Identify mildew by applying a drop of household bleach to any dark spots you see on the surface of the wood. If the spots disappear within two minutes, mildew is present on the wood. To remove it, simply follow the instructions above for Cleaning Redwood. Another cause of dark staining is extractive bleeding. Water soluble chemical extractives naturally occur within redwood. “Bleeding” occurs when these extractives reach the wood’s surface. Use oxalic acid for redwood color restoration in this case. Simply wash the redwood’s surface with a mixture containing one cup of TSP, one cup of household bleach and a gallon of water. Rinse well, then dissolve four ounces of oxalic acid crystals in a gallon of warm water and apply to the structure. Be sure to use non-metallic containers for both solutions. Allow the wood to dry completely, and then rinse with clean water. When redwood is exposed to iron and water, naturally occurring tannins react and form dark stains. Any species of wood containing a high amount of tannin can stain in this way. For successful redwood color restoration, use the previously described treatment using oxalic acid solution.
Brochure
Redwood Finishing Tips
Refinishing goes a long way to ensure that your Humboldt Redwood structure will retain that warm, beautiful color for a long time. It’s a relatively simple task, with planning and preparation.
Remove any debris (such as dirt, sawdust, or leaves) in the area. One of the most effective methods of removing an old finish or heavy surface grime is by power washing. You can certainly do this on your own, however, it is advisable to discuss your options with a contractor or other expert prior to proceeding. You’ll need to learn to identify the appropriate setting on the power washer you’re using to avoid damaging the wood’s surface fibers. When using the appropriate setting, power washing is fast and effective, and perfectly prepares your structure for refinishing.
Another method of refinishing redwood is to use a varnish or paint remover, available at hardware and home improvement stores. If you decide to do this, it is advisable to test a piece of new, clean redwood prior to widespread application. This will determine whether or not the varnish or paint remover you purchased might discolor the wood. If the test piece doesn’t discolor after application, you can proceed with using that product to refinish your redwood structure.
Additional, recommended redwood finishing tips include:
When selecting redwood, choose kiln dried where possible. Kiln dried redwood more readily accepts finishes. If the wood is unseasoned, make sure it stands exposed to the ambient air for at least a month before applying any finish. Opt for wind-free days with stable weather for your finishing project. The perfect temperature for applying a finish should be somewhere between 50 and 70 degrees. Clean the redwood prior to finishing. If you need to use water to clean the redwood, ensure that it dries thoroughly before applying a finish or sealant. Thoroughly ventilate the area prior to finishing application. Moisture is a frequent cause of ineffective finishes, so be sure the proper precautions against it are taken. This includes using air vents, vapor barriers, and flashing. If your project is outdoors, choose wood finishes recommended for outdoor use only. Avoid using abrasive, metal-based brushes, since they may react with the wood and stain it. Choose stiff-bristled, non-metallic brushes. Be sure any products you mix are meant to be used together. Mixing dissimilar finishes might result in failure of the finish. Prime the wood prior to applying paints or other external finishes. Choose the finest hot-dipped galvanized nails available. Opting for lower-quality nails may result in stains. After finishing, rinse the surface of your redwood structure with a hose to remove surface grime. For a deeper cleaning job, scrub the affected area with a stiff-bristled brush dipped in warm water and a mild cleaning agent, then rinse. Always follow the manufacturer’s specific instructions for all products used.
Jeff Imwalle, a respected redwood deck building expert, walks you through all the steps needed to refinish your redwood deck like a professional.
Brochure
California Redwood Decking
Redwood is naturally resistant to insects and decay, and resists warping and splitting. The warm reddish tonal range makes a statement and creates a dramatic effect that few building materials can achieve without the aid of a saturated stain.
With regular maintenance, Redwood decking can last up to 15-20 years. At any stage in the aging process, it is possible to preserve Redwood’s distinct color by simply applying a sealer, or allow it to weather naturally to a silvery patina. The application of sealants, paints or other finishes is not required to complete a Redwood structure, which is resistant to UV rays, so it will maintain its beautiful vibrant appearance for decades to come.
How to Build a Redwood Deck: A Step-by-Step Guide from Start to Finish
of 19 How to build a redwood deck Step by step guide for Redwood Deck Remove Existing Concrete – step one DIY Concrete-Mounted Frame tutorial How to Install Deck Footings How to build deck frame step by step How to Install Deck Joists How to Install Redwood Deck Floor How to Install Curved Deck Floor How to Finish Deck Step by Step How to Stain & Seal Wood Deck Before and After – Redwood Deck tutorial on Homedit Before and after deck project Redwood deck project before and after Redwood Deck- step-height lift works beautifully Redwood Deck – stairs Before and after pictures of installing deck Redwood Deck Homedit Project DIY Modern Redwood deck Project Builing Process How to Build a Redwood Deck: A Step-by-Step Guide from Start to Finish Buy Now
One of the best value-adds to your home and quality of life is a deck. If your home already has a deck, wonderful! Enjoy it. If, on the other hand, your home is missing that piece of outdoor living that will bring you joy and happy memories, perhaps you would consider building a deck.
View in gallery
View in gallery
Step-By-Step Instructions To Build a Deck in Your Garden
If you are interested in building a redwood deck, this article will point you to the guides that walk you, in great detail and step by step with photos, through the process of how to build a deck that your family will enjoy for years to come.
Step 1 – Remove Existing Concrete
View in gallery
To begin, you’ll need to remove any existing patio concrete under the point of your deck. This will allow you to install footings directly into the ground for maximum stability and longevity. To remove your patio concrete, you’ll need a pry bar, a heavy-duty sledgehammer, and a high lift jack. If your old concrete is already cracked, it will make the process much easier. You’ll want to start by finding a section where the edges or cracks meet, and from there, you can use the pry bar to begin the removal work. The sledgehammer will then come into play to further the process. This will take a good amount of time and effort, so recruit a friend or family member to assist if you can. If you have no existing concrete to remove, move on to the next step.
Step 2 – Concrete-Mounted Frame
View in gallery
If your deck neighbors part of your home’s foundation, you will save yourself a bit of work (and get an excellent, sturdy frame) by using the concrete foundation for part of your deck frame. This process takes some muscle, but you may be surprised how quickly you get the hang of it…and how easy this version of framing is when compared to footings. This is a very effective way to build a frame for a curved part of a deck, too, as this article will show you. You’ll need a rotary hammer drill to mount the deck frame, which is an excellent tool for working through concrete.
Step 3 – Install Deck Footings
View in gallery
For the part(s) of your deck that isn’t next to a concrete foundation, you can install footings as your base support for the deck frame itself. There are several ways to approach this task; the one shown in this article involves installing 4×4 posts into holes and using quick-set concrete, mixed right in the hole, to secure those posts. Another method of installing footings includes brackets placed into concrete, which (although it’s written for installing pergola posts) you could use for deck footings as well. You’ll use post brackets and from there you can install the footing into the secure brackets.
Step 4 – Build Deck Frame
View in gallery
Once your footings are dry and/or your wall-mount frame is completed, you’re ready to finish up your deck frame. This article shows how to level your deck frame and install a double-2×6 beam, both as an outer frame and also as an inner beam for adequate joist support. This process is not hard, but it takes time and effort to get everything level and accurate. Laying a precise foundation, such as in your deck framing, will make the rest of your deck building process much easier and, more importantly, the final result much better and more beautiful. So take your time and complete this step with care.
Make sure you begin installing your deck frame at the sturdiest point of the deck. Take time with the measurements and you may want to add more framing for support depending on the size of your deck. While there are a lot of steps to this process, don’t get overwhelmed and just take them one at a time to create a fantastic final result.
Step 5 – Install Deck Joists
View in gallery
With your perimeter frame and inner frame beams installed and ready to go, it’s time for you to install the deck joists. Deck joists are those pieces of lumber that run perpendicular to the actual deck floor, and hold up the floor. So, in other words, the frame supports the joists, and the joists (with the frame) support the floor. This article will show you how to install the 16” spaced joists efficiently and effectively. Tip: Strategize the direction you want your wood deck floor boards to run, based upon lumber lengths and visual effect, and hang your joists perpendicular to that direction. The direction that the boards run will feel larger.
For most people, this is one of the most exciting parts of how to build a deck, as you’ll finally see your deck coming together. Once the deck joists are in place, you’ll be able to visualize what the final result will look like. Make sure you measure and mark pieces carefully during the process, to ensure everything will fit together correctly in the end.
Step 6 – Install Deck Floor
View in gallery
With your frame in place supporting the deck joists, there is nothing keeping you from installing your deck floor. This article will show you the absolute best way to install a redwood deck floor. The method is efficient, and (the best part of all) results in a deck floor with virtually no visible screws. It’s amazing. You definitely don’t want to miss out on this deck floor-laying tool and technique.
Before starting this stage, ensure you are squared off. You’ll need to use precision and care during this process and won’t want to rush installing your deck floor. If there is a curve to your deck, you’ll start with the outer part of the curve first. During this stage, a deck spacer will be one of the best tools to assist you. You’ll never want to build a deck without it again after using one.
Step 7 – Install Curved Deck Floor
View in gallery
When we were researching methods that “regular” (e.g., non-professional) people used to install their wood deck floor on a curve, we found very little information. This is why this super simple method (which uses kitchen wax paper, of all things) will be very useful to you if you’re facing a similar issue. You will actually look forward to running your deck floor directly up to your curved patio steps after learning this simple way to custom-fit a wood deck floor to any curve. You’ll start with the outer curved floor board first, so you have enough space at the top to mount it effectively. It will also make it much easier to figure out the alignment and create a better overall aesthetic.
Step 8 – Install Deck Trim
View in gallery
With your deck floor installed, you might feel like you’re about done with the project. And you’re very close, but not quite done. Before staining and sealing the deck, you’re going to want to add your final finishing touches – including adding wood trim around any posts and also trimming the side of your deck. This article will show you some simple ways to trim like a professional. You’re going to love the finished results. There are a couple of ways you can achieve this finish and it will create a polished and professional look to your DIY redwood deck.
Step 9 – Stain & Seal the Deck
View in gallery
A beautiful redwood deck is something to behold, to be sure. This type of wood – and most fresh woods, in fact – is beautifully raw. Unfortunately, that new look will only last so long. Sooner rather than later, your gorgeous redwood will begin to grey and age, and much of your hard work will be undone if not treated. This article will show you the best redwood deck staining product and how to apply it (in one step!) for a gorgeous, lasting finish. Of course, you’ll need to restain every couple of years for optimum wood preservation and function. But this process can be done in a few short hours, with results that last years.
There are mixed opinions on staining decks, and some people wait between three and twelve months to let the wood fully dry before staining it. However, we recommend just waiting a week after installation before sanding and sealing the wood. If you live in a snowy or cold place, you will want to protect the wood straight away, or you’ll risk it getting destroyed within your first winter. Of course, this is all up to personal preference and may depend on where in the world you live.
View in gallery
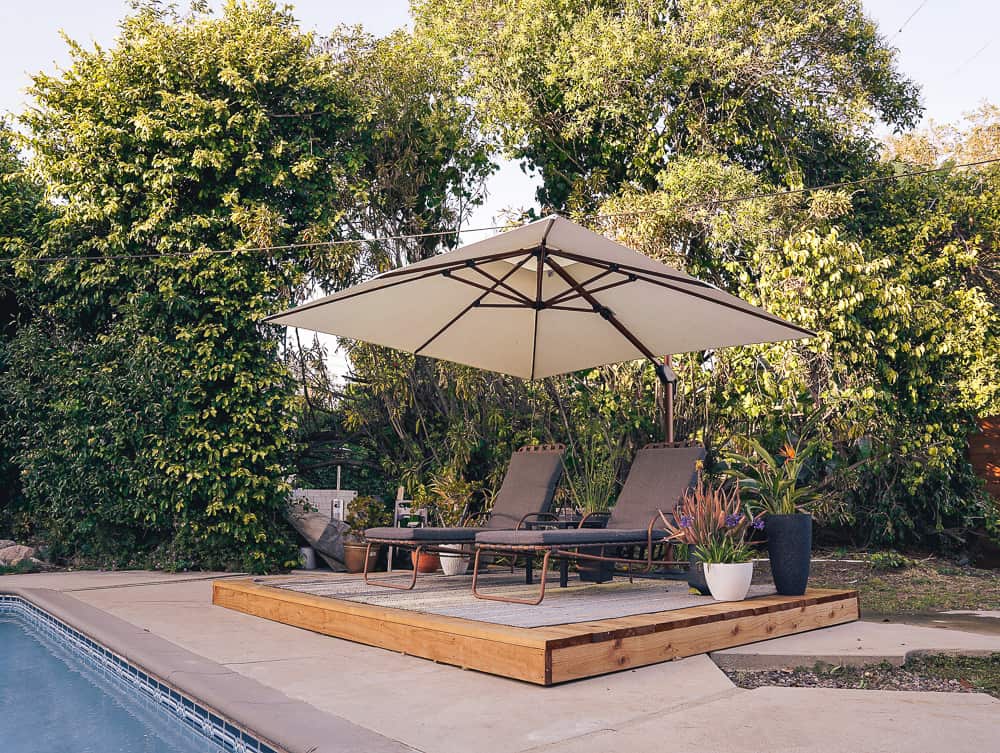
Here are some before and after photos of the deck area shown in this example.
View in gallery
The new deck (with accompanying pergola) has certainly added value to the home and its owners’ lives.
View in gallery
The backyard not only looks better with this deck in place, but the patio area also looks larger as a result of the deck.
View in gallery
A slight, step-height lift works beautifully here…
View in gallery
…the deck floor is not too high to be unsafe, but low enough to allow the deck to run safely right up to the curved edge of the first step.
View in gallery
One last before and after photo, showing the richness of color in the backyard. Even though the season is close to winter in the second photo, the space looks more vibrant than the summertime brightness of the first photo.
View in gallery
We hope you find these deck-building articles useful as you realize that you, too, can build your own deck.
View in gallery
Building a redwood deck can seem like a daunting project, but by following these instructions and breaking the process down into stages, you’ll find it’s an enjoyable experience. Of course, DIY projects are always more fun when you have someone to help you.
Recruit a friend or family member to give you a helping hand, and you can enjoy bonding over this project this summer. A deck can completely transform your garden, and you’ll love sitting out here for years to come.
Happy (redwood) deck building.
So you have finished reading the how to build a redwood deck topic article, if you find this article useful, please share it. Thank you very much. See more: redwood deck stain, how to build a bench on an existing deck, redwood deck cost, cedar deck, built-in deck benches with backs, built-in deck benches with backs plans, best deck materials 2022, best composite decking consumer reports