
You are looking for information, articles, knowledge about the topic nail salons open on sunday near me how to fix eyes in lightroom mobile on Google, you do not find the information you need! Here are the best content compiled and compiled by the Chewathai27.com team, along with other related topics such as: how to fix eyes in lightroom mobile how to fix red eye in lightroom 2022, how to fix red eye in lightroom mobile app, how to fix red eye in lightroom iphone, how to fix red eye in lightroom ipad, how to fix eyes on lightroom, remove red eye iphone, red eye remover, where is selective in lightroom mobile
Lightroom 6 has a new addition to Red Eye; the Pet Eye tool. Let’s look at both. For humans (and possibly some aliens), the retina reflects red. This tool will detect the redness and apply a black mask to hide it.In order for the redness to be detected, you must draw an oval over the eye area.Open the photo you want to work on in the Develop Module. Select the Adjustment brush by clicking on it or press the ‘k’ key to select the brush. Zoom into the eyes. Press the ‘o’ key to activate the Overlay.
- Switch to the Develop module.
- Click the Red Eye Correction tool icon. The Red Eye Correction icon.
- Click Red Eye or Pet Eye.
- Starting at the center, draw a circle over the affected eye.
- Adjust the available settings.
- Click Done.
Contents
Does Lightroom Mobile have red eye correction?
Lightroom 6 has a new addition to Red Eye; the Pet Eye tool. Let’s look at both. For humans (and possibly some aliens), the retina reflects red. This tool will detect the redness and apply a black mask to hide it.In order for the redness to be detected, you must draw an oval over the eye area.
How do you open eyes in Lightroom mobile?
Open the photo you want to work on in the Develop Module. Select the Adjustment brush by clicking on it or press the ‘k’ key to select the brush. Zoom into the eyes. Press the ‘o’ key to activate the Overlay.
How do you fix glowing eyes in Lightroom?
While working in the Develop module of Lightroom, select the Red Eye Correction tool from the right column. You can find it nestled between the Spot Removal tool and the Gradient Filter. You’ll then select either Red Eye or Pet Eye correction. Red Eye is for photos of people because our eyes reflect in red.
How do I remove eye reflection in Lightroom?
Using the Adjustment Brush
The adjustment brush is another handy tool you can use to target a specific area of a photograph. Using the tool, we can minimize the glare to allow more focus on the eyes of the subject. You can find the adjustment brush near the spot removal tool.
How do you fix red eye in Lightroom Android?
- Switch to the Develop module.
- Click the Red Eye Correction tool icon. The Red Eye Correction icon.
- Click Red Eye or Pet Eye.
- Starting at the center, draw a circle over the affected eye.
- Adjust the available settings.
- Click Done.
How do I use the Selective tool in Lightroom mobile?
In the Edit panel in the Loupe view, tap Selective icon at the bottom of the screen. Tap the ‘+’ sign that appears at the upper-left corner and then choose one of the selective edit tools – Brush Selection, Radial Selection, Linear Selection, or Depth Selection (Tech Preview).
How do I improve in Lightroom mobile?
- Open a raw image, JPEG, or TIFF in Loupe view.
- In the menu bar, select Photo > Enhance. …
- In the Enhance dialog box, select Super Resolution. …
- Click Enhance to create an enhanced DNG version of your selected image.
How do I make my eyes look better in Lightroom?
In the Develop Module, select the Radial Filter tool. In the resulting menu, select Iris Enhance as the Effect, then go directly to the bottom and click Invert Mask. Next, click and drag to make an ellipse that covers the iris. You’ll see a color shift right away as the default settings are applied.
How can I edit the bags under my eyes?
- Download YouCam Perfect. YouCam Perfect is a free app available for both iOS and Android. …
- Navigate to Eye Bag Tool. Once you have the app, select Photo Edit. …
- Make Adjustments for the Most Natural Look. Use the slider on the right side of the screen to adjust your undereye bags.
How do you fix eye bags in pictures?
- Download the YouCam Makeup App (available for iPhone and Android)
- Tap Photo Makeup to Choose Your Photo.
- Tap Retouch, and find the Dark Circles removal feature.
- Start auto Dark Circles removal and adjust the intensity with the slider.
- Save the edited photo.
Is there a red eye tool in Lightroom?
Using the Red Eye Correction tool in Adobe Lightroom Classic is a quick and easy way to correct red eye in your photos.
Can you get rid of red eye in Lightroom?
Click and drag the photo so that the red eye or pet eye area is visible. Click the Red Eye Correction tool in the Develop panel on the right side of your workspace. Click either Red Eye or Pet Eye. Red Eye will remove the red discoloration of a person’s eyes that can result from a camera flash going off.
How do you fix red eye on iPhone?
- Open the Photos app.
- Tap on a photo with red-eye glare to open it.
- Tap Edit in the top-right corner.
- Tap the icon that looks like an eye with a slash through it.
- Tap each red eye in the image that you want to fix.
- Tap Done to save your changes.
Where is the red eye tool in Lightroom 2022?
As explained, Lightroom already has the Red Eye Correction tool in the Develop panel. Its position is on the right side of your screen. Click Red Eye or Pet Eye according to your needs. Red Eye is used to remove the red color that appears in the eyes of the model in the photo because the camera flash is off.
Remove red eye in Lightroom Classic
- Article author: helpx.adobe.com
- Reviews from users: 23935
 Ratings
 - Top rated: 4.0
- Lowest rated: 1
- Summary of article content: Articles about Remove red eye in Lightroom Classic Updating …
- Most searched keywords: Whether you are looking for Remove red eye in Lightroom Classic Updating Correct red eye and cure unnatural pet eye colors captured in photos in Adobe Photoshop Lightroom Classic.Developing photos,Classic,Reference
- Table of Contents:
fixing red eyes easily in Lightroom on the iPad – YouTube
- Article author: www.youtube.com
- Reviews from users: 9975 Ratings
- Top rated: 4.2
- Lowest rated: 1
- Summary of article content: Articles about fixing red eyes easily in Lightroom on the iPad – YouTube Updating …
- Most searched keywords: Whether you are looking for fixing red eyes easily in Lightroom on the iPad – YouTube Updating in today’s episode I show you how to quickly fix red eyes in Lightroom on the iPad.If you liked this video give it a big thumbs up and subscribe so we can ke…red eyes, fix, Lightroom, Lightroom cc, adobe, ipad, workflow, pet, human, how to, pro tips, labradoodle, retouching
- Table of Contents:

Quick Fix! Blemish and Red Eye Removal in Lightroom CC – RockyNook
- Article author: rockynook.com
- Reviews from users: 5516 Ratings
- Top rated: 4.9
- Lowest rated: 1
- Summary of article content: Articles about Quick Fix! Blemish and Red Eye Removal in Lightroom CC – RockyNook Updating …
- Most searched keywords: Whether you are looking for Quick Fix! Blemish and Red Eye Removal in Lightroom CC – RockyNook Updating
- Table of Contents:

How to Brighten Eyes In Lightroom (Enhance and Define)
- Article author: expertphotography.com
- Reviews from users: 46528 Ratings
- Top rated: 3.2
- Lowest rated: 1
- Summary of article content: Articles about How to Brighten Eyes In Lightroom (Enhance and Define) Updating …
- Most searched keywords: Whether you are looking for How to Brighten Eyes In Lightroom (Enhance and Define) Updating When you take a portrait you usually want to make the eyes pop out in the resulting photograph. We show you how to brighten and enhance eyes in Lightroom!
- Table of Contents:
Lightroom Steps to Enhance Eyes
Associated Questions About Making Eyes Pop Out
Conclusion
About the Author
Related Articles
10 Hidden Lightroom Features That Professional Photographers Always Use
10 Hidden Lightroom Features That Professional Photographers Always Use
Fixing Under Eye Circles in Lightroom – YouTube
- Article author: www.youtube.com
- Reviews from users: 12390 Ratings
- Top rated: 3.2
- Lowest rated: 1
- Summary of article content: Articles about Fixing Under Eye Circles in Lightroom – YouTube Updating …
- Most searched keywords: Whether you are looking for Fixing Under Eye Circles in Lightroom – YouTube Updating Learn how to fix under eye circles in Lightroom in this quick tutorial. View the full tutorial here:https://www.lightroompresets.com/blogs/pretty-presets-blo…lightroom, lightroom tutorial, under eye circles, editing in lightroom, portrait editing, lightroom editing, skin retouching
- Table of Contents:
How do I get rid of red eye in Lightroom mobile? – Question and Answer – locate.euronats2014.eu
- Article author: locate.euronats2014.eu
- Reviews from users: 49522 Ratings
- Top rated: 3.9
- Lowest rated: 1
- Summary of article content: Articles about How do I get rid of red eye in Lightroom mobile? – Question and Answer – locate.euronats2014.eu While working in the Develop module of Lightroom, select the Red Eye Correction tool from the right … …
- Most searched keywords: Whether you are looking for How do I get rid of red eye in Lightroom mobile? – Question and Answer – locate.euronats2014.eu While working in the Develop module of Lightroom, select the Red Eye Correction tool from the right … How do I get rid of red eye in Lightroom mobile?How do I get rid of red eye in Lightroom mobile?
- Table of Contents:
↑ How to fix red eyes in Lightroom
↑ How do you fix red eye in Lightroom mobile
↑ How do you remove red eye in Lightroom
↑ How do I fix my eyes in Lightroom
↑ Why is Lightroom showing red
↑ How do you fix red eyes
↑ What apps fix red eye
↑ How do you fix red eye on iPhone
↑ Lightroom Tutorial Red Eye Removal Arunz Creation Tutorials
How to Use Lightroom Mobile Presets to Edit Eyes – Hue & Hatchet
- Article author: hueandhatchet.com
- Reviews from users: 36165 Ratings
- Top rated: 4.3
- Lowest rated: 1
- Summary of article content: Articles about How to Use Lightroom Mobile Presets to Edit Eyes – Hue & Hatchet Expectedly, editing the iris of the subjects directly will go along way toward helping them stand out in the photograph. By using the local … …
- Most searched keywords: Whether you are looking for How to Use Lightroom Mobile Presets to Edit Eyes – Hue & Hatchet Expectedly, editing the iris of the subjects directly will go along way toward helping them stand out in the photograph. By using the local … Editing the eyes can totally transform the look of a photo. Here’s how you can use lightroom mobile presets to make such edits.
- Table of Contents:
Why Are Eyes So Important in Photography
Proper Composition
Different Editing Methods in Lightroom
What Type of Presets Are Best
In-Depth Eye Editing
Using Adobe Lightroom Mobile Presets Can Seem Difficult

Red Eye Remover (How to Remove Red Eyes in Lightroom)
- Article author: expertphotography.com
- Reviews from users: 47537 Ratings
- Top rated: 4.5
- Lowest rated: 1
- Summary of article content: Articles about Red Eye Remover (How to Remove Red Eyes in Lightroom) While working in the Develop module of Lightroom, select the Red Eye Correction tool from the right column. You can find it nestled between the Spot Removal … …
- Most searched keywords: Whether you are looking for Red Eye Remover (How to Remove Red Eyes in Lightroom) While working in the Develop module of Lightroom, select the Red Eye Correction tool from the right column. You can find it nestled between the Spot Removal … While flash can be a huge help in lighting, it can also produce red eyes on our subjects. Here’s how to use Lightrooms red eye remover in a few easy steps!
- Table of Contents:
What Is Red Eye in Photography
About the Author
Related Articles
10 Hidden Lightroom Features That Professional Photographers Always Use
10 Hidden Lightroom Features That Professional Photographers Always Use
See more articles in the same category here: https://chewathai27.com/toplist.
Quick Fix! Blemish and Red Eye Removal in Lightroom CC
Blemish Removal
Spot removal is not just for landscapes or dust removal, it can also be used to retouch facial blemishes. Let’s do some spot work on a face. For this image, I’m just doing light work to demo the process. There’s been some negative Clarity brushed on the skin, and a little red removed from the skin. All blemishes were left intact for the initial shot.
For the circles under the eyes, I draw over the area to be retouched with Feather and Opacity at 100. The Size is set so only one stroke is required. Next, I reduce the Opacity to blend the fix with the original area. This helps it look more natural. The aim is not to remove, but to improve. Lightroom won’t select the best area, so move the source to the cheek directly below the eye. When retouching, you need to match areas because skin texture is different all over the face. Skin from the upper cheek is different from cheek skin near the chin. The side of the forehead is different than the center, or even the area just above the nose. It’s critical that you match skin as you spot.
With one eye done, repeat the process for the second eye. The settings you’ve changed for the first eye will be set for the second. Now tackle the blemishes. After the first blemish is removed, reset the Opacity to 100. You want to completely remove these. Set the size to match the blemish. Use the shortcut Command + Option + click and drag (Mac) or Control + Alt + click and drag to size the spot as you go.
The difference between the Before and After views is subtle. That’s the point.If a retouch is noticeable, you’ve done a bad job.
Red Eye
Red Eye occurs when flash is reflected from your subject’s retina.It’s prone to happen with compact cameras and in-camera flashes from digital SLRs.It can still happen with external in-camera flashes if you’re far enough away from your subject and using a telephotos lens.In fashion circles, it’s common when using a ringflash.
Red Eye is the third tool in the Tool Strip.It has no shortcut and can’t be synced to other photos.Lightroom 6 has a new addition to Red Eye; the Pet Eye tool. Let’s look at both.
Red Eye Removal
For humans (and possibly some aliens), the retina reflects red.This tool will detect the redness and apply a black mask to hide it.In order for the redness to be detected, you must draw an oval over the eye area.
As per the panel instructions, click the center of the eye and drag outward to include the whole eye.If it works, you’ll see a little animation as Lightroom zooms into the pupil and darkens it.
If you’ve not included enough of the eye, or the currently selected size hasn’t worked, you’ll see an error message. Once the eye has been fixed, the panel changes to Edit mode.In this mode, you can change the pupil size, as well as darken the pupil further if necessary. In addition, you can drag the red eye position around. Click the other eye(s).If you want to avoid the error dialog, drag over each eye individually.
These helpful tips were taken from Lightroom Guru Sean McCormack’s book, The Indispensable Guide to Lightroom CC – Available now!
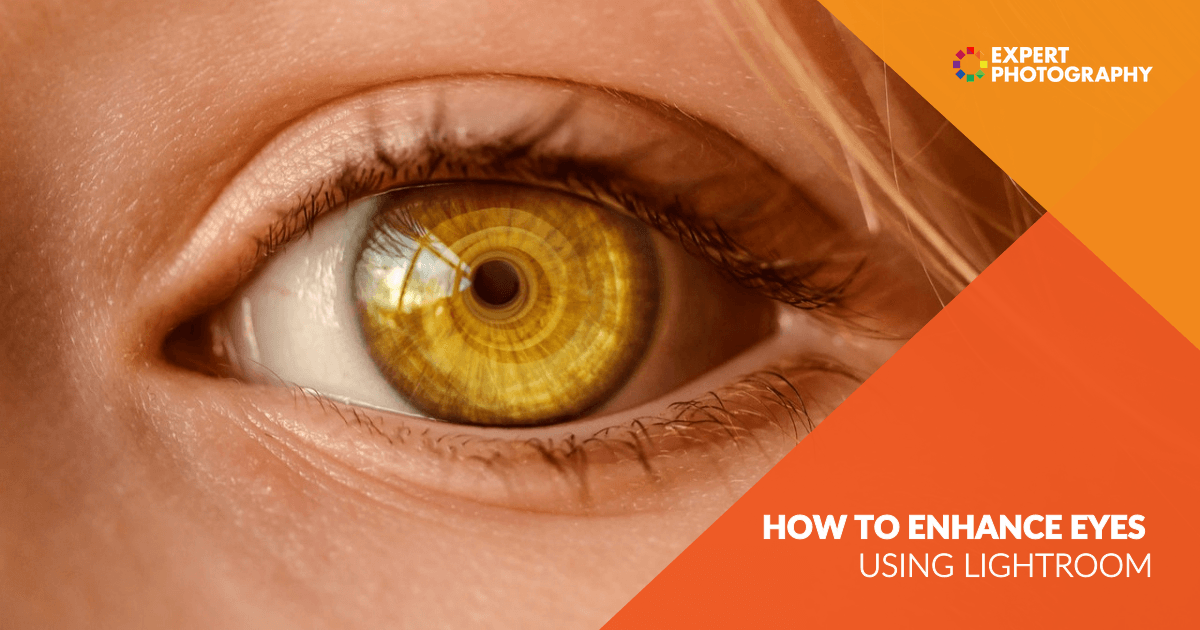
How to Brighten Eyes In Lightroom (Enhance and Define)
You can also select your interests for free access to our premium training:
Related course: Effortless Editing with Lightroom
When you take someone’s portrait you usually want to make their eyes pop out in the resulting photograph.
In this article, we’ll show you how to brighten and enhance eyes in Lightroom.
Lightroom Steps to Enhance Eyes
As with everything you can do in Lightroom there is always more than one set of steps to achieve a similar result. I’ll walk you through the best ways I know how to make eyes pop out using Lightroom.
I encourage you to experiment with different combinations of these steps. You may discover other ways to enhance eye color or correct unnatural eye colors.
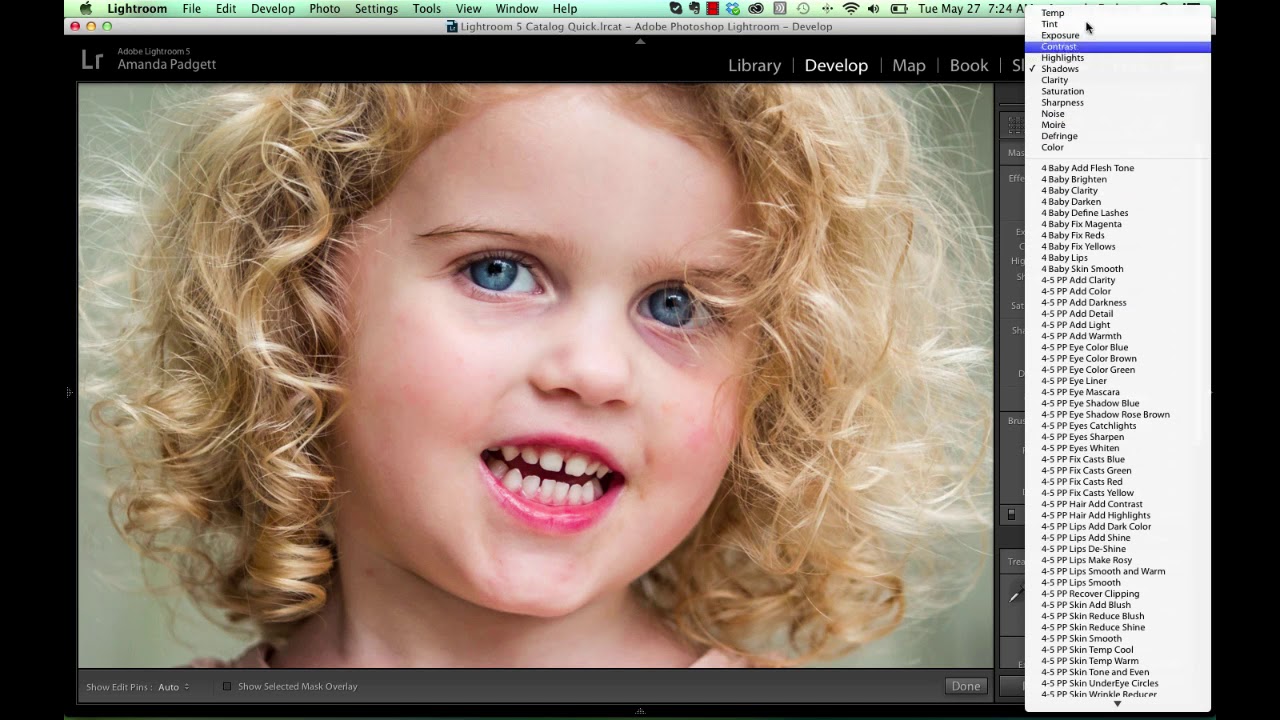
Step 1: Adjustment Brush
Open the photo you want to work on in the Develop Module. Select the Adjustment brush by clicking on it or press the ‘k’ key to select the brush.
Zoom into the eyes. Press the ‘o’ key to activate the Overlay. This will allow you to see the area you are painting as you work with the brush.
Now paint over the iris and the whites of the eye.
Step 2: Adjust the Exposure
Press the ‘o’ key again to hide the Overlay. Press the ‘h’ key to hide the small dot if you find it distracting.
Now use the slider and adjust the exposure for the area you have just painted over. Slide it to the right which will increase the exposure. You will most likely want to increase it minimally.
You can type in a number next to the slider instead of dragging. This way you can be more precise. If your mouse has a scroll wheel you can also click the slider and then use the scroll wheel to make the adjustment.
Zoom out and take a look at the effect of your adjustment on the whole image. You can use the toggle next to the Reset option at the bottom of the panel to turn off and on the adjustment to compare before and after.
When you have a subject with both eyes evenly lit you can use the same brush to make adjustments to both eyes.
In my example image, I have used two separate adjustment brushes because the eyes are not lit the same.
Step 3: Additional Adjustments
In this step, you can create a new brush or use a Radial Filter mask to make adjustments to the iris. As you did in steps 1 and 2, select the adjustment brush and paint over the iris.
Alternatively, use the Radial Filter and drag an oval over the iris. If you use this method you need to check the Invert box so only the area inside the oval will be affected by changes you make.
In the Effect drop-down at the top of the panel you can select the Iris Enhance preset. Once you have selected this you can still make manual adjustments to any of the sliders to tweak the iris.
The main sliders to work with here are the:
You may also want to adjust the:
Using this second set of adjustments you can enhance eye color. This is how to make eyes bluer.
As with any time you are making slider adjustments in Lightroom, avoid extremes. Making a combination of subtle changes will help keep the integrity of your images intact. Pushing sliders to the extremes can result in artifacts, banding and other technical problems.
Associated Questions About Making Eyes Pop Out
How Do You Whiten Eyes in Lightroom CC?
Further to the steps above you can continue to use the brush tool to remove or reduce blood vessels in the whites of the eyes.
Select the brush tool again (k) and bring the size of it right down. Zoomed in to the eye begin to paint over the vessels you want to work on. Don’t forget to have your overlay (o) turned on so it’s easy to see what you are painting.
Tip: You can change the color of the mask overlay by going to Tools in the top menu and then Adjustment Mask Overlay. Switching it to Green will make it easier to see when painting over the blood vessels.
Once you’ve finished painting adjust the sliders for:
Exposure (increasing it slightly)
Clarity (reducing it)
Sharpness (reducing it)
Aim to keep your adjustments subtle and keep the eyes looking natural, unless you are looking for a more cartoon-like result. Everyone’s eyes have visible blood vessels so to remove them completely looks unnatural.
How Do I Make My Eyes Pop in Lightroom CC Mobile?
In Lightroom Mobile, it is possible to make eyes pop out. Simply use the selective option and paint over the eyes in much the same way as I have described in the steps above.
Once you have your area selected use the sliders in the Light option. You can also find further tools under the Effects and Detail tabs.
Does Lightroom CC Fix Red-eye?
Problems with red-eye are not so common as they used to be, but you can use Lightroom to fix it when it does occur. In the Develop Module simply select the Lightroom Red Eye Correction tool.
Click on the affected area in the image and drag until the eye is covered by the circle. Make manual adjustments to the Pupil Size and also Darken the pupil.
Can You Whiten Teeth in Lightroom CC?
Yes, you can use much the same techniques I have outlined in this article to whiten teeth. Having painted over the teeth you will want to concentrate mainly on the Exposure and Saturation sliders to lighten the teeth.
Conclusion
Whenever you make adjustments to photos in Lightroom it is always good to keep your end goal in mind. Picturing the result you want before you start will help you be more accurate in the choices you make.
If you want a final image to look as realistic as possible you will make different edits than if you are going for a more poster or cartoon look. Keeping it real usually means making more minor adjustments.
Any radical movement of sliders can more easily create an unnatural looking photo.
How do I get rid of red eye in Lightroom mobile?
2021-02-11 · 0
While working in the Develop module of Lightroom, select the Red Eye Correction tool from the right column. You can find it nestled between the Spot Removal tool and the Gradient Filter. You’ll then select either Red Eye or Pet Eye correction. Red Eye is for photos of people because our eyes reflect in red.
↑ How to fix red eyes in Lightroom
↑ How do you fix red eye in Lightroom mobile?
In the Lightroom CC mobile app toggle to the “Selective” option. Once in Selective, use the brush to draw on only the eyes in the photograph. Once the eyes are selected you can begin editing.
↑ How do you remove red eye in Lightroom?
Click and drag the photo so that the red eye or pet eye area is visible. Click the Red Eye Correction tool in the Develop panel on the right side of your workspace. Click either Red Eye or Pet Eye. Red Eye will remove the red discoloration of a person’s eyes that can result from a camera flash going off.
↑ How do I fix my eyes in Lightroom?
Adjust or redo as necessary until you get the look you like. Just as in previous versions of Lightroom, we’ll use the Adjustment Brush presets to brighten up the whites of the eyes. When you’re happy with the look of the irises, choose a new Adjustment Brush state by clicking on the Adjustment Brush tool.
↑ Why is Lightroom showing red?
In technical terms, clipping occurs when Lightroom detects a lack of digital information in a portion of your image, meaning those areas that show up with the red or blue overlay have no visual detail.
↑ How do you fix red eyes?
Tutorial: How to Remove Red Eye in Photos on Android
Step 1: Download and Install the Android App. Head over to Google play store and find an app called Eye Color Changer, then download and install it on your Android. Step 2: Load the Photo to the App. Step 3: Drag and Drop the “eye” Tool to Where the Red Eye Is.
↑ What apps fix red eye?
Top 15 Best Red Eye Removal Apps For Android And iOS
Adobe Photoshop Express. Adobe Photoshop Express is one of the best red eye removal apps for both android and iOS users. Visage. Pixlr. Eye Color Studio. Cymera. Eye Color Changer. PicShop Lite. Eye Lens Color Changer.
↑ How do you fix red eye on iPhone?
How to fix red eye in photos on an iPhone
Open the photo with the red eye issue in your Photos app and tap “Edit” at the top right corner. Tap the icon of the eye with a slash through it in the top-left corner. Tap each red eye you want to fix. Hit “Done” in the bottom right corner once you’ve fixed all the red eyes.
↑ Lightroom Tutorial Red Eye Removal | Arunz Creation Tutorials
So you have finished reading the how to fix eyes in lightroom mobile topic article, if you find this article useful, please share it. Thank you very much. See more: how to fix red eye in lightroom 2022, how to fix red eye in lightroom mobile app, how to fix red eye in lightroom iphone, how to fix red eye in lightroom ipad, how to fix eyes on lightroom, remove red eye iphone, red eye remover, where is selective in lightroom mobile