
You are looking for information, articles, knowledge about the topic nail salons open on sunday near me how to install 12v lights on a 48v golf cart on Google, you do not find the information you need! Here are the best content compiled and compiled by the https://chewathai27.com team, along with other related topics such as: how to install 12v lights on a 48v golf cart led light bar for 48v golf cart, how to install led lights on yamaha golf cart, how to install a light bar on a golf cart, how to wire 12 volt lights to a 36 volt golf cart, 48 volt to 12 volt reducer wiring diagram, how to install a 12 volt power outlet in a golf cart, do i need a voltage reducer for my golf cart, wireless golf cart lights
Contents
How do you hook up 12 volt lights to a golf cart?
- Mount the Lights. Disconnect the chassis black wire from the negative battery terminal on your golf cart. …
- Mount the Toggle Switch. Mount the toggle switch for the lights on the driver’s side of the dash. …
- Wire the Lights. …
- Secure the Wiring. …
- Set the Toggle Switch.
How do you hook up a cigarette lighter on a golf cart?
Pull the wire all through the body of the cart and up into the battery container. Now, attach the negative wire to the negative – usually black – terminal on your 12-volt battery. Drag the positive wire through the cart in the same way and connect it to the positive terminal.
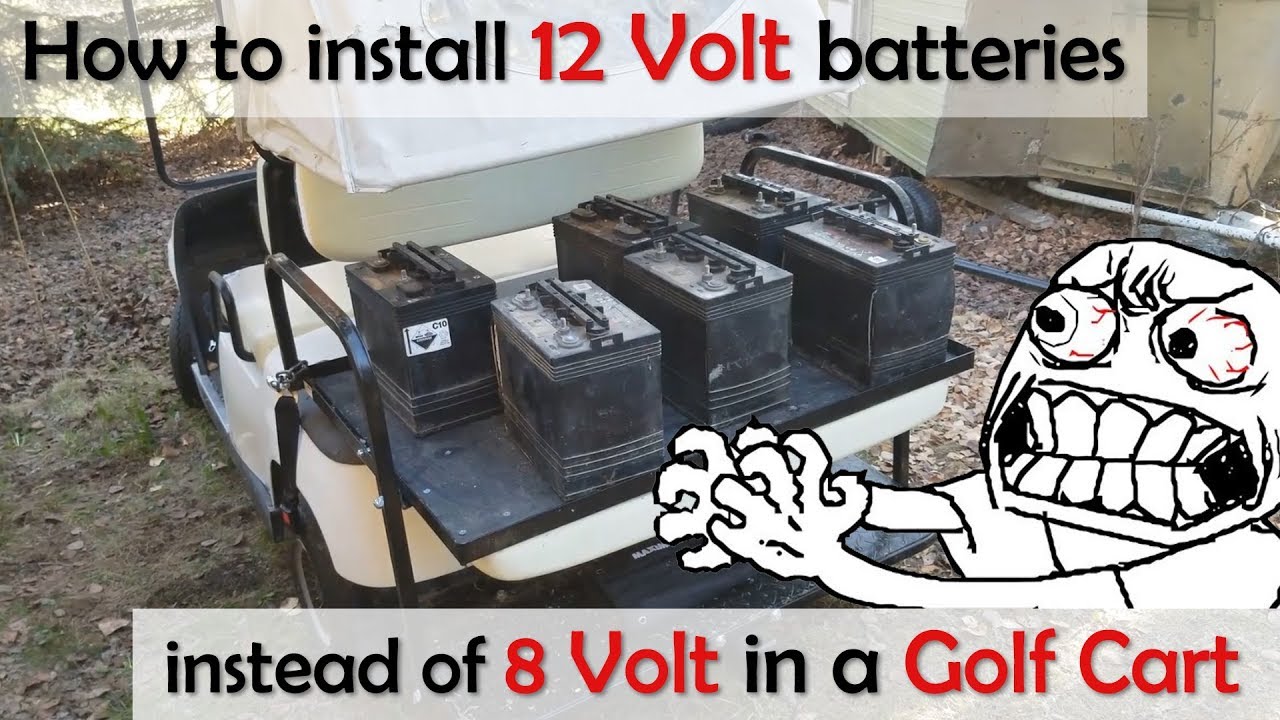
Can you put 4 12 volt batteries in a 48 volt golf cart?
With many golf cars requiring 48-volt battery packs, one of the most common money-saving assumptions is that purchasing fewer batteries with higher voltages will be a less expensive alternative. For example, a typical 48-volt golf car may use eight 6-volt batteries, six 8-volt batteries, or four 12-volt batteries.
Can I wire a cigarette lighter directly to the battery?
Wiring a cigarette lighter to a battery is actually extremely simple, and you can either go a DIY route or buy a product that is designed for this specific purpose. There really isn’t anything special or difficult about wiring a cigarette lighter to a battery, in fact.
How to Wire Lights to a Golf Cart: Step-by-Step Instructions | Golflink.com
- Article author: www.golflink.com
- Reviews from users: 42196
 Ratings
 - Top rated: 3.3
- Lowest rated: 1
- Summary of article content: Articles about How to Wire Lights to a Golf Cart: Step-by-Step Instructions | Golflink.com Updating …
- Most searched keywords: Whether you are looking for How to Wire Lights to a Golf Cart: Step-by-Step Instructions | Golflink.com Updating Adding golf cart lights simply makes your cart better. But how exactly do you do that? Check out this step-by-step guide on lighting up your cart.
- Table of Contents:
Step 1 Mount the Lights
Step 2 Mount the Toggle Switch
Step 4 Wire the Lights
Step 5 Secure the Wiring
Step 6 Set the Toggle Switch
Tips
About the Author
How To Install DC Converter on Golf Cart | 48v to 12V Power Converter | Accessory Power Supply – YouTube
- Article author: www.youtube.com
- Reviews from users: 44538 Ratings
- Top rated: 4.8
- Lowest rated: 1
- Summary of article content: Articles about How To Install DC Converter on Golf Cart | 48v to 12V Power Converter | Accessory Power Supply – YouTube Updating …
- Most searched keywords: Whether you are looking for How To Install DC Converter on Golf Cart | 48v to 12V Power Converter | Accessory Power Supply – YouTube Updating #ezgo #golfcart #clubcarThe converter connects across your entire 36V or 48V pack to supply 12v.Power Converter 30 amp – https://amzn.to/2YiwytZFuse Block – …how to, golf cart, how to install dc converter on golf cart, how to install power converter, how to install accessories on golf cart, golf cart 12v power converter, golf, 48-12 voltage reducer, voltage reducer for 48v golf carts, voltage reducer 48v to 12v, voltage reducer 36v to 12v, golf cart power inverter, golf cart power converter, golf cart dc converter wiring diagram, 48 volt, club car, Precedent
- Table of Contents:
Using 12v Batteries in a 48v Golf Cart, instead of 8 / 6 volt battery – Yamaha g19 (and others!) – YouTube
- Article author: www.youtube.com
- Reviews from users: 47626 Ratings
- Top rated: 3.8
- Lowest rated: 1
- Summary of article content: Articles about Using 12v Batteries in a 48v Golf Cart, instead of 8 / 6 volt battery – Yamaha g19 (and others!) – YouTube Updating …
- Most searched keywords: Whether you are looking for Using 12v Batteries in a 48v Golf Cart, instead of 8 / 6 volt battery – Yamaha g19 (and others!) – YouTube Updating Main Channel: http://youtube.com/BestEdmontonMallENTERTAINMENT PURPOSES ONLY – ALWAYS HAVE WORK COMPLETED BY A TRAINED CERTIFIED PROFESSIONAL.Just sharing ho…Golf Cart Batteries, Golf Cart 12v Batteries, using 12v batteries in a golf cart, Yamaha golf cart, Yamaha Golf Cart Batteries, 12v batteries in 48v golf cart, 12v batteries instead of 8v, Golf Cart Marine Batteries, Yamaha G19, yamaha g19e, yamaha g19e batteries, how to install golf cart batteries, golf cart battery installation, golf cart battery, golf cart, battery, golf, how to, installation, 6 volt battery, 48v, 6 volt, 48 volt, yamaha, G19, G19e, batteries, cart, golfcart, volt
- Table of Contents:
How To Install A Cigarette Lighter In A Golf Cart (Step-by-Step)
- Article author: www.golfcartreport.com
- Reviews from users: 24374 Ratings
- Top rated: 3.9
- Lowest rated: 1
- Summary of article content: Articles about How To Install A Cigarette Lighter In A Golf Cart (Step-by-Step) Updating …
- Most searched keywords: Whether you are looking for How To Install A Cigarette Lighter In A Golf Cart (Step-by-Step) Updating Knowing how to install a cigarette lighter in a golf cart properly is very important. We give you a step-by-step guide on this process.
- Table of Contents:
How to Install a Cigarette Lighter in a Golf Cart (Step-by-Step)
Reader Interactions
Primary Sidebar
Footer
How to hook up and run a 12 volt light on my 48 volt golf cart that has six 8 volt batteries – Quora
- Article author: www.quora.com
- Reviews from users: 23447 Ratings
- Top rated: 3.4
- Lowest rated: 1
- Summary of article content: Articles about How to hook up and run a 12 volt light on my 48 volt golf cart that has six 8 volt batteries – Quora Connect two pairs of 6 Volt batteries in series to make two 12 Volt batteries. Then connect the two 12 Volt batteries in parallel. …
- Most searched keywords: Whether you are looking for How to hook up and run a 12 volt light on my 48 volt golf cart that has six 8 volt batteries – Quora Connect two pairs of 6 Volt batteries in series to make two 12 Volt batteries. Then connect the two 12 Volt batteries in parallel. 48v led lights are widely available, just buy some of them instead… Otherwise the only way that won’t lead to battery imbalances would be get a 48v to 12v regulator circuit and fit that… google “Golf Cart DC Converter 36V – 60V to 12V Step Down Re…
- Table of Contents:

Golf Cart Lights: Installation Discussion | Golf-Cart-Blog
- Article author: golfcar.blog
- Reviews from users: 36585 Ratings
- Top rated: 3.0
- Lowest rated: 1
- Summary of article content: Articles about
Golf Cart Lights: Installation Discussion | Golf-Cart-Blog Tutorial about golf cart lights & light kits, installation … In Club Car & Yamaha 48-volt systems there is no place to tap into 12-volts. … - Most searched keywords: Whether you are looking for
Golf Cart Lights: Installation Discussion | Golf-Cart-Blog Tutorial about golf cart lights & light kits, installation … In Club Car & Yamaha 48-volt systems there is no place to tap into 12-volts. Tutorial about golf cart lights & light kits, installation concerns on gas vs. electric carts and using a DC to DC voltage reducer. - Table of Contents:
PROBLEM #1 48-VOLT SYSTEMS
PROBLEM #2 PREMATURE BATTERY FAILURE
THE SOLUTIONS
VOLTAGE REDUCERS (DC to DC Converters)
NOTE 1
NOTE 2
This is the dynamic
6 thoughts on “All About Golf Cart Lights”
How To Wire Lights On A 48 Volt Golf Cart? [ Everything You Need To Know ] – Golfer Watch
- Article author: golferwatch.com
- Reviews from users: 30650 Ratings
- Top rated: 4.6
- Lowest rated: 1
- Summary of article content: Articles about How To Wire Lights On A 48 Volt Golf Cart? [ Everything You Need To Know ] – Golfer Watch A voltage reducer that works on 48-volt golf carts; Your light of choice, some pre-made lighting kits are already available for easier installation. Mounting … …
- Most searched keywords: Whether you are looking for How To Wire Lights On A 48 Volt Golf Cart? [ Everything You Need To Know ] – Golfer Watch A voltage reducer that works on 48-volt golf carts; Your light of choice, some pre-made lighting kits are already available for easier installation. Mounting … How to Wire Lights on a 48 Volt Golf Cart? A question that arises to the golfers, if you are interested to know have a read.
- Table of Contents:
Why Is There a Need to Wire Lights
Wiring Procedure
Here is a How to Wire Lights on a 48 Volt Golf Cart
Important Notes
Post navigation
Similar Posts
2 Comments
![How To Wire Lights On A 48 Volt Golf Cart? [ Everything You Need To Know ] - Golfer Watch](https://golferwatch.com/wp-content/uploads/2019/08/golfer-watch.jpg)
How to Get 12 Volts From a 48 Volt Golf Cart | Sciencing
- Article author: sciencing.com
- Reviews from users: 29824 Ratings
- Top rated: 3.1
- Lowest rated: 1
- Summary of article content: Articles about How to Get 12 Volts From a 48 Volt Golf Cart | Sciencing Attach terminal connectors to two insulated wires and then connect one wire to each terminal on the battery. Depending on the type of terminal, … …
- Most searched keywords: Whether you are looking for How to Get 12 Volts From a 48 Volt Golf Cart | Sciencing Attach terminal connectors to two insulated wires and then connect one wire to each terminal on the battery. Depending on the type of terminal, … Gas engines or electric motors power most golf carts. Gas engines require at least one battery to power the starter motor and accessories such as lights or a horn, while electrically powered carts often have six or more batteries. It is possible to create a 12-volt feed from the batteries with a minimum of electrical …
- Table of Contents:
Gas-powered Carts
Battery-powered Carts
How to Size a Transformer KVA
How to Make 12 Volt to 24 Volt Conversion
How to Charge a 12V Battery With a DC Motor
How to Calculate Induced Armature Voltage
How to Calculate KVA to MVA
How to Make an Electric Fan

How to Wire Lights to a Golf Cart: Step-by-Step Instructions | Golflink.com
- Article author: www.golflink.com
- Reviews from users: 1634 Ratings
- Top rated: 4.3
- Lowest rated: 1
- Summary of article content: Articles about How to Wire Lights to a Golf Cart: Step-by-Step Instructions | Golflink.com Adding golf cart lights simply makes your cart better. But how exactly do you do that? Check out this step-by-step gue on lighting up your cart. …
- Most searched keywords: Whether you are looking for How to Wire Lights to a Golf Cart: Step-by-Step Instructions | Golflink.com Adding golf cart lights simply makes your cart better. But how exactly do you do that? Check out this step-by-step gue on lighting up your cart. Adding golf cart lights simply makes your cart better. But how exactly do you do that? Check out this step-by-step guide on lighting up your cart.
- Table of Contents:
Step 1 Mount the Lights
Step 2 Mount the Toggle Switch
Step 4 Wire the Lights
Step 5 Secure the Wiring
Step 6 Set the Toggle Switch
Tips
About the Author
See more articles in the same category here: 670+ tips for you.
How to Wire Lights to a Golf Cart: Step-by-Step Instructions
If your personal golf cart did not come with lights installed, you’re one of many. If you use your cart for purposes other than golf you should install lights to help you see where you’re driving. In some instances, communities even require golf carts with lights, so this might be for you. Let’s go through a step-by-step process of how to wire your own lights on a golf cart.
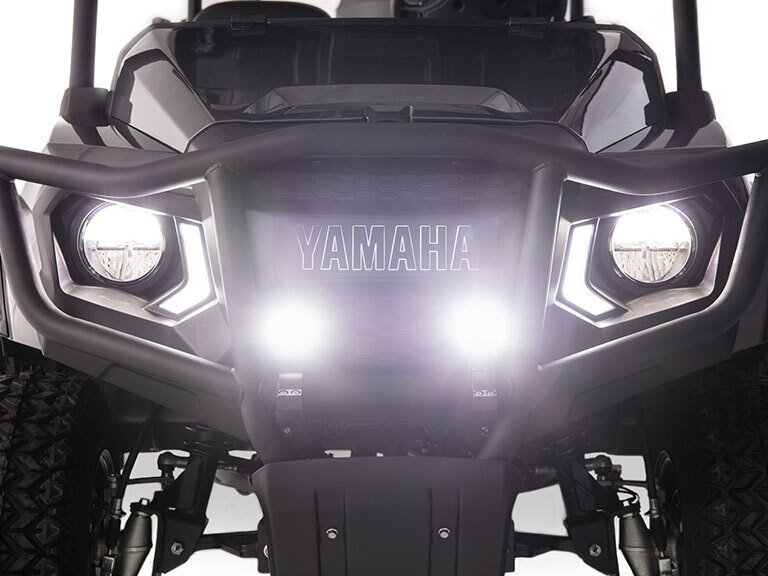
Step 1. Mount the Lights Disconnect the chassis black wire from the negative battery terminal on your golf cart. Then, mount your lights on either the front bumper or top of your golf cart if your cart has a roll bar. If it does not have a roll bar, then clamping the lights to the front bumper is the next best place to install them.
Step 2. Mount the Toggle Switch Mount the toggle switch for the lights on the driver’s side of the dash. Drill a 1/2 inch hole in the dash to thread the mounting screw for the light switch.
Step 3. Connect the Electrical Connect one of the leads of the inline fuse holders to the positive terminal of the battery with a ring terminal. Use a “butt” connector to connect the un-attached lead of the in-line fuse holder to the middle terminal of the toggle switch with a female spade terminal.
Step 4. Wire the Lights Use 16-gauge wire and connect the second terminal of the toggle switch to the headlights’ positive connection with a butt connector.
Step 5. Secure the Wiring Cover all of the connections with electrical tape and then secure the wiring to the body of the golf cart with nylon wire ties.
Step 6. Set the Toggle Switch Set the toggle switch in the mounting hole previously drilled. Then, re-connect the negative battery terminal. Test the light by turning the light switch to the “on” or “up” position and your lights are now setup.
How To Install A Cigarette Lighter In A Golf Cart (Step-by-Step)
Though some golf carts do come with a cigarette lighter or some type of 12-volt device, you may find that many do not.
And if you are a smoker or you just want a lighter on your cart for charging purposes, you’re going to have to add it to your cart yourself or hire an expert to do it for you.
Thankfully, we find that most cart owners can handle this process if they understand the basic steps.
How to Install a Cigarette Lighter in a Golf Cart (Step-by-Step)
Here are a few great options from Amazon.
Golf Carts Universe Golf Cart Cigarette Lighter With Socket Dash Mount Golf cart dash mount cigarette lighter
Stainless steel
Includes cap creating a protective seal
Wiring not included
12 volt – 15 amp
Sale QC 3.0 USB Outlet 12V Boat Marine Waterproof Cigarette Lighter Socket Splitter 12 Volt DC Power Charger Adapter DIY Kit with Blue LED Dual USB Ports for Rocker Switch Panel on Car RV Golf Cart ATV ♕【Considerate & Worry-Free】Upgraded high-quality QC 3.0 USB outlet with Limited time NEW PRODUCT experience price, worry-free 60-Day refund Guarantee, 5-Year Replacement and Lifetime Support. Qidoe car chargers, your ideal choice.
♕【Cigarette Lighter Socket】 Total power up to 120W (12V) / 150W (24V). Enough for everyday use, fits perfectly with compatible devices such as dashcam, GPS, vacuum cleaner, air purifier, etc.
♕【Faster than Fast】This Cigarette outlet is Designed with dual USB ports supporting QC 3.0, whose max single output is 18W. Built-in official Qualcomm smart chip, will intelligently detect your devices and simultaneously charging 2 devices at optimal current. Charge compatible devices up to 4 times faster than conventional charging, backward-compatible with QC 2.0 & 1.0.
♕【Multiple Protection】Certified by CE & ROHS with Over-load, Over-current and Short Circuit Protection to ensure charging safety, meanwhile, built-in Smart IC ensures the circuit won’t be burnt out if wrong wiring. IP66 waterproof grade, dose good job on marine, boat and Golf Cart.
♕【Broad Compalitity 】This USB charger socket fits for 12-24V car, boat, marine, motorcycle, ATV, RV etc. Suitable for charging mobile phone, GPS, digital camera, PDA and other USB accessories.
1. Identify Where You Want to Install the Lighter
When installing a cigarette lighter in your cart, you need to make sure you find a place that makes sense for your installation needs.
For example, you may want to add one directly on the dash where you can use it to light your smokes as you ride.
Or if you have multiple riders who smoke, you may want to put it more towards the center of the dash to make sure everyone can access it.
If you just want a cigarette lighter as a 12-volt adapter – not uncommon for those who want to add GPS or other items to their ride – the location is a bit more open.
Most of the time, you’re going to want to put it somewhere that multiple people can easily reach without much confusion.
We suggest towards the bottom of your dash because you can hide it from the weather more easily in this spot.
Beyond that, you also need to pay attention to the layout of your dash and where installations are allowed for new items.
For example, there may be a spot on the dash that is labeled as being a good place to install a cigarette lighter.
This location is based on its electrical needs and the ease of integrating it into the electrical system of your cart at the same time.
Once you have found a spot that makes sense for you, it is possible to start the installation process.
You’re going to want to gather up your tools – a saw that can cut plastic, various types of soldering devices, multiple rolls of electrical tape, screwdrivers, and more.
2. Locate the Battery on Your Cart
Depending on your golf cart and its design, you are likely to find anywhere from one to many batteries in your cart when you open up the engine bay.
This factor depends on if you have a gasoline cart or an electrical cart.
Gas-powered carts have just one battery because they get most of their power from internal combustion, while electrical carts have many batteries – sometimes as many as six or seven.
As a result, it is important to understand not only how to locate the battery but the type that you need to use when hooking up your cigarette lighter.
If you’re working in a gasoline cart, you don’t have to worry about this factor as much because you’ll attach the wires to the proper terminals and it will get the electrical charge that it needs by tapping into their output.
Check for the 12-volt output terminals on these gas-powered cart batteries.
However, in electrical carts, there will be batteries of many different voltages.
For example, you may have anywhere from 8-12 volts in a single battery.
Locate one that has an output of 12 volts and note its location in your engine bay.
Where exactly is your engine bay located?
That all depends on different factors but is usually pretty basic in most types of golf carts.
A rule of thumb – most golf carts have their engine bay under the rear seats of the cart or as far back as possible on the body.
Sometimes, you may find a cart that has them in the front or more towards the middle.
This positioning is very rare, though – and this rear location is common in Club Car, EZGO, and Yamaha Carts, so these directions are universal for most cart models.
3. Cutting a Hole for the Lighter
Here comes the challenging part of this process – drilling or cutting a spot in your cart body for the lighter.
Remember in step one when you found the spot that worked the best for your needs?
Now is the time to cut out that hole.
Start by drilling a small hole at the corner of the area that you want to cut out.
Work your saw into this hole and use it to cut away some of the plastic.
Slowly cut the hole by allowing the saw teeth to cut into the plastic.
Don’t press too hard as you cut – the saw should be doing most of the work.
You are mostly working to guide the blade and make sure that it stays straight.
So do any course correction that is needed as you cut to ensure that you get the hole that you want in your cart without any difficulties here.
After the hole is cut to the proper shape for your lighter – which includes not just the lighter itself but the body of the unit, which is usually much larger than the lighter.
This body should contain not only the lighter but its wiring, all of its electrical components, and much more.
Make sure that this unit is carefully sealed and not open to the environment before you move on to any other steps.
Now, use plastic-safe sandpaper to smoothen out the edges where you will install the lighter.
You should try to avoid removing too much plastic here.
Just make the surface safe to touch and free of any excess cut plastic remnants.
The idea here is to prevent the body of the lighter from getting damaged and to ensure that it slides in easily and without a lot of effort at the same time.
4. Wiring the Lighter Through the Cart’s Body
Start by carefully pressing the lighter into the hole that you have cut.
You aren’t going to mount the lighter just yet but use its wires as a guide for where you need to cut.
Get underneath of your cart – jack it up as high as possible – and inspect the bottom of the cart.
Depending on the cart, there should be only a few or many disruptions between the lighter hole and the battery on your cart.
Examine the pathway that your wire will need to take under the cart and plan how you are going to attach it to the bottom.
For example, there may be areas that you need to drill small holes through to allow your wires easier and straight access to the battery.
You are going to need to be very careful here and take your time to avoid damaging your cart.
At this point, you need to make any cuts that are necessary and open up your battery compartment to make sure that there is a hole from which you can pull the wires.
If not, you need to cut a hole here using the drill and saw method mentioned earlier.
Typically, you’re not going to need a very big hole – just big enough that your wires can come up through the battery compartment with ease.
Critically, you also need to check with your cart’s schematic to ensure that you don’t drill or cut into any vital areas of your cart.
Always know EXACTLY where you are working and NEVER drill or cut into any axles, connecting wires, or anything else that keeps your cart running.
You can contact your cart’s manufacturer to get a schematic.
5. Connecting the Lighter to the Battery
After you have checked and double-checked the wire length from your light to your cart’s battery, you can hook it up.
Start by pressing the lighter into the hole you cut and using appropriate glue or another type of adhesive to hold it into place.
Don’t worry – you should be able to cut these seams of glue later if your lighter needs to be removed and replaced at any other time.
Take the wires from the lighter and move them through the path that you planned for your lighter’s installation.
Make sure to start with the negative wire first and to keep the positive separate for the time being.
Pull the wire all through the body of the cart and up into the battery container.
Now, attach the negative wire to the negative – usually black – terminal on your 12-volt battery.
Drag the positive wire through the cart in the same way and connect it to the positive terminal.
Make sure to avoid touching the end of the wire because you may get shocked once the negative wire is hooked up to the terminal.
Use a pair of gloves or a set of pliers to wrap the positive wire around the other terminal – make sure it stays tightly wrapped to avoid causing sparks.
Tape the wires up to the chassis of your cart to make sure that they don’t drag as you drive.
6. Care and Maintenance of the Lighter
After installing your lighter in your cart and testing it to make sure that it works, you need to take care of it regularly to ensure that it doesn’t run into any operational problems.
Thankfully, there aren’t a lot of steps that you need to take to keep your cart running smoothly.
Most of the time, all you’ll need to do is make sure that the wires stay strong and secure while your cart operates.
We suggest checking the wire connections of your cart at least once a year to make sure that they aren’t fraying.
In most cases, this single inspection should be enough to spot more problematic and persistent issues, such as disconnected wires.
If you find that your lighter is disconnecting at any point, change out the wires using the steps above and replace them with stronger and more sturdy wires.
You should also check the interior of the lighter from time to time for any debris that may cause a malfunction.
For example, dirt, dust, mud, and other debris may end up in your lighter if you keep the end of it out.
And when you press it down to light up a smoke, you’ll notice a burning smell that may cause some serious damage.
So try to keep your lighter inside of the plug at all times to prevent any type of burning issues.
You shouldn’t depress it constantly, though, as this will make it hot and could cause other problems.
Instead, leave it sitting in the hole to avoid dirt and other issues.
Just as importantly, make sure to use a can of concentrated air to blow debris out of the lighter slot.
Golf Cart Lights: Installation Discussion
Golf Cart Lights & Light Kits:
The first thing to consider when purchasing a light package, be it just golf cart lights or a full blown system with brake lights & turn signals, is how much power is it going to consume and from where all that power will come. The problem with factory golf cart light installations is they ‘tap’ into one or two batteries in series to provide the needed current. This is OK if the electrical accessories will be for VERY occasional use. If you plan on night excursions with friends running the river banks or hunting while using high output lights and listening to the CD player you need to consider several options that will help your batteries stand up to the requirements.
BATTERY TAPS & 8-VOLT BATTERIES:
The problem with ‘tapping’ into 2 batteries for a 12-volt power supply is twofold:
PROBLEM #1, 48-VOLT SYSTEMS:
In Club Car & Yamaha 48-volt systems there is no place to tap into 12-volts. You must either connect your golf cart lights to one battery, which gives you 8-volts (lights do not burn as brightly as they could but they will last a long time) or connect to two batteries, which gives you 16-volts (lights burn very brightly but they will not last as long as they should). Neither of these voltages (8 or 16) will support a CD, tape or radio system.
If you have a 36-volt electrical system then it is easy to ‘tap’ into 12-volts. Wire the ‘hot’ lead to a positive battery terminal and run the ground wire back to the negative battery terminal on the next battery over that is connected to the first one. DO NOT wire the ground to the frame of the car…run the ground wire back to the negative post on the appropriate battery. A frame ground is never recommended on any electric vehicle. See illustration below for proper wiring of 12 volt golf cart lights into a 36 volt system.
Both of the systems outlined above work very nicely for golf cart lights that will be used only once in a while. If the lights are needed for constant & long duration, this leads to the second problem.
PROBLEM #2, PREMATURE BATTERY FAILURE:
Any heavy, constant draw on these ‘tapped’ systems mentioned above will cause the battery(s) that are tapped to discharge faster than the others in the pack. The more accessories that are powered off the one or two ‘tapped’ batteries, the faster those batteries will fail. Even though the batteries recharge when the charger is connected, they never catch up to the ‘untapped’ batteries and they become chronically undercharged. Eventually, they will not be able to provide the steady voltage needed to power the accessories and the car, and they will need to replaced before the others do. Life is bad!
THE SOLUTIONS:
If you just want lights and can live with the reduced illumination of an 8-volt power supply…go for it. If you want to use the golf cart lights a lot but don’t want to spring for a voltage reducer (see below), order a pair of 36 or 48-volt head & tail lights. These golf cart lights wire up to all the batteries in the pack and draw them all down evenly. The battery charger then recharges them all evenly and life is good!
If you have to have all the golf cart lights and a CD or tape player to boot then you must consider the third option, a voltage reducer.
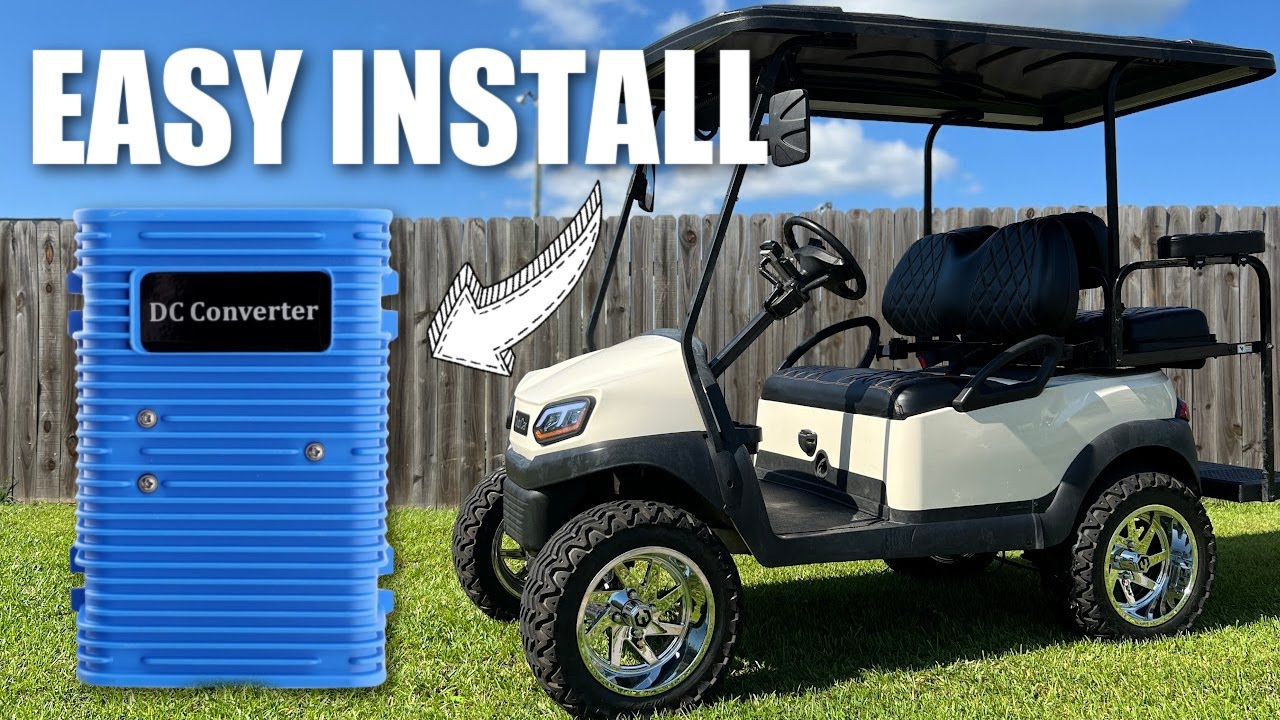
VOLTAGE REDUCERS (DC to DC Converters):
Use a voltage reducer to prolong the life of your batteries when adding golf cart lights or other electrical accessories. A voltage reducer will draw power evenly from your entire battery pack instead of just a couple batteries. This will ensure that the one or two batteries used to power the accessories will not die prematurely before the others due to excessive discharge of those particular batteries.
A voltage reducer, or ‘DC to DC converter’ as they are sometimes called, reduces the 24, 36 or 48 volts provided by the golf cart battery pack down to a usable 13.7-13.9 volts required by radios, CD & tape players and they can handle up to 25 amps of steady draw. A 10 Amp version cannot handle much more than 2 headlights & 2 tail lights. If you plan on installing even more 12-volt accessories (radios, fans, etc.), you will need a 25 Amp version instead.
NOTE 1:
2 head and 2 tail lights will use up 10 amps of current at 12-volts. A CD player or a tape cassette player will consume another 10 amps if added on top of a golf cart lights. That number increases significantly if high output speakers are employed. A standard radio consumes very little current as does a horn. Power consumption by a fan depends how much air it pushes. Electrical accessories made for the boating & camping (RV) industry are designed with power consumption in mind and therefore generally will consume less current than accessories for the auto & truck market where the alternator can produce plenty of juice for the many accessories common to those vehicles. When you design the accessory package for your golf cart think about now and think about what you might want down the road a year or so. Order accordingly.
NOTE 2:
Why do you need a voltage reducer? Consider this: A 10 amp draw from the golf cart lights, another 10 amp draw from the CD player and all of this current coming out of one or two batteries. No big deal if this draw is VERY occasional, but what about security or airport operations that have 24/7/365 power needs from the battery pack for lights, strobe, warning buzzer & communications in addition to powering the electric vehicle around the grounds? If all the current for the electrical accessories comes out of 1 or 2 batteries, then those batteries will run out of power long before the others. This wouldn’t be too bad if they recharged fully but they don’t! Initially you won’t notice those two batteries do not come up to full recharge as the others do but soon the two overused batteries will fail prematurely.
This is the dynamic:
The 1 or 2 overused batteries never do come back up to full charge like the others. After each day of extra heavy use (remember they have to help power the car AND all of the accessories) they do recharge but they never catch back up to the other batteries and over time they wear down further & further until they can no longer provide the needed power to do their job. Now the car performs well fresh off of the charger but the overused batteries quickly give out. The electric vehicle is not designed to operate on less than a full set of batteries so if one or two give out, so goes the vehicle. Longer charging times will not help. If this sounds like you…you need a voltage reducer.
By Jack Triolo
So you have finished reading the how to install 12v lights on a 48v golf cart topic article, if you find this article useful, please share it. Thank you very much. See more: led light bar for 48v golf cart, how to install led lights on yamaha golf cart, how to install a light bar on a golf cart, how to wire 12 volt lights to a 36 volt golf cart, 48 volt to 12 volt reducer wiring diagram, how to install a 12 volt power outlet in a golf cart, do i need a voltage reducer for my golf cart, wireless golf cart lights