
You are looking for information, articles, knowledge about the topic nail salons open on sunday near me how to layer different colors of resin on Google, you do not find the information you need! Here are the best content compiled and compiled by the https://chewathai27.com team, along with other related topics such as: how to layer different colors of resin how to layer resin colors in molds, how long to wait between layers of resin, 3d layered resin painting, how to layer resin in molds, how long to wait between layers of epoxy resin, how long to wait between layers of polyester resin, does resin stick to cured resin, resin art
Contents
Can you do multiple layers of resin?
Yes, you can apply a second coat of resin if you need to fix a mistake or a surface imperfection. You can also pour multiple layers if you need to cover areas of high relief, if you’re pouring into a mold or if you simply like the look of a thicker coat.
How long do you let resin sit before pouring?
Layering in molds – allow each layer to set up for at least 3 hours before pouring next layer. Doming – you can apply your resin right after the 5 minute rest period, or let the resin thicken for up to 25-30 minutes.
Do you have to sand between layers of resin?
💡TIP: Remember: whenever your resin is dry, you need to sand before you apply a second coat to ensure the two layers bond together. If you don’t sand, you run the risk of the two layers eventually delaminating.
Should you sand between coats of epoxy?
Some projects are more porous than others and may need help spreading the epoxy effectively. Then you’ll begin sanding epoxy resin between coats. Sanding epoxy isn’t hard, but you’ll want to be thorough! Sand the entire piece evenly.
Can you mix different Colour resins?
The general consensus is that mixing different resins of the same type is not a problem, even using different colors and/or brands is fine, but the resin type should be the same.
How do you blend resin?
- After the two parts are poured at the correct ratio, mix them together thoroughly for a full 2 – 3 minutes with a mixing stick. …
- Be sure to scrape the sides, corners, and bottom of the container several times during mixing. …
- Make sure to scrape both sides of the mixing cup also.
Can I pour epoxy over epoxy?
Can I put another coat of epoxy over cured epoxy? Yes. Since the epoxy has cured a chemical bond is not possible so what is called a mechanical bond is needed. This simply means that the cured epoxy has to be lightly sanded before the next coat is applied: the first coat should have a matt, almost white, surface.
How long should epoxy cure before sanding?
Tip: The epoxy resin must be really dry before sanding. You should therefore allow a waiting period of at least 48 hours before processing. Follow the manufacturer’s instructions, as there are resins that take even longer to harden completely.
What is a dirty pour in resin art?
For this project, we are doing an epoxy dirty pour, which is a pouring technique where different colors are mixed together, then combined (not mixed) into a single cup. Then, this cup of resin is poured onto the canvas or project evenly.
Preventing Color Mixing in Epoxy Resin | Art Resin – YouTube
- Article author: www.youtube.com
- Reviews from users: 21035
 Ratings
 - Top rated: 4.8
- Lowest rated: 1
- Summary of article content: Articles about Preventing Color Mixing in Epoxy Resin | Art Resin – YouTube Updating …
- Most searched keywords: Whether you are looking for Preventing Color Mixing in Epoxy Resin | Art Resin – YouTube Updating Here is a simple and effective way to prevent colors from blending in Art Resin. Check out other resin projects at https://www.keddiewoodshop.com/resinItems …resin, epoxy resin, dirty pour epoxy resin, art resin, mica powder, how to use epoxy resin, epoxy resin projects, diy resin, resin coasters, epoxy resin coasters, keddiewoodshop, ecopoxy
- Table of Contents:

How Do You Pour Multiple Resin Layers? – YouTube
- Article author: www.youtube.com
- Reviews from users: 11084 Ratings
- Top rated: 3.7
- Lowest rated: 1
- Summary of article content: Articles about How Do You Pour Multiple Resin Layers? – YouTube Updating …
- Most searched keywords: Whether you are looking for How Do You Pour Multiple Resin Layers? – YouTube Updating https://www.artresin.comOn today’s Video Friday we are talking layers!Whether you’re fixing an imperfection in your first layer, embedding objects, covering …ArtResin, Epoxy Resin, clear, clearer, non-yellowing, safe, varnish, thick, resin, epoxy, art, photography, wood, artists, best, favorite, how to pour layers, how to sand resin layers, resin layers, how long to wait in between resin layers
- Table of Contents:

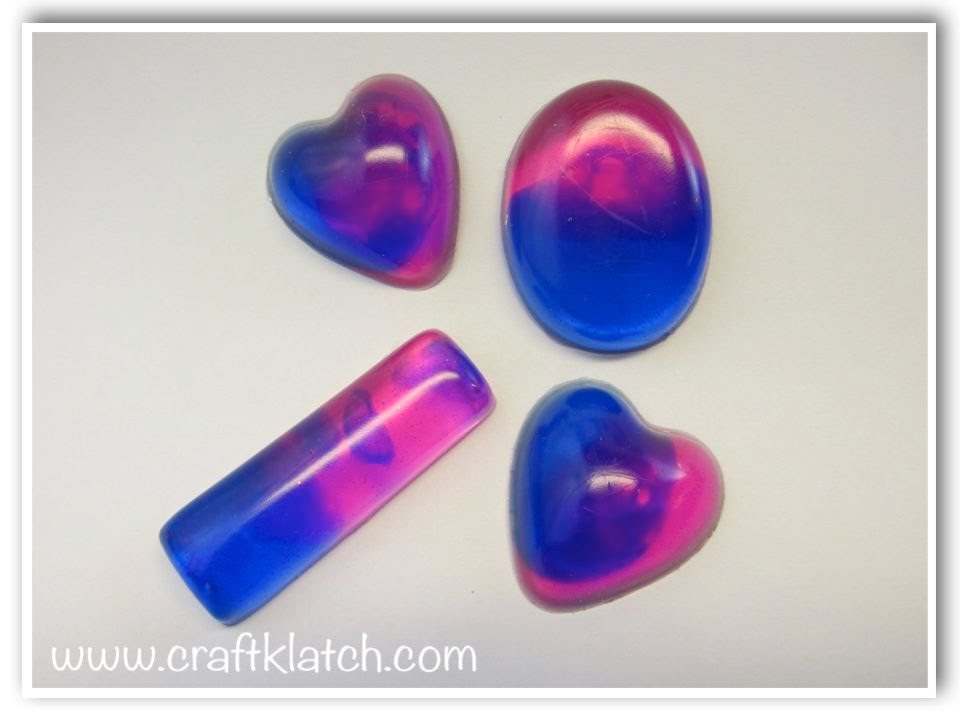
Resin and Ink Experiment Color Blending Make Something Monday – YouTube
- Article author: www.youtube.com
- Reviews from users: 37273 Ratings
- Top rated: 4.6
- Lowest rated: 1
- Summary of article content: Articles about Resin and Ink Experiment Color Blending Make Something Monday – YouTube Updating …
- Most searched keywords: Whether you are looking for Resin and Ink Experiment Color Blending Make Something Monday – YouTube Updating Here is a link to the ink I used:https://amzn.to/2DZh4y7Here is a link to the resin mold:https://amzn.to/2DWi1HzHere is a link to Easy Cast:https://amzn.to/2…craft klatch, craft, crafting, crafts, easy crafts, decor, handmade, homemade, fun craft, best craft, video, tutorial, craft wars, hgtv, diy, howto, how to, style, Do It Yourself (Website Category), resin, ink, resin experiment, india ink, craft ideas, jewelry, pendants, rings, blending, resin blending, blending resin, pink, blue
- Table of Contents:
How to Apply A Multiple Resin Coats & Sand Between Coats? – ArtResin
- Article author: www.artresin.com
- Reviews from users: 1052 Ratings
- Top rated: 3.9
- Lowest rated: 1
- Summary of article content: Articles about
How to Apply A Multiple Resin Coats & Sand Between Coats? – ArtResin
Updating … - Most searched keywords: Whether you are looking for
How to Apply A Multiple Resin Coats & Sand Between Coats? – ArtResin
Updating Do you want to find out if you can apply a second or even multiple coats of epoxy resin in your artwork? Read now our guide & follow our steps. - Table of Contents:
How To Apply A Second Coat Of Epoxy Resin
How To Apply Multiple Coats Of Epoxy Resin
30 Day Satisfaction Guarantee

How do you pour multiple colors of resin? –
- Article author: salvagesecretsblog.com
- Reviews from users: 9236 Ratings
- Top rated: 3.4
- Lowest rated: 1
- Summary of article content: Articles about How do you pour multiple colors of resin? – To pour different layers of resin, you’ll need to let the first layer cure completely before adding … …
- Most searched keywords: Whether you are looking for How do you pour multiple colors of resin? – To pour different layers of resin, you’ll need to let the first layer cure completely before adding … Do you want to create a beautiful piece of art with multiple colors of resin?It’s easier than you might think! In this blog post, we will walk you through the steps necessary to create a stunning work of art with multiple colors of resin.
- Table of Contents:
How do you pour different layers of resin
Can you mix resin colors
Can you pour multiple layers of resin
How do you use doming resin
How do you mix epoxy resin colors
How do you swirl resin colors
How do you mix epoxy resin
How long do you let resin sit before pouring
How long should you wait between layers of resin
How long do you wait between coats of resin

How to Layer Resin – Happily Ever After, Etc.
- Article author: happilyeverafteretc.com
- Reviews from users: 31081 Ratings
- Top rated: 3.7
- Lowest rated: 1
- Summary of article content: Articles about How to Layer Resin – Happily Ever After, Etc. Luckily layering resin is very simple… if you’ve learned to pour one layer of resin you’ve pretty much got the concept. …
- Most searched keywords: Whether you are looking for How to Layer Resin – Happily Ever After, Etc. Luckily layering resin is very simple… if you’ve learned to pour one layer of resin you’ve pretty much got the concept.
- Table of Contents:
Supplies
Step 1 Pour Layer 1
Step 2 Pour Layer 2

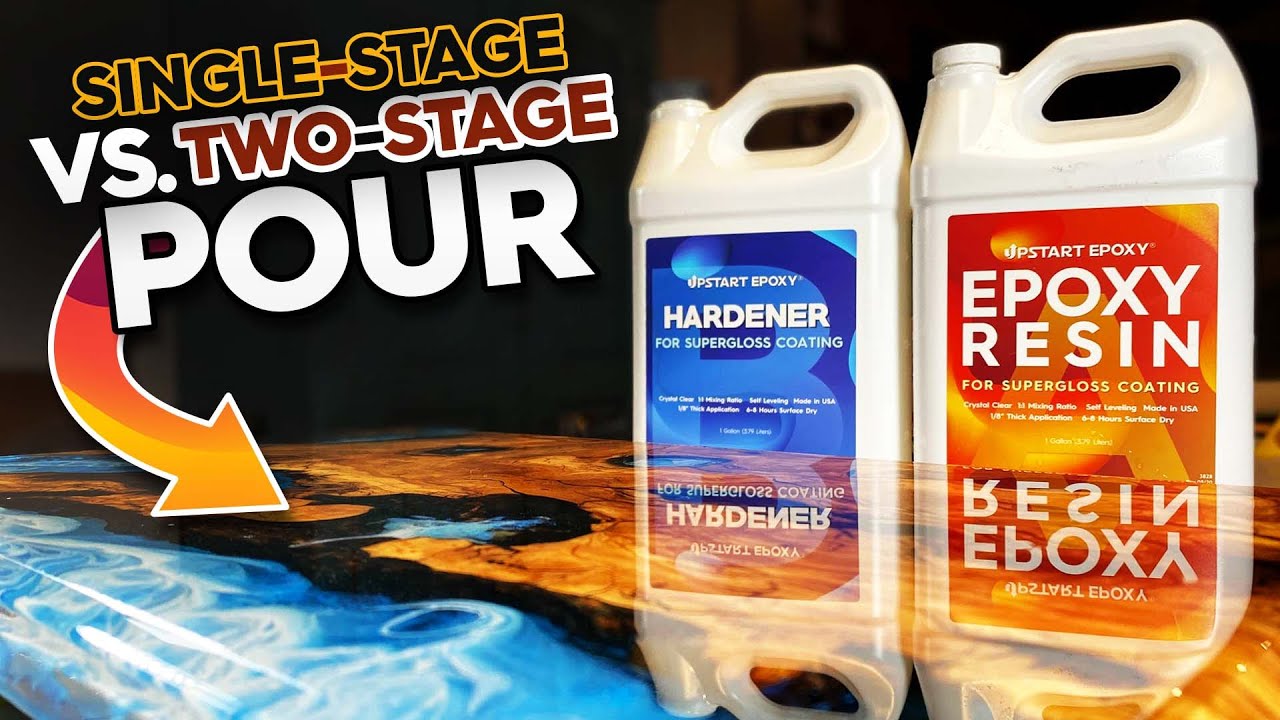
How Long to Wait Between Resin Layers: Your Guide to Layering Resin
- Article author: www.upstartepoxy.com
- Reviews from users: 15874 Ratings
- Top rated: 4.0
- Lowest rated: 1
- Summary of article content: Articles about How Long to Wait Between Resin Layers: Your Guide to Layering Resin Here’s how to layer resin – using deep pour epoxy, your first pour will be a colored one, where you’d use the powdered pigments set. …
- Most searched keywords: Whether you are looking for How Long to Wait Between Resin Layers: Your Guide to Layering Resin Here’s how to layer resin – using deep pour epoxy, your first pour will be a colored one, where you’d use the powdered pigments set. Wondering how long to wait between resin layers? Check out this guide on layering resin to help you achieve that perfect effect.
- Table of Contents:
How to Layer Resin
How Long to Wait Between Resin Layers
Finishing Your Layered Resin Project
How Long Do I Need To Wait Between Resin Layers? – ArtResin
- Article author: www.artresin.com
- Reviews from users: 12885 Ratings
- Top rated: 3.3
- Lowest rated: 1
- Summary of article content: Articles about
How Long Do I Need To Wait Between Resin Layers? – ArtResin
There are two methods for applying additional epoxy resin coats: 1) sanding down your first layer after having let it dry for 24 hrs or, if you’re in a hurry, 2 … … - Most searched keywords: Whether you are looking for
How Long Do I Need To Wait Between Resin Layers? – ArtResin
There are two methods for applying additional epoxy resin coats: 1) sanding down your first layer after having let it dry for 24 hrs or, if you’re in a hurry, 2 … Interested to know how long do you need to wait between the two layers of resin? Read now our blog and find out the best two methods. - Table of Contents:
The 24 hour method
The 3-5 hour method
30 Day Satisfaction Guarantee

How to Layer Resin – Happily Ever After, Etc. | Resin crafts, Resin crafts tutorial, Diy resin projects
- Article author: www.pinterest.com
- Reviews from users: 17874 Ratings
- Top rated: 3.2
- Lowest rated: 1
- Summary of article content: Articles about How to Layer Resin – Happily Ever After, Etc. | Resin crafts, Resin crafts tutorial, Diy resin projects Layering resin! Resin projects can be as simple as one layer […] … What sort of products can be used to color resin for art and crafts? We. …
- Most searched keywords: Whether you are looking for How to Layer Resin – Happily Ever After, Etc. | Resin crafts, Resin crafts tutorial, Diy resin projects Layering resin! Resin projects can be as simple as one layer […] … What sort of products can be used to color resin for art and crafts? We. Apr 27, 2020 – Once you’ve started making resin projects you’ll never want to stop… it’s kind of addicting! If you’re here you’ve likely attempted a project or two (maybe you’ve followed my how to mix resin for beginners tutorial) and now you’re ready for the next step. Layering resin! Resin projects can be as simple as one layer […]
- Table of Contents:

See more articles in the same category here: https://chewathai27.com/toplist.
How to Apply A Multiple Resin Coats & Sand Between Coats? – ArtResin
How To Apply A Second Coat Of Epoxy Resin:
Yes, you can apply a second coat of resin if you need to fix a mistake or a surface imperfection. You can also pour multiple layers if you need to cover areas of high relief, if you’re pouring into a mold or if you simply like the look of a thicker coat.
Most people who do a second coat of epoxy are trying to fix a surface imperfection that happened in the first coat. For example, you may find bubbles, or hair or dust that landed while your piece was wet and cured into your resin.
Here’s how to fix that and what grit to sand epoxy
First, sand down the entire surface of your piece with coarse sandpaper ( we use 80 grit sandpaper here at ArtResin ). Sanding epoxy resin between coats will not only get out the imperfection, but will also serve to provide some tooth between the first and second layers.
It will look very scuffed in the short term, but don’t worry, once you pour the second coat over top, all of those sanding marks will disappear.
Wipe away any of sanding debris before you pour your next coat of well measured, well mixed ArtResin over the top, then cover with a dustcover to make sure you avoid any of those imperfections a second time and you should be good to go!
💡TIP: ArtResin self-levels at about an 1/8″ of an inch. You can pour a little deeper if you’re pouring into a vessel like a silicone mold, but you want to be careful not to pour deeper than 1/4″ for a couple of reasons: first, it’s hard for bubbles to release at anything thicker than that and second, the resin can heat up in ways you don’t want if you pour too thick. Keep in mind that if you pour ArtResin deeper than 1/8″, it will take longer to cure.
How To Apply Multiple Coats Of Epoxy Resin:
Some artists like to do third, fourth or fifth coats with artwork in between each layer for a 3D effect. You can also pour multiple layers of ArtResin if you just like the look of a thicker coat, if you want to embed objects into the resin or if you’re pouring into a silicone mold.
If you are looking for that layered look, there are two ways to achieve it:
1) Wait 24 Hours & Sand Down the Whole Piece
First, you can wait 24 hrs after your first pour, sand down the whole piece with coarse sandpaper to create some tooth, and pour your second coat at that point, as originally described. Repeat until you reach the thickness you desire.
2) Wait 3-5 Hours & Pour the Second Coat of Epoxy Resin
Second, to save you some time, you can wait 3-5 hrs after your first pour, to where the resin has reached a jelly like state. Instead of sanding, you’ll pour the second coat on at that time: the stickiness of the resin will provide the tooth and the curing will happen simultaneously between the two layers, bonding them together very nicely. Repeat these steps until you reach the thickness you desire.
Both methods work very nicely for pouring multiple layers! So whether you’re working on an epic piece with lots of layers, or you’re simply trying to fix an imperfection on your first coat, rest assured that pouring a second coat is always an option!
Check out our blog on How you Can Small Imperfection in your Epoxy Resin.
Check out our blog about scratch marks from sanding under a second coat of resin!
ArtResin: Made By Artists For Artists
How do you pour multiple colors of resin? –
Do you want to create a beautiful piece of art with multiple colors of resin?
It’s easier than you might think! In this blog post, we will walk you through the steps necessary to create a stunning work of art with multiple colors of resin.
Let’s get started!
How do you pour different layers of resin?
If you want to create a project with multiple colors, you’ll need to pour each color separately.
To pour different layers of resin, you’ll need to let the first layer cure completely before adding the next layer on top.
You can use silicone molds or other barriers to help keep your layers separate while they cure.
Once each layer is cured, you can remove the barrier and enjoy your multi-colored creation!
Can you mix resin colors?
Yes, you can mix resin colors to create new shades. However, it’s important to note that the different colors will not always blend together perfectly.
You may end up with some streaks or spots of one color in another color.
This is normal and part of the character of hand-mixed resins.
Can you pour multiple layers of resin?
You can pour multiple layers of resin, but you will need to wait for each layer to dry before adding the next. This will ensure that the colors stay separate.
You can use a variety of methods to mix the colors together, such as swirling them around in a bowl or using a toothpick to create swirls on the surface of the resin.
Just make sure that you don’t overmix them, or they will become one color.
How do you use doming resin?
Doming resin is a great way to add a three-dimensional effect to your project. It’s easy to use and can be poured in multiple colors for a unique look.
Here’s how you do it:
First, gather your supplies. You’ll need doming resin, pigment or dye, gloves, stir sticks, and cups or beakers for mixing.
Make sure you have a well-ventilated workspace set up before you begin.
Next, mix your pigment or dye with the doming resin according to the manufacturer’s instructions.
Once it’s mixed thoroughly, pour it into your cups or beakers.
How do you mix epoxy resin colors?
There are a few ways to mix colors with epoxy resin. The first way is to use pre-mixed pigment powders.
You can find these powders at most craft stores. Simply add the desired amount of powder to your resin and mix thoroughly.
Another way to mix colors is to use alcohol inks.
These inks come in concentrated drops, so you will need to dilute them before adding them to your resin.
To do this, simply add a few drops of ink to a small amount of vodka or Everclear and mix well.
Once diluted, add the ink mixture to your resin and stir until combined.
How do you swirl resin colors?
The technique is simple. You pour one color of resin into your mold, then pour the second color of resin on top of the first color.
The key is to pour the second color slowly so that it doesn’t mix with the first color too much.
Then, use a chopstick or other sharp object to swirl the colors together.
How do you mix epoxy resin?
You can mix epoxy resin by using a mixing stick. You will need to pour the epoxy resin into a cup and then slowly stir it with the mixing stick.
Once you have mixed the epoxy resin, you can then pour it into your mold.
If you want to pour multiple colors of epoxy resin, you will need to use a plastic syringe.
You will need to insert the syringe into each color of resin and then slowly dispense the resin into your mold.
Once you have poured all of the colors that you want, you can then use a toothpick to swirl the colors together.
How long do you let resin sit before pouring?
You should let the resin sit for at least 24 hours before pouring. This will allow the resin to cure properly and achieve its desired results.
You may also need to wait longer if you are using a thicker resin.
How long should you wait between layers of resin?
You don’t have to wait too long between layers of resin, maybe a minute or two.
If you pour the next layer of resin too soon, it can start to mix with the first layer and you won’t get that nice, defined line between colors.
But if you wait too long, the first layer will start to set up and it will be harder to get a clean line.
So just pour each new layer when the previous one is no longer wet-looking, but before it starts to look matte.
How long do you wait between coats of resin?
You can pour the next color of resin after the first coat has cured for 24 hours.
If you pour multiple colors of resin too close together, the colors will run together and you won’t get the desired effect.
Be patient and wait for each coat to cure completely before adding the next layer.
Pouring multiple colors of resin is a great way to add depth and interest to your projects.
By layering different colors, you can create unique designs that are sure to stand out.
Just be sure to give each coat plenty of time to cure before adding the next one. With a little patience, you’ll be able to create some truly stunning pieces!
How to Layer Resin
Once you’ve started making resin projects you’ll never want to stop… it’s kind of addicting! If you’re here you’ve likely attempted a project or two (maybe you’ve followed my how to mix resin for beginners tutorial) and now you’re ready for the next step.
Layering resin!
Resin projects can be as simple as one layer of resin or as complicated as a 7 layer cake… with lots of layers! Since resin is clear the concept of layering is truly amazing… since you can trap items between the layers and they can still be seen from above!
Luckily layering resin is very simple… if you’ve learned to pour one layer of resin you’ve pretty much got the concept. The art of layering is really all about timing. Add the layers too close together and they’ll mix… wait to aaaaaannnnnnnd you’ve waited a long time.
There really isn’t a downside to waiting too long other than there are only so many hours in a day to spend waiting.
Let’s get to it.
Supplies:
Step 1: Pour Layer 1
Whether you’re pouring a piece with 2 layers, 3 or 12 the first layer is always the first step. Take note of which side of your mold is the front: sometimes (like with these little coaster molds) the front is actually the inside of the mold… so you’ll want to add your embellishments (or inclusions) so that they’re facing the bottom of the mold.
That’s why our little butterfly is face down with the back exposed.
Other molds (like the mold I used for this little tray) are designed so that the front of the piece are at the top (what you see).
All of this just goes to say be aware of which side the front of the mold is and which side is the back.
Regardless of whether your piece is a mixture of clear or solid you want the top layer to be clear enough to see bottom layers… otherwise you won’t be able to see all the layers!
Typically I leave the top layer clear or with just a bit of glitter.
Either way go ahead and pour your first layer of resin and decorate it with a few inclusions. Check out my master list of 25 budget friendly resin inclusions if you need a few ideas.
Once you have the first layer the way you want it leave it to dry. You don’t have to wait for the full cure but you want the first layer to be solid before pouring a second layer… typically that’s 4-5 hours of waiting before you move on to the second step.
Step 2: Pour Layer 2
Alright now that layer one is dry we can pour our second layer! This is the perfect time to add a little dimension. Typically in a 3 layer piece I’ll do a solid bottom layer, inclusions like tiny rocks, glitter or rose gold leaf in the second layer and a clear layer in the third and top layer.
Although you can mix it up if you like… go crazy!
Once you’ve added everything you like then it’s back to the waiting game. Either 4-5 hours for another layer or 24 hours to cure!
Once your piece is perfect and it’s been curing for an entire day it’s time to demold. You can pop that bad boy out and see all of your pretty layers!
I just love the floating element multiple layers add to a piece… they make it a bit more dimensional. Just take a look at all that pretty rose gold leaf… the different layers are so pretty!
Ready to tackle a bigger project? This rose gold and blush inspired geode tray looks fancy but it’s really just 3 layers of resin in a DIY silicone mold. I’ll walk you through making one of your own in this step by step tutorial! Use your own colors to personalize it and make it fit your own decor style.
Looking for more resin projects? I’ve got you covered!
You are invited to the Inlinkz link party! Click here to enter
You made it through the entire post? That means you’re one of my new favorite people! I’d love to be friends and see what else you would like to read about! Leave me a comment and then sign up for your very own FREE paint planner …. so that you can keep track of every single paint color with ease!
Welcome back! I’d love to be friends and see what else you would like to read about! Leave me a comment and then sign up for your very own FREE paint planner …. so that you can keep track of every single paint color with ease!
Show me some LOVE y’all: Facebook
So you have finished reading the how to layer different colors of resin topic article, if you find this article useful, please share it. Thank you very much. See more: how to layer resin colors in molds, how long to wait between layers of resin, 3d layered resin painting, how to layer resin in molds, how long to wait between layers of epoxy resin, how long to wait between layers of polyester resin, does resin stick to cured resin, resin art