
You are looking for information, articles, knowledge about the topic nail salons open on sunday near me how to lower all velocity fl studio on Google, you do not find the information you need! Here are the best content compiled and compiled by the https://chewathai27.com team, along with other related topics such as: how to lower all velocity fl studio Velocity FL Studio, Reset velocity fl studio, fl studio note velocity shortcut, How to open velocity fl studio, how to change velocity of all notes in fl studio, how to reset velocity fl studio, how to adjust velocity in fl studio, How to randomize velocity in fl studio
Simply hold down Ctrl and Shift key simultaneously and then select the notes which you want to change the velocity. Scrolling upwards and downwards will increase or decrease their velocity respectively. Hope this helps.Mouse-wheel velocity – Use Mouse-wheel while holding notes to change velocity. Mouse-wheel tools – Change tools by holding right click and rolling the wheel.
Contents
How do you lower the velocity of all notes in FL Studio?
Mouse-wheel velocity – Use Mouse-wheel while holding notes to change velocity. Mouse-wheel tools – Change tools by holding right click and rolling the wheel.
How do you level velocity in FL Studio?
you can just select the notes you want to work with, or scale the whole scores levels at once. Or you can select all notes and ALT+Mouse wheel all the way up until all notes velocities are at the top, then ALT+Mousewheel down to your desired overall level.
How do I change my MIDI velocity?
Click the “V” icon or press Alt + Ctrl/Cmd. The lines inside of a MIDI note correspond to the velocity value assigned to a specific note. A numeric velocity value will appear once a MIDI note has been clicked. You can adjust the velocity value by dragging up or down.
How do you change the tempo of a pattern in FL Studio?
Create automation clip, choose a tempo, copy value, then click/right click in the automation pattern where you want the change and paste value. Repeat until your happy.
Error 403 (Forbidden)
- Article author: www.quora.com
- Reviews from users: 30750
 Ratings
 - Top rated: 3.5
- Lowest rated: 1
- Summary of article content: Articles about Error 403 (Forbidden) Updating …
- Most searched keywords: Whether you are looking for Error 403 (Forbidden) Updating
- Table of Contents:
Piano roll
- Article author: www.image-line.com
- Reviews from users: 38644 Ratings
- Top rated: 3.4
- Lowest rated: 1
- Summary of article content: Articles about Piano roll Updating …
- Most searched keywords: Whether you are looking for Piano roll Updating Bump notes – Piano roll, Color group – Piano roll, Copy & Paste Notes – Piano roll, Duplicate notes – Ctrl+B, Event Editor – Piano roll, Ghost Notes – Double Right-Click to edit, MIDI – Note color & channel, Notes – Musical, Piano roll, Property editor – Piano roll, Score – Piano roll, Sequencer – Piano roll, Slice notes – Piano roll, Slide event – Piano roll, Time Signatures – Piano roll
- Table of Contents:
Piano roll Controls
Using the Piano roll
Note Properties & Event Editor
Understanding Slides & Portamento
Color Groups (Slides MIDI Editing)
Note Properties Dialog
Piano roll Menu
Multi-touch Gestures
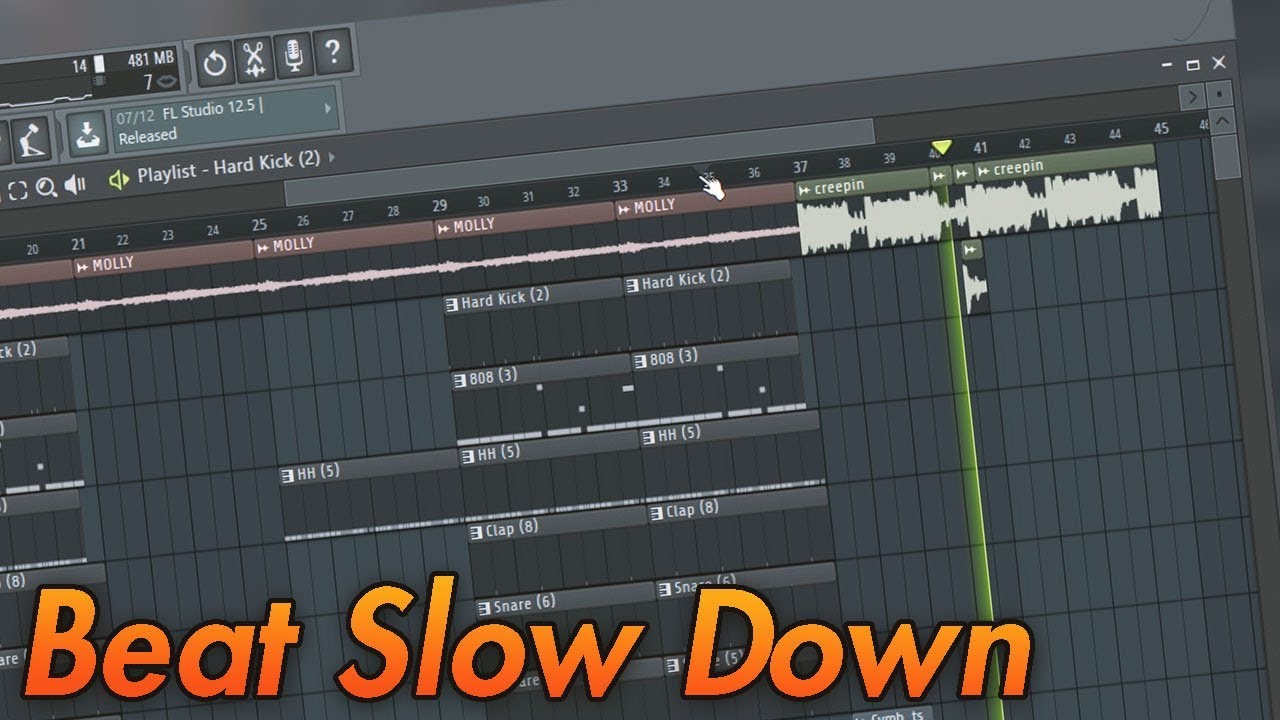
FL Studio 12 – Quick Tips – How to make a Beat Slow Down – YouTube
- Article author: www.youtube.com
- Reviews from users: 45381 Ratings
- Top rated: 4.4
- Lowest rated: 1
- Summary of article content: Articles about FL Studio 12 – Quick Tips – How to make a Beat Slow Down – YouTube Updating …
- Most searched keywords: Whether you are looking for FL Studio 12 – Quick Tips – How to make a Beat Slow Down – YouTube Updating My Website | Kits & Beats :https://gunsoww.comGet the NANI Plugin here!(Use code GUNSOWW10 for a 10% Discount) :https://www.naniplugin.com/___Social Medias :…gunso, gunsoww, undeadgunso, beat, trap, tutorial, fl studio 12, fruity loops, fruity loops studio 12
- Table of Contents:
How to Change Midi Velocity FL Studio 12 & 20 – YouTube
- Article author: www.youtube.com
- Reviews from users: 20989 Ratings
- Top rated: 4.7
- Lowest rated: 1
- Summary of article content: Articles about How to Change Midi Velocity FL Studio 12 & 20 – YouTube Updating …
- Most searched keywords: Whether you are looking for How to Change Midi Velocity FL Studio 12 & 20 – YouTube Updating This is a quick FL Studio velocity tutorial, learn how to change and record note velocity. Video presented by producers 3E Wave & Stunna. Get the “How to Mak…midi velocity, midi velocity fl studio, fl studio midi velocity, fl studio velocity, fl studio velocity shortcuts, fl studio velocity control, fl studio velocity piano roll, fl studio velocity automation, fl studio velocity not working, change velocity fl studio, note velocity fl studio, velocity fl studio 12, fl studio 12 note velocity, fl studio 20 velocity, fl studio, fl studio tutorial, beat making
- Table of Contents:
Fl Studio Change Velocity Of Multiple Notes (Tutorial)
- Article author: www.homemusicmaker.com
- Reviews from users: 40311 Ratings
- Top rated: 3.6
- Lowest rated: 1
- Summary of article content: Articles about Fl Studio Change Velocity Of Multiple Notes (Tutorial) The most straightforward method is to open your piano roll editor and navigate to the bottom of the … …
- Most searched keywords: Whether you are looking for Fl Studio Change Velocity Of Multiple Notes (Tutorial) The most straightforward method is to open your piano roll editor and navigate to the bottom of the … The most straightforward method is to open your piano roll editor and navigate to the bottom of the window. MIDI notes will have a set of bars at the bottom
- Table of Contents:
Changing The Velocity Of Multiple Notes In FL Studio
How To Change The Velocity Of Notes in FL Studio
important
pro tip
Related Questions
Post navigation
Raise all velocities in fl studio piano roll? – Gearspace.com
- Article author: gearspace.com
- Reviews from users: 10675 Ratings
- Top rated: 3.8
- Lowest rated: 1
- Summary of article content: Articles about Raise all velocities in fl studio piano roll? – Gearspace.com You may be unable to login. You can change this setting using the Privacy Panel at the bottom right of the screen. To allow our cookies, toggle the setting ” … …
- Most searched keywords: Whether you are looking for Raise all velocities in fl studio piano roll? – Gearspace.com You may be unable to login. You can change this setting using the Privacy Panel at the bottom right of the screen. To allow our cookies, toggle the setting ” … Raise all velocities in fl studio piano roll?, gearspace, gearspace.com, gearslutz, gearslutz.com, recording, studio, microphone, mic pre, compressor, equalizer, pro tools, DAW, Cubase, SSL, Neve, Helios, review, reviewsHow can i raise velocities for multiple notes at the same time on the piano roll? as opposed to have to edit each notes velocity level?
- Table of Contents:

How To Reset All Velocities In Piano Roll Sonar? – Mozart Project
- Article author: www.mozartproject.org
- Reviews from users: 41031 Ratings
- Top rated: 3.4
- Lowest rated: 1
- Summary of article content: Articles about How To Reset All Velocities In Piano Roll Sonar? – Mozart Project How Do You Change The Velocity On A Piano Roll? How Do You Reset Velocity In Logic? How Do I Set Default Velocity In Fl Studio? …
- Most searched keywords: Whether you are looking for How To Reset All Velocities In Piano Roll Sonar? – Mozart Project How Do You Change The Velocity On A Piano Roll? How Do You Reset Velocity In Logic? How Do I Set Default Velocity In Fl Studio?
- Table of Contents:
How Do You Change The Velocity Of All Notes In Cakewalk
How Do You Change The Speed Of A Midi Note Cakewalk
How Do You Change The Velocity On A Piano Roll
How Do You Reset Velocity In Logic
How Do I Set Default Velocity In Fl Studio
How Do You Edit Notes In Cakewalk
How Do You Edit Midi Notes In Cakewalk
Watch How To Reset All Velocities In Piano Roll Sonar Video
Post navigation
Edit velocity in the Piano Roll Editor in Logic Pro – Apple Support
- Article author: support.apple.com
- Reviews from users: 46562 Ratings
- Top rated: 3.2
- Lowest rated: 1
- Summary of article content: Articles about Edit velocity in the Piano Roll Editor in Logic Pro – Apple Support When this command is chosen, higher velocity notes appear in warmer colors, and lower velocity notes appear in cooler colors. Figure. Different vote velocities … …
- Most searched keywords: Whether you are looking for Edit velocity in the Piano Roll Editor in Logic Pro – Apple Support When this command is chosen, higher velocity notes appear in warmer colors, and lower velocity notes appear in cooler colors. Figure. Different vote velocities … In the Logic Pro Piano Roll Editor, edit the velocity of notes using one of several options.
- Table of Contents:
Logic Pro User Guide
Edit the velocity of notes using the pointer
Edit the velocity of notes using Musical Typing or a music keyboard
Assign the same velocity value to selected notes
Apple Footer
See more articles in the same category here: https://chewathai27.com/toplist.
Piano roll
PIANO ROLL
Piano roll
FL Studio’s Piano roll has the well deserved reputation as the best Piano roll in the business. The Piano roll sends note and automation data to plugin instruments associated with the Piano roll’s Channel. This process is known as ‘sequencing’. There are a number of useful tools to help with complex score editing and other manipulations as described below. Note pitch is displayed on the vertical axis and time on the horizontal axis. This is the exact principle as paper ‘Piano rolls’ used to automate player-pianos in former times. The resolution of the grid is user-selectable (zoomable) and allows the composition of songs with unlimited complexity. Note data can be entered manually with the editing tools or recorded in from ‘live’ MIDI controllers, then edited to fix mistakes or make changes.
NOTES: You can click the (Middle-Mouse-Button) and drag in the Piano roll to scroll vertically and horizontally at the same time. To change the selected Note Color (Left-click) the color selector. To set a custom color, (Right-click) it.
Piano roll Basics
Notes – are displayed as horizontal bars. Slides are shown as horizontal bars with a small triangle drawn in the right side. Preview Channels by Left-clicking the Preview Keyboard keys.
– are displayed as horizontal bars. are shown as horizontal bars with a small triangle drawn in the right side. Preview Channels by Left-clicking the Preview Keyboard keys. Pitch – is mapped from bottom (low) to top (high).
– is mapped from bottom (low) to top (high). Duration – The horizontal length represents time. The number on the Piano roll’s top-ruler are bars (groups of beats).
– The horizontal length represents time. The number on the Piano roll’s top-ruler are bars (groups of beats). Resolution / grid – The smaller grid each bar is divided into are set by the window’s snap ( ) setting. Scroll speed will slow when snap settings other than ‘ Line ‘ are used. Resolution can also change with Zoom when Snap is set to Line . Selecting Main will use the Global Snap value. Some Global snap settings will also quantize live input recording from a MIDI controller.
– The smaller grid each bar is divided into are set by the window’s snap ( ) setting. will slow when snap settings other than ‘ ‘ are used. when Snap is set to . Selecting will use the Global Snap value. will also live input recording from a MIDI controller. Target Channel – Select a Channel with the drop-down menu, in the title bar, to select for editing. Channels with notes, in the currently selected Pattern, will display a tick. You can roll your mouse-wheel while hovering over the control to show Channels with notes OR hold ( Ctrl+Mouse-wheel ) to show used and unused Channels.
NOTES:
Click-and-hold – Beware the ‘F10 > General Settings > Click-and-hold functions in piano roll’ option on the General settings tab. It’s functions include: Copy note : Hold on an existing note to copy it.
: Hold on an existing note to copy it. Cycle slide/porta – Click and hold when adding a note to cycle through slide & porta event modes.
– Click and hold when adding a note to cycle through slide & porta event modes. Glue notes – Place the cursor between 2 neighbor notes, so the resize cursor appears, then click and hold to glue them. Mouse-wheel velocity – Use Mouse-wheel while holding notes to change velocity. Mouse-wheel tools – Change tools by holding right click and rolling the wheel. Time Markers – When set to type Pattern length (Right-Click a marker) Time Markers will define the length of the currently selected Pattern.
Piano roll Controls
Toolbar icons – Along the top of the Piano roll window: Main Menu – Includes: Edit, Tools, View, Snap, Select, Group, Zoom, Time Marker, Clip Source, Performance Mode, playhead and Detach options. Tools menu – Riff machine ( Alt+E ); Quick legato ( Ctrl+L ); Articulate ( Alt+L ); Quick quantize ( Ctrl+Q ); Quick quantize start times ( Shift+Q ); Quantize ( Alt+Q ); Quick chop ( Ctrl+U ); Chop ( Alt+U ); Glue ( Ctrl+G ); Arpeggiate ( Alt+A ); Strum ( Alt+S ); Flam ( Alt+F ); Claw machine( Alt+W ); Limit ( Alt+K ); Flip ( Alt+Y ); Randomize ( Alt+R ); Scale levels ( Alt+X ), LFO ( Alt+O ) Piano roll Snap – Snap determines how Notes will move and quantization aligns events relative to the background grid (Hold Alt to temporarily set snap to ‘none’). NOTE: There is a Global Snap selector on the Snap Panel. Stamp tool – Add predefined chords selected from the menu that opens when this tool is clicked. NOTE: Deselect ‘ Only one ‘ at the top of the menu to avoid the tool reverting to single note mode after the first stamp. Loop switch – See the Channel Rack section on Looping Controls. In this case the Piano roll will show a Marker of type Loop for Channels containing Piano roll notes to indicate the current loop point. Draw ( P ) – Left-click to add a note. Left-click-and-drag to reposition the note before releasing it. Right-Click to delete notes. Right-Click and drag to delete multiple notes. Right-Click and hold on the background to open the slice tool (F10 > General settings > Click and hold functions on). Modifier keys: ( Shift ) add in stretch mode. ( Ctrl ) to make a selection. ( Alt ) to add in Draw mode (pencil) with snap set to ‘none’. Paint ( B ) – Paints multiple notes as you drag in lines. You can paint notes above or below existing notes to create chords. Left-click to add a single note. Click-and-drag to add multiple notes. Right-Click notes to delete them. Modifier keys: ( Shift ) – Monophonic paint allows vertical movement while painting AND replaces existing (or selected) notes to create a monophonic score. Use ( Ctrl ) to make a selection. Paint drum sequencer mode ( N ) – Similar to the ‘Paint’ tool above. Adds multiple notes as you drag in lines. Behaviors are fine-tuned to work for drum sequencing in the Piano roll, where you may want to mute/unmute steps. Left-click to add a note. Click-and-drag to paint a line of notes. Left-click on notes to mute/unmute them. Right-Click to delete notes. Right-Click and drag to delete multiple notes. Snap sets the note length. Right-Click and hold on the background to open the slice tool (F10 > General settings > Click and hold functions on). Modifier keys: ( Ctrl ) to make a selection. ( Alt ) paint at half the selected snap setting. Delete ( D ) – Click or Click-and-drag to delete notes. Right-Click and hold on the background to open the slice tool (F10 > General settings > Click and hold functions on). Modifier keys: Hold ( Ctrl ) to make a selection, then press ( Delete ). Mute ( T ) – Left-click on notes to mute them. Left-click and drag to mute multiple notes. Right-Click to delete notes. Right-Click and hold on the background to open the slice tool (F10 > General settings > Click and hold functions on). Modifier keys: ( Ctrl ) to make a selection. Slice ( C ) – Left-click and drag vertically to slice through notes. Glue notes by making a selection of touching notes and using the ( Ctrl+G ) shortcut. Modifier keys: ( Shift ) slice without dragging. ( Ctrl ) to make a selection. ( Shift+Alt ) Slice without dragging and with snap set to ‘none’. Select ( E ) – Click notes or Click and drag to make group selections. Modifier keys: ( Shift ) add to or remove notes from the selection. Zoom to selection ( Z ) – Left-click and drag to zoom to selection. Left-click on background to zoom out. When in other modes use ( Ctrl+Right-Click ) and drag to make a zoom-to selection. Right-Click again to swap between zoom and unzoomed modes. Right-Click the icon to open a menu of quick zoom options: Zoom in/ Zoom out ( Page up / Page down ) – Zoom centers on the Cursor position. Quick-zoom 1, 2 & 3 ( Shift+1, 2, 3 ) – Three handy zoom levels. Zoom out far ( Shift+4 ) – Minimum horizontal zoom. On Selection ( Shift+5 – Zoom to time-line selection. The command will be disabled if no time region is selected in the timeline. Play selected ( Y ) – Click the notes you want to play. Click and drag to ‘scrub’ play notes. Modifier keys: ( Ctrl ) make a selection. Play / Pause – Left-click to start/pauses playback. Right-Click (while playing) to stop and return to the last set start position. Right-Click (while stopped) to return the playhead to the start of the Piano roll. NOTE: There is an option on the Right-Click main transport Stop button Remember seek time for the start position to be remembered.
– Along the top of the Piano roll window: Target Channel – Change instrument channels (of the current pattern) without leaving the Piano roll. Right-Click to open the target Channel instrument’s interface.
– Change instrument channels (of the current pattern) without leaving the Piano roll. to open the target Channel instrument’s interface. Event editor target – Selects the data to be displayed in the integrated event editor. This can include parameters such as note properties ( Panning, Velocity , etc.) or automation events.
– Selects the data to be displayed in the integrated event editor. This can include parameters such as note properties ( , etc.) or automation events. Slide & Portamento – These are flags that can be set per-note and work as follows: Portamento Toggle ( O ) – When selected, notes added to the Piano roll will display a ‘portamento flag’ ( icon). The portamento flag causes a short slide in pitch from the end of one note to the note with the portamento flag . This is a note transition effect. NOTES: 1. these features only work with native FL Studio instruments and not VST instruments. 2. Click-and-hold functions in piano roll – Click and hold when adding a note to cycle through slide, portamento note mode. See General Options settings. Slide Toggle ( S ) – When selected, notes added to the Piano roll become ‘ slide notes ‘ displaying the slide icon ( ) that causes notes, above or below the slide-note, to slide to the pitch of the slide-note. The slide-time is set by the length of the slide-note.
– These are flags that can be set per-note and work as follows: Note color / Color group selector – Create note groups for independent editing of overlapping notes categorized by color group. NOTES: MIDI Control – Color groups appear to plugins as separate MIDI channels, so one Piano roll can control several MIDI channels in the associated plugin. Recording notes – To record incoming MIDI Channels from a controller or MIDI sequencer to the correct MIDI note colors, Right-Click the instrument’s Channel Rack button and activate the ‘MIDI channel through’ option. Color group selection – There is another Note / Clip Grouping function activated from the Toolbar Group Icon, that groups notes by selection. Use the Piano roll menu to group selected notes. Customize note colors – Right-click the Note Color selector to change note colors from the defaults.
– Create note groups for independent editing of overlapping notes categorized by color group. Preview keyboard – Click on the keyboard to preview notes. This does not work when play is active. Click here with the ( Middle mouse button) and drag vertically to change the vertical zoom centered on the note you click.
– Click on the keyboard to preview notes. This does not work when play is active. Click here with the ( and drag vertically to change the vertical zoom centered on the note you click. Horizontal & Vertical Zoom controls – To horizontally zoom the Piano roll click on the edge of the horizontal position slider and drag. For the vertical zoom boxes likewise click and drag.
– To horizontally zoom the Piano roll click on the edge of the horizontal position slider and drag. For the vertical zoom boxes likewise click and drag. Ghost notes – These are notes in other Piano rolls associated with the current Pattern. See the Piano roll Menu > Helpers > Ghost channels ( Alt+V ) option. To edit Ghost notes ( Double Right-Click or X1 button ) on the notes to switch to the Ghost channel. Piano roll menu > Editable ghosts ( Ctrl+Alt+V ) – Allows direct interaction with Ghost Notes as per normal notes.
– These are notes in other Piano rolls associated with the current Pattern. See the ( ) option. To ( ) on the notes to switch to the Ghost channel. ( ) – Allows direct interaction with Ghost Notes as per normal notes. Event Editor – Edit: Note Velocity, Pan, Pitch, Filter cutoff & Automation events (the lower Piano roll area can display the same data as the Event Editor). Select events to edit from the Target Control selector or Right-Click the area at the front of the editor as shown above.
– Edit: Note Velocity, Pan, Pitch, Filter cutoff & Automation events (the lower Piano roll area can display the same data as the Event Editor). Select events to edit from the Target Control selector or Right-Click the area at the front of the editor as shown above. Notes – Click/select to drag, stretch, paint, clone, copy, etc. (see ‘operating with notes’ below). Note colors can have special functions, discussed here.
– Click/select to drag, stretch, paint, clone, copy, etc. (see ‘operating with notes’ below). can have special functions, discussed here. Splitter handle – Left-click and drag the divider to resize the upper and lower windows. Right-Click to return to the original position.
Using the Piano roll
FL Studio has, arguably, the most powerful Piano roll editor available. Combined with the Piano roll menu you will find the possibilities are endless and (after practice) effortless.
NOTE: Many of the movement and draw commands are constrained by the snap setting that controls how notes move relative to the Piano roll grid. Hold the (Alt) key to temporarily bypass snap. Important also, the Global snap setting can be used for MIDI input quantizing.
Tools Menu – ( ) is a shortcut to the Piano roll tools submenu (see the Piano roll menu page, ), containing various commands for operating on patterns in the Playlist.
– ( ) is a shortcut to the Piano roll tools submenu (see the Piano roll menu page, ), containing various commands for operating on patterns in the Playlist. Adding Notes – draw mode ( ) allows you to draw, edit and delete notes. To add notes and draw the length , hold the ( Left-Shift ) Left-click and drag to the desired length. The paint mode ( ) is similar, but allows you to draw multiple notes at once while dragging horizontally in the Piano roll. Notes are added monophonically (replacing any notes they overlap). Hold ( Shift ) to bypass monophonic paint mode. In draw or paint mode, Left-click in the Piano roll’s grid to draw a note . The default length for notes will be equal to the last touched note.
– ( ) allows you to draw, edit and delete notes. To , hold the ( ) and drag to the desired length. The ( ) is similar, but allows you to draw multiple notes at once while dragging horizontally in the Piano roll. (replacing any notes they overlap). Hold ( ) to bypass monophonic paint mode. In draw or paint mode, in the Piano roll’s grid to . The will be equal to the last touched note. Deleting notes – Right-Click a note to erase it (alternatively switch to erase mode to erase with Left-clicks ( ).
– it (alternatively switch to to erase with Left-clicks ( ). Selecting/Deselecting groups of notes – There are a number of methods to select several notes, so you can move and resize them all at once: Standard selection – Press and hold ( Ctrl key ) and either click a note to select it, or drag a rectangle to select all notes in enclosed area. Magic lasso – The Piano roll Menu > Select > Magic lasso option must be selected. Move your mouse pointer in a loop that encloses the notes you want to select (no clicking required, it’s ‘magic’ remember). Make sure you have no notes selected before you perform the lasso action (Right-Click the empty Piano roll to deselect all notes and make another selection). Add notes to selection – Hold ( Ctrl+Shift ) together while selecting to add notes to the existing selection. Selecting notes in a time or pitch range – Time , ( Ctrl+Left-click ) or double-click the time ruler (along the top of the Piano roll) and drag along it to select all notes in a specified time range. Pitch , ( Ctrl+Left-click ) the Preview Keyboard to select a range of notes with the same pitch (dragging vertically on the Keyboard will select notes in the vertical pitch range). Deselect all notes – While holding ( Ctrl key ), click empty space in Piano roll’s grid. Remove notes from selection – ( Ctrl+Shift ) deselects individual notes from the existing selection of notes. Invert selection – Use ( Shift+I ). Select mode button – Instead of holding ( Ctrl key ), you can also switch Piano roll to select mode by clicking the select mode button ( ).
– There are a number of methods to select several notes, so you can move and resize them all at once: Group notes – ( Shift+G ) – Group the selected notes. Grouping functions so that an action on any note in the Group will affect all other notes in the same way. Any number of groupings may be created. To group notes: make a selection using the Select tool, then use the Group function. Activate / deactivate grouping: Use the Note / Pattern Grouping switch on the Toobar icons. Deselecting the Note / Pattern Grouping switch will disable note grouping behavior until the switch is reactivated.
– ( ) – Group the selected notes. Grouping functions so that an action on any note in the Group will affect all other notes in the same way. Any number of groupings may be created. make a selection using the Select tool, then use the Group function. Use the switch on the Toobar icons. Deselecting the Note / Pattern Grouping switch will disable note grouping behavior until the switch is reactivated. Copy & Paste – Make a selection (see above), hold the ( Shift ) button THEN drag selection with the left-mouse button OR ( Ctrl+C ), scroll to the new position/pattern and ( Ctrl+V ).
– Make a selection (see above), hold the ( ) button THEN drag selection with the left-mouse button OR ( ), scroll to the new position/pattern and ( ). Duplicate selection – Make a selection and press ( Ctrl+B ). The selection, or all notes if nothing is selected, will be duplicated to the right of the original selection. To define a specific repeat interval, make a time-line equal to the complete interval to be duplicated and press ( Ctrl+B ). NOTE: The time-line selection and note selection can be made independently. The repeat interval is set by the time-line selection, the notes duplicated by the note selection. In this way, notes outside the time-line selection can be duplicated according to the time-line interval.
– Make a selection and press ( ). The selection, or all notes if nothing is selected, will be duplicated to the right of the original selection. To define a specific repeat interval, make a time-line equal to the complete interval to be duplicated and press ( ). The time-line selection and note selection can be made independently. The repeat interval is set by the time-line selection, the notes duplicated by the note selection. In this way, notes outside the time-line selection can be duplicated according to the time-line interval. Moving notes – Select the note/sequence, Left-click on the note and drag vertically or horizontally. NOTES: The snap setting will affect the movement. Horizontal note positions can be adjusted by ( Shift + mouse-wheel ) by holding the cursor over a target note in the Piano roll. ( Shift ) – Vertical position lock. ( Ctrl ) – Horizontal position lock.
– Select the note/sequence, and drag vertically or horizontally. Bumping notes – This allows you to move the note/s by either ‘snap’ or ‘pixel’ based units. Snap units : Select the sequence/note and hold the ( Shift key ) and use the arrow keys on your keyboard. The snap setting will affect the bump size. Pixel units : Hold the ( Alt ) key and use the arrow keys on your keyboard. In this case the zoom setting will affect the bump size.
– This allows you to move the note/s by either ‘snap’ or ‘pixel’ based units. : Select the sequence/note and hold the and on your keyboard. The snap setting will affect the bump size. : Hold the and on your keyboard. In this case the zoom setting will affect the bump size. Change note length – Select the note/sequence, Left-click on the right side and drag horizontally to change the note length. This can also be performed on a selection of notes. NOTE: The snap setting will affect the way in which the note changes length. If ( Caps Lock ) is on and the note is selected by the left side, resizing notes will anchor the note end point, moving only the start position. If the note is selected by the right side the start point will be anchored.
– Select the note/sequence, and drag horizontally to change the note length. This can also be performed on a selection of notes. The snap setting will affect the way in which the note changes length. If ( ) is on and the note is selected by the left side, resizing notes will anchor the note end point, moving only the start position. If the note is selected by the right side the start point will be anchored. Edit Ghost notes – Use ( Double Right-Click or X1 button ) on the Ghost notes to switch to the Ghost channel.
– Use ( ) on the Ghost notes to switch to the Ghost channel. Stretch / compress scores – Select a group of notes and drag the pop-up handle OR hold ( Right-Shift ) and drag the right edge of a note in the selection. This changes both note length and sequence duration. ( Alt + Right-Shift ) will stretch in 25% increments.
– Select a group of notes and drag the pop-up handle hold ( ) of a note in the selection. This changes both note length and sequence duration. ( ) will stretch in 25% increments. Slice Tool – ( ) allows you to split one or more notes in the direction of the cut through the Piano roll. To use the cut tool, make sure you’re in cut mode (the Cut button is selected), Left-click in the grid area and drag to define the “cut line” direction and length. Release the mouse button to split all notes at their intersection point with the cut line.
– ( ) allows you to split one or more notes in the direction of the cut through the Piano roll. To use the cut tool, make sure you’re in cut mode (the Cut button is selected), Left-click in the grid area and drag to define the “cut line” direction and length. Release the mouse button to split all notes at their intersection point with the cut line. Resize chords & splits – Hold ( Left-Shift ) click and drag on the slice point or right-side of the chord.
– Hold ( ) click and drag on the slice point or right-side of the chord. Playback/Scrub tool – ( ) enables you to preview the current sequence by dragging horizontally in the Piano roll (thus enabling you to define the playback speed and order). Alternatively, hold ( Alt ) + Right-Click while in draw mode .
– ( ) enables you to preview the current sequence by dragging horizontally in the Piano roll (thus enabling you to define the playback speed and order). Alternatively, hold while in . Play notes straddling the playback position marker – When stopping and starting you can play notes that cross the playback position by opening the Audio Options and selecting ‘ Play truncated notes ‘.
– When stopping and starting you can play notes that cross the playback position by opening the Audio Options and selecting ‘ ‘. Quick chords – Enter chords with one click using the Piano roll Menu > Tools > Stamp Tool . The stamp tool allows you to add chords & note-patterns selected from a menu.
– Enter chords with one click using the Piano roll Menu > Tools > Stamp Tool . The stamp tool allows you to add chords & note-patterns selected from a menu. Note properties – Note velocity, panning, filter-cutoff , etc, are available from the Target control menu and appear in the Piano roll Event Editor . Note properties can be adjusted by mouse-wheel ( Alt+mouse-wheel ) by holding the cursor over a target note in the ‘Note event window’.
– , etc, are available from the menu and appear in the Piano roll . Note properties can be adjusted by ( ) by holding the cursor over a target note in the ‘Note event window’. Merging scores across Patterns – Place the Pattern Clips in the Playlist, with the Pattern Clip you want to receive the other scores at the top. Select all the clips to merge then use the Edit > Merge pattern Clips function from the Playlist Menu. This merges the selected Pattern Clips into the uppermost Clip.
– Place the Pattern Clips in the Playlist, with the Pattern Clip you want to receive the other scores at the top. Select all the clips to merge then use the function from the Playlist Menu. This merges the selected Pattern Clips into the uppermost Clip. Click-and-hold functions in piano roll – Copy: Hold on an existing note. Slide & Porta: Click and hold when adding a note to cycle through slide, portamento event mode. See General Options settings.
Selection Stretch Handle
After making a selection the Stretch Handle appears. You can click and drag this to stretch the selected notes. Hold the (Alt) key to apply snap settings. Alternatively, hold (Right-Shift) key then click on the right-side of a note in the group and drag.
Mouse-wheel Property Note Changes
Hold your mouse over the note and hold (Alt+Mouse-wheel) to change the currently selected note property. To see the property being adjusted maximize the vertical zoom.
Note Properties & Event Editor
The note properties editor gives you access to a number of per-note properties and event data velocity, pan, release, Mod X & Y (where supported), pitch etc. Select the data to be edited with the Target control, as shown below.
Selecting Targets – Left-click to select from the menu. You can also roll your mouse-wheel while hovering over the selector.
– Left-click to select from the menu. You can also roll your mouse-wheel while hovering over the selector. Note properties – are displayed as vertical lines with a small circle at the top. The right-facing tail allows you to see the independent values of notes with the same start time. Note properties move with the notes they belong to. The editor can also display standard Event Automation associated with the pattern. NOTE: To edit the properties of a note when it has the same start time as others, make a selection first, then edit the property for the note (as shown above in red).
– are displayed as vertical lines with a small circle at the top. The right-facing tail allows you to see the independent values of notes with the same start time. Note properties move with the notes they belong to. The editor can also display standard Event Automation associated with the pattern. To edit the properties of a note when it has the same start time as others, make a selection first, then edit the property for the note (as shown above in red). Note events – When editing Automation Events the editor works in the same way as the Event Editor.
Time Signatures
The default Project Time signature is set in the ‘Project General Settings > Time settings > Set as time signature’. You can also set custom and even multiple Time Signatures per Pattern. And, since Patterns exist independent of the Playlist Time Signature, you can use multiple Time Signatures at any point in the Playlist (polyrhythms) by stacking Patterns using different Time Signatures. This flexibility means you need to manage your Pattern and Playlist time signatures independently.
NOTE: Time Signatures are a visual helper for the Piano roll and Playlist grids. They have no technical effect on the notes played, except for the downbeat heard when using the Metronome. You can safely change Time Signatures for the Pattern without affecting the notes, only the grid behind them changes. One Channel affects all – As Time Signatures are set per-Pattern, changing the Time Signature for any Piano roll (Channel) will affect ALL Channels in the Pattern. Use the Pattern Clip menu opton ‘Make unique’ to avoid this, if it is a problem.
TIPS: Here are some useful tips for working with Time Signatures. This applies both to the Piano roll and Playlist.
Set a custom Time Signature – Place the Play head at the point you want to set the new time signature and hold ( Shift+Alt+T ) to open the Time Signature tool.
– Place the Play head at the point you want to set the new time signature and hold ( ) to open the Time Signature tool. Set a Time Signature range – Make a time selection and hold ( Shift+Alt+T ) to open the Time Signature tool. The Time Signature will return to the Project Default at the end of the selection.
– Make a time selection and hold ( ) to open the Time Signature tool. The Time Signature will return to the Project Default at the end of the selection. Set a Time Signature based on the Pattern Clip location in the Playlist – Open the Clip Menu and select ‘ Use current time signature ‘
– Open the Clip Menu and select ‘ ‘ Move Time Signatures – Drag the Time Marker/s. Additionally you can use this feature to set partial bars of a given Time Signature.
– Drag the Time Marker/s. Additionally you can use this feature to set partial bars of a given Time Signature. More on Time Signatures – See: Playlist Time Signatures & Project General Settings.
Waveform Helper View
Sometimes it is useful to closely align notes with an audio waveform. For example when using Fruity Vocoder or Pitcher. To show the waveform drag from a waveform preview and drop on the Piano roll. To deselect this view use Piano roll menu > Helpers > Background waveform (Alt+N).
Understanding Slides & Portamento
The following ONLY applies to native FL Studio instruments. To slide a VST instrument automate the channel pitch knob. The Piano roll can slide notes from one pitch to another using slide notes above or below the notes to be affected. Slide notes have a small triangle drawn at the start of the note.
Portamento Toggle ( O ) – When selected, notes added to the Piano roll will display a ‘portamento flag’ ( icon). The portamento flag causes a short slide in pitch from the end of one note to the note with the portamento flag . This is a note transition effect. NOTES: 1. these features only work with native FL Studio instruments and not VST instruments. 2. Click-and-hold functions in piano roll – Click and hold when adding a note to cycle through slide, portamento note mode. See General Options settings.
( ) – When selected, notes added to the Piano roll will display a ‘portamento flag’ ( icon). The portamento flag causes a short slide in pitch from the end of one note with the . This is a note transition effect. 1. these features only work with native FL Studio instruments and not VST instruments. 2. – Click and hold when adding a note to cycle through slide, portamento note mode. See General Options settings. Slide Toggle ( S ) – When selected, notes added to the Piano roll become ‘ slide notes ‘ displaying the slide icon ( ) that causes notes, above or below the slide-note, to slide to the pitch of the slide-note. The slide-time is set by the length of the slide-note.
( ) – When selected, notes added to the Piano roll become ‘ ‘ displaying the slide icon ( ) that causes notes, above or below the slide-note, to slide to the pitch of the slide-note. The slide-time is set by the length of the slide-note. Add a slide note – Click the slide switch and then click as normal to add a note to the Piano roll.
– Click the and then click as normal to add a note to the Piano roll. De-select the slide mode – Click the slide button again.
– Click the slide button again. Channel Settings > Misc – Polyphony > SLIDE (even if grayed out) will interact with Portamento notes, and Time > GATE will interact with Portamento and Slide notes.
NOTE: The General settings Click-and-hold & special gesture functions activate cycle slide/porta. Click and hold when adding a note to cycle through slide & porta event modes.
How slide notes work
Slide notes are used to create ‘glissando’ effects. That is, a continuous slide upwards or downwards in pitch between two notes.
Notes – Slide notes must overlap the note they slide. A slide note, played on its own, without overlapping a standard note, will not produce sound. The length of the overlap sets the slide time. When the slide note is reached the pitch of the original (standard) note will start sliding toward the slide notes pitch, reaching the same pitch at the end of the slide note event. The length of the slide note controls the rate of pitch-changed of the slide. If the note being slid, ends before the slide notes pitch has been reached, the slide will terminate prematurely.
– Slide notes the note they slide. A slide note, played on its own, without overlapping a standard note, will not produce sound. The length of the overlap sets the slide time. Chords – If notes are overlapping, so they form part of a chord, the topmost note is used as the reference for the pitch offset (see picture below). All notes in the Chord will slide so the topmost note reaches the same pitch as the slide note, with all notes in the chord moving the same note interval. After the slide event ends, notes still remain offset from their original pitch. Note colors can be used to create independent slides for up to 16 notes in a chord. Notes of the same color group, slide each other.
NOTE: Slide events have all the usual note properties (velocity, panning, cutoff and resonance, etc). During slides all note properties move toward those set in the slide note. Slides themselves do NOT produce sound, although they allow preview when created/moved.
How portamento notes work
Portamento applies only to the transition from one note to the next. This is basically a fast slide, only at note transitions. The effect is most audible when larger note intervals are used. The Portamento indicator should be set on the note to receive the portamento effect.
Color Groups (Slides, MIDI, Editing)
Editing – To select the note/slide color, click the Color selector then one of the 16 colors on the color group selector and click in the Piano roll to add notes. To change the color group of existing notes, make a selection and use the Piano roll menu > Edit > Change color (Alt+C) option.
By creating color groups you can choose to edit the properties of only notes of the selected color. This can be handy when there are overlapping notes in the same Piano roll that you wish to manipulate independently. Colors are used for independent processing of notes in the Piano roll, these include:
MIDI Channels – Each color is locked to a particular MIDI channel. To see the relationships, hover the mouse over each color and look at the hint bar where the MIDI channel number is displayed. NOTE: This only applies to plugins hosted by the Wrapper, in other words, these MIDI channels will only be visible to the plugin associated with the Piano roll. To control external MIDI hardware on separate MIDI channels use the MIDI Out plugin. NOTE: You can load and save complete note color palettes from the Piano roll menu > View > Note colors option.
– Each color is locked to a particular MIDI channel. To see the relationships, hover the mouse over each color and look at the hint bar where the MIDI channel number is displayed. This only applies to plugins hosted by the Wrapper, in other words, these MIDI channels will only be visible to the plugin associated with the Piano roll. To control external MIDI hardware on separate MIDI channels use the MIDI Out plugin. Sliding – Slides will apply only to notes of the same color as the slide note event. For example, yellow slide note will bend the pitch of yellow notes, but will ignore green notes. This way you can have up to 16 notes sliding simultaneously in different directions. Slide color groups are also used with the Mono mode in the polyphony settings (see Miscellaneous Channel Settings). Mono mode applies to each color group separately. So using all four colors actually can result in a polyphony of up to 4 voices at once.
– Slides will apply only to notes of the same color as the slide note event. For example, yellow slide note will bend the pitch of yellow notes, but will ignore green notes. This way you can have up to 16 notes sliding simultaneously in different directions. Recording notes – To record incoming MIDI Channels from a controller or MIDI sequencer to the correct MIDI note colors, Right-Click the instrument’s Channel Rack button and activate the ‘MIDI channel through’ option.
NOTE: Some plugins use note colors for special functions. For example Harmless, Harmor and Slicex.
Note Properties Dialog
The Note Properties pop-up is an alternative way to set notes properties. It’s particularly useful when you need to set different properties for notes that start simultaneously (so their properties appear as one in the integrated event editor). Double-click a note to display the properties pop-up box.
Levels – These controls allow changes to per note – panning ( PAN ), note on velocity ( VEL ), release velocity ( REL ), channel filter cutoff ( MODX ) and channel filter resonance ( MODY ). NOTE: MOD X/Y can also link to custom parameters as set in native plugins. Harmor has Mod X/Y controls that map to these parameters, for example.
– These controls allow changes to – panning ( ), note on velocity ( ), release velocity ( ), channel filter cutoff ( ) and channel filter resonance ( ). MOD X/Y can also link to custom parameters as set in native plugins. Harmor has Mod X/Y controls that map to these parameters, for example. Slide – Slide ON / Slide OFF. Determines if the note will respond to slide events. Porta – ON, inverts the portamento state for this note. If the global portamento (see Misc Channel Settings) for this channel is off, for this note it is on and vice versa.
– Slide ON / Slide OFF. Determines if the note will respond to slide events. – ON, inverts the portamento state for this note. If the global portamento (see Misc Channel Settings) for this channel is off, for this note it is on and vice versa. Color – Click on this to select the color channel group the note is on. NOTE: If the note you double-click is a part of a selection, then the properties you set apply to all notes in that selection. The Time section is not available in that case, because the selected notes might have different length or start point.
– Click on this to select the color channel group the note is on. Time – Change the Start Time (note position) in bar:step:tick. The length of a ‘tick’ depends on the PPQ setting. Reducing PPQ mid-song will reposition any notes not falling on an exact Bar or Step boundary.
– Change the (note position) in bar:step:tick. The length of a ‘tick’ depends on the PPQ setting. Reducing PPQ mid-song will reposition any notes not falling on an exact Bar or Step boundary. Duration – Change the Note duration in bar:step:tick. The length of a ‘tick’ depends on the PPQ setting. Reducing PPQ mid-song will reposition any notes not falling on an exact Bar or Step boundary.
– Change the in bar:step:tick. The length of a ‘tick’ depends on the PPQ setting. Reducing PPQ mid-song will reposition any notes not falling on an exact Bar or Step boundary. Reset – Resets note properties to levels they had before launching the properties box.
– Resets note properties to levels they had before launching the properties box. Accept – Apply your awesome changes!
Piano roll Menu
This menu provides many important functions for working with the Piano roll, such as copying and pasting notes, converting color groups, etc. You can access Piano roll’s menu by clicking the Piano roll menu button. For more information, see the Piano Roll menu page.
Multi-touch Gestures
See FL Studio User Interface > Multi-touch support
Piano roll keyboard shortcuts
See the Playlist Keyboard Shortcuts page.
Why 12 Notes and Why Music Theory?
We recommend watching the following videos:
Fl Studio Change Velocity Of Multiple Notes (Tutorial)
We hope you love the products we recommend. We may collect a small commission if you purchase through one of our links. This will not cost you anything extra. Thank you if you do. As an Amazon Associate, I earn from qualifying purchases.
The most straightforward method is to open your piano roll editor and navigate to the bottom of the window. MIDI notes will have a set of bars at the bottom of the screen indicating their velocity value. Left-click and hold, then drag the slider up or down to increase or decrease its velocity.
Changing The Velocity Of Multiple Notes In FL Studio
I’ve run into many moments where I felt “stuck” in my time using FL Studio. One of the earliest and most annoying moments was the adjustment of MIDI note velocity.
Velocity plays a massive part in music of every form. It conveys the overall emotion of the notes being triggered.
Understanding this technique will have a huge impact on your sounds, workflow, and general impact of the song you are creating.
There are different ways to perform the same actions in FL Studio. Still, by the end of this article, you will completely understand the various methods of changing the velocity of multiple notes.
What you will need to follow in this tutorial
Computer with FL Studio
An open mind
How To Change The Velocity Of Notes in FL Studio
Method One – Step 1 – Locate Your Piano Roll
Hover your mouse cursor over the Piano Roll icon and left-click to open the window.
Step 2 – Input Some MIDI Notes
Left-click in your desired spots for MIDI note placement. (Anywhere will do, this is all a learning curve).
Step 3 – Click And Drag The Velocity Bars
Click and drag (up or down) the velocity bars at the bottom (FL Studio is set to velocity by default, as shown on the left of the screen)
Alternative: you can click without dragging to jump the bar to a certain point.
It’s that easy!
You can test the play-through for hearing how the different velocity rates trigger each note. Low ones will sound quiet, as though lightly hitting a piano key.
In contrast, the higher register velocities will be similar to hitting a piano key with more force.
But just like a real piano, more velocity means more volume, too, so be wary!
Method Two – Step 1 – Repeat Steps 1 – 2 from Above
Follow steps 1 and 2 from the previous method.
Note: you may not need to do this if your selected notes are still pasted into the window from earlier.
Step 2 – Select Multiple Notes At The Same Time
Click the “Select” icon in the toolbar.
Step 3 – Adjust Specific Notes
Left-Click and Drag Over The Specific Note Or Notes You Wish To Adjust.
Alternative: If you wish to highlight all of your notes, you can use the keyboard shortcut Ctrl+A.
Step 4 – Adjust Velocity Levels
Hold ALT And Scroll Mouse Wheel To Adjust All Velocity Levels Together.
Alternative: If you don’t have a mouse scroll, you can use the shortcut ALT+X to bring up the slider and manually adjust the “Multiply” fader.
Note that this applies to all notes that are highlighted.
Bear in mind that you can still individually adjust desired note velocities at any time. Simply right-click to deselect all the notes and then left-click whichever one you want to change separately, as some may sound better suited than others.
Related Questions
How Do You Change Velocity In FL Studio? This can be done by either means mentioned above: In the piano roll window, left-click individually to adjust each midi note manually, or hit ALT+X to increase or decrease as a group. How Do You Select Multiple Notes In FL Studio? Either CTRL+A to select all notes, or hit the select tool/SHIFT+E and then left-click drag. How to Delete Multiple Notes In FL Studio? Right-click (hold) and drag over whichever notes you want to delete.
Alternative: If you have the “Select” tool enabled, you can left-click drag over the desired notes and hit Delete on your keyboard How to Make All Notes Same velocity FL Studio? This one is handy for sure; hold down SHIFT+Left-click and drag the cursor from left to right across all the velocity bars – this will make each velocity match the initial point you started from. How Do I Reset Velocity In FL Studio? Like the step above, the only difference is that you hold ALT+Left click and drag. All notes will reset to the default setting of 78% (the most natural hitting of keys). How Do I Enable Velocity in FL Studio? Should the velocity edit window not be shown (it usually is by default), simply hit SHIFT+D on your keyboard to bring it up.
If the bottom section of the piano roll is not set to velocity, you can click the word “Control” on the left side and select it. (Check out the other adjustable options here too)
Are you looking for more top tips? Check out this article on how to change the tempo in FL Studio.
Raise all velocities in fl studio piano roll?
Forum Jump
Forum Jump User Control Panel Private Messages Subscriptions Who’s Online Search Forums Forums Home The Forums Q+A with Manny Marroquin – brought to you by Audeze Hot Threads & Featured Articles Interviews (Link) Best Studio Gear Link New Product Alert Product Alerts older than 2 months Samples, Presets and Services New Products – Coming soon Electronic Music Instruments and Electronic Music Production Electronic Music Interviews (Link) Modular Mania – All Things Eurorack and Modular Synths/Effects Modular Mania Moderator Thread Picks Label and Industry Offers Post Your Electronic Music Here Electronic Instrument User Reviews Link Electronic Music Q+A Archive Q+A with Erol Alkan Q+A with Mark Pritchard Q+A with KiNK Q+A with Robert Babicz Q+A with Rhys Fulber Q+A with Jesper Kyd Q+A with Steve Roach Q+A with David L. Morley Q+A with Richard Devine Q+A with Éric Mouquet Q+A with Steffi & Martyn (aka Doms & Deykers) Q+A with Suzanne Ciani Q+A with Luca Pretolesi – brought to you by pureMix.net Q+A with Legowelt Q+A with David Moufang Q+A with Paul & Phil Hartnoll (Orbital) Q+A with Aleksi Perälä Q+A with Klas ‘Sasse’ Lindblad Q+A with Eskmo Q+A with STARCADIAN – brought to you by Arturia Q+A with UDO Super 6 synth designer George Hearn Q+A with Paul Godfrey (Morcheeba) Q+A with techno producer Ansome (aka Kieran Whitefield) Q+A with Vince Watson Q+A with Gianfranco Ceccolini of MOD Devices Q+A with techno artist/musician Dave Mech Q+A with techno/electronic producer Inigo Kennedy Q+A with Paul Whittington of PWM Q+A with Ludo Wic Q+A with Marshall Jefferson So Much Gear, So Little Time Drums! Connectors, Cables, Stands and Accessories Music Business Articles Studio Business Music Computers DAW Talk Ableton Live Apple Logic Pro Avid Pro Tools Bitwig Studio Cakewalk by BandLab (formerly SONAR) Cockos Reaper Harrison Mixbus MOTU Digital Performer PreSonus Studio One Propellerhead Reason Steinberg Cubase + Nuendo Universal Audio – LUNA Other DAWs iOS + Android Music + Audio Production Apps + Peripherals High End Low End Theory Remote Possibilities in Location Recording & Production All Things Technical Jump to Mobile & Location Rigs Jump to Gear, Crew, Musicians Jobs & Referrals Jump to the main Remote forum Mobile & Location Rigs Jump to All Things Technical Jump to Gear, Crew & Musician Jobs & Referrals Jump to the main Remote forum Gear, Crew & Musician Jobs & Referrals Jump to All Things Technical Jump to Mobile & Location Rigs Jump to the main Remote forum Mastering Forum Mastering for Beginners Audio Transfers, Restoration and Archiving Where To Podcasting, Vlogging & Audio For Social Media Studio Building / Acoustics Bass traps, acoustic panels, foam etc Photo diaries of recording studio construction projects Post Production Forum Post Jobs Offered Video Production and Post-Production VR (Virtual Reality), Spatial, Atmos, Immersive + Ambisonics So Many Guitars, So Little Time Rap + Hip Hop Engineering and Production Post your rap & hiphop music here Audio Student Engineering + Production Question Zone Live Sound Stage Lighting GeekZone DIY electronic build + refurbishment photo diaries Music For Picture Music For Games Songwriting Lyricist’s Corner Collaborations! Audio Life The Good News Channel Life Hacks Career / Work Gadgets Gadgets Gadgets Work/Life Balance Health and Hearing Loss Planes, Trains & Automobiles Hobbies, Sport, Holidays, Movies, TV Shows and Downtime Personal Stuff Gear free zone – shoot the breeze Gearspace en Español Archives Piracy discussions Hurricane Sandy AES 2019 – 147th Audio Engineering Society Show, NYC NAMM 2020 Show NAMM Show 2022 Music Business The Big Sweetwater Mic Shootout 2017 The Sweetwater Virtual Mic Shootout 2018 News User Reviews Featured Articles Link Pro Audio News Competitions! Click here for our latest contests & giveaways! Events – Audio events, trade shows & meet-ups worldwide For those we have lost. Memorials, RIPs and Obituaries Introductions Captain’s Blog Marketplace Gearspace Secondhand Gear Classifieds Deal Zone Jobs eBay round up Mic pres Microphones Compressors & Limiters Monitors DAW interfaces EQ’s Effects Consoles Pro Tools Reverbs Converters Gear Shootouts / Audio File Uploads / Interviews / Podcasts Gear Shoot-Outs / Sound File Comparisons / Audio Tests Work In Progress / Advice Requested / Show and Tell / Artist Showcase / Mix-Offs Podcasts and Interviews Q+A Archives Expert Question and Answer Archives Visit our Electronic Music Q+A archive here Q+A with Jens Bogren – brought to you by Bogren Digital Q+A with Klaus Heinz & Frederik Knop of HEDD Audio Q+A with producer/musician Gordon Raphael Q+A with DJ Swivel, aka Jordan Young Q+A with engineer John Hanes Q+A with Andrew Scheps Q+A with Geoff Emerick Q+A with Che Pope – brought to you by Universal Audio Q+A with Vance Powell – brought to you by Universal Audio pureMix Live – Universal Audio Apollo Artist Session with Joel Hamilton and Lyrics Born – July 8, 20 Q+A with Jacquire King – brought to you by Universal Audio Q+A with Robb Allan Q+A with Mark Needham Q+A with Dave Jerden Q+A with Ross Hogarth Q+A with Sylvia Massy Q+A with Howie Weinberg Q+A with Michael Beinhorn Q+A with engineer Al Schmitt Q+A with engineer / producer Jay Messina Q+A with Eric Valentine Q+A with engineer Phill Brown Q+A with producer / engineer Ken Scott Q+A with engineer / producer / artist – Alan Parsons Q+A with Butch Vig The Miloco producer interview series Q+A with Tommy Lee & The Public Record Q+A with producer John Leckie International Music Software Trade Association Q+A Q+A with Tony Maserati Q+A with Dave Pensado Q+A with Daniel Lanois Downloads, the future – Q+A forum with expert guests from CD Baby, Tunecore and Nimbit Q+A with Haydn Bendall, Mick Glossop, Mike Howlett and Tony Platt Q+A with Russell Elevado Q+A with Tchad Blake Q+A with Justin Frankel (designer of Reaper) Q+A with Kevin Killen Q+A with Bruce Swedien Chuck Ainlay, Ed Cherney, Frank Filipetti, George Massenburg, Elliot Scheiner, Al Schmitt Q+A with Michael H. Brauer Q+A with Mike Shipley Q+A with Charles Dye Q+A with Dave Derr (designer of the Distressor compressor)
So you have finished reading the how to lower all velocity fl studio topic article, if you find this article useful, please share it. Thank you very much. See more: Velocity FL Studio, Reset velocity fl studio, fl studio note velocity shortcut, How to open velocity fl studio, how to change velocity of all notes in fl studio, how to reset velocity fl studio, how to adjust velocity in fl studio, How to randomize velocity in fl studio