
You are looking for information, articles, knowledge about the topic nail salons open on sunday near me how to make a serrated knife on Google, you do not find the information you need! Here are the best content compiled and compiled by the https://chewathai27.com team, along with other related topics such as: how to make a serrated knife how to make a serrated bread knife, knife serration machine, putting serrations on a knife, crkt veff sharpener, serrated edge smite, making a bread knife, knife aid, veff serrations
The serrated design of a quality knife is so efficient that it will still slice when the teeth and gullets become dull. A thin but sturdy blade made of high-quality stainless steel helps retain the sharp edges of the teeth and gullets.A bread knife always has serrations along the cutting edge. Serrations are needed to be able to ‘saw’ through the hard, crispy crust and soft interior without too much friction (friction causes crumbs, shedding, tearing).
…
Steps To Create A Serrated Knife
- Step 1: Mark Out Your Pattern. Mark out where each serration’s center will be. …
- Step 2: Cut in Guides. Make some grooves that will serve as guides for the next step. …
- Step 3: Shape the Serrations. …
- Step 4: Clean Up the Backside.
Contents
What are serrated knives made of?
The serrated design of a quality knife is so efficient that it will still slice when the teeth and gullets become dull. A thin but sturdy blade made of high-quality stainless steel helps retain the sharp edges of the teeth and gullets.
Should bread knives be serrated?
A bread knife always has serrations along the cutting edge. Serrations are needed to be able to ‘saw’ through the hard, crispy crust and soft interior without too much friction (friction causes crumbs, shedding, tearing).
What is the best knife to slice bread?
A serrated knife excels at slicing bread, as well as a few other specialty kitchen tasks. Serrated knives have long—at least 7 inches—blades with sharp serrations instead of a smooth edge. Unsurprisingly, serrated knives are often interchangeably called bread knives.
Why are bread knives so long?
The idea behind the length of the blade is it allows the cook to cut large surfaces in long, smooth strokes – much like a saw in carpentry. The serrated teeth help the knife grip the bread’s surface, keeping it straight and steady without having to apply downward pressure that might compress the loaf.
What is a lettuce knife?
+ Larger Image. A plastic serrated edge knife that is designed to slice lettuce without causing the edges of the lettuce to turn brown. When cutting lettuce with a metal knife, the edges of the lettuce will turn a light rusty brown after it is stored for a short time.
Can you sharpen a bread knife with a steel?
Using a round hone (ceramic or steel), gently pass it through each serration. You will feel a burr pushing to the non-angle side of the blade. A couple of swipes with the hone on the flat side will strip the burr, leaving you with every serration being incredibly sharp and slice ready.
Why does a tomato knife have two points?
Two prongs on the tip of the knife handle tomato slices with kid gloves. They allow you to gently lift slices of tomato from the cutting board without smashing the flesh.
Do serrated knives cut better?
The main difference between plain edge blade and serrated blades comes down to how you use your blade. As we’ve just explained plain edges are better for push cuts and serrated edges are better for slicing cuts.
Does a bread knife have teeth?
The types of serrations in bread knives differ depending on the brand. Some knives feature sharp teeth with deep hollows in between, while others have a gentler profile with rounded teeth. Sharp pointed serrations require less pressure when cutting. They cut into hard surfaces better, but they also produce more crumbs.
Can a butter knife be serrated?
A serrated butter knife allows you to use special teeth to scrape the surface of the butter, creating a nice, soft and easy to spread stream of butter. These teeth are often sharp enough to cut bread, but not nearly as efficient as a traditional bread knife.
Is a steak knife serrated?
Traditionally, serrated blades have been the most common choice for steak knives. A serrated blade features scallops, also called ‘gullets’ along the cutting edge – and no, we’re not talking about shellfish.
What is the difference between a bread knife and a serrated knife?
A bread knife looks like a longer, more exaggerated version of a serrated utility knife. Its serrated grooves are specifically designed to cleanly slice through bread without crushing it.
Can you sharpen a serrated bread knife?
But with minimal investment in time and tools, your bread knife, serrated steak knives and any other serrated blades can be sharpened. Sharpening a bread knife does require a specialized sharpening stone like the DMT Diafold Serrated Knife Sharpener.
Can you sharpen a serrated steak knife?
Serrated knives can and should be sharpened, but they don’t need it very often. A serrated knife’s pointed teeth do most of the work. Less friction means the blade stays sharper longer. The characteristics that keep them sharper also make serrated knives more difficult to resharpen.
Can I sharpen a serrated knife with an electric sharpener?
You can’t sharpen a serrated knife using a traditional knife sharpener or even most electric knife sharpeners due to the unique shape of the blade. (Some high-end electric sharpeners feature a serrated knife slot, but they’re not as precise.)
How To Make A Serrated Knife | Step-By-Step Instructions – Red Label Abrasives
- Article author: www.redlabelabrasives.com
- Reviews from users: 9185
 Ratings
 - Top rated: 3.6
- Lowest rated: 1
- Summary of article content: Articles about
How To Make A Serrated Knife | Step-By-Step Instructions – Red Label Abrasives Updating … - Most searched keywords: Whether you are looking for
How To Make A Serrated Knife | Step-By-Step Instructions – Red Label Abrasives Updating Making serrated blades can be more complex than creating a smooth-edge knife, so in this blog, the team at Red Label Abrasives shares some tips on how to make serrated blades. - Table of Contents:
Advantages of Serrated Blades
Advantages of Handcrafted Serrated Blades
Steps To Create A Serrated Knife
Sharpening a Serrated Blade
Ready to Make Blades With Extra Bite
Shop Our Knife Making Belts

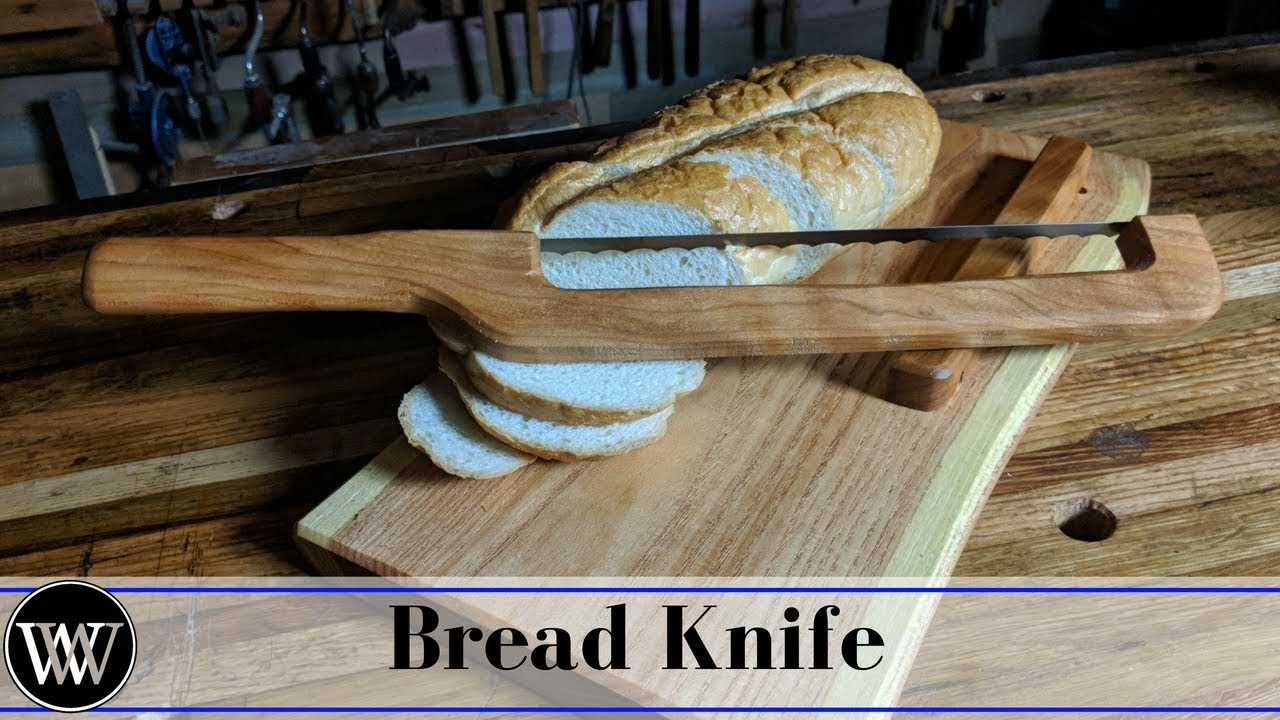
How to Make a Bread Knife | Bow Style Beginner Project – YouTube
- Article author: www.youtube.com
- Reviews from users: 39712 Ratings
- Top rated: 3.7
- Lowest rated: 1
- Summary of article content: Articles about How to Make a Bread Knife | Bow Style Beginner Project – YouTube Updating …
- Most searched keywords: Whether you are looking for How to Make a Bread Knife | Bow Style Beginner Project – YouTube Updating We are making a bow Style Bread knife for the kitchen. in this video, we are making the bread knife that will nest into a breadboard in a future video. this …Wood By Wright, woodworking, Handtools, Hand tool, Hand Tools, Hand plane, Hardwood, Hardwoods, Bread Knife, bow knife, Kitchen knife, How to Make a bread knife, bread saw, Kitchen tool., how to, how-to, howto
- Table of Contents:
How to Sharpen a Serrated Knife – Can you Sharpen Serrated Knives? – YouTube
- Article author: www.youtube.com
- Reviews from users: 4977 Ratings
- Top rated: 4.7
- Lowest rated: 1
- Summary of article content: Articles about How to Sharpen a Serrated Knife – Can you Sharpen Serrated Knives? – YouTube Updating …
- Most searched keywords: Whether you are looking for How to Sharpen a Serrated Knife – Can you Sharpen Serrated Knives? – YouTube Updating To sharpen serrated knives you will need a diamond or ceramic rod and as an option you can hone with leather or denim. You can also touch up serrations with…serrated blade, how to sharpen a serrated knife, knife sharpening, best knife sharpener, how to sharpen, serrated knife sharpening, how to sharpen a bread knife, how to sharpen a knife, knife sharpening tool, knife sharpening system, bread knives, knife sharpener, kitchen knife (culinary tool), how to sharpen serrations, how to sharpen a pocket knife, how to sharpen kitchen knives, worksharp, work sharp, pivot knife sharpener, ceramic hone, diamond sharpening rod
- Table of Contents:

Why a Serrated Knife Belongs in Your Kitchen | Misen
- Article author: misen.com
- Reviews from users: 15897 Ratings
- Top rated: 4.2
- Lowest rated: 1
- Summary of article content: Articles about
Why a Serrated Knife Belongs in Your Kitchen | Misen
Updating … - Most searched keywords: Whether you are looking for
Why a Serrated Knife Belongs in Your Kitchen | Misen
Updating They’re often called bread knives, but the serrated teeth make them useful for much more. Here’s how to use a serrated knife and what to look for when you add one to your kitchen collection. - Table of Contents:
Item added to your cart
Your cart is empty Let’s fix that!
Search
Why You Need a Serrated Knife
Best Uses for Serrated Knives
What to Look for in a Serrated Knife
Serrated for Success
Chef’s Knife
Nonstick Pan
Stainless Skillet
Choosing a Knife for Sourdough Bread: Full Guide – Truesourdough.com
- Article author: truesourdough.com
- Reviews from users: 19011 Ratings
- Top rated: 3.8
- Lowest rated: 1
- Summary of article content: Articles about Choosing a Knife for Sourdough Bread: Full Guide – Truesourdough.com Updating …
- Most searched keywords: Whether you are looking for Choosing a Knife for Sourdough Bread: Full Guide – Truesourdough.com Updating I’ll admit; I used to use any old knife to slice my sourdough bread. And truthfully, I thought the mess I was making was purely …
- Table of Contents:
Why Use a Specific Type of Knife to Slice Sourdough Bread
What to Look for in a Knife for Sourdough Bread
Length of the Blade
Shape of the Blade
Best Type of Handle for a Bread Knife
Checklist for an Effective Sourdough Bread Knife
Sharpness of the Blade
My Top Sourdough Bread Knife Pick
What Else Can I Use My Bread Knife For
Alternatives to a Bread Knife
Correct Way to Slice Artisan Bread Using a Bread Knife
Post navigation

Add Serrations to a Pocket Knife : 4 Steps (with Pictures) – Instructables
- Article author: www.instructables.com
- Reviews from users: 7572 Ratings
- Top rated: 3.7
- Lowest rated: 1
- Summary of article content: Articles about Add Serrations to a Pocket Knife : 4 Steps (with Pictures) – Instructables Grind away while holding the knife at a steep angle. Move your way up to the largest bit. While you’re doing this check often to make sure your grinding is … …
- Most searched keywords: Whether you are looking for Add Serrations to a Pocket Knife : 4 Steps (with Pictures) – Instructables Grind away while holding the knife at a steep angle. Move your way up to the largest bit. While you’re doing this check often to make sure your grinding is … Add Serrations to a Pocket Knife: After buying this pocket knife I found out it’s also sold serrated. Instead of returning it I added the serrations myself. For doing it by hand I think it turned out well. All you need is a dremel tool, or something similar, and some diamond bits.&n…
- Table of Contents:
Introduction Add Serrations to a Pocket Knife
Step 1 Mark Out Your Pattern
Step 2 Cut in Guides
Step 3 Shape the Serrations
Step 4 Clean Up the Backside
Be the First to Share
Recommendations
47 Comments

Error 403 (Forbidden)
- Article author: www.quora.com
- Reviews from users: 28526 Ratings
- Top rated: 3.5
- Lowest rated: 1
- Summary of article content: Articles about Error 403 (Forbidden) The factory does it by machining the blade using a shaped grinding wheel. A hobbyist can add serrations to a blade also by using the edge of a grinding wheel, … …
- Most searched keywords: Whether you are looking for Error 403 (Forbidden) The factory does it by machining the blade using a shaped grinding wheel. A hobbyist can add serrations to a blade also by using the edge of a grinding wheel, …
- Table of Contents:
See more articles in the same category here: https://chewathai27.com/toplist.
How To Make A Serrated Knife
Quick Summary Making serrated knife blades requires a few more steps than creating a smooth-edged knife. To make serrations, you’ll need to mark out your pattern, cut in guides, shape the serrations, and clean up the backside of the blade.
Jump to:
A lot of modern knives feature serrated blades. These blades, which look like they have small, jagged ‘teeth’ on one or both sides, look impressive and are designed to cut through materials that might be too tough for a regular blade edge.
Making serrated blades can be more complex than creating a smooth-edge knife, so in this blog, the team atRed Label Abrasives shares some tips on how to make serrated blades.
Advantages of Serrated Blades
The main advantage of serrated blades is their greater cutting power. They can rip through plastics, textiles, bone, and other materials that can be problematic for regular blades. Other advantages include:
Serrations can clear cuts more effectively, especially when you’re ripping hardwoods.
They have greater piercing power than a smooth blade.
Serrations can extend the cutting surface of the blade because they have more edges to cut with.
The multiple sharp edges make it easier to snag and cut fibrous materials like rope or line.
Even when dull, serrations do an effective cutting job because more pounds per square inch are applied to a smaller area.
Advantages of Handcrafted Serrated Blades
Manufactured serrated blades have their place, but there are many advantages to making or buying a handcrafted serrated blade. For example:
Handmade serrations are made one at a time with a file before you heat treat the steel blade. After that, each tooth is individually finished, polished, and sharpened, resulting in crisper and cleaner cutting edges.
Factory serrations are typically ground from one side of the blade while handmade serrations are created from both sides, resulting in a more even alignment and much sharper serration.
Factory serrations are harder to sharpen because so much material has to be removed from one side of the blade. Since they have less surface area to cut away, well-made double-sided serrations are simple to tune up with a few quick strokes.
Factory serrations tend to be uneven because they are cut by grinding wheels that don’t always wear evenly during automated grinding. To ensure an even fit, all handmade serrations are meticulously laid out by hand.
Since the machining technology is limited, factory serrations are never crisp or well defined. With handmade serrations, each cut is individually made to ensure a crisp point.
Factory serrations do not extend up to the grind’s termination because they are made by a machine alone. With fine handmade serrations, the placement can be nearer the termination, or even into the termination with substantial strength and thickness at the first critical teeth.
There are many convex profiles in factory serrations, as the wheels used to cut them can’t have deep peaks or valleys.
Factory serrations never have any points. They are also not usually angled, arranged, canted, or slanted to accommodate the knife handle. Serrations on fine handmade knives apply specific cutting forces to the handle and blade design.
Factory serrations may be softer because they are usually ground after the blade has been heat treated. This can result in overheating and temper loss.
Taking the time to create your own serrated blade can result in a finished product that looks great, delivers a sharp cut, and lasts a lot longer than its mass-produced counterpart. Now let’s get started.
Steps To Create A Serrated Knife
Step 1: Mark Out Your Pattern
Mark out where each serration’s center will be. Make sure the mark extends a little beyond the blade’s bevel.
Step 2: Cut in Guides
Make some grooves that will serve as guides for the next step. Using a diamond blade, cut into the blade until you reach the edge of the bevel.
Step 3: Shape the Serrations
With a rotary cutting tool like a dremel set at its lowest setting, grind away while holding the knife at a steep angle. Work your way up to the largest bit. Make sure you keep your grinding centred with the guiding groove the entire time. Once the grooves disappear, gently apply pressure toward each tooth in the serration until a uniform pattern results.
When you are cutting serrations into your blade, be careful not to overheat the blade. These blades are already heat treated and tempered for good edge retention, and you don’t want to compromise that. For best results, spritz the metal with cool water after each pass.
As soon as steam appears, it means the water has reached the boiling point, so you have at least hit 212 degrees. You want to keep it under 300 or 400 degrees, so if you see steam, it’s a good idea to take a break.
Step 4: Clean Up the Backside
There are less aggressive channels on the backside of the blade. At this stage, burrs begin to form on the backside, so you’ll want to clear them away. Repeat the process, but with just enough grinding to remove them.
Sharpening a Serrated Blade
Sharpening a serrated knife is not as straightforward as sharpening a chef’s knife. Although most people prefer to have their serrated knives sharpened by a professional because the best method requires each serration to be sharpened separately, you can still do it yourself.
You should use a ceramic honing rod to manually sharpen your serrated knife. The rod is shaped to fit inside the serrations of the blade and sharpen the knife, tooth by tooth.
Take the following steps:
Starting at the back end of the blade, place the rod in the serrated groove (the gullet). The rod should be angled in the same direction as the chiseled cut you see in the gullet.
Slide the rod through the gullet toward the edge of the blade. This should be done for each gullet. A few passes should suffice.
Once each gullet has been sharpened, turn the knife over and run its flat side across the surface of a fine-grit finishing stone to remove any burrs created during the sharpening process.
Routine sharpening can keep your handmade serrated blades in great condition and preserve the edge needed for them to do their work.
Ready to Make Blades With Extra Bite?
Serrated blades are powerful cutting tools that require the right abrasive materials for both creation and maintenance. Red Label Abrasives is a leading and trusted manufacturer of
sanding belts
and
sanding sheets
for knifemaking. To learn more about our products or place an order, please call 844-824-1956 or
fill out our contact form
.
Why a Serrated Knife Belongs in Your Kitchen
Serrated knives easily slice through food with thick or resistant outer surfaces.
The serrated design of a quality knife is so efficient that it will still slice when the teeth and gullets become dull.
A thin but sturdy blade made of high-quality stainless steel helps retain the sharp edges of the teeth and gullets.
The right tool for the right job. It’s a philosophy with universal appeal — even in the kitchen. You wouldn’t, for example, try to cook a steak with your toaster. But there is an overwhelming number of tools we can buy for the kitchen, and you have to know what they’re supposed to do before you can decide if you have the right tools.
Take that knife with the teeth. The serrated one. It kind of looks like a saw. Why was it designed that way? What does it do? What is its right job?
Why You Need a Serrated Knife
Serrated knives are also known as bread knives. They’re distinguished by the saw-like appearance of the blade’s edge. This design makes the serrated knife highly efficient at certain kinds of cutting. It easily slices through food with thick or resistant outer surfaces. Thick as in a crusty loaf of bread. Resistant as in the skin of a tomato.
Think about the plain, non-serrated edge of a chef’s knife. The razor-sharp edge allows you to make a cut when you force it into the food. In fact, a chef’s knife can cut, shave, chop, peel, slash, and more. Because of this, a chef’s knife will see more action in the kitchen than a serrated knife.
The plain edge of a chef’s knife is suited to a wider variety of knife work than a serrated knife. But the chef’s knife’s true specialty is force cuts. You’re making the cut by forcing the blade all the way through the food. The non-serrated edge moves only in one direction.
The serrated blade is designed for a different kind of use. Serrated blades excel at slicing cuts where you drag the edge across the food. There’s no better example than cutting a loaf of bread. You have to get through the tough outer crust, but you’ll smoosh or compress the soft inner part of the bread if you try to make a force cut. So instead, you use the serrated edge to grip the crust and make the initial cut. The unevenness of the blade catches and incises food by moving transversely over what you’re cutting. The movement starts out as more parallel than perpendicular.
The high points, or teeth, of the serration meet up with the crust first. There’s more pressure at these points. They puncture and tear the crust. When you reach the soft inner part of the bread, the chiseled, moon-shaped gullets continue and make a clean slice.
The serrated design also offers superior edge retention. You’ll regularly hone and sharpen other kitchen knives — perhaps a few times each year, depending on use — but your serrated knife may only need to be sharpened after several years of use. The serrated design of a quality knife is so efficient that it will still slice well even when the teeth and gullets become dull after years of use. This is due to the chisel grind of the serrations, which get less contact with food during cutting.
Best Uses for Serrated Knives
They do such a great job of slicing bread that serrated knives run the risk of being pigeonholed into this singular task. Your quality serrated knife can do much more. Bread isn’t the only food that’s hard on the outside and soft on the inside. And keep in mind that hard in this case also means difficult to pierce.
Any type of squash or melon is perfect for a serrated blade, as are any fruits or vegetables with qualities similar to a tomato — a soft and fleshy interior protected by a membrane or skin that has to be punctured before you can slice it. Your serrated knife is a better choice to slice up an eggplant or assist with creating thin and attractive slices of overripe tomatoes.
Carving up a roast is also easier with a serrated knife because you can easily cut against the grain of the meat. Many steak lovers also prefer aserrated knife blade on their steak knives because it takes less effort to make bite-size cuts.
What to Look for in a Serrated Knife
Quality serrated kitchen knives have broad, deep, and pointed serrations. The crescent-shaped concave indentations in the steel are called gullets. These gullets are chisel-cut at angles, making the concave indentations razor-sharp.
Some knives have scalloped or rounded serrations. These are backward serrations that extend outward. Instead of teeth, the blade looks as if it’s made of a row of symmetrical clouds. The theory behind this design is that the chiseled scallops will stay sharper and expose more of the angled blade to food. But the pointed ends of the concave crescents (rather than the cloud-like serrations) that offer more grip and bite into the food.
The Science Behind Serrations
Look for a serrated knife that offers lots of bite because it has pointed tips and fewer serrations that are spaced wider apart. Ourserrated knife features 33 deep, pointed tips with extra wide gullets. There’s a reason that a lower number of serrations result in a better cut, and it has to do with physics.
You will exert pressure on what you’re cutting with a serrated knife, even though your objective is to push or pull the teeth across the food with a sawing motion. The force of that pressure is divided among the serrations. Simple math comes into play. The more serrations a knife has, the less power each one receives. Fewer serrations get more power, and they bite into food more readily. The same physics-related distribution of power applies to the surface area of each tip, so a pointed shape has more concentrated force, giving it more power to grip and bite into food.
Like chef’s knives, it’s possible to find serrated knives with narrower Japanese-style blade angles. This helps to make thinner and more precise slices. A thin but sturdy blade made of high-quality stainless steel helps to retain the sharp edges of the teeth and gullets. That’s important because serrated knives are not as easy to hone or sharpen as a knife with a non-serrated blade.
Pay no attention to the recommendation that you should just get an inexpensive bread knife that you won’t mind throwing away when it gets dull. Quality serrated knives can last you a lifetime. They are manufactured with fewer gullets so they stay sharper longer and can be resharpened.
Serrated Knife Handles and Bolsters
You may use it less frequently than your chef’s knife, but you’ll want to keep control over this knife as you make those saw-like movements and the serrations go to work. Make sure your knife has a handle that offers a good grip and doesn’t get slippery when wet.
A bolster will add safety as well. This is the part of a knife that can act as both a finger guard and a place to pinch and maintain a firm grip. Don’t be lulled into a false sense of security by a bulky bolster. Its mass won’t necessarily protect your fingers. Instead, look for a sloped bolster that rewards you with a secure grip.
Caring for Your Serrated Knife
It’s distinctly different from other kitchen cutlery, but serrated knives generally do not require specific care and handling — except for sharpening and honing. Even high-end electric knife sharpeners may not be capable of re-sharpening a serrated knife. This shouldn’t be much of a concern because serrated knives will reward you with clean and precise cutting for years before they need maintenance.
When your serrated knife no longer makes quick, clean cuts with minimal force, it’s time to have it professionally sharpened. If you purchased your knife from us,we’ll do it for free. Or you can manually sharpen it yourself.
If you can easily envision how the teeth and gullets of a serrated knife pierce and cut through something as unyielding as a crusty loaf of bread, you shouldn’t have difficulty imagining why it’s not a good idea to store it — or any sharp knife — loose in a kitchen drawer. Instead, use a magnetic knife holder to keep your knife safe and within reach. Or purchase an in-drawer knife holder that protects the blades and makes it easy to retrieve them.
Dishwashers and kitchen knives are an unfortunate combination. Your knives may be manufactured from quality steel, but the harsh formulations used in automatic dishwashing detergent will etch and dull them over time. Instead, use a mild liquid dish soap to hand-wash your knives. Then dry and immediately store them. Be mindful of the serrated knife’s teeth and chiseled gullets, as they can easily catch on loosely woven dish towels.
Serrated for Success
You need just three quality knives to do just about everything in the kitchen. A serrated knife is one of this important trio. Call it a bread knife if you prefer but don’t lose sight of the fact that its unique characteristics give it the ability to make saw cuts — which allow you to effortlessly cut through anything from a dense kabocha squash to delicate persimmons. It may not be your most frequently used knife, but you’ll appreciate your serrated knife when it’s needed.
Choosing a Knife for Sourdough Bread: Full Guide
I’ll admit; I used to use any old knife to slice my sourdough bread. And truthfully, I thought the mess I was making was purely down to my terrible slicing skills! I never knew that using the right knife was so important until I found an actual bread knife down the back of my kitchen drawer and tried it out. Wow. What a difference!
A bread knife that is well designed to cut into crusty sourdough bread should have the following properties:
The Blade The Handle Pointed
serrations Non-slip Long length Ergonomic Thin but
inflexible One piece Narrow
angled bevel Bowed
cutting edge
In this guide, I’ll go through each of the properties in the table above and explain in more detail what you need to be looking for in an effective bread knife, along with some of my top picks that tick all the boxes.
NOTE: I originally did this research for myself, as I wanted to purchase an effective bread knife for my crusty style homemade sourdough bread. I chose this one from Amazon, which I’m really happy with, but there are more recommendations below.
Why Use a Specific Type of Knife to Slice Sourdough Bread?
Using the wrong type of knife (or a badly designed one), not only makes it difficult to slice your bread, but it also ruins your crumb (the fluffiness on the inside of your bread).
The challenge with cutting into sourdough bread is that although the crust can be quite thick and hard, the inside can be soft, airy and fluffy, giving a unique challenge to the knife it is cut with. It has to be able to slice through both hard and soft simultaneously without damaging either.
Using a Regular Chef’s Knife for Slicing Sourdough
If you were to use a regular chef’s knife to slice your hard crusted sourdough bread (like I used to!), you’ll find at least some of these issues come up:
The interior crumb would get squashed and compressed, which would ruin the texture of the bread.
Slices would be uneven, or worse, won’t even resemble slices!
The crust would shed a lot of crumbs and there would be more waste.
There would be unnecessary strain put on your hands and wrists when slicing, and it would take much more effort to slice the bread.
The knife would wear down and become blunt much quicker than it should.
The Benefits of Using a Properly Designed Bread Knife
A properly designed bread slicing knife will work far more efficiently, and give you slices that actually look like slices, and the integrity of the bread will stay intact. Here are some additional benefits:
There’ll be less waste overall as there is less shedding.
It will be easier, faster and more efficient to slice the bread.
Less skill is required to cut neat slices.
There’ll be no damage to the texture of the bread.
The crust will remain intact when slicing, with less tearing and crumb waste.
There is much less strain on your hands and wrists when slicing.
The right type of knife helps get perfectly even, clean slices
So you can see, especially if you are making your bread at home, all that time and effort put into making that gorgeous artisan loaf, with an open crumb, great texture, and beautiful crispy crust, can all be undone simply by using the wrong type of knife!
And if you have been using the wrong knife up until now, you can almost safely say that the reason those slices were so messy was because of the knife, NOT YOU!
==>Check out my online course to learn how to make great sourdough bread AND fit it into a busy lifestyle!
What to Look for in a Knife for Sourdough Bread
There are a lot of bread knives out there that don’t slice bread particularly well. Price doesn’t necessarily equal efficiency, so it’s useful to know what to look for before deciding on a purchase.
Let’s take a look at what specifically makes a bread knife great, and how it is designed in this way to make sure that your bread maintains its integrity even after being sliced.
Best Type of Blade for Slicing Sourdough
There are many different aspects of the blade of a knife, that affect how well it slices hard, artisan style crusty bread. Let’s take a look at some of them…
Serrated Knife Edge
A bread knife always has serrations along the cutting edge. Serrations are needed to be able to ‘saw’ through the hard, crispy crust and soft interior without too much friction (friction causes crumbs, shedding, tearing).
It means the bread can be cut into without too much downward pressure, hence protecting the texture of the bread. But not all serrations are the same. There are some that work better for artisan bread than others. Let’s take a look at the different types.
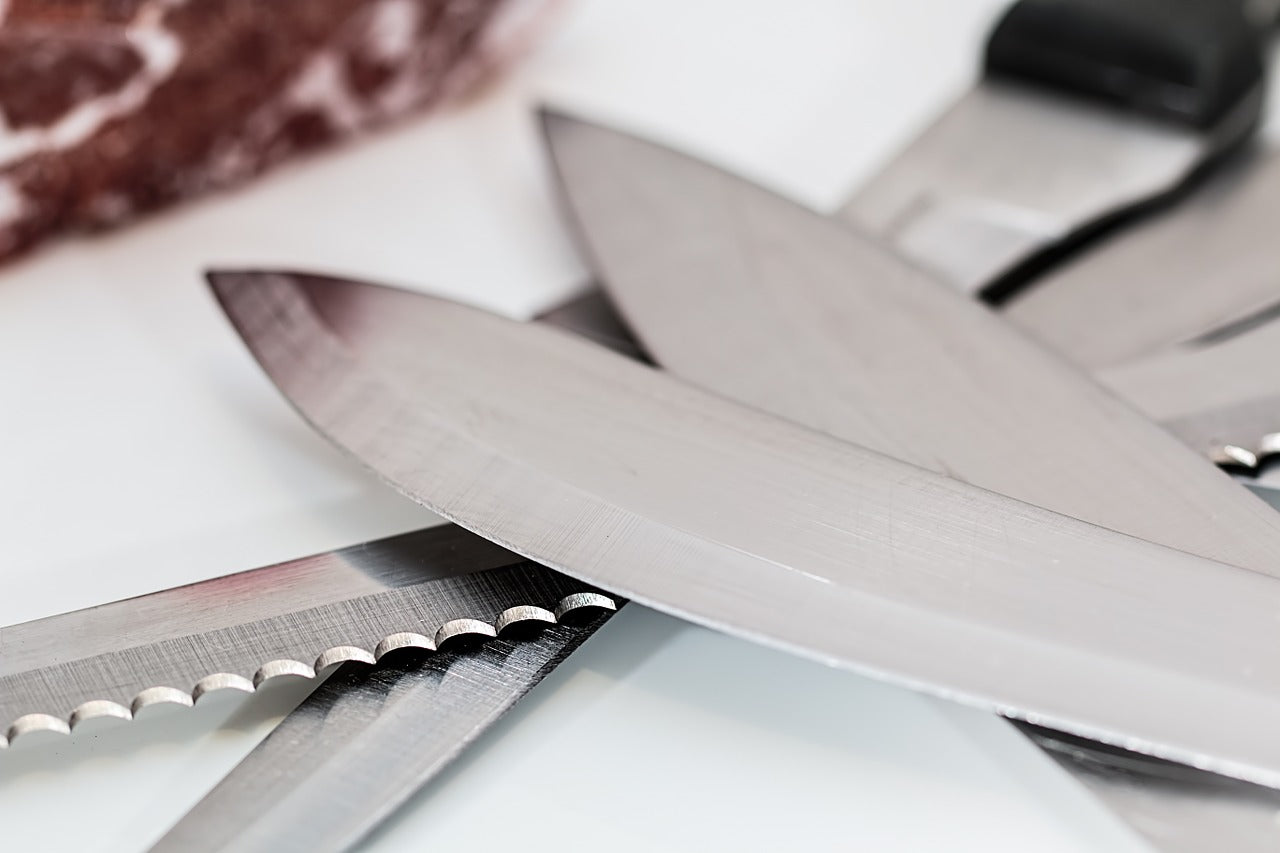
Bread knives normally have one of two types of serrations:
Scalloped serration – This type of serrated knife has rounded serrations, without any actual points on the edge. It tends to be more effective for softer breads like challah, and fruits such as kiwis or tomatoes.
Pointed serration – This type of knife has sharp points spaced evenly out across the edge. The pointed serrations are well suited to slicing sourdough bread.
Why is This Type of Serration Best for Sourdough Bread?
The pointed serration style performs far better for hard crusted sourdough bread than the scalloped serration. And here’s why…
Bread knives use a sawing action, where the sharp points dig into and grip the bread, cutting into it in a horizontal fashion. Meanwhile, the bits between the points help reduce the blade’s friction as it moves through. Less friction makes it easier and more efficient to cut through the bread without shredding or tearing, giving you nice clean slices.
In comparison, a knife with scalloped serrations doesn’t dig in and grab the crust as easily, even though it does cut horizontally. This makes it less suited to crusty bread than the pointed serration style.
In addition to this, having deeper and pointier serrations allows the bread to be gripped easier and have more force applied to the bread with less effort.
BUYER’S TIP: Look for pointier, deeper serrations rather than shallower ones. The more pointed and deeper the serration, the more efficient each serration is at slicing into your bread.
Pointed serrations like these make lighter work of slicing hard crusted bread
Number of Serrations
It would be easy to assume that having more serrations equals more slicing power, but it’s actually the opposite…
The fewer the serrations, the better the knife performs.
Imagine a floor full of spikes. If there are loads of spikes and they are all tightly packed together, you could probably get away with lying down on that surface without too much damage. But if the spikes were fewer in number with gaps in between, then lying down on it would be very painful!
That’s because the force coming from the spikes is spread out over less surface area, and so it is all concentrated on the fewer spikes, rather than spread out over many. This is the same concept when it comes to serrations on knives. Having fewer serrations creates more force into the slicing action, hence making it a more effective bread knife.
Also, having fewer serrations means there is a wider gap between each serration. Remember, the gaps between serrations provide a way to reduce friction. The wider the gap, the less friction there is, making for more efficient slicing.
BUYER’S TIP: Look for a bread knife with fewer serrations, and wider gaps between the serrations for more effective slicing.
Length of the Blade
Most bread knives will be between 7 and 10 inches long give or take a few. But in the case of a knife for slicing crusty bread; the longer the blade, the better.
The motion used to slice crusty bread is a ‘sawing’ action. Therefore, the longer the blade, the more efficient the slicing will be. In other words, you will get ‘more slice for less work’ because you can use the whole length of the blade before sawing in the opposite direction.
A longer length blade also allows you to slice into larger loaves without ‘running out’ of knife! However, it’s worth mentioning here, that if you only ever cut small bread sizes, then you don’t have to get a 10 inch knife. As long as the knife is wider than the loaf you are cutting into then you’re good to go. It just means your knife will be less versatile.
BUYER’S TIP: The longer the blade, the less effort it will take to slice your bread, and the more versatile the knife will be. A 10 inch blade is a good length to aim for when looking to purchase a good bread knife.
Thickness of the Blade and Bevel
A blade that is thin, with a narrow angled bevel performs better with crusty bread. The bevel is the angled edge of the blade that has been sharpened and angled towards the cutting surface. So in this case, we’re talking from the tip of the serration, to the dip/groove in between the serration.
A knife that is suited to crusty sourdough bread, will have one completely smooth straight side, and the other side will have the sharpened bevel. A bevel with a 16 degree angle or less is a good rule of thumb. And a blade that is a maximum of 2.2 mm thick will be pretty efficient. This set up would give minimal friction when slicing. A thicker blade with a wider angled bevel will feel more blunt when slicing through.
A thicker blade will slice more inefficiently than a thinner one
NOTE: Although the blade should be thin, it should also be sturdy and inflexible. Some serrated knives are flexible in nature, and they are useful when cutting into tomatoes, and other soft fruits. But for crusty bread, it is best to go for a knife that doesn’t flex, as this can be annoying if it gives way when you are in the middle of slicing!
Blade Material
Most bread knives are made out of stainless steel these days. This works well, but if you can find one that is made of high carbon stainless steel, then that would be even better. High carbon stainless steel is tougher and more durable than regular stainless steel, and will stay sharper for longer.
BUYER’S TIP: The higher the carbon content in a stainless steel knife, the more durable the blade will be.
Shape of the Blade
If you’ve ever tried to slice crusty bread with the wrong type of knife, you probably would have noticed how thick the bottom crust can be. After slicing all the way through, it’s usually an extra task to cut that last bit of crust at the bottom, which tends to be the hardest and thickest part of the crust.
If possible, look for a bread knife that has a slightly bowed/curved cutting edge. This will allow you to cut through the final part of the crust more easily. It doesn’t have to look completely curved. Only a very slight, hardly noticeable curve can make all the difference. This shape will help to slice through the crust just before your knife actually reaches the bottom of the chopping board.
The knife should also be shaped so that you have enough comfortable hand space when you get to the bottom of the slice. This can either be done through having the blade become wider as it draws toward the handle, or by the handle being placed at a higher position than the blade (known as ‘offset’).
BUYER’S TIP: Buying a knife with a slightly bowed/curved cutting edge will help slice the bottom crust easily.
Best Type of Handle for a Bread Knife
The handle of a bread knife is a very important part of the design. An uncomfortable handle will make the most well designed blade of a knife completely useless. There are 3 main areas to check in a bread knife handle:
The surface of the handle – Try to make sure the handle is ‘grippy’ and doesn’t have a slippery or smooth surface. A good grip will make for confident slicing. The shape of the handle – is the handle comfortable for you to hold? This will vary from person to person. The best shape of a handle will have plenty of ‘affordance’, which means it will be comfortable even when held in different ways. The components of the handle – Be weary of fancy looking handles that have screws or other extra parts attached to it. These can eventually become loose and fall apart. The most durable handles will be made from one piece only.
BUYER’S TIP: Find a bread knife with a handle that is non-slip, and has ‘affordance’ i.e. shaped in a way which can be comfortably held in many different ways. The best handles are simple ones.
A bread knife handle should have a non-slip surface
Checklist for an Effective Sourdough Bread Knife
Here’s a summary of all the aspects discussed above, which would make a ‘best case scenario’ bread knife:
Best Bread Knife for Sourdough Bread The BLADE should be: Serrated – pointed serrations that are fewer in number, and deeper and pointer in design. Durable material – high carbon stainless steel is best. Extra long – the longer the better; 10″ is a good length. Thin but inflexible – 2.2 mm maximum thickness, with no flexibility. Narrow angled bevel – The narrower the angle, the better the performance of the knife. 16 degrees or narrower is a good rule of thumb. Bowed cutting edge – A very slightly curved cutting edge will make slicing the bottom of a crusty loaf easy.
The HANDLE should be: Non-slip – a surface that gives good grip and is not completely smooth. Ergonomic shape – should be comfortable to hold in a number of positions. A single piece – no added pieces that can become loose over time.
Sharpness of the Blade
It obviously goes without saying that a sharp bread knife is better than a blunt one. But it’s worth noting here, that serrated knives tend to stay sharp for a very long time. Especially if it’s made out of good quality high carbon steel.
Unlike regular straight edged knives, serrated blades naturally have less wear and tear (due to reduced friction during use). And so they stay sharp for much, much longer.
In fact, you will probably go years before the knife becomes blunt. And even then, because of the way a serrated bread knife is designed, it will continue to be effective at slicing crusty artisan bread even without being sharpened (albeit not quite as efficient). A blunt bread knife will produce extra crumbs on your chopping board, but it will still do the job quite well; far better than a regular knife would.
Having said that, eventually of course you may want to sharpen your knife. And the serrations on a bread knife will bring on an extra challenge.
Sharpening a Serrated Blade
Because bread knives have a serrated edge, they are unfortunately not as simple and easy to sharpen as their regular straight edged counterpart. Unlike regular knives, they require a different sharpening technique and different knife sharpening tools.
You may want to consider getting your bread knife sent off to get professionally sharpened. Especially considering how rarely it will need sharpening when compared to a regular chef’s knife.
If you did want to sharpen it yourself at home though, it can be done using a tapered sharpening rod like this one (link to Amazon). The rod is used to sharpen in between each point individually. And so, although not too difficult to do, it can be relatively time consuming and tedious. Here’s a useful video of a serrated bread knife being sharpened using this technique:
My Top Sourdough Bread Knife Pick
First of all, the knife I ended up buying after my research, was the Mercer 10″ long serrated bread knife (Amazon link). I chose it because it was within my budget and fit pretty much all of the criteria I’ve mentioned above. i.e.
10″ long
made of high carbon steel
non-slip handle with a comfortable grip and simple design
pointed serrations that are not too packed together
has a slightly bowed cutting edge
thin blade and narrow bevel angle
I bought this knife guard along with it for extra protection of the blade too.
NOTE: For more information about the products I love and use to bake sourdough bread at home, check out my Baking Tools section!
I’ll be honest, because of the low price point I was expecting to be a little disappointed. But this knife works extremely effectively so I guess my research paid off!
Granted, a more expensive one will have a higher carbon content in the steel, so will stay sharper for longer. But for the price, the Mercer bread knife is definitely worth considering.
If you’re able to spend a little more though, this Challenger Breadware knife trumps the Mercer. It has everything the Mercer has, but in addition to this, it also has:
A thinner blade than the Mercer
blade than the Mercer Longer blade (12 inches)
blade (12 inches) Serrations that are deeper
For this reason, my TOP PICK for a great bread knife for sourdough bread is the Challenger Breadware knife. It’s excellent value for what you get, as it will last a lifetime if looked after correctly.
So if you’re able to spend a little more, the Challenger Breadware knife is the way to go. It’ll also stay sharper for longer due to its extra durable blade, and will be very effective at making light of that artisan crispy crust on your sourdough bread.
The Challenger Bread Knife has excellent performance on sourdough bread with a 12 inch long, thin blade and deep serrations.
If you do buy a more expensive knife, it’s worth getting a sharpening rod to keep your blade in tip top condition (here’s a link to one on Amazon).
QUICK TIP: Buying a decent bread knife goes a long way to getting nice even, clean slices. But if you want each slice to be equal in width every time, you may want to consider buying a bread guide like this one (Amazon link). It’s inexpensive and helps guide your slices to be all of equal width.
What Else Can I Use My Bread Knife For?
Your serrated bread knife can be used for other foods too. In fact, many items that your straight edged chef’s knife is NOT good for, is likely a good candidate for your serrated knife. Anything that is too hard or too soft (or both in the case of sourdough bread!) can be cut more efficiently using a serrated knife than with a chef’s knife. Here’s a list of foods that are better suited to a serrated knife than a chef’s knife:
Every kind of bread, from crusty to soft
Soft sponge cakes
Soft fruits and vegetables, like tomatoes, kiwis, etc.
Any type of melon with a tough skin, like watermelon, honey melon, etc.
Winter squashes like pumpkin, butternut squash, etc.
Carving tender meat slices
The serrations allow slicing through the food without putting pressure on the fruit. This is the same concept that makes it good for crusty bread, and also soft fluffy bread. It helps cut through both very soft and delicate foods, AND hard/crusty foods without squashing them.
Serrated bread knives slice tomatoes effectively
Anything that can get squashed, like a tomato or some bread, will work well with a serrated knife. And will equally NOT work well with a regular chef’s knife. That’s why when you try to slice a tomato with a straight edged knife, it always gets squashed, even if the knife is sharp.
Alternatives to a Bread Knife
Using an ordinary chef’s knife is not recommended for slicing sourdough bread because the chef’s knife will become blunt, and you will make a mess of the slices. But sometimes, a bread knife is not suitable either. Many bakers have reasons why they can’t or won’t slice their own bread, such as:
arthritic hands/wrists
injuries/disabilities
simply no desire to slice it by hand!
Thankfully there are alternatives to manually slicing your bread…
Electric Bread Knife
Electric Bread Knives (like this one) are designed to cut into crusty bread without physical effort. The serrations on the blade move forward and backward in a quick motion, relieving the need for you to saw the bread. You simply hold the knife in place and slowly push down as the bread is automatically sliced.
Electric Food Slicer
This awesome gadget slices bread completely effortlessly. You simply pass the bread through the machine and it slices the bread perfectly. And you can adjust how thick or thin you would like the slices to be. Something I aspire to buy one day when I have a kitchen with enough counter top space! Here’s a link to one on Amazon if you’re curious.
Correct Way to Slice Artisan Bread Using a Bread Knife
Once you have purchased a decent bread knife, it’s important to get the most out of it by using it in the correct way. Here are a few tips to give you the best chance of getting those beautiful even slices:
Tip #1: Hold the knife parallel to the chopping board – do not hold it at an angle, as this will make it much harder to slice into it.
Tip #3: Make a groove – For particularly tough crusts, it’s best to lightly make a groove in the crust first using the knife. This will help guide the knife in the right direction.
Tip #3: Use the whole length of the knife – This will help make sure the knife is doing most of the work, not you!
Tip #4: Saw forward and backward, not down – The knife is most effective if using in a horizontal direction. Be patient! Don’t push down, and let the knife do the work.
BONUS TIP: Use a wooden chopping board. This will protect your bread knife from losing its sharp edge.
Did you know that WHEN you slice your bread makes a difference to how neat your slices come out? Check out my article here to learn more (it also includes more detailed tips on how to slice your bread neatly.
So you have finished reading the how to make a serrated knife topic article, if you find this article useful, please share it. Thank you very much. See more: how to make a serrated bread knife, knife serration machine, putting serrations on a knife, crkt veff sharpener, serrated edge smite, making a bread knife, knife aid, veff serrations