
You are looking for information, articles, knowledge about the topic nail salons open on sunday near me how to make an existing pond bigger on Google, you do not find the information you need! Here are the best content compiled and compiled by the https://chewathai27.com team, along with other related topics such as: how to make an existing pond bigger how to make a farm pond bigger, how to dig out an existing pond, how to add to an existing pond, enlarging pond, how to dig out a farm pond, making existing pond deeper, bathtub goldfish pond, why dredge a pond
You can always add on; in fact, most pond owners upgrade their feature an average of three times! When the time comes to improve upon an existing pond, consider adding a new stream.Raised ponds can be either completely above ground or only partially raised. Partially raised ponds are more suitable for fish as they keep the temperature of the water more stable, particularly during the winter months.There are a few ways you can do it to: Renovate your pond so it looks the same but functions smoothly and stays low maintenance so you can work less to enjoy more. Transform your pond into a pondless water feature so it’s even less work. Turn your unwanted pond into a fountainscape for a totally new look.
- Make the old pond bigger. …
- New outlet and overflow. …
- Clear the big square. …
- Take away topsoil. …
- Mark out a small square. …
- The bottom of the bank. …
- Dig the big pond. …
- Put soil on banks.
- Remove any plants, fish and other living organisms from your pond.
- Drain the water from the pond using a submersible pump. …
- Allow the pond bed time to dry so that the soil is easier to work with. …
- Begin digging in the center of the pond, working your way out to the edges.
Contents
How do I increase the size of my pond?
- Remove any plants, fish and other living organisms from your pond.
- Drain the water from the pond using a submersible pump. …
- Allow the pond bed time to dry so that the soil is easier to work with. …
- Begin digging in the center of the pond, working your way out to the edges.
Can you add on to an existing pond?
You can always add on; in fact, most pond owners upgrade their feature an average of three times! When the time comes to improve upon an existing pond, consider adding a new stream.
Can a pond be raised?
Raised ponds can be either completely above ground or only partially raised. Partially raised ponds are more suitable for fish as they keep the temperature of the water more stable, particularly during the winter months.
What can I turn my old pond into?
There are a few ways you can do it to: Renovate your pond so it looks the same but functions smoothly and stays low maintenance so you can work less to enjoy more. Transform your pond into a pondless water feature so it’s even less work. Turn your unwanted pond into a fountainscape for a totally new look.
How much does it cost to deepen a pond?
| Pond Type | Average Cost Range | Factors Affecting Cost |
|---|---|---|
| Natural swimming | $50 – $300 per square foot | Depth, liner, labor |
| Human made | $100 – $5,000 | Liner, labor, size |
| Farm pond | $5,000 – $70,000 | Liner, labor, size, fish |
| Backyard | $50 – $15,160 | Liner, labor, size |
How much does it cost to make a pond deeper?
It typically costs between $2.50 and $7.15 per square foot to dig a pond. The larger a pond is, the deeper you will also have to dig, and that means you’ll need to do more excavation. As a result, as you increase the pond’s size, the cost per square foot also increases.
How do you make a pond flow into another?
Basically you need to make a conduit between the two for water to flow through. This can be achieved using a piece of pond liner to create a channel or joining stream. If the original pond is a preformed pond then it is a little trickier.
Can you turn an existing pond into a swimming pond?
Yes, you can convert an existing pond into a Natural Swimming Pool/Pond, though the process is expensive (typically costs more than building a NSP from scratch) and must be done on a custom basis.
How do you add a bog to an existing pond?
- Select a site for the bog at the edge of the pond. …
- Excavate the bog area to a depth of 2 feet 3 inches below soil level. …
- Line the bog with 2 inches of sand. …
- Fill the bottom of the bog with 1- to 1 1/2-inch round gravel to a depth of 6 inches.
Will wildlife come to a raised pond?
‘Levelling the container with the ground will allow a range of creatures to get in and out. However, those wanting a raised pond can add plants, bricks and stones around the edge to act as a step for the wildlife.
Will wildlife use a raised pond?
Flying insects may be able to access raised ponds but for everything else they provide a massive barrier to any wildlife wanting to get in or out of the pond. If you have to go raised, make a large area of rocks and wood both in and out of the pond to allow wildlife to access the water easily and safely.
What is a good size pond for fish?
Fish ponds should be 1/2 acre or more in water surface area. Minimizing the amount of shallow edge around your deep water pond will reduce emergent vegetation, most species of which grow in water less than four feet deep. For this reason, create steep slopes to a depth of four feet or more.
How do you connect two fish ponds together?
Take a piece of pre-cut pond liner at least wide enough for the channel width plus twice the depth + 10%. Make sure the liner is LDPE or rubber and it can be joined to the existing pond onto the channel cut by using cold glue joining tape. It makes a nice looking effect for one pond to spill over into the other.
How deep should a pond be for a fish to survive winter?
During the coldest parts of winter, your pond must not freeze all of the way through. There should be enough unfrozen water at the bottom of the pond for your fish to ride out the winter. As a rule of thumb, ponds need to be at least 18 inches deep, ideally 24 inches or more, to overwinter fish.
What is a good pond size?
Wildlife will use the shoreline vegetation for concealment and as areas to search for food You also want the pond to have enough depth for the water to stay clean. I recomend a swimming pond to be no smaller then 40′ x 40′ and a minimal depth of 8′.
What is a good depth for a pond?
The deep water of a pond also allows water to remain cooler throughout the summer months. Having most of a ponds depth between 10-12 feet is ideal. The ideal average water depth is 8 feet.
How to make your old pond bigger
- Article author: www.nzdl.org
- Reviews from users: 11415
 Ratings
 - Top rated: 3.7
- Lowest rated: 1
- Summary of article content: Articles about How to make your old pond bigger Updating …
- Most searched keywords: Whether you are looking for How to make your old pond bigger Updating
- Table of Contents:
How to Make a Natural Pond Bigger & Deeper | Home Guides | SF Gate
- Article author: homeguides.sfgate.com
- Reviews from users: 4177 Ratings
- Top rated: 3.7
- Lowest rated: 1
- Summary of article content: Articles about How to Make a Natural Pond Bigger & Deeper | Home Guides | SF Gate Updating …
- Most searched keywords: Whether you are looking for How to Make a Natural Pond Bigger & Deeper | Home Guides | SF Gate Updating How to Make a Natural Pond Bigger & Deeper. Many garden ponds have vinyl, plastic or concrete liners that define their size and depth. Some ponds, however, have a natural bed that doesn’t need a liner due to high levels of clay and other water-resistant materials in the soil. Unlike ponds with manmade liners, …
- Table of Contents:
Restoring a Filled-In Pond
Enlarging a Pond
The 3 areas of your house you should be deep cleaning but maybe aren’t
How to Clean an Outdoor Pond
How to Dig Out a Preformed Pond
Filling in a Plastic Pond
How to Control pH Levels in Ponds
How to Remove a Garden Pond
How to Cover the Edges of a Raised Pond
How to Use Bentonite to Stop a Pond Leak
How to Care for Plastic Tub-Lined Ponds
How to Clean Dead Leaf Buildup Out of a Pond
How to Build a Large Garden Pond With Concrete
How to Dig Out an Overgrown Pond

How To Build A Raised Pond | World of Water
- Article author: worldofwater.com
- Reviews from users: 32894 Ratings
- Top rated: 3.9
- Lowest rated: 1
- Summary of article content: Articles about How To Build A Raised Pond | World of Water Updating …
- Most searched keywords: Whether you are looking for How To Build A Raised Pond | World of Water Updating raised ponds, Raised Pond Design Tips By World of Water Aquatic CentresWorld Of Water
- Table of Contents:
3 Actions For What To Do With Your Unwanted Pond | Premier Ponds
- Article author: premierpond.com
- Reviews from users: 26563 Ratings
- Top rated: 3.8
- Lowest rated: 1
- Summary of article content: Articles about 3 Actions For What To Do With Your Unwanted Pond | Premier Ponds Updating …
- Most searched keywords: Whether you are looking for 3 Actions For What To Do With Your Unwanted Pond | Premier Ponds Updating You can take one of thes 3 courses of action for what to do with an unwanted pond. One of them could be the next step you’ve been looking for.
- Table of Contents:
How to Make a Natural Pond Bigger & Deeper | Home Guides | SF Gate
- Article author: homeguides.sfgate.com
- Reviews from users: 19934 Ratings
- Top rated: 4.7
- Lowest rated: 1
- Summary of article content: Articles about How to Make a Natural Pond Bigger & Deeper | Home Guides | SF Gate Begin digging in the center of the pond, working your way out to the edges. Only remove a small amount of soil with each shovelful, making the pond deeper and … …
- Most searched keywords: Whether you are looking for How to Make a Natural Pond Bigger & Deeper | Home Guides | SF Gate Begin digging in the center of the pond, working your way out to the edges. Only remove a small amount of soil with each shovelful, making the pond deeper and … How to Make a Natural Pond Bigger & Deeper. Many garden ponds have vinyl, plastic or concrete liners that define their size and depth. Some ponds, however, have a natural bed that doesn’t need a liner due to high levels of clay and other water-resistant materials in the soil. Unlike ponds with manmade liners, …
- Table of Contents:
Restoring a Filled-In Pond
Enlarging a Pond
The 3 areas of your house you should be deep cleaning but maybe aren’t
How to Clean an Outdoor Pond
How to Dig Out a Preformed Pond
Filling in a Plastic Pond
How to Control pH Levels in Ponds
How to Remove a Garden Pond
How to Cover the Edges of a Raised Pond
How to Use Bentonite to Stop a Pond Leak
How to Care for Plastic Tub-Lined Ponds
How to Clean Dead Leaf Buildup Out of a Pond
How to Build a Large Garden Pond With Concrete
How to Dig Out an Overgrown Pond
Making an existing pond bigger – Pond Boss Forum
- Article author: forums.pondboss.com
- Reviews from users: 12085 Ratings
- Top rated: 4.2
- Lowest rated: 1
- Summary of article content: Articles about Making an existing pond bigger – Pond Boss Forum Hello all. I’m new. I just bought 11 acres that has a .4 of an acre pond currently on it. We plan on enlarging the pond. …
- Most searched keywords: Whether you are looking for Making an existing pond bigger – Pond Boss Forum Hello all. I’m new. I just bought 11 acres that has a .4 of an acre pond currently on it. We plan on enlarging the pond.
- Table of Contents:
Making an existing pond bigger
- Article author: www.houzz.com
- Reviews from users: 19224 Ratings
- Top rated: 4.0
- Lowest rated: 1
- Summary of article content: Articles about Making an existing pond bigger best solution for you would be to just dig a larger pond, this way you’ll get the size and shape you want. You can re-use your existing liner for a waterfall. …
- Most searched keywords: Whether you are looking for Making an existing pond bigger best solution for you would be to just dig a larger pond, this way you’ll get the size and shape you want. You can re-use your existing liner for a waterfall. We have a 950 gallon 5 1/2 X 5 1/2 foof square/roundish pond with quite a bit of Plants etc. We are toying with the idea of expanding it for a number of reasons….. 1. We need more room for our fish…2. We want to add more water features (maybe a fountain) and 3. We are soooo in love with our back…
- Table of Contents:

How To Make Your Pond Bigger – Water Garden Advice
- Article author: www.watergardenadvice.com
- Reviews from users: 41513 Ratings
- Top rated: 4.0
- Lowest rated: 1
- Summary of article content: Articles about How To Make Your Pond Bigger – Water Garden Advice Do you have a small pond in your backyard that you’d like to expand? There are a few different ways to make an existing pond larger and in … …
- Most searched keywords: Whether you are looking for How To Make Your Pond Bigger – Water Garden Advice Do you have a small pond in your backyard that you’d like to expand? There are a few different ways to make an existing pond larger and in … Do you have a small pond in your backyard that you’d like to expand? There are a few different ways to make a pond bigger
- Table of Contents:
Benefits of expanding an existing pond
Things to keep in mind before expanding your pond
How to make your pond larger
RELATED ARTICLES
How do people make a natural pond bigger and deeper? – Quora
- Article author: www.quora.com
- Reviews from users: 10438 Ratings
- Top rated: 4.0
- Lowest rated: 1
- Summary of article content: Articles about How do people make a natural pond bigger and deeper? – Quora You have to be careful working on an existing pond. Two problems you might cause—one is if you dig down below the bottom of the existing pond, you might dig … …
- Most searched keywords: Whether you are looking for How do people make a natural pond bigger and deeper? – Quora You have to be careful working on an existing pond. Two problems you might cause—one is if you dig down below the bottom of the existing pond, you might dig … You have to be careful working on an existing pond. Two problems you might cause—one is if you dig down below the bottom of the existing pond, you might dig into a layer of permeable sand, gravel, rock, etc. and the water would all drain away. The…
- Table of Contents:

How to Enlarge Farm Ponds | HomeSteady
- Article author: homesteady.com
- Reviews from users: 46617 Ratings
- Top rated: 3.1
- Lowest rated: 1
- Summary of article content: Articles about How to Enlarge Farm Ponds | HomeSteady Place any ground stones or large boulders around the base of the expanded pond. Fill in any stone cover you may want as the bottom of the pond. …
- Most searched keywords: Whether you are looking for How to Enlarge Farm Ponds | HomeSteady Place any ground stones or large boulders around the base of the expanded pond. Fill in any stone cover you may want as the bottom of the pond. Farm ponds serve a variety of uses for recreation or farm function. A pond provides important landscaping, fishing, irrigation and waters livestock, besides the ecosystem it creates in the area. The U.S. Department of Agriculture estimates farmers build nearly 50,000 ponds each year. Enlarging a farm pond is a …
- Table of Contents:
Cleaning
Interior
HVAC
Electrical
DIY
Exterior
Maintenance
Paint
Laundry
How to Deepen a Pond (The Easy Way)
- Article author: helpusfish.com
- Reviews from users: 472 Ratings
- Top rated: 4.8
- Lowest rated: 1
- Summary of article content: Articles about How to Deepen a Pond (The Easy Way) You can also increase the pond by expanding your old pond’s interior. It is similar to deepening your pond, only that you will have to remove soil from the … …
- Most searched keywords: Whether you are looking for How to Deepen a Pond (The Easy Way) You can also increase the pond by expanding your old pond’s interior. It is similar to deepening your pond, only that you will have to remove soil from the … Do you manage a pond for your fish and other aquatic organisms? Are you experiencing a reduction in the depth of your pond? Do you feel the need to deepen theDo you manage a pond for your fish and other aquatic organisms? Are you experiencing a reduction in the depth of your pond? Do you…
- Table of Contents:
How Do I Make My Pond Deeper
How Much Does It Cost to Dredge a Small Pond
How Deep is Too Deep for a Pond
How to Deepen a Pond
Can You Make a Pond Bigger
About Us
AMAZON ASSOCIATES DISCLOSURE
Latest Posts
Misc Pages
See more articles in the same category here: 670+ tips for you.
How to make your old pond bigger
How to make your old pond bigger
42. The easiest way to make your old pond bigger is to build a new, small pond next to your old pond.
Make the old pond bigger
43. Build the new pond in the same way that you built the old pond. Booklet No. 27 tells you how to do it.
44. In building the new pond, take away one side bank of the old pond and use the earth to build the new banks.
45. You will not need to make a new inlet for your new pond because the old one in the old part of the pond is all you will need.
46. You will need to make a new outlet in your new pond to let the water flow from the old part of the pond into the new part of the pond.
47. You will also need to make an overflow for the new pond. The old pond did not have one.
48. The drawing shows you where to put the new outlet and how the water should flow and where to put the overflow. You will learn how to build an outlet and an overflow later in this book.
New outlet and overflow
How to build a new, bigger pond
49. There is much more work to do when you build a big pond than when you build a small pond.
50. First mark out a big square on the site you have chosen, about 21 by 21 metres. Mark the corners with pegs and run a string between the pegs to show you where the outside of the banks will be.
51. Clear the big square of all trees, bushes and grass and take away ail the big roots you can.
Clear the big square
52. Take away about 20 centimetres of topsoil from all over the square. Put the topsoil aside. Later you will put it back on the top and outer sides of the banks.
Take away topsoil
53. Then mark out a small square inside the big square, about 15 by 15 metres. Mark the corners with pegs and run a string between the pegs to show you where the inside of the banks will be.
Mark out a small square
54. The bottom of the bank in the shallow part of your pond and along the sides should be about 1 metre from the upper end and sides of the small square.
55. The bottom of the bank in the deepest part of your pond should be about 2 metres from the lower end of the small square.
The bottom of the bank
56. Now mark out a third smaller area in the centre of your pond, about 12 by 13 metres. We will call this the central area. Mark the corners with pegs and run a string between the pegs to show where the bottom of the banks will be.
57. Be sure that all the pegs and strings marking the 21- metre square, the 1 5- metre square and the central area are set up in the way shown in the drawings.
58. Now you are ready to begin digging out soil from inside the central area to build the banks of your pond.
59. Ask your neighbours to help you to dig your big pond. Then you can help them in turn to dig their ponds.
Dig the big pond
60. Shared work is lighter work. When we work together with our neighbours, the work is easier and better.
61. Begin digging at the 1- metre string marking the central area at the upper end of your pond. Dig about 20 centimetres deep. As you dig toward the lower end, dig a little deeper. When you get to the deepest part, at the 2- metre string marking the central area, you should be digging about 30 centimetres deep.
62. As you dig out the soil, put it between the 15 by 1 5- metre square and the 21 by 21- metre square where the banks will be. Put it nearest to where you are digging. This way, the banks will be higher and wider as you move toward the lower end.
Put soil on banks
63. When you come to roots, take away as much of them as you can.
Take away the roots
64. Whenever the loose soil you put on the banks reaches half as high as your knees, pack it down tightly. You can do this by beating the soil with a heavy plank, a length of tree trunk or an earth tamper.
Pack down the soil tightly
65. When you are digging, keep the slope of the pond bottom as regular as you can. It should slope gently down from the upper end to the deepest part. The bottom of the pond should have slopes like these in the drawings.
66. Begin again to dig soil out of the central area. Dig 20 more centimetres from the upper end and 30 more centimetres from the deepest part. Put the soil on the banks and Pack it down tightly as before.
Put soil on banks
67. Now begin again, for the third and last time, to dig soil out of the central area. Dig 20 more centimetres from the upper end and 30 more centimetres form the deepest part. Put the soil on the banks and pack it down tightly.
68. When you have finished digging out the central area and you have put on the banks all the soil that you have taken out, you will have a hole 12 by 13 metres with straight sides. Now it is time to shape the banks.
69. Dig the soil away from the edges of the central area to form the slope of the banks. Put this soil on top of the banks and pack it down tightly.
Dig soil away to shape banks
70. The inside of the banks should slope less steeply than the outside. The drawing shows you what the banks should look like when they are finished.
Inside banks stope leas
71. The top of the banks should be about 1.5 metres wide and should be straight and flat all the way around the pond.
The top of bank
72. Put the 20 centimetres of topsoil you took away when you began digging on the top and outer sides of the banks. Plant grass on the banks. Banks covered with grass last longer.
73. The bottom of your pond should be about 1.10 metres from the top of the banks at the shallow upper end and about 1.40 metres from the top of the banks at the deepest part.
the bottom of pond
74. Be sure that the bottom of the pond is fairly smooth and regular.
75. Now dig a ditch in the bottom of the pond from the centre to the lower end. The ditch should be about 50 centimetres wide and about 20 centimetres deep. This ditch will help to drain out all the water when you empty your pond.
Centre ditch
76. When the ditch is finished, remove all loose soil and other trash from the bottom of the pond.
Remove the loose soil
77. Now you are ready to install your inlet, outlet and overflow.
The inlet
78. You will need an inlet to let water into your pond when you want to fill it.
79. You should place the inlet at the point nearest to the water supply. Most often this will be at or near the upper end of your pond.
Upper end
80. Your inlet can be made from a piece of heavy bamboo or a pipe of plastic or metal. The inlet pipe should be about 10 centimetres in diameter.
Inlet pipe
81. The inlet pipe should be long enough to reach through the top of the bank from one side to the other. You will need a pipe about 3 metres long to reach through the bank at the upper end of your pond.
82. Now dig a gap in the bank where you want the inlet to be. It should be a little above the water- level on the inside of your pond and a little below the level of the water which flows from the source on the outside of your aced.
Inlet
83. Put the inlet pipe in the gap in the bank and rebuild the bank over it.
84. You can also make an inlet by cutting a shallow trench through the bank to let the water into the pond.
85. If you use a shallow trench to get water into your pond, you can improve it and keep it from washing away by using a trough of roofing metal to line the bottom of the trench.
Use a trough of roofing metal
The outlet
86. You will need an outlet to let water out of your pond when you want to empty it.
87. You should place the outlet at the bottom of the bank at the lower end of your pond at the deepest part.
Deepest part
88. The outlet can be made from a piece of heavy bamboo or a pipe of plastic or metal. The outlet pipe should be about 10 centimetres in diameter. The bank of your pond is much wider at the lower end than at the upper end, so the outlet pipe will have to be longer than the inlet pipe.
Outlet pipe
89. The outlet pipe should be long enough to reach through the bottom of the bank from one side to the other. You will need a pipe about 6.5 metres long to reach through the bank at the lower end of your pond.
90. It you cannot get a pipe that is long enough to go through the bank, you can join shorter pieces of pipe together using straight pieces of pipe like the ones in the drawing.
Join using straight pieces
91. If you are using bamboo, you can join short pieces of bamboo together with pieces of smaller bamboo in the centre, but the smaller pieces should be at least 8 to 9 centimetres in diameter. Wrap the bamboo joints with rope and close them with tar to keep water from seeping out.
Rope and tar
92. Now dig a gap in the bank where you want the outlet to be. It should reach from the deepest part on the inside of the pond through the bank to the outside of the pond.
93. If the outlet pipe is below ground level on the outside of the pond, you will have to dig a ditch to take the water away from the outlet.
Take the water away from the outlet
94. Put the outlet pipe in the gap in the bank and rebuild the bank over it.
95. If you use an outlet of about 10 centimetres in diameter, it will take about half a day to empty your pond.
96. It is easier to place the outlet where you want it to be before you dig out the centre of the pond and build the banks. When you build another pond, you will understand this and you will be able to do it when you are building the banks. But now, when you are building your first pond, you should place the outlet in the way you have just learned in this booklet because it is easier to understand.
A better outlet
97. If you use a plastic or metal pipe for the outlet of your pond, you can make it better by putting an upright length of pipe on the end of the outlet using an L or a T piece like the ones in the drawing. Close the T piece with a plug as shown.
L and T pieces
98. Put the L or T piece and the upright pipe on the end of the outlet outside the pond, but protect it so that it cannot be reached by animals or other people.
99. The top of the upright pipe should reach about 3 to 5 centimetres above the water- level of your pond. If the water rises above this level, it will overflow from the upright pipe.
Water level in pond
100. Tie the upright pipe to a pole which has been pounded into the ground so that it will not slip down and let the water out of the pond before you want it to.
101. When you want to let out the water, untie the upright pipe and push it down. The water will then flow out of the pond.
Push down the upright pipe
102. There is still another way to let water out of your pond, using a siphon. You will learn how to use a siphon in items 114- 124.
The overflow
103. If there is too much water in your pond, some of the water may flow over the banks. This may wash the banks away and some of your fish may get out.
104. You can use an overflow to keep the water in your pond from rising over the banks.
105. The better outlet you learned about in Items 97- 101 will act as an overflow.
106. If you use a straight pipe outlet or a siphon to let water out of your pond, you will need another kind of overflow.
107. This kind of overflow can be made from a piece of bamboo or a pipe of plastic or metal. The overflow pipe should be about 6 centimetres in diameter.
108. The overflow pipe should be long enough to reach through the top of the bank from the inside of the pond to a place far enough on the outside to keep overflow water from washing away the bank. You will need a pipe about 4.5 metres long to do this.
109. If you cannot get a pipe that is long enough, join short pieces of pipe or bamboo together. (see items 90 and 91).
110. It is best to place your overflow in the bank at the lower end of your pond right above the outlet so that the water that overflows can run off in the outlet ditch.
Lower end
111. If you are going to put the overflow over the outlet, you can put it in the same gap that you dug for the outlet in Item 92. The water- line should be about 50 centimetres below the top of the bank, so put your overflow there as you rebuild the bank.
Water level
112. If you are going to put the overflow in another place, you will have to dig another gap in the bank about 50 centimetres deep.
113. When the pond is full, the overflow will keep the water about 60 centimetres deep at the shallow upper end and about 90 centimetres deep at the deepest Dart.
Keep the water deep
A siphon
114. You can also use a siphon to empty your pond. If you use a siphon, you will not need an outlet but you will need an overflow like the one described in Items 103- 113.
115. A siphon is a simple tube that runs from the inside of the pond over the bank and lies on the ground outside the pond.
116. A siphon can be made of plastic or rubber tubing at least 3 centimetres in diameter.
Top of bank
117. The siphon must be long enough to reach from the deepest part of the pond, run over the top of the bank and down the outside of the bank. You will need a siphon about 8 metres long to reach over the top of the bank from the deep part to the outside.
118. When you are ready to empty your pond, put all of the siphon into the pond. It will fill with water. Be sure the tube is full of water from one end to the other. If the siphon is not full of water, it will not work.
Empty the pond
119. While the siphon is still in the water, close one end of the tube with a plug and leave the other end open.
Stones
120. Leave the open end of the siphon below the surface of the water. You can use stones to held the siphon under the water, but be sure that they are not so heavy that the water will be shut off.
121. Take the other end of the siphon, which is closed with the plug, over the top of the bank and put it on the ground outside the pond. If the ground on the outside of the pond is higher than the pond bottom at the deepest part, you will have to dig a ditch so that the end of the siphon on the outside of the pond will be lower than the end of the siphon in the pond. The ditch will also take the water away when you empty your pond.
Empty the pond
122. Now, take the plug out of the siphon. If the end on the outside is lower than the end in the pond and if the end in the pond is under water, water will start to flow through the tube and out of your pond.
Take the plug out of the siphon
123. If the end of the siphon in the pond comes to the surface, the water may stop flowing. If this happens, put the siphon into the pond to fill it with water and begin again.
124. It will take a lot more time to empty a pond with a siphon than with an outlet. It you use a siphon of about 3 centimetres in diameter, it will take about three days to empty your pond.
Screens
125. Your inlet should have a screen to keep out wild fish, dirt and trash when you fill the pond.
126. If you fill your pond with an inlet trench, it should have a screen, too.
Use a screen
127. A siphon, which is very small, usually does not have a screen.
128. Your outlet should have a screen to keep your fish from getting away when you empty your pond.
129. Your overflow should have a screen to keep your fish from getting away when the pond is too full and the water begins to overflow.
Screen overflow
130. You can easily make screens for your inlet, outlet and overflow from fine- mesh plastic or metal or from a tin with holes in the end.
Make screens
131. Screens should be placed outside the pond on the inlet pipe and Inside the pond on the outlet and overflow pipes.
Place screens
132. This will keep the pipes from filling with trash which could stop the flow of water.
133. Lash the screens tightly in place on the pipes, using heavy cord or light wire.
Lash the screens tightly
134. If you fill your pond by cutting a trench through the bank, you can screen the opening using a fish trap, split and woven bamboo, a clay pot with holes in the bottom or a piece of metal roofing with holes, as you did in Booklet No. 27.
135. When you are filling or emptying your pond, clean the screens often. If you do not do this, dirt and leaves will cover them up and the water will not flow.
136. This book has told you how to build a bigger pond and how to build it better.
137. Now that your new pond is built, you will have to learn more. You will need to learn e
· how to fill your pond with water
· how to fertilize your pond
· about the fish you will put into your pond
· how to feed your fish every day e how to care for your fish
· how to harvest your fish
138. The next booklet in this series, Booklet No. 30, Better freshwater fish farming: the fish, will help you.
How to Make a Natural Pond Bigger & Deeper
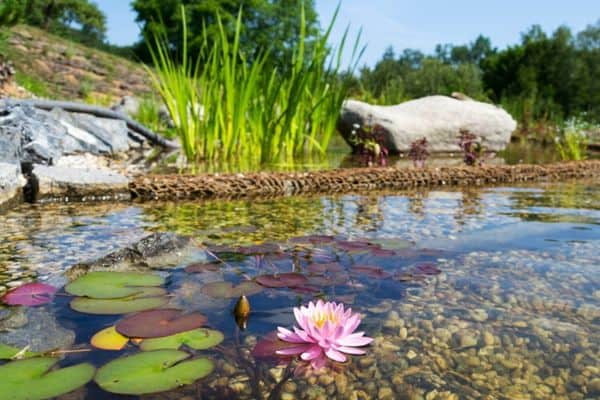
Many garden ponds have vinyl, plastic or concrete liners that define their size and depth. Some ponds, however, have a natural bed that doesn’t need a liner due to high levels of clay and other water-resistant materials in the soil. Unlike ponds with manmade liners, it’s possible to make natural ponds deeper and larger without the added work of draining the pond and removing the liner first. This is typically done to reverse a gradual filling in of the pond due to fish waste and erosion; larger expansion efforts may require you to drain the pond.
Builder Tip: Upgrade Existing Pond with a Stream
You’ve probably encountered more than one customer who has champagne taste on a beer budget. They want their backyard to be the perfect oasis with a gorgeous water feature, yet they simply don’t have the budget to get what they want. When you encounter this type of customer, don’t fret. Let your client know you can always add on to the pond they can afford today.
It’s no different with a kitchen renovation. The homeowner might want the chef’s range but end up taking a lesser appliance, knowing they can upgrade in the future. Reassure your customer that the same philosophy rings true with a pond. You can always add on; in fact, most pond owners upgrade their feature an average of three times!
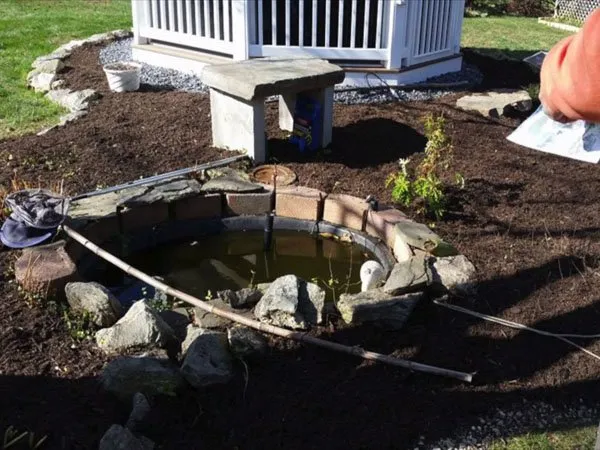
When the time comes to improve upon an existing pond, consider adding a new stream. Consider the following scenario. A client wanted a pond and stream when they first acquired a water feature, but the budget simply didn’t allow it. They decided to invest in a larger 16’ x 16’ pond with an interesting free form shape (see figure 4 below).
A waterfall was built right on the edge of the pond with hopes that it would become a stream in the future. A year later they were ready to break ground on their dream stream. The clients liked the concept of a fast-flowing shallow steam coupled with a deep-water stream, which would also increase the volume of the pond.
The flexibility of a liner pond system allows for this easy addition to take place.
1) The first step is to design the new stream and calculate the materials needed for the addition (see fig.5 below).
35’ stream
20’ deep 8” – 12” water depth at pond level
10’ shallow 3”-4” water depth
5’ upper pool
Materials
liner 10’ x 40’
50’ -2” pipe
2- slip x slip 2” couplings
1 installation kit
10’ – 6” cover tape
5 ton of boulders
1 1⁄2 ton of gravel
2) The next step is to shutdown the waterfall and pump all of the water out of the BioFalls® Filter.
Do not remove the check-valve until you’ve pumped out the old BioFalls; this will keep sediment from back-flushing into the pond. Disconnect the BioFalls snout and start digging around the filter. Since we are relocating the biological filter approximately 35’ away from the pond’s edge, the existing berm will have to be moved and reshaped. Our steps are the same as new construction, Set the BioFalls and connect the plumbing first. The only difference is that we have to dig the filter out before we can set it in its new location. Cut the pipe two to three feet away from the bulkhead fitting and pull the BioFalls out of the ground. Note: It is easier to pull the BioFalls out with the filter support tubes removed.
3) Next, position the BioFalls in its new location; level and compact the soil according to the standard installation instructions. Using PVC couplings, add a new section of pipe to the filter and connect it to the old plumbing.
4) Drain the existing pond down to the first shelf and remove all stones from the waterfall down to the shelf.
5) You are now ready to move some soil. Re-position the soil around the BioFalls in its new location. You do not need to move the entire berm. Some of it may remain in place to add interest to the pond’s perimeter and balance the larger berm around the waterfalls with the surrounding landscape. Remember, you will be getting additional soil from the deep stream’s excavation, but it still may be necessary to bring in more soil depending on the berm size. A large planting berm adds visual interest so it might be worth bringing in more soil whenever possible.
6) Now that the old berm has been removed, the excavation on the deep stream can start. Give it some character by varying its width and putting in some twists or curves.
Be sure to check the stream’s depth from the skimmer. The stream should be 8” – 12” deep, which will allow fish to swim up to the waterfalls.
7) The next step of seaming the liners together is a very important one. If you are not comfortable with seaming the liners, you have two options. You can either change the design where the entire steam is shallow, flowing into the pond as a waterfall, or leave the design and remove the entire existing liner and install a larger one. It’s a good idea however, to learn how to seam liners together as noted below.
Thoroughly clean the pond liner of algae and water deposits.
Use an EPDM Primer or an equal substitute to prepare the liner surfaces. Overlap the two liners and remove all wrinkles and folds.
Using the 6” cover tape, start at one side of the liner and peel approximately two feet of the paper backing off of the tape and center it over the two liners. (You can choose either 6” cover tape or double-sided tape; they will both work.)
Carefully press the tape into place smoothing out all bubbles and wrinkles from the center of the tape outwards.
It is very helpful to have two people working on this part so one person can hold the tape and peel off the paper backing while the other simultaneously presses and smooths the tape into place.
Take your time; if done carefully the seam will be leak-free for the life of the pond. The upper half of the fast moving stream can either be cut into the existing soil or built up with extra soil. The foreman on site typically makes this decision. Everyone has their own style and this is one of the most creative parts of your job. Make it fun and it keep experimenting with new ideas.
8) The last step is to finish the stream and waterfalls as you normally would.
Keep in mind, you are better off building a series of smaller waterfalls instead of one large one. The overall effect is more natural in appearance and sound.
As you can see, a simple steam addition will totally change a water feature forever. There are other ways to upgrade an existing pond (see diagram below). With your customer’s vision in mind, you’ll be able to create an improved masterpiece when their budget allows.
So you have finished reading the how to make an existing pond bigger topic article, if you find this article useful, please share it. Thank you very much. See more: how to make a farm pond bigger, how to dig out an existing pond, how to add to an existing pond, enlarging pond, how to dig out a farm pond, making existing pond deeper, bathtub goldfish pond, why dredge a pond