
You are looking for information, articles, knowledge about the topic nail salons open on sunday near me how to measure motorcycle rear shock length on Google, you do not find the information you need! Here are the best content compiled and compiled by the https://chewathai27.com team, along with other related topics such as: how to measure motorcycle rear shock length motorcycle rear shock length chart, rear shock size chart, motorcycle shock length, motorcycle shock length chart, progressive shocks, stock dyna shock length, stock harley shock length, road glide stock shock length
Contents
How do I measure shock length?
A shock is measured by its extended and collapsed lengths, and is measured from the center of the loop mount or the base of the stud mount. To get the extended length of a shock, remove it from the vehicle and allow it to expand on its own or pull it to the fully extended position and take a measurement.
What happens if your shocks are too long?
The other problem is that if the shock absorber that has been fitted to the vehicle is too long, in this case the vehicle suspension could experience the shock absorber “Bottoming out”. This term is used when the shock absorber is fully compressed, but the suspension still has an allowed amount of travel to go.
How much travel does my rear shock have?
Stroke travel: This is how much a rear shock compresses. It is comparatively short: 1.5” to 3”. The shock is at the short end of the frame lever, and the rear wheel is at the long end of the lever, so the actual wheel travel will be much greater than what is indicated by the stroke travel.
How is rear travel measured?
“The best method for measuring frame travel may be to remove the shock and measure the vertical travel at the rear axle, with the suspension linkage at the full shock length, and at the shock bottom-out length (original eye-to-eye minus manufacturers specified shock stroke).
How much travel should a shock absorber have?
On straight axle suspension systems, there is a 1 to 1 ratio between the movement of your shock and your wheel. That means if your wheel moves one inch, your shock extends or compresses one inch. In these applications 2.5 inches of shock travel in both directions (compression and extension) should generally be enough.
How do you measure rear shock mounting hardware?
- Measure the eye to eye length.
- Attach a shock pump and slowly remove all the air from the shock.
- Compress the shock fully and measure the eye to eye length again.
- Subtract this measurement from the initial eye to eye length to find the usable stroke. (ie. 185 – 132.5 = 52.5)
How is RC shock length measured?
Length Counts
Check the length of each shock afterwards. Use a calliper and measure between the hole in the shock cap and the ball cup. Measuring the overall length can give wrong results as you might have flash on the ball cups that add to the overall length.
What is a metric rear shock?
“Metric,” as it’s referred to here, is actually a new set of sizes for rear shocks that have been agreed upon by several suspension and frame manufacturers. That means new eye-to-eye and stroke measurements in conveniently chosen increments of millimeters.
Can you increase rear shock travel?
The amount of travel the bike has is mostly based on design and the ratio the design uses, not the rear shock. Simply increasing the rear shock wont do much but break your bike. If you can fit a shock with the same i2i but with more stroke, then you get more travel. Your frame or your shock can limit travel.
How much up travel should a shock have?
If you think you might go up a tire size later on, you may want to compensate for that now. Summary Notes: –1/3 to 2/3 of the shock should be up travel. -Do not exceed 9″ of droop.
Should a shock absorber extend on its own?
Fully compress unit and allow the rod to extend on its own. This should require less than 45 seconds on a unit with normal gas pressure and up to 2 minutes for a low gas unit. If the unit fully extends to these specs, it is considered fully functional. Non-gas units do not extend.
How To Measure Shock Length – Summit Racing Quick Flicks – YouTube
- Article author: www.youtube.com
- Reviews from users: 1105
 Ratings
 - Top rated: 3.7
- Lowest rated: 1
- Summary of article content: Articles about How To Measure Shock Length – Summit Racing Quick Flicks – YouTube Updating …
- Most searched keywords: Whether you are looking for How To Measure Shock Length – Summit Racing Quick Flicks – YouTube Updating Custom suspension changes on your vehicle may require different shocks than stock. Al talks you thorough how to find the compressed and extended length meas…shock length, shock springs, car lowering, car lifting, vehicle suspension, static height, extended height, compressed height, summit racing, shocks
- Table of Contents:

DIY – Measuring Shocks – YouTube
- Article author: www.youtube.com
- Reviews from users: 39967 Ratings
- Top rated: 3.3
- Lowest rated: 1
- Summary of article content: Articles about DIY – Measuring Shocks – YouTube Updating …
- Most searched keywords: Whether you are looking for DIY – Measuring Shocks – YouTube Updating Aldan American Custom Coilovers – https://aldanamerican.com/coil-over-shocks/**Social Media (Aldan American Suspension): Instagram – https://www.instagram.co…coilover extended length, eyelet shock, shock measurment, how to measure coilovers, chosing coilover, measuring shock lengths, shock length, collapsed length
- Table of Contents:

How to Measure Shocks – Shockwarehouse.com
- Article author: www.shockwarehouse.com
- Reviews from users: 12768 Ratings
- Top rated: 4.0
- Lowest rated: 1
- Summary of article content: Articles about How to Measure Shocks – Shockwarehouse.com Updating …
- Most searched keywords: Whether you are looking for How to Measure Shocks – Shockwarehouse.com Updating Guide to finding shocks for custom or rare applications incloudes directions on how to measure shocks and find shock dimensions by measuring vehicleHow to Measure Shocks, Measuring Shocks, Find a Shock, Custom Shocks, Lifted Shocks, Lowered Shocks, Shocks
- Table of Contents:
#AskJarv: How to Measure Your Rear Shock – YouTube
- Article author: www.youtube.com
- Reviews from users: 38931 Ratings
- Top rated: 4.0
- Lowest rated: 1
- Summary of article content: Articles about #AskJarv: How to Measure Your Rear Shock – YouTube Updating …
- Most searched keywords: Whether you are looking for #AskJarv: How to Measure Your Rear Shock – YouTube Updating One of the more confusing things on bikes is replacing a rear shock. Toady, we tackle that issue and tell you the essential measurements you need to know to …rear shock, moutain biking, MTB, suspension system, #askjarv
- Table of Contents:

Error 403 (Forbidden)
- Article author: www.quora.com
- Reviews from users: 5174 Ratings
- Top rated: 3.3
- Lowest rated: 1
- Summary of article content: Articles about Error 403 (Forbidden) Best way to measure suspension length is, centre or top mounting hole to centre of bottom mounting hole. …
- Most searched keywords: Whether you are looking for Error 403 (Forbidden) Best way to measure suspension length is, centre or top mounting hole to centre of bottom mounting hole.
- Table of Contents:
Measuring shock length – Harley Davidson Forums
- Article author: www.hdforums.com
- Reviews from users: 1728 Ratings
- Top rated: 4.4
- Lowest rated: 1
- Summary of article content: Articles about Measuring shock length – Harley Davidson Forums When measuring rear shock length, do you measure from the center of the mount holes or from the absolute top and bottom of the entire shock? …
- Most searched keywords: Whether you are looking for Measuring shock length – Harley Davidson Forums When measuring rear shock length, do you measure from the center of the mount holes or from the absolute top and bottom of the entire shock? Measuring shock length, harley, forum, harley davidson, davidson, sportster, touring, classifieds, parts, sale ,reviews, guides,hdforums, harley davison forum,softail,dyna glide,VRSC,motorcycle, motorcycle forumSportster Models – Measuring shock length – When measuring rear shock length, do you measure from the center of the mount holes or from the absolute top and bottom of the entire shock? Mine are 11.5 from center eye to center eye, so I’d like to go a big longer but wanted to be sure. Thanks!
- Table of Contents:
how to determine rear shock length ? | Cafe Husky
- Article author: www.cafehusky.com
- Reviews from users: 47500 Ratings
- Top rated: 3.2
- Lowest rated: 1
- Summary of article content: Articles about how to determine rear shock length ? | Cafe Husky Both front and rear should compress equally with the rer in the center of the bike. The general rule is, you want to use about 25% of your … …
- Most searched keywords: Whether you are looking for how to determine rear shock length ? | Cafe Husky Both front and rear should compress equally with the rer in the center of the bike. The general rule is, you want to use about 25% of your … Ok, guys need some help I have a 1979 wr 250 and I need shocks for my restore. I need to know whats the proper way to measure for new shocks . So here is…
- Table of Contents:
How To Measure The Shock And Hardware Size On A MTB
– MTB Direct Australia
- Article author: www.mtbdirect.com.au
- Reviews from users: 6312 Ratings
- Top rated: 4.3
- Lowest rated: 1
- Summary of article content: Articles about
How To Measure The Shock And Hardware Size On A MTB
– MTB Direct Australia The most accurate method for shock measurement: · Measure the eye to eye length · Attach a shock pump and slowly remove all the air from the shock … … - Most searched keywords: Whether you are looking for
How To Measure The Shock And Hardware Size On A MTB
– MTB Direct Australia The most accurate method for shock measurement: · Measure the eye to eye length · Attach a shock pump and slowly remove all the air from the shock … When looking to upgrade the shock on your mountain bike, all the numbers and measurements can get a little overwhelming. In this blog, we are going to cover what all those numbers mean and how you can work out what size shock and what size hardware you need to suit your bike. Before we begin The fastest and easiest way - Table of Contents:
Item added to your cart
Before we begin
In this blog we will cover
What you’ll need
How shock sizing works
Measuring eye to eye length
Measuring stroke length
Imperial vs metric sizing
All About Mounting Hardware
Types of shock mounts
How to measure your shock hardware
Measuring the width
Measuring the bolt diameter
Quick links
Info
About Us

– MTB Direct Australia
Suspension Tech: What do shock eye-to-eye, stroke & width measurements mean? – Bikerumor
- Article author: bikerumor.com
- Reviews from users: 23626 Ratings
- Top rated: 4.1
- Lowest rated: 1
- Summary of article content: Articles about Suspension Tech: What do shock eye-to-eye, stroke & width measurements mean? – Bikerumor The eye-to-eye measurement is the total length of your shock, as measured from the center of each mounting bolt hole on either end of the … …
- Most searched keywords: Whether you are looking for Suspension Tech: What do shock eye-to-eye, stroke & width measurements mean? – Bikerumor The eye-to-eye measurement is the total length of your shock, as measured from the center of each mounting bolt hole on either end of the … What do eye-to-eye, stroke & eyelet measurements mean on a mountain bike rear shock? It’s all about how it fits your frame, and it’s all explained here!
- Table of Contents:
See more articles in the same category here: 670+ tips for you.
How to Measure Shocks
Shock Measurement Guide
When ordering shocks for most vehicles, all you will need to do is enter your vehicle information into our shock finder and pick the best shock for your needs. Some vehicles do not have shocks built specifically for them, usually this is only the case with particularly rare vehicles or trim lines, or for custom applications. Vehicles with lowered or raised suspensions need different length shocks than a stock-height vehicle, and often there is not a shock built for the specific amount of lift or lowering your vehicle might have. In these cases, you will need to measure your vehicle to find the correct dimensions.
For lifted and lowered vehicles, there is often an easier way to find the correct shock for your vehicle than measuring the suspension. The best option, if you purchased a lift kit or lowering kit, is to contact the manufacturer of the kit and find out the recommended shock dimensions. If that is not possible, measuring the shocks that came packaged with your kit and finding a similarly sized shock will work.
How to Measure Shocks
A shock is measured by its extended and collapsed lengths, and is measured from the center of the loop mount or the base of the stud mount. To get the extended length of a shock, remove it from the vehicle and allow it to expand on its own or pull it to the fully extended position and take a measurement. To get the collapsed length of a shock, compress it by hand or by using a strap and take a measurement. With the expanded and collapsed lengths of your current shocks, you will be able to find a suitable shock for your custom application.
This shock has a length of approximately 25 inches.
This shock has a length of approximately 16 inches because the measurement is taken to the base of the mount, where the threading starts.
How to Measure a Vehicle for Shocks
Measuring your vehicle for shocks is a last resort if none of the other ways of finding a proper replacement shocks is available. To find the correct measurement for a shock absorber, you will need to measure from the center of a loop style mount and from the closest point on the mount for a stud type shock (since the shock is measured from the base of the stud, not the tip). To get the collapsed length measurement for your vehicle, you will need to compress your suspension fully. To do this, you can drive up a ramp with one side of the vehicle until the suspension is fully compressed or put a jack under one wheel to compress it *THIS CAN BE EXTREMELY DANGEROUS AND SHOULD ONLY BE DONE BY A COMPETANT, EXPERIENCED MECHANIC WITH A FULL ARRAY OF SAFETY EQUIPMENT. IF YOU ARE UNSURE IN ANY WAY ABOUT HOW TO PROPERLY JACK AND SECURE A VEHICLE, BRING IT TO A MECHANIC.* When looking for a shock, subtract half an inch from the compressed length to allow for bump stop compression.
To get the extended length of your suspension, you will need to jack and secure your vehicle and allow the suspension to drop. Jack the vehicle up until the wheel is off the ground, then lower it so the tire is just on the ground. Take a measurement with the suspension at this point. If your vehicle currently has shocks on it, you will need to remove them before measuring, as the shock could limit the suspension travel.
Once you have determined the correct size for your shocks, find one that is as close as possible to your measurements using one of the guides at the bottom of this page. Keep in mind that you may not find a shock that fits your vehicle exactly and that, if available, more travel (a shorter collapsed length and longer extended length) is preferable.
If you are looking for a replacement shock for a unique vehicle, be aware that it is very important to match the mounting points exactly between your vehicle and the shock absorber. A shock that does not fit correctly could have a reduced life or cause improper and dangerous handling characteristics.
Shock Lengths
Monroe Shock Lengths
KYB Shock Lengths
Off Road Shock Lengths
Bilstein 5125 Off Road Shocks
Bilstein 5150 External Reservoir Off Road Shocks
Bilstein 5165 Series Remote Reservoir Off Road Shocks
Mount codes
Often, the description of the type of upper and lower mounts on a shock are only listed by the manufacturer code for the mount. Below you will find a list of values to identify what each code means.
FOX MOUNTING CONFIGURATION TABLE Stem Bushing Mount SM1 .500 Stem Mount Kit, Tall Bushing, Long Stem (2.0 Factory Series) SM2 .500 Stem Mount Kit, Short Buhsing, Long Stem w/ Spacer SM3 .500 Stem Mount Kit, Short Bushing, Short Stem (2.0 Performance Series) Stem Mount w/ No Bushing S1 Short Stem: [1/2-20 Thread, 3.050 TLG] S2 Long Stem: [1/2-20 Thread, 3.350 TLG] Eyelet Bushing Mount EB1 Hourglass Bushing: 0.750 Inner Diameter x 1.300 TLG EB2 Hourglass Bushing: 0.625 Inner Diameter x 1.300 TLG EB3 Hourglass Bushing: 0.625 Inner Diameter x 1.460 TLG EB4 Hourglass Bushing: 0.750 Inner Diameter x 1.460 TLG Eyelet Sleeve Mount ES1 Sleeve: 0.478 Inner Diameter X 0.625 Outer Diameter X 1.500 TLG ES2 Sleeve: 0.506 Inner Diameter X 0.625 Outer Diameter X 1.375 TLG ES3 Sleeve: 0.506 Inner Diameter X 0.625 Outer Diameter X 1.480 TLG ES4 Sleeve: 0.482 Inner Diameter X 0.625 Outer Diameter X 1.545 TLG ES5 Sleeve: 0.478 Inner Diameter X 0.625 Outer Diameter X 1.250 TLG ES6 Sleeve: 0.478 Inner Diameter X 0.625 Outer Diameter X 1.750 TLG ES7 Sleeve: 0.478 Inner Diameter X 0.625 Outer Diameter X 1.438 TLG ES8 Sleeve: 0.478 Inner Diameter X 0.625 Outer Diameter X 2.045 TLG ES6 Sleeve: 0.560 Inner Diameter X 0.750 Outer Diameter X 1.625 TLG ES7 Sleeve: 0.560 Inner Diameter X 0.750 Outer Diameter X 1.675 TLG ES8 Sleeve: 0.560 Inner Diameter X 0.750 Outer Diameter X 1.313 TLG ES9 Sleeve: 0.560 Inner Diameter X 0.750 Outer Diameter X 1.880 TLG ES10 Sleeve: 0.630 Inner Diameter X 0.750 Outer Diameter X 2.280 TLG ES11 Sleeve: 0.630 Inner Diameter X 0.750 Outer Diameter X 1.375 TLG ES12 Sleeve: 0.510 Inner Diameter X 0.750 Outer Diameter X 1.490 TLG ES13 Sleeve: 0.560 Inner Diameter X 0.750 Outer Diameter X 1.550 TLG ES14 Sleeve: 0.560 Inner Diameter X 0.750 Outer Diameter X 2.045 TLG Bar Pin Mount BP1 Bar Pin: 3.100 TLG X 0.635 Outer Diameter X 2.818 Bolt Hole Span BP2 Bar Pin: 3.750 TLG X 0.635 Outer Diameter X 3.515 Bolt Hole Span BP3 Bar Pin: 3.250 TLG X 0.635 Outer Diameter X 3.060 Bolt Hole Span BP4 Bar Pin: 3.875 TLG X 0.635 Outer Diameter X 3.736 Bolt Hole Span BP5 Bar Pin: 3.875 TLG X 0.635 Outer Diameter X 3.736 Bolt Hole Span BP5 Bar Pin: 4.750 TLG X 0.760 Outer Diameter X 3.780 Bolt Hole Span BP6 Bar Pin: 4.750 TLG X 0.625 Outer Diameter X 3.938 Bolt Hole Span (-10 Heim) BP7 Bar Pin: 4.750 TLG X 0.750 Outer Diameter X 3.938 Bolt Hole Span (-12 Heim) BP8 Bar Pin: 3.875 TLG X 0.625 Outer Diameter X 3.341 Bolt Hole Span (-10 Heim) Clevis Mount C1 Clevis: 1.750 W X 2.130 L x 0.575 Thru Bolt Hole (Performance Series) C2 Clevis: 1.390 W X 2.270 L x 0.590 Thru Bolt Hole (Factory Series) C3 Clevis: 1.390 W X 2.400 L x 0.580 Thru Bolt Hole (Performance Series) C4 Clevis: 2770 W X 2.050 L x 0.635 Thru Bolt Hole (Performance Series) Eyelet Heim SB1 Spherical Bearing: -8, 0.500 Inner Diameter SB2 Spherical Bearing: -10, 0.625 Inner Diameter SB3 Spherical Bearing: -12, 0.750 Inner Diameter SB4 Spherical Bearing: -14, 0.875 Inner Diameter SB5 Spherical Bearing: -12, 0.750 Inner Diameter (2.0 Perfromance Series) Taper Pin Mount TP1 Taper Pin: 4.845 TLG X 0.712 Outer Diameter TP2 Taper Pin: 4.050TLG X 0.625 Outer Diameter OEM TM OEM Truck Top Mount
How To Measure The Shock And Hardware Size On A MTB
When looking to upgrade the shock on your mountain bike, all the numbers and measurements can get a little overwhelming. In this blog, we are going to cover what all those numbers mean and how you can work out what size shock and what size hardware you need to suit your bike.
Before we begin
The fastest and easiest way to work all this out is to do a bit of searching online. Most good bike manufacturers will list detailed specs on their website or in the bike’s manual, so you can save yourself a bit of messing around if you’re able to look it up. You might need to dive into the bike archive or their support pages to find info for older models though.
Unfortunately, some of the larger brands still tend to be rather reluctant to share this kind of info, so it’s still a good idea to know how to work it out yourself.
Got a Fox rear shock? You can use the 4 digit code to look up your shock info HERE
In this blog we will cover:
How shock sizing works
How to measure eye to eye and stroke length
Imperial vs metric sizing
All about mounting hardware
Bushing types
Shock mount types
How to measure your shock hardware
What you’ll need:
Ruler or tape measure
Set of vernier calipers (preferably digital)
Shock pump
Allen keys
How shock sizing works:
Shock measurements refer to two factors the overall length of the shock (measured from eyelet to eyelet) and how much it can be compressed (the stroke). If a shock is listed with the size 210x55mm this means it has an eye to eye length of 210mm and a stroke of 55mm.
Measuring eye to eye length
Simply measure from the centre of each shock eyelet to find the overall length of your shock.
Measuring stroke length
For coil shocks: Remove the spring and measure from where the shaft goes into the shock body to where the eye starts on the shaft.
For air shocks: In many cases, it’s possible to get an accurate stroke measurement by simply measuring from the lip of the wiper seal to the end of the air shaft. Rockshox even make this super easy and engrave the eye to eye and stroke length on some of their shocks. However, some shocks have their travel limited internally with travel reduction spacers (not to be confused with a volume reduction spacer), so you won’t always get an accurate measurement this way. The Float X2 on the Norco Sight in these images looks like it has a stroke of 55mm when measured externally, however, Norco has fitted it with a 2.5mm travel reduction spacer from the factory so the usable stroke is actually only 52.5mm.
The most accurate method for shock measurement:
Measure the eye to eye length Attach a shock pump and slowly remove all the air from the shock Compress the shock fully and measure the eye to eye length again Subtract this measurement from the initial eye to eye length to find the usable stroke
(ie. 185 – 132.5 = 52.5)
You’ll probably need a helper to compress the shock while you measure it, so another method is to get to step 3 above, push the sag ring up against the wiper seal, then re-inflate the shock and measure from the lip of the wiper seal to the sag ring. This should give you the same measurement without having to juggle too many things at once.
It’s important to note here that these numbers won’t tell you how much rear-wheel travel your frame has. That’s all down to the design and leverage ratio of your rear suspension. A 140mm and a 160mm bike could both use a shock with exactly the same size eye to eye and stroke length.
Also, keep in mind that two shocks that have the same eye to eye measurement could have a different stroke length. When upgrading, be sure to match up both the eye to eye and stroke length with your existing shock to avoid any issues.
Some frames do offer the potential to run a slightly longer stroke to eke out some extra travel (as people discovered by long shocking the Santa Cruz Hightower a few years back) but it’s not something we would recommend unless you really know what you’re doing. You’re getting into quite dicey territory from a warranty standpoint if anything goes wrong so our official stance will always be to stick with the original manufacturer spec.
Imperial vs metric sizing
Imperial
Historically, MTB shocks have been measured in inches or imperial measurements. Specific sizes were often requested by frame manufacturers to suit the unique requirements (ie. fix the problems) of particular suspension designs. Over the years a bewildering array of shock sizes were created all measured in inches, and fractions of an inch, with varying spring curves, and without any real logical progression in terms of dimensions or stroke length.
There is a lot of tech going on inside a shock and suspension manufacturers were often forced to squish all those complicated circuits and seals into shocks that weren’t quite large enough, making it difficult to keep up with the ever-increasing performance and reliability requirements of long-travel bikes. The 7.875 x 2.25″ (200 x 57mm) one of the most commonly used air shocks on enduro bikes was a particularly hard one to work with due to space restrictions compromising the placement of the internals, so its performance and reliability was never quite 100%.
There is also the small issue that most of the world outside of the US (and most of the bicycle industry) thinks in millimetres and it’s much harder to perform complex calculations using the imperial system.
Metric
In 2016 (The day before April Fool’s no less) Rockshox and a handful of other suspension brands announced the introduction of metric shocks as part of an industry-based initiative to create a more standardised and simplified approach to shock sizing. The new system wasn’t just about suddenly deciding to use a different system of measurement though; it introduced a new range of sizes with more logical, evenly spaced increments between each size and a consistent air spring curve across the whole range. If a brand decided to run a different sized shock on their bike, they wouldn’t have to redesign all their suspension kinematics as the spring rate would remain the same. The sizes were chosen in consultation with suspension and frame manufacturers to provide the most room to optimise the internals while making life a whole lot easier for frame designers, retailers, and consumers alike.
With metric sizing, eye to eye measurements increase in 20mm increments, and stroke lengths increase in 5mm increments (or 2.5mm with travel reduction spacers installed) which provides consistent air spring curves across all sizes. As part of the package they also revised shock hardware sizing to tidy up the mess of 80+ options to a much more sensible 18, while creating more freedom for the use of bearing or trunnion mounts for a better fit with particular suspension designs.
It’s important to note here that imperial and metric shocks aren’t interchangeable, and even though you’ll often see imperial sized shocks listed with the measurements converted to mm (ie. 7.875×2.25″ / 200x57mm), these aren’t actually metric shocks. It’s quite easy to spot these faux-metric sized shocks as they will normally have more random-looking numbers (ie. 200×57, 216×63) while metric sizing is much cleaner and doesn’t hurt your brain so much to look at (ie. 210×50, 230×60).
Imperial sized shocks are still available for purchase but the intention is for them to be phased out over a 4-5 year window, so things will be quite messy in the meantime with a mixture of sizing standards on the market. You will start to see decreased availability over the next couple of years, but imperial sizing will still be supported as long as the demand remains. There is no need to hock your faithful steed just yet.
All About Mounting Hardware
Shock mounting hardware (often called reducers) does not come with the shock and needs to be purchased separately. A standard hardware setup consists of an axle that is pressed into the shock’s eyelet, and spacers that slide over the axle to take up the space between the frame’s mounting tabs and the shock to create a tight fit without any play. The hardware could consist anywhere between 3-7 pieces depending on the brand and age of your setup. Shock hardware can be the same on both ends, different sizes, or could be replaced by a Trunnion mount, a bearing, a yoke, or an open eyelet on one end. You’ll need to know what you need before making a purchase so it’s a good idea to remove your shock and check things out first.
Another benefit to come with the transition to metric shock sizing is a simplification of the sizing for shock mounting hardware. Metric shock mounting bolts come in 6mm, 8mm, or 10mm diameter and the hardware changes in 5mm increments. Once the old school sizing gets phased out it’ll be simpler to work things out, and bike shops will find it easier to stock a full range of hardware sizes without having to resort to grinding and filing to remove those 0.1’s and 0.2’s of a mm to make things fit.
It is often possible to reuse your existing hardware when upgrading to a different brand of shock but different bushing types can vary in width and cause fitment issues when mixing brands. A mechanic in a workshop has the luxury of a trial and error approach to try out different combinations to find the best fit, but that’s something we don’t have the luxury of when shopping for bike parts online so it’s better to get it right the first time.
We highly recommend getting new hardware to match brands when purchasing a new shock to avoid any potential fitment issues that could cost you time off your bike!
Bushing Types: With a few exceptions (Cane Creek non-inline shocks have a 14.7mm eyelet and some older ones are 16mm), most modern shocks from the main brands have eyelets with a 15mm inner diameter and a 12.7mm (1/2″) width. A bushing is normally pressed in to provide a buffer between the eyelet and the hardware and wear over time so the shock eyelet doesn’t have to. They are an inexpensive part that is easy to replace.
Some shocks come with a metal bushing with a PTFE coating while others come with a beige coloured polymer bushing. On some shocks, the bushing will be exactly 12.7mm wide and sit flush with the eyelet, while others most notably Fox use a flanged polymer bushing that extends outside the eyelet. That extra width is what can cause problems if you try to mix and match hardware and bushing types between brands.
Types of shock mounts
15mm open eye: Literally just an eyelet with no bushing or hardware installed. Frames requiring this setup will come with their own proprietary hardware. If you buy a new shock you will need to remove the bushing from the eyelet before the shock can be installed.
Trunnion mount: Popular on frames with vertically mounted shocks. A Trunnion mount has a threaded hole on either side of the shock body which shortens the overall length while maintaining the stroke length. A shock with a trunnion-mount is 25mm shorter than the standard mount equivalent allowing for reduced standover height and greater flexibility with shock placement.
Bearing Mount: Some suspension designs that produce a large degree of rotation on one mount can benefit from using a sealed bearing in place of the standard bushing/hardware setup to reduce friction and provide a more supple feel. Manufacturers can choose to have this on the shaft end or the body end whichever end has the most rotation.
Yoke: A yoke is a strut that extends from the linkage to attach to the rear of the shock. Yokes are often found on Specialized FSR frames but also other brands such as Devinci. Due to the proprietary sizing found on Specialized frames upgrading the shock has only really been possible by purchasing a BikeYoke aftermarket to allow you to fit a standard-sized shock. Thankfully 2019+ Specialized models use standard metric sized shocks and they’ve done away with their proprietary sizing (hooray!)
If you’re a Specialized owner and need a BikeYoke to upgrade your shock, CLICK HERE
How to measure your shock hardware
For the most accurate readings, you’ll need a set of digital vernier calipers for this as they will give you a repeatable and accurate measurement. You’ll need to be accurate to within a 1/10mm so a ruler or tape measure isn’t going to cut the mustard.
Note that the shock mounting bolt comes with your frame and doesn’t come with the hardware. If you’ve managed to lose this you’ll need to contact your frame manufacturer (or a brand dealer) to source a new one.
Shock hardware is labelled first by the width of the hardware axle, and then by the diameter of the mounting bolt. 21.8 x 8mm hardware would be 21.8mm wide and take an 8mm bolt.
To work out your shock hardware sizing you will need to take these two measurements:
The width of the hardware axle, or the inner width of the shock mount tabs on the frame. The outer diameter of the shock mounting bolt, or the inner diameter of the bolt hole on the hardware.
Measuring the width
Measuring the bolt diameter
Hopefully now you’re skilled up with everything you need to know to upgrade the shock on your bike. If you’re still stuck and need a hand feel free to get in touch with our team at [email protected] or hit us up on live chat on the site and we’ll do our best to get you sorted.
Suspension Tech: What do shock eye-to-eye, stroke & width measurements mean?
When it comes to fork, it’s pretty easy to know what you’re getting should you upgrade. Just get a tapered steerer and match the axle type and the travel and you’re good to go.
With shocks, it’s a little trickier. OK, a lot trickier. There are more measurements to account for, and those aren’t always easy to determine. You’ll need to do a little research, or pull out the calipers and other tools. Here are the three basics and how to measure them…
EYE-TO-EYE
The eye-to-eye measurement is the total length of your shock, as measured from the center of each mounting bolt hole on either end of the shock. Which is among the easier things to measure, unless your shock’s mounts are rotated 90º from each other. Or it bolts directly into the yoke from its end rather than pivoting on a bolt and bearings. But, basically, this measurement refers to the effective overall length of your shock.
SHOCK STROKE
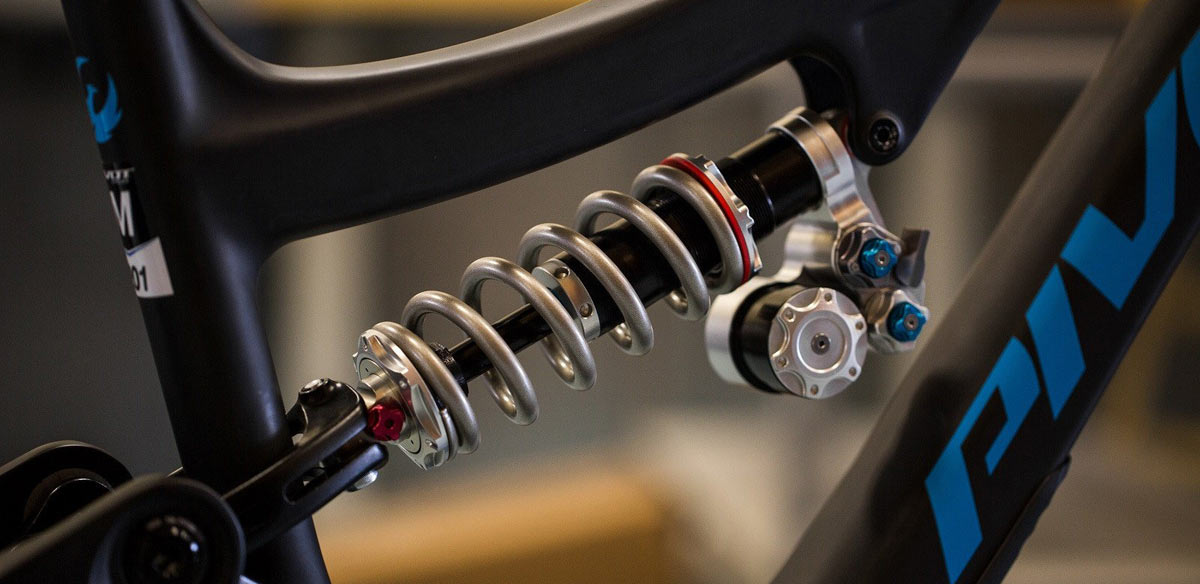
When it comes to shock stroke, which measures the total distance the shock compresses from fully extended to fully compressed, it depends on the type of shock you have. On coil shocks, it’s quite easy, says PUSH Industries’ Darren Murphy. Simply measure the exposed shaft. That means the smaller shaft that slides into the main body of the shock, which sits under the coil…so you’ll likely need to remove the coil to get an accurate measurement. So you’ll need to mark it’s location so you can get it back to the right preload setting.
But on air shocks, it’s not as simple. Technically, the “air spring” part of an air shock sits over the piston, just like a “coil spring”. The tricky part is that the air canister covers it. A lot of models use internal spacers to control the stroke. So you need to take the air can off to properly measure stroke by measuring the internal piston.
MOUNTING HARDWARE
The mounting hardware needs up to three measurements – bolt diameter, bolt length, and mounting width. And these might be different on either end of the shock. If you’re upgrading just the materials that sit between the shock and the bolt, you’ll need to know bearing or bushing width, diameter and thickness, too. Many times these are Igus bearing bushings, and they can sometimes help you find the right part. Or…
You can probably call or email your bike’s manufacturer to get their specs (if they’re not already listed on their website), or you can ask the suspension manufacturer which model you need as they’ve probably got a list, too. Regardless of which one you ask, it’s a good idea to inquire about the shock’s tune, too, as most every bike now has a custom tuned shock based on the frame’s leverage ratio and other parameters. Or, you know, have your local bike shop do that for you and order through them.
Huge thanks to Darren at PUSH Industries for helping us level up the answers and images this week! Hit that link to check out their ElevenSix coil-over shock to upgrade your long travel enduro or DH bike!
The fun never ends. Stay tuned for a new post each week that explores one small suspension tech, tuning or product topic. Check out past posts here. Got a question you want answered? Email us. Want your brand or product featured? We can do that, too.
So you have finished reading the how to measure motorcycle rear shock length topic article, if you find this article useful, please share it. Thank you very much. See more: motorcycle rear shock length chart, rear shock size chart, motorcycle shock length, motorcycle shock length chart, progressive shocks, stock dyna shock length, stock harley shock length, road glide stock shock length