
You are looking for information, articles, knowledge about the topic nail salons open on sunday near me how to open navigator in photoshop on Google, you do not find the information you need! Here are the best content compiled and compiled by the https://chewathai27.com team, along with other related topics such as: how to open navigator in photoshop Rotate canvas Photoshop, Navigator Photoshop, Fill is the standard zoom level in the Navigator panel, Workspace Photoshop, Photoshop Basic, How to rotate in Photoshop, Photoshop tutorial for beginners, Overscroll Photoshop
1 Choose Window > Navigator to open the Navigator panel. The Navigator panel. 2 Click an image to select it, then use the slider in the Navigator panel to adjust the zoom level in of image.The Navigator palette floats above your document and allows you to quickly move around and zoom in and out of your image. A little red box indicates which area of the image you’re currently viewing.
- Switch to ImageReady. This navigation bar image was made in Photoshop to take advantage of Photoshop’s wide range of image-editing features. …
- Create a Button Shape. Start by creating one tab-shaped button. …
- Move the Button. …
- Add Button Text. …
- Make a Layer Group. …
- Make Duplicate Buttons.
Contents
What is Navigator palette in Photoshop?
The Navigator palette floats above your document and allows you to quickly move around and zoom in and out of your image. A little red box indicates which area of the image you’re currently viewing.
How do I create a navigation bar in Photoshop?
- Switch to ImageReady. This navigation bar image was made in Photoshop to take advantage of Photoshop’s wide range of image-editing features. …
- Create a Button Shape. Start by creating one tab-shaped button. …
- Move the Button. …
- Add Button Text. …
- Make a Layer Group. …
- Make Duplicate Buttons.
How do I show the palette in Photoshop?
Note: If you ever find your Tools or Options palettes missing, go to Window in your Menu and select either Tools or Options from the list to reveal the palettes.
How do I get my panels back in Photoshop?
Tim’s Quick Answer: You can bring back any “missing” panels in Photoshop by choosing the panel by name from the Window menu. So in this case you can choose Window > Layers from the menu to bring up the Layers panel. More Detail: All of the various panels available in Photoshop can be found on the Window menu.
What are various tools in Photoshop?
- Zoom tool (Z) Zooms in or zooms out your image. …
- Hand tool (H) Moves your photo in the Photoshop Elements workspace. …
- Move tool (V) …
- Rectangular Marquee tool (M) …
- Elliptical Marquee tool (M) …
- Lasso tool (L) …
- Magnetic Lasso tool (L) …
- Polygonal Lasso tool (L)
What is the hand tool in Photoshop?
The Hand tool allows you to move your image while you’re zoomed in to more than 100% and part of the image is out of view. Select the Hand tool (H) from the tool bar or press and hold the spacebar key to temporarily switch to the Hand tool.
How do I use layers in Photoshop?
- Drag a layer up or down in the Layers panel to change the order of layered objects in the image.
- Click the Create a New Layer icon at the bottom of the layers panel to make a new layer. …
- To name a layer, double-click the current layer name.
What are the retouching tools in Photoshop?
The retouching tools in Adobe Photoshop are: Clone Stamp, Pattern Stamp, Healing Brush, Patch and Color Replacement.
How do I change my workspace in Photoshop?
Go up to the Window menu, choose Workspace, and then choose New Workspace. Or, click on the Workspace icon and choose New Workspace. In the New Workspace dialog box, enter the exact same name as the existing workspace.
How do I make Photoshop default layout?
- Select one of the tools from the toolbar. …
- If you’re on Windows, hold down Ctrl and click on the tool icon at the top. …
- Select the Reset All Tools option.
- Hit OK in the prompt on your screen and all of your tools will be reset.
How do I use the zoom tool in Photoshop?
- “Z” selects the Zoom Tool.
- Option -click (Mac) | Alt -click (Win) toggles the Zoom tool to Zoom In / Zoom out.
- Hold down the Spacebar and then add Option (Mac) | Alt (Win) to temporary access the Zoom In tool without having to switch to the Zoom tool.
What are the selection tools in Photoshop?
Adobe Photoshop also offers a number of selection tools: Quick Mask, Rectangular marquee, Elliptical marquee, Lasso, Polygonal Lasso, Magnetic Lasso, Magic Wand. The most efficient way to make a selection in Adobe Photoshop is to use Quick Mask mode.
Photoshop navigator panel how to get it digital painting tips for artists – YouTube
- Article author: www.youtube.com
- Reviews from users: 30273
 Ratings
 - Top rated: 4.3
- Lowest rated: 1
- Summary of article content: Articles about Photoshop navigator panel how to get it digital painting tips for artists – YouTube Updating …
- Most searched keywords: Whether you are looking for Photoshop navigator panel how to get it digital painting tips for artists – YouTube Updating How to find and use the navigator bar in Photoshop. I am using Photoshop CS6 in the video but I have tested this on Adobe Photoshop CC latest version at the …photoshop navigator panel, navigator bar, photoshop cs6, navigator panel, disappeared, navigator dissapeared, vanished, gone, get navigator back, adobe, elements, elements navigator panel, how to use, how to use navigator, what is navigator, photoshop navigation, photoshop windows, tutorials, digital art tips, digital painting tips, tips and tricks, photoshop tutorial, photoshop artists, photoshop basics, beginners, learn digital art, photoshop options, photoshop features
- Table of Contents:

Photoshop Hidden Gem: The Navigator Panel – YouTube
- Article author: www.youtube.com
- Reviews from users: 19177 Ratings
- Top rated: 3.9
- Lowest rated: 1
- Summary of article content: Articles about Photoshop Hidden Gem: The Navigator Panel – YouTube Updating …
- Most searched keywords: Whether you are looking for Photoshop Hidden Gem: The Navigator Panel – YouTube Updating By A.J. W.video, chia sẻ, điện thoại có máy ảnh, điện thoại quay video, miễn phí, tải lên
- Table of Contents:

The Navigator Palette – Adobe® Photoshop® CS2 Studio Techniques [Book]
- Article author: www.oreilly.com
- Reviews from users: 41940 Ratings
- Top rated: 4.3
- Lowest rated: 1
- Summary of article content: Articles about The Navigator Palette – Adobe® Photoshop® CS2 Studio Techniques [Book] Updating …
- Most searched keywords: Whether you are looking for The Navigator Palette – Adobe® Photoshop® CS2 Studio Techniques [Book] Updating The Navigator Palette If you do a lot of detail work where you need to zoom in on your image as if you’re wearing glasses as thick as Coke bottles, … – Selection from Adobe® Photoshop® CS2 Studio Techniques [Book]
- Table of Contents:
About O’Reilly
Support
International
Download the O’Reilly App
Watch on your big screen
Do not sell my personal information
Don’t leave empty-handed
Three Ways to Help Navigate Documents in Photoshop CC – YouTube
- Article author: www.youtube.com
- Reviews from users: 21643 Ratings
- Top rated: 3.6
- Lowest rated: 1
- Summary of article content: Articles about Three Ways to Help Navigate Documents in Photoshop CC – YouTube Updating …
- Most searched keywords: Whether you are looking for Three Ways to Help Navigate Documents in Photoshop CC – YouTube Updating This week’s episode gives three tips for navigating documents in Photoshop. For more in-depth tutorials, training, techniques and shortcuts for working with …photoshop, adobe photoshop, adobe photo shop, photo shop, photoshop cc, how to photoshop, photoshop tutorial
- Table of Contents:

Adobe Photoshop – Building a Navigation Bar : Adobe Photoshop
- Article author: www.brainbell.com
- Reviews from users: 5551 Ratings
- Top rated: 3.2
- Lowest rated: 1
- Summary of article content: Articles about Adobe Photoshop – Building a Navigation Bar : Adobe Photoshop Updating …
- Most searched keywords: Whether you are looking for Adobe Photoshop – Building a Navigation Bar : Adobe Photoshop Updating Adobe Photoshop – Building a Navigation Bar Adobe Photoshop tutorial
- Table of Contents:
How to use the Navigator Panel in Photoshop
- Article author: www.photoshopessentials.com
- Reviews from users: 33483 Ratings
- Top rated: 4.8
- Lowest rated: 1
- Summary of article content: Articles about How to use the Navigator Panel in Photoshop The Navigator panel is not part of Photoshop’s default workspace, which means we need to open it ourselves. So to open it, go up to the Window menu in the Menu … …
- Most searched keywords: Whether you are looking for How to use the Navigator Panel in Photoshop The Navigator panel is not part of Photoshop’s default workspace, which means we need to open it ourselves. So to open it, go up to the Window menu in the Menu … Learn how Photoshop’s Navigator panel makes it easy to zoom and pan images, and why it’s perfect for navigating your images when you’re zoomed in!
- Table of Contents:
Opening an image
Where do I find the Navigator panel
A quick tour of the Navigator panel
How to resize the Navigator panel
The view box
Zooming with the slider bar
Dragging the view box to pan the image
The Zoom in and Zoom Out icons
Entering a specific zoom value
Zooming with the hidden scrubby slider
Dragging a view box manually
How to change the view box color
How to hide the Navigator panel

How to open navigator in photoshop_
- Article author: www.thepicpedia.com
- Reviews from users: 43956 Ratings
- Top rated: 4.1
- Lowest rated: 1
- Summary of article content: Articles about How to open navigator in photoshop_ To he or show all panels, including the Tools panel and Control panel, press Tab. To … …
- Most searched keywords: Whether you are looking for How to open navigator in photoshop_ To he or show all panels, including the Tools panel and Control panel, press Tab. To … To open the Navigator panel, choose Window→Navigator. The panel opens in a floating window, as shown in this figure. At the upper right adjacent to the
- Table of Contents:
What is the shortcut key for maximizing canvas area in Photoshop
Where is the layer palette in Photoshop
How do I show the palette in Photoshop
Can I get pattern preview on a 2020 Photoshop
How do I scale a pattern in Photoshop 2021
How do I make a repeating pattern in Photoshop 2021
Where is quick actions in Photoshop 2021
What does ctrl t do in Photoshop
How do I find actions in Photoshop
Which Photoshop is best
What is the fastest way to hide or show any panels in Photoshop
Adblock Detected
How To Use The Navigator Panel In Photoshop
- Article author: www.photoshopessentials.com.cach3.com
- Reviews from users: 18285 Ratings
- Top rated: 4.1
- Lowest rated: 1
- Summary of article content: Articles about How To Use The Navigator Panel In Photoshop The Navigator panel lets us view our image and change its zoom level, just like we can in the document window. We can manually zoom in on any part of our image … …
- Most searched keywords: Whether you are looking for How To Use The Navigator Panel In Photoshop The Navigator panel lets us view our image and change its zoom level, just like we can in the document window. We can manually zoom in on any part of our image … Learn how Photoshop’s Navigator panel makes it easy to zoom and pan images, and why it’s perfect for navigating your images when you’re zoomed in!
- Table of Contents:
What Is The Use Of Navigator Palette In Photoshop? – DW Photoshop
- Article author: dwphotoshop.com
- Reviews from users: 37123 Ratings
- Top rated: 3.8
- Lowest rated: 1
- Summary of article content: Articles about What Is The Use Of Navigator Palette In Photoshop? – DW Photoshop What Are The Navigation Tools In Adobe Photoshop? … If you want to open it, go to the Menu Bar and then to the Window menu. …
- Most searched keywords: Whether you are looking for What Is The Use Of Navigator Palette In Photoshop? – DW Photoshop What Are The Navigation Tools In Adobe Photoshop? … If you want to open it, go to the Menu Bar and then to the Window menu.
- Table of Contents:
Where Is The Navigator Palette In Photoshop
What Are Photoshops Used For
What Is The Use Of History Palette In Photoshop
What Are The Navigation Tools In Adobe Photoshop
What Are The Two Types Of Navigation Tools In Photoshop
How Do I Get The Navigator Window In Photoshop
What Is The Navigator Panel In Photoshop
What Is History Log In Photoshop
What Happens When You Click A Status In The History Palette In Photoshop
Watch What Is The Use Of Navigator Palette In Photoshop Video
Using the Navigator panel – Photoshop Video Tutorial | LinkedIn Learning, formerly Lynda.com
- Article author: www.linkedin.com
- Reviews from users: 14811 Ratings
- Top rated: 4.2
- Lowest rated: 1
- Summary of article content: Articles about Using the Navigator panel – Photoshop Video Tutorial | LinkedIn Learning, formerly Lynda.com Photoshop offers a Navigator panel that lets you zoom and pan the image on the screen. Drag the red rectangle to pan; … Switching between open images. …
- Most searched keywords: Whether you are looking for Using the Navigator panel – Photoshop Video Tutorial | LinkedIn Learning, formerly Lynda.com Photoshop offers a Navigator panel that lets you zoom and pan the image on the screen. Drag the red rectangle to pan; … Switching between open images. Photoshop offers a Navigator panel that lets you zoom and pan the image on the screen. Drag the red rectangle to pan; Ctrl-drag or Command-drag to zoom. Resize the Navigator panel for a bigger preview. Press the Ctrl or Command key and scrub the zoom value in the bottom-left corner of the panel to zoom on-the-fly.
- Table of Contents:
From the course Photoshop One-on-One Fundamentals
Using the Navigator panel
Practice while you learn with exercise files
Download courses and learn on the go
Contents

Photoshop Elements > Navigation > 4 – Navigator Panel
- Article author: www.photokaboom.com
- Reviews from users: 15669 Ratings
- Top rated: 4.1
- Lowest rated: 1
- Summary of article content: Articles about Photoshop Elements > Navigation > 4 – Navigator Panel The Navigator panel may be in the panel bin on the right se of your screen. If the panel isn’t open, click the Navigator tab. …
- Most searched keywords: Whether you are looking for Photoshop Elements > Navigation > 4 – Navigator Panel The Navigator panel may be in the panel bin on the right se of your screen. If the panel isn’t open, click the Navigator tab.
- Table of Contents:
Open the Navigator Panel
Map
Zoom
Moving Around
More
See more articles in the same category here: 670+ tips for you.
Adobe® Photoshop® CS2 Studio Techniques [Book]
The Navigator Palette
If you do a lot of detail work where you need to zoom in on your image as if you’re wearing glasses as thick as Coke bottles, you should love the Navigator palette (Figure 1.16). The Navigator palette floats above your document and allows you to quickly move around and zoom in and out of your image. A little red box indicates which area of the image you’re currently viewing. By dragging this box around the miniature image of your document that appears in the Navigator palette, you can change which area you’re viewing in the main image window. You can also just click outside the red box and the box will center itself on your cursor.
Figure 1.16. The Navigator palette.
Building a Navigation Bar : Adobe Photoshop
In this tutorial you’ll learn a variety of techniques for creating visually exciting graphics that support and enhance navigation.
If you’re not familiar with Photoshop then read this tutorial New file for the Web before working on this tutorial.
Navigation is the most important graphic element in a Web site. A good navigation scheme is one that is both easy to find on every page and easy to use. It communicates clearly and simply where the viewer is in the site, where she can go from that point, and how to get there.
Add a set of matching buttons to a navigation bar.
Switch to ImageReadyThis navigation bar image was made in Photoshop to take advantage of Photoshop’s wide range of image-editing features. You could continue to use Photoshop to add buttons to this bar, but we recommend you switch to ImageReady for that purpose to make use of ImageReady’s exclusive object-oriented tools (the Tab Rectangle tool, Smart Guides, multiple layer selection, layer groups, Move tool variations, and more).
With the file open in Photoshop, click the Edit in ImageReady button at the bottom of the Photoshop toolbox. ImageReady launches, and the open file is automatically moved to ImageReady. You’ll work in ImageReady for the rest of this project.Create a Button ShapeStart by creating one tab-shaped button. Select the Tab Rectangle tool in the ImageReady toolbox A. In the Options bar, make sure the Shape Layer icon is selected B. Set the button’s size by checking Fixed Size and entering Width: 106 px and Height: 24 px C. Set the button’s style by clicking the arrow on the Style field and choose Glass Table Cool style or just choose a different style. Select the Background layer in the Layers palette. Then click in the image to create a button on a new shape layer E. Give the layer a meaningful name by double-clicking Layer 1 and typing button 1 in its place F.
You can hide the blue border that appears around your new button by choosing View>Show>Layer Edges.
3. Move the Button
Now you’ll turn the button upside down and hang it from the navigation bar. Select the Move Tool in the toolbox A, and make sure the Layer Select tool is highlighted in the Options bar B. This variation of the Move tool automatically selects the layer or layer group that contains the object you click on in the image. Click on the button you just made to automatically select the button 1 layer. Choose Edit>Transform>Flip Vertical to invert the button. Click and drag the button into position under the navigation bar’s overhang C.
4. Add Button Text
Select the Type tool in the ImageReady toolbox. In the Options bar, set Font Family to Arial Narrow or a similar font A, set Font Size to around 14 px B, and set Font Color to black C. Click on the button in the image and type home. This creates a new home type layer above the button 1 layer. Don’t worry about where the text is positioned on the button for now.
5. Make a Layer Group
With the home type layer selected, hold the Shift key and click the button 1 layer in the Layers palette, so that both layers are selected A. Then choose Layer>Group Layers from the main menu bar. This gathers the two layers into a layer group labeled Group 1 B. Now that the button and text are grouped, it will be easy to duplicate them as a unit.
6. Make Duplicate Buttons
Duplicate button 1 along with its text by Control/right-clicking Group 1 in the Layers palette and choosing Duplicate Layer Group from the menu that appears in following image. You won’t see the duplicate button in the image yet because it is located directly on top of the original button.
You can select more than one layer at a time-but only in ImageReady, not Photoshop. To select multiple layers, Shift-click if the layers are next to one another in the Layers palette; Command/Ctrl-click if they are not.
Select the Move tool, and make sure its Layer Select tool variation is highlighted in the Options bar. Click on the button in the image and drag to the right to move the duplicate button and its text B.
Notice the light blue lines that appear and disappear as you move the button C. These are Smart Guides-temporary alignment guides that display automatically when you move an object. Use them to align the buttons horizontally as you drag. Release the mouse when a vertical Smart Guide appears in between the two buttons, indicating that they are no longer overlapping.
Layer Groups vs. Layer Sets.
ImageReady layer groups are similar to layer sets, but more useful for working with objects, because of the way layer groups react to the Move tool variations-the Layer Select tool and the Direct Select tool. If an object is on a layer that’s included in a layer group, clicking on the object with the Layer Select tool selects the entire layer group, while clicking with the Direct Select tool selects only the layer. If an object is on a layer that’s in a layer set, both tools select the layer, but not its set.Repeat this step five more times until you have a total of seven layer groups and seven buttons, all displaying the label home D.
7. Change the Button Text
Select the Type tool and click and drag to highlight the word home on the second button from the left. Type the word Info instead. Repeat this step on each button, renaming the next five buttons: tours, stories, pictures, booking, and links.
8. Edit Multiple Layers at Once
You can save time by editing multiple layers together. Command/Ctrl-click on each of the seven type layers in the Layers palette to select them all A. Open the Character palette (Window>Character). With the Type tool selected, click the All Caps icon in the Character palette to make all the button labels uppercase.
You must click directly on the word home to select the corresponding type layer so you replace that text. Otherwise you’ll create a new type layer. If that happens, use the History palette to back up and try again.Align Text to ButtonsNow align each text label to its button. Start with the home button. Shift-click the home type layer and the button 1 layer to select them both in the Layers palette A. Select the Move tool in the Options bar. Click the Align Layer Horizontal Centers button to move the text to the horizontal center of the button B. Then click the Align Layer Vertical Centers button to move the text to the vertical center of the button C. Repeat this step on each of the six remaining pairs of button and text.
by updated
Congratulations! You’ve created a navigation bar of matching buttons and text with a minimum of fuss. The file is still in PSD (Photoshop Document format), which is a good format in which to save the source file because it retains program features like layers. However, this image is not ready to upload to the Web, because Web browsers cannot display a PSD file. The file must first be converted to a Web-ready format, like JPEG or GIF (Learn GIF Optimization Settings and JPEG Optimization Settings ).
How to use the Navigator Panel in Photoshop
How to use the Navigator Panel in Photoshop
This tutorial shows you how to use the Navigator panel in Photoshop to zoom and pan images, and why the Navigator panel is like having the Zoom Tool and the Hand Tool rolled into one!
Written by Steve Patterson.
So far in this series on navigating images in Photoshop, we’ve learned how to zoom in and zoom out of an image with the Zoom Tool and how to pan or scroll an image using the Hand Tool. But Photoshop also includes a Navigator panel designed specifically for zooming and panning. In fact, the Navigator panel is a lot like having the Zoom Tool and the Hand Tool rolled into one. Let’s see how it works.
I’m using Photoshop 2022 but any recent version will work. To get the most from this lesson, be sure to read through the first tutorial in this series to learn the basics of zooming and panning images before you continue.
Let’s get started!
Opening an image
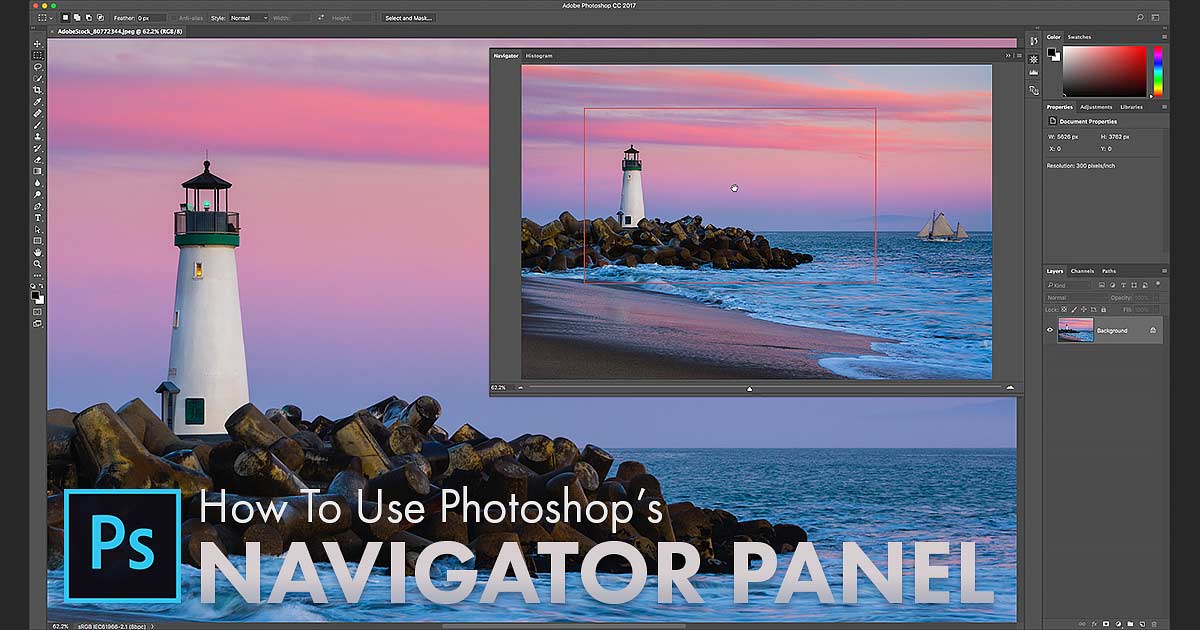
You can follow along by opening any image in Photoshop. I’ll use this image from Adobe Stock.
An image newly opened in Photoshop.
Where do I find the Navigator panel?
The Navigator panel is not part of Photoshop’s default workspace, which means we need to open it ourselves. So to open it, go up to the Window menu in the Menu Bar.
Opening the Window menu.
Here you’ll find a list of all the panels available in Photoshop. Click the Navigator panel to open it.
Opening the Navigator panel.
The Navigator panel opens in the secondary panel column to the left of the main column. And these panels are displayed only as icons until we click on an icon to expand it.
The Navigator panel opens in the secondary panel column.
A quick tour of the Navigator panel
Photoshop’s Navigator panel is pretty simple. There’s a main preview window surrounded by a red outline (which we’ll come back to in a moment) where we see the image.
The current zoom level is displayed in the lower left of the panel. And a slider bar along the bottom lets us change the zoom level by dragging the slider left or right.
Photoshop’s Navigator panel.
How to resize the Navigator panel
But the first thing you’ll probably want to do is make the Navigator panel larger. And you can resize it by clicking and dragging the bottom left corner outward.
Dragging the bottom left corner to resize the Navigator panel.
The view box
The red outline around the image in the preview window is the view box. The box surrounds the section of the image that’s visible in Photoshop’s main document window at the current zoom level.
Since I’m zoomed out far enough to see my entire image in the document window, the box is surrounding the entire image.
The red outline is the view box.
Zooming with the slider bar
But if I zoom in on the image by dragging the bottom slider to the right, the view box shrinks to surround just the area I’m zoomed in to.
This makes it easy to keep track of exactly which part of the image you’re looking at in the document window since the entire image is always visible in the Navigator panel.
The view box in the preview window resizes as you zoom in closer.
Dragging the view box to pan the image
Once you’re zoomed in, you can pan around the image to inspect different areas by clicking inside the view box in the preview window and dragging it to different spots.
Here I’ve dragged the box around the sailboat on the right, which lets me view that part of the image in the document window.
Drag the outline to pan or scroll around the image.
The Zoom in and Zoom Out icons
Along with dragging the slider, you can zoom in by clicking the large mountain icon to the right of the slider, or zoom out by clicking the smaller mountain icon on the left.
Click the mountain icons to zoom in and out.
Entering a specific zoom value
You can also change the zoom level by highlighting the current value in the lower left, entering a new value, and then pressing Enter on a Windows PC or Return on a Mac.
Enter specific zoom values in the lower left.
Zooming with the hidden scrubby slider
And here’s a couple of tricks to use with the Navigator panel. First, if you hover your mouse cursor over the zoom level in the lower left, and press and hold the Ctrl (Win) / Command (Mac) key on your keyboard, your cursor will change to a scrubby slider. You can then click and drag left or right with the scrubby slider to zoom in or out.
Hold Ctrl (Win) / Command (Mac) to access the scrubby slider.
Dragging a view box manually
Or if you press and hold the Ctrl (Win) / Command (Mac) key and hover over the image in the preview window, your cursor will change to a magnifying glass.
But instead of clicking to zoom in like you would with the Zoom Tool, you can click and drag a view box around whatever it is you want to zoom in on.
Holding Ctrl (Win) / Command (Mac) and dragging around an area to zoom in.
How to change the view box color
If you’re having trouble seeing the view box in front of your image, you can change its color by clicking the Navigator panel’s menu icon in the upper right:
Clicking the menu icon.
Choosing Panel Options:
Opening the Panel Options.
And then choosing a new color in the Panel Options dialog box, either from the list of presets or by clicking the color swatch and choosing one from the Color Picker.
The Panel Options dialog box.
How to hide the Navigator panel
Finally, to hide the Navigator panel when you’re done, just click its icon in that secondary panel column.
Click the icon to hide the Navigator panel.
Where to go next…
And there we have it! In the next lesson in this Navigating Images in Photoshop series, we’ll learn how a relatively new feature in Photoshop known as Overscroll lets us pan an image even when it already fits on the screen! Or visit my Photoshop Basics section for more topics for beginners!
So you have finished reading the how to open navigator in photoshop topic article, if you find this article useful, please share it. Thank you very much. See more: Rotate canvas Photoshop, Navigator Photoshop, Fill is the standard zoom level in the Navigator panel, Workspace Photoshop, Photoshop Basic, How to rotate in Photoshop, Photoshop tutorial for beginners, Overscroll Photoshop