
You are looking for information, articles, knowledge about the topic nail salons open on sunday near me how to paint fiberboard ceiling tiles on Google, you do not find the information you need! Here are the best content compiled and compiled by the https://chewathai27.com team, along with other related topics such as: how to paint fiberboard ceiling tiles how to paint drop ceiling tiles, how to paint ceiling tiles, spray paint drop ceiling tiles, painting old 12×12 ceiling tiles, best paint for drop ceiling tiles, paint ceiling tiles before and after, how to paint acoustic ceiling tiles, painting ceiling tiles ideas
Contents
Can you paint fiber ceiling tiles?
Things You’ll Need
If the tiles are fiberglass, or laminated with Mylar or vinyl, you can’t; but it’s fine to paint their mineral fiber tiles, as well as the metal grid variety. The Armstrong company realizes that over time, customers may want to repaint when tiles get dingy or stained.
What paint can you use on ceiling tiles?
Typically, for ceiling tiles, you will use spray paint or flat-latex paint. Except for wood tiles. It is also easier to apply your paint with a sprayer rather than a brush or roller. However, a good brush and roller are great options too.
How do you paint cardboard ceiling tiles?
Pour some wall paint into a pan. Dip and roll the paint roller into the pan; begin painting the cardboard ceiling tiles. Apply even coats to each tile, according to Painter Click. Don’t paint the edges, just the exposed sides.
Can you paint plastic ceiling tiles?
Plastic tile paneling is inexpensive and durable but it does not fit every decor. While removing it can be expensive, time consuming and messy, it’s not your only option. Thanks to the advent of adhesion primers, you can paint over plastic tile and be confident that the look will last for years.
How can I make my ceiling tile look better?
…
even turn them into a legitimate design statement.
- Paint them. …
- Cover them with drywall. …
- Replace them with tin. …
- Wallpaper them. …
- Cover them with wood. …
- Minimize the grid.
How do you paint old ceiling tiles?
Remove your tiles from the ceiling grid by lifting them up and turning them on edge, then sliding them down and out of the grid. Clean the ceiling tile grid with a sponge and a solution of warm water and dish detergent. If the grid has any chips or discoloration, apply a coat of spray paint in the color of your choice.
Can you paint over polystyrene ceiling tiles?
Most gloss paints are incompatible with polystyrene and it is not therefore practicable to use such paint as a first coating on polystyrene tiles. But it is possible to use paint of this kind on top of emulsion paint and it is tempting to do this on kit~hen and bathroom ceilings in order to provide a wipeable surface.
How do you paint a drop ceiling tile?
- Prop up a few ceiling tiles with furring strips.
- Using a large paintbrush, paint the edges and the frame holding the tiles.
- Once paint is dry, drop the tile back.
- Using a roller, apply paint to the middle of the tile.
Can you paint ceiling grid tiles?
The metal grid can be repainted, and the tiles can be painted or replaced. Painting a ceiling grid is a bit trickier than painting a wall, but it’s an easy afternoon project.
Can acoustic ceiling tiles be painted?
Coat yes, paint no! Traditional paint will fill the pores in acoustical ceiling tiles therefore voiding its sound dampening qualities. Alpine Painting can apply a specialty coating, such as ProCoat, made for acoustical ceiling tiles.
How much does it cost to paint a ceiling grid?
It’ll cost you anywhere from $0.50 to $3.00 per square foot to paint a ceiling. For smaller projects, like a single room, expect pricing to increase to $1 and up per square foot. Smaller jobs tend to cost more per square foot because of overhead costs, like fuel, insurance, travel and most supplies.
How do you revamp a drop ceiling?
Just remove old ceiling panels from the grid, snap on EASY UP clips, and slide planks into place, securing them with the clips. Remember to stagger the planks to reduce waste and create a more natural finish. Easily upgrade an outdated 2×4 ceiling to a more modern design with 2×2 ceiling panels.
How do you update ceiling tiles?
For a quick update, pop old tiles out of the ceiling grid and replace with fresh ones. If your grid holds 24″ x 48″ tiles, try a “scored” product that’s designed to look like 24″ x 24″ panels. With this style, you won’t need to purchase additional cross tees – just pop out the old ceilings and place in the new.
Can false ceiling be painted?
To paint your false ceiling, it’s best to use flat paint for the ceiling tiles and semi-gloss paint for the metal gridding. You should also use a metal primer on the gridding beforehand. Primer will prevent oxidation and will ensure an even paint coat.
Can you paint over polystyrene ceiling tiles?
Most gloss paints are incompatible with polystyrene and it is not therefore practicable to use such paint as a first coating on polystyrene tiles. But it is possible to use paint of this kind on top of emulsion paint and it is tempting to do this on kit~hen and bathroom ceilings in order to provide a wipeable surface.
Can you cover polystyrene ceiling tiles?
Never ever should you plaster over polystyrene tiles.
Is it safe to paint asbestos ceiling tiles?
As previously mentioned, as long as you do not remove or disturb your asbestos ceiling tiles, then it is safe to cover them up.
Can you paint drop ceiling grid?
Suspended ceilings are a common fixture in homes and offices. These ceilings are installed easily and are durable, sometimes so durable that decorating trends change and leave older ceilings behind. The metal grid can be repainted, and the tiles can be painted or replaced.
How to Paint Armstrong Ceiling Tile | eHow
- Article author: www.ehow.com
- Reviews from users: 33301
 Ratings
 - Top rated: 3.4
- Lowest rated: 1
- Summary of article content: Articles about How to Paint Armstrong Ceiling Tile | eHow Updating …
- Most searched keywords: Whether you are looking for How to Paint Armstrong Ceiling Tile | eHow Updating You can paint some types of Armstrong acoustical ceiling tiles. If the tiles are fiberglass, or laminated with Mylar or vinyl, you can’t; but it’s fine to paint their mineral fiber tiles, as well as the metal grid variety.
- Table of Contents:
Spraying Armstrong Ceilings
Step 1
Step 2
Step 3
Step 4
Rolling Armstrong Ceiling Tiles
Step 1
Step 2
Step 3
How to Paint Armstrong Ceiling Tile | eHow
- Article author: ecopaintmyhouse.com
- Reviews from users: 17130 Ratings
- Top rated: 3.9
- Lowest rated: 1
- Summary of article content: Articles about How to Paint Armstrong Ceiling Tile | eHow Updating …
- Most searched keywords: Whether you are looking for How to Paint Armstrong Ceiling Tile | eHow Updating You can paint some types of Armstrong acoustical ceiling tiles. If the tiles are fiberglass, or laminated with Mylar or vinyl, you can’t; but it’s fine to paint their mineral fiber tiles, as well as the metal grid variety.
- Table of Contents:
Spraying Armstrong Ceilings
Step 1
Step 2
Step 3
Step 4
Rolling Armstrong Ceiling Tiles
Step 1
Step 2
Step 3
How to Paint Cardboard Ceiling Tiles | eHow
- Article author: www.ehow.com
- Reviews from users: 39497 Ratings
- Top rated: 4.0
- Lowest rated: 1
- Summary of article content: Articles about How to Paint Cardboard Ceiling Tiles | eHow Updating …
- Most searched keywords: Whether you are looking for How to Paint Cardboard Ceiling Tiles | eHow Updating Today, ceiling tiles are made of several materials including recycled material, fiberglass, wood and metal. If you have old tiles on one or more of your ceilings, they're likely made of cardboard. Years ago, that was the commonly-used material. Cardboard ceiling tiles can become soiled and stained over time.
- Table of Contents:
Step 1
Step 2
Step 3
Step 4
How to Paint Ceiling Tiles in a Drop Ceiling – YouTube
- Article author: www.youtube.com
- Reviews from users: 48563 Ratings
- Top rated: 3.2
- Lowest rated: 1
- Summary of article content: Articles about How to Paint Ceiling Tiles in a Drop Ceiling – YouTube Updating …
- Most searched keywords: Whether you are looking for How to Paint Ceiling Tiles in a Drop Ceiling – YouTube Updating ¾ Paint roller cover https://amzn.to/2z6EsNt9” roller frame https://amzn.to/3abwdwwPaint pan https://amzn.to/2RJUN0ZPan liners https://amzn.to/3crQD5F3” Angl…paint ceiling tiles, paint drop ceiling
- Table of Contents:

Can you paint fiberboard ceiling? – TheKnowledgeBurrow.com
- Article author: theknowledgeburrow.com
- Reviews from users: 33927 Ratings
- Top rated: 3.7
- Lowest rated: 1
- Summary of article content: Articles about Can you paint fiberboard ceiling? – TheKnowledgeBurrow.com Only use latex (water-based) paint on the tiles. Are there any good mineral fiber ceiling tiles? …
- Most searched keywords: Whether you are looking for Can you paint fiberboard ceiling? – TheKnowledgeBurrow.com Only use latex (water-based) paint on the tiles. Are there any good mineral fiber ceiling tiles?
- Table of Contents:
Can you paint fiberboard ceiling
How do you paint old fiber ceiling tiles
What kind of ceiling tiles do I need for a commercial space
Post navigation
Can a soft fiberboard ceiling be painted? | Hometalk
- Article author: www.hometalk.com
- Reviews from users: 35954 Ratings
- Top rated: 4.7
- Lowest rated: 1
- Summary of article content: Articles about Can a soft fiberboard ceiling be painted? | Hometalk The fiberboard on the ceiling is similar to homasote and I want to know if it can be painted? … Yes. I would prime it first. It will suck up paint. … Yes. I … …
- Most searched keywords: Whether you are looking for Can a soft fiberboard ceiling be painted? | Hometalk The fiberboard on the ceiling is similar to homasote and I want to know if it can be painted? … Yes. I would prime it first. It will suck up paint. … Yes. I … The fiberboard on the ceiling is similar to homasote and I want to know if it can be painted?
- Table of Contents:
How to Paint Old Ceiling Tiles | Home Guides | SF Gate
- Article author: homeguides.sfgate.com
- Reviews from users: 40816 Ratings
- Top rated: 4.2
- Lowest rated: 1
- Summary of article content: Articles about How to Paint Old Ceiling Tiles | Home Guides | SF Gate Open the all-in-one primer/paint, if painting tin tiles, and stir with a paint stir stick. Pour some of the primer/paint into a paint tray. Apply primer to the … …
- Most searched keywords: Whether you are looking for How to Paint Old Ceiling Tiles | Home Guides | SF Gate Open the all-in-one primer/paint, if painting tin tiles, and stir with a paint stir stick. Pour some of the primer/paint into a paint tray. Apply primer to the … How to Paint Old Ceiling Tiles. Ceiling tiles, whether the tin vintage style or the acoustic tiles used in drop ceilings, benefit from a fresh coat of paint once in a while. Tin ceiling tiles may just need a fresh color or coating to hide chipped paint. Acoustic tiles become stained from leaking water or moisture or …
- Table of Contents:
1 Remove the Ceiling Tiles
2 Clean the Ceiling Tiles
3 Prep the Ceiling Tiles
4 Prime Ceiling Tiles
5 Paint Ceiling Tiles
How to grow your own herb garden in any indoor or outdoor space
How to Paint Acoustical Tile
How to Refurbish Vintage Pressed Metal Tiles
How to Clean Decorative Metal Tile
Acoustic Ceiling Tile Cleaning Products
How to Change Ceiling Tiles on a Dropped Ceiling
How to Cover a Tile Backsplash
How to Update a Kitchen With a Dropped Ceiling
How to Make a Chalkboard With Tile
Cracked Tile Repair With Glue & Paint
How to Hide Kitchen Wall Tiles
How to Glaze an Old Tiled Bath
How to Paint Armstrong Ceiling Tile | eHow
- Article author: www.ehow.com
- Reviews from users: 17828 Ratings
- Top rated: 4.8
- Lowest rated: 1
- Summary of article content: Articles about How to Paint Armstrong Ceiling Tile | eHow You can paint some types of Armstrong acoustical ceiling tiles. If the tiles are fiberglass, or laminated with Mylar or vinyl, you can’t; but it’s fine to … …
- Most searched keywords: Whether you are looking for How to Paint Armstrong Ceiling Tile | eHow You can paint some types of Armstrong acoustical ceiling tiles. If the tiles are fiberglass, or laminated with Mylar or vinyl, you can’t; but it’s fine to … You can paint some types of Armstrong acoustical ceiling tiles. If the tiles are fiberglass, or laminated with Mylar or vinyl, you can’t; but it’s fine to paint their mineral fiber tiles, as well as the metal grid variety.
- Table of Contents:
Spraying Armstrong Ceilings
Step 1
Step 2
Step 3
Step 4
Rolling Armstrong Ceiling Tiles
Step 1
Step 2
Step 3
How to Paint Armstrong Ceiling Tile | eHow
- Article author: ecopaintmyhouse.com
- Reviews from users: 37901 Ratings
- Top rated: 3.4
- Lowest rated: 1
- Summary of article content: Articles about How to Paint Armstrong Ceiling Tile | eHow Painting a suspended ceiling is also a little different than most other ceilings. What Kind of Paint Do You Use on Ceiling Tiles? The paint you choose to paint … …
- Most searched keywords: Whether you are looking for How to Paint Armstrong Ceiling Tile | eHow Painting a suspended ceiling is also a little different than most other ceilings. What Kind of Paint Do You Use on Ceiling Tiles? The paint you choose to paint … You can paint some types of Armstrong acoustical ceiling tiles. If the tiles are fiberglass, or laminated with Mylar or vinyl, you can’t; but it’s fine to paint their mineral fiber tiles, as well as the metal grid variety.
- Table of Contents:
Spraying Armstrong Ceilings
Step 1
Step 2
Step 3
Step 4
Rolling Armstrong Ceiling Tiles
Step 1
Step 2
Step 3
Installation & Painting FAQs | Armstrong Ceiling Solutions – Commercial
- Article author: www.armstrongceilings.com
- Reviews from users: 19378 Ratings
- Top rated: 3.4
- Lowest rated: 1
- Summary of article content: Articles about Installation & Painting FAQs | Armstrong Ceiling Solutions – Commercial Lay tile and knife on table … edge on Ultima (mineral fiber board). …
- Most searched keywords: Whether you are looking for Installation & Painting FAQs | Armstrong Ceiling Solutions – Commercial Lay tile and knife on table … edge on Ultima (mineral fiber board). Installation and Field PaintingAnswers to your most common questions about installing and field painting commercial ceilings from Armstrong Ceiling Solutions.
- Table of Contents:
Step-By-Step: How to Paint Styrofoam Ceiling Tiles
- Article author: www.interiorsplace.com
- Reviews from users: 11186 Ratings
- Top rated: 4.5
- Lowest rated: 1
- Summary of article content: Articles about Step-By-Step: How to Paint Styrofoam Ceiling Tiles Painting tiles that are still in the ceiling; Touching up; Clean up. There are pros and cons to different kinds of paint, brushes, and methods of installation, … …
- Most searched keywords: Whether you are looking for Step-By-Step: How to Paint Styrofoam Ceiling Tiles Painting tiles that are still in the ceiling; Touching up; Clean up. There are pros and cons to different kinds of paint, brushes, and methods of installation, … Styrofoam ceiling tiles require a specific type of paint that won’t melt or flake. Latex-based or water-based acrylics are the only two kinds you should consider as they don’t contain chemicals that can damage the tiles.
- Table of Contents:

See more articles in the same category here: 670+ tips for you.
How to Choose Paint for Ceiling Tile and How to Apply?
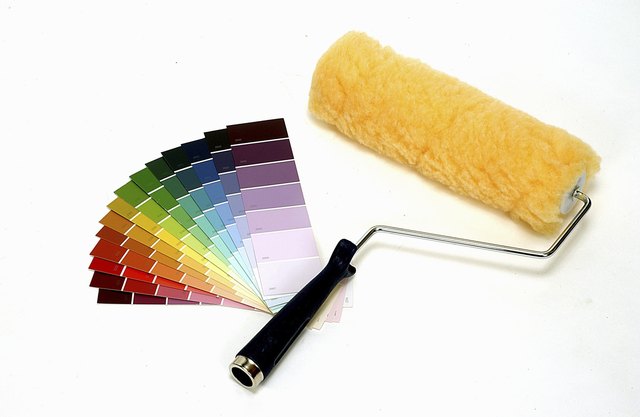
Painting a ceiling can be intimidating. Especially when you are at the hardware store trying to pick out the right paint, brushes, and other supplies. Then you get home, and it’s time to paint, but you have no idea where to begin. Not to worry, I’m here to help.
How to choose paint for ceiling tile and how to apply? There is a difference between ceiling paint and interior paint. Typically, for ceiling tiles, you will use spray paint or flat-latex paint. Except for wood tiles. It is also easier to apply your paint with a sprayer rather than a brush or roller. However, a good brush and roller are great options too.
If you’re new when it comes to rollers in general, don’t worry, we have two articles to help. Go here for getting the best use out of microfiber rollers and here for foam rollers.
There is a lot of preparation that goes into applying your paint. If you are doing a whole room, it is best to start with your ceiling. Before you begin, though, you will need to make sure you have the proper:
Equipment
Room temperature
Floor protection
Cleaned ceiling with any damages repaired beforehand
Paint and primer (unless your ceiling paint has primer in it)
Painting a suspended ceiling is also a little different than most other ceilings.
What Kind of Paint Do You Use on Ceiling Tiles?
The paint you choose to paint your ceiling tiles will first depend on what ceiling tiles you have. Ceiling tiles come in a wide variety of materials:
Different types of metal like tin
Faux-tin tiles are made of thermoplastic such as PVC
Plastic
Wood
Fiberglass which is typically not painted over
Mineral Fibers usually used for Noise Reduction Coefficient (NRC)
There is a wide variety of ceiling tiles, but mostly you will always see a matte finish style paint for a ceiling. The only time you will see a glaze or sheer finish on a ceiling is usually with tin ceiling tiles.
Paint for Tin/Faux-Tin Tiles
If you are painting over tin or faux-tin, you can get away with spray paint.
Most tiles will need a coat of primer before starting. For the tin and faux-tin tiles, you can find a can of primer spray paint. Spray paint typically works the best for these tiles because they usually have a lot of grooves to get around. Not only this, but the paint goes on thin which is what you want for this material. You don’t want thick paint for tin tiles.
Painting faux-tin tiles can get complicated quick, though. Specifically, the old 19th-century style ceiling tiles. A lot of the time, when you only use one color to paint these tiles, it will end up looking flat to the eye. You can run into this problem with tin tiles as well.
This is because the tiles have very intricate designs in them. An easy way to get away with only using one color for these types of ceilings is by using a sheer style paint. One that does not have a matte finish. If you decide to pick a paint with a matte finish, you will come to find out that you’ll need to compensate for highlights and shadows with similar shades of the same paint.
You will quickly turn an easy project into a more artistic project by going this route. However, if it is done correctly and with a lot of patience, it could very well be worth it in the end.
Paint for Drop Ceiling or Acoustic Tiles
Acoustic or drop ceiling tiles are great for hiding an eyesore like old pipes and wiring. However, they are a big investment and can start to look dingy after a few years. This is why painting these tiles is usually a go-to.
Painting an acoustic ceiling with regular ceiling paint will cause some of the sound-absorbing qualities of the tile to decrease. If you want to conserve the NRC qualities then you will have to use a specific kind of paint.
Acousti-Coat is a water-based, flat-latex paint that is formulated with sound-absorbing fillers and ceramic microspheres.
Acousti-Coat is the ideal paint for painting acoustical tiles when you do not want to compromise the noise reduction qualities. This paint will actually help block the noise even further.
Some things to note:
Really thin, watery paint is not recommended for ceiling tiles of any kind. It is cheaper, but you will end up using more of it in the long run. The finish of this paint is not the best either.
Wood, plastic and even tin and faux-tin tiles will most likely need to be sanded down before you apply the paint
Primer paint is also a critical part of choosing your tile paint
Paint for Plastic Tiles
When it comes to painting plastic ceiling tiles, this will take some prep work. It is not super tricky to accomplish, and you will be glad you did it. Aside from cleaning the ceiling and prepping the room, which I will get into more later, you will also need to sandpaper your plastic. This isn’t something you need to spend a lot of time on, just roughing up the surface a bit, so it’ll hold your paint better.
A 180-grit sandpaper or sanding sponge will do. You may need a few of them, depending on your ceiling size.
Plastic ceiling tiles call for an oil-based primer. The problem with this type of primer is it contains chemicals that aren’t necessarily good to breathe in for long periods at a time. Be sure to be in a well-ventilated area. It also takes upwards of 8 hours to dry. When this has dried, you can now paint the plastic tiles using oil-based paint or latex-based paint.
* More on the application process at the bottom.
Oil-based paint poisoning can occur after large amounts of the fumes attack your lungs. This can also happen through your skin pores and eyes. Some symptoms include:
Respiratory difficulty (coughing)
Confusion
Rapid heartbeat
Skin irritation
Blistering/irritated and watery eyes
Running sinuses
Dizziness
Unconsciousness
Abdominal pain
Diarrhea
Vomiting
Paint for Wood Ceiling Tiles
The paint and primer you use for wood tiles are similar to that of plastic tiles. If you do not use an oil-based primer (and a lot of it), your paint will not stick. Your primer could also end up bleeding through your paint and discoloring it.
You also want to make sure to sand the wood tiles down before you start as well, or the paint will not stick.
What Is the Difference Between Wall Paint and Ceiling Paint?
When you are choosing your ceiling paint, you want to make sure you choose the right one. There are specially formulated paints made specifically for painting ceilings. This is because wall paint is made thinner. It is also meant to be more durable and can be scrubbed with soap and water if need be.
Ceiling paint does not require such durability and also is thicker to hide any irregularities in the ceiling, hopefully. It is meant to cover well and stick well, and usually only comes in a matte finish. While wall paint has a number of different finishes. These rules do not apply for spray paint though.
What Colors are the Best for My Room?
Most of the time, people paint their ceilings, either black or white. A black ceiling is especially a great choice is you are talking about a ceiling that is located in the kitchen of a restaurant. The dark color will hide all possible smoke stains as well as dust. That being said, you have to make sure you keep up on cleaning these ceilings.
White is usually the go-to for the home because it brings more light into the room. However, if you are painting tin, faux-tin, or vinyl tiles, you may opt for a more fun color. Especially with tin tiles. Having a sheer finish on a tin tile makes it that much more extravagant feeling.
Otherwise, a good rule of thumb to live by is this:
Small room: Keep it cozy with matching dark colors across the ceiling and walls Choose to open up space with matching lighter colors across the walls and ceiling
Large room: You can bring in that cozy feeling to a larger room by also painting the ceiling and walls a darker color You may want to create a feeling of a wide-open space. To do this, choose lighter colors
Suppose you have ceiling trim. This serves as a great way to accent between the ceiling and wall color. Having this division (usually in white) will really bring out the size of the room.
How Much Paint Will I Need?
Another tough decision is knowing how much paint you will need to buy. It is usually recommended to put two coats of paint on your ceiling, but in some cases, you can get away with one.
For instance, acoustic or drop ceiling tiles usually only call for one coat of paint. Especially if you are using your acoustic tiles for NRC qualities and not just covering an eyesore. The reason for only one coat is so you can conserve some of the natural sound-absorbing technology from the tile.
On the contrary, though, your drop ceiling tiles might be old and covered in stains. This will cause stains to show through one coat of paint. That is unless you invest in a good primer.
If you choose to buy the cheaper, thinner paint, you will need to buy more. This paint doesn’t go as far as the quality paint brands.
Here is a good rule of thumb for when you are calculating how much paint you need:
One gallon of paint will usually cover 400 square feet on a smooth ceiling
One can of spray paint will yield about 20 square feet
How Much Is Too Much for Paint?
There are countless paint companies out there. Finding the right paint for your ceiling can have you crunching numbers and pinching pennies. Here is a chart of the top brands of ceiling paint for the best value:
How to Get Rid of Old Stains on Tiles?
Proper prep work is the key to a quality paint job. This starts with cleaning the ceiling tiles. There are a few different ways to clean your ceiling tiles, depending on the material the tiles are made from. It also depends on how long you have had your tiles, and the environment they are living in.
No matter, sometimes you can get away with a simple dusting. You can do this via a cloth or fluffy microfiber duster. Sometimes even a lint roller will work depending on the material. The only thing you don’t want to use is a towel or anything that will leave behind pieces of debris on your tiles.
If you have a handheld vacuum cleaner, this will also work quite well.
Acoustic/drop ceiling tiles may need some more care spent during the cleaning process. The good thing about these tiles is they come off from the ceiling quite easily. Allowing you to dust the ceiling as well as vacuuming each tile.
Your tiles may be suffering from water or smoke damage though, causing deep-set stains. After you have gotten rid of the standing dust on the tiles. Make up a bleach and water mixture, preferably in a spray bottle. Spray and wipe each tile.
Some of the stains may be too deeply set to come out. This is okay and expected. Mainly, you want to clean your tiles to make sure there is nothing that will show through your paint. Like dust particles, for instance. Any stains that are left behind can be covered up with a coat of primer.
How Much Is Too Much for Primer?
Just like paint prices, primer prices can get a little confusing. Here is a chart of the top brands of primer for the best value:
Brands/Type Volume Price Special Notes Kilz Original Oil Based Primer 1 Quart Or 5 Gallons Starting at $7.88 – Excellent Adhesion – Blocks water and Smoke stains – Fast Dry time – Also available in water-based Zinsser Cover Stain Oil based Primer 1 Quart $8.97 – Sticks to all surfaces without sanding – Also available in water-based – Quick-dry time Zinsser Deep Tint Primer 1 Quart $15.07 – Perfect for drastic color changes – Water-based primer – Seals and tones BEHR Multi-Surface Primer 1 Gallon Or 5 Gallon $22.98 – Great for wood primer – Blocks old stains – Resistant to peel – Fast dry time Insl-X Waterborne Bonding Primer 1 Gallon $53.99 – Fast dry time – Works great for vinyl and acoustic tiles – Easy soap and water clean up
How Long Does It Take to Dry?
Dry time varies between products and brands. It also depends on the amount of airflow in the room or area you are painting. The weather can also play into dry time. If there is a high humidity index outside, drying may take a little longer.
Primer
The typical dry time for primer is one hour. Your primer should feel tacky to the touch within thirty minutes. It is recommended you wait at least three hours before painting, though. It doesn’t necessarily matter if you are using oil-based, water-based, stain blocker or a multi-surface primer.
This is the standard wait time across the board. However, be sure to read the recommendations on the container of primer you purchased. Different brands could still have different recommendations.
Paint
Paint takes a little longer to dry than primer. You also have a curing time to worry about before you can wash your walls. Your paint will typically feel dry within the first hour, but this is a little deceiving. You will want to wait at least four hours before applying another coat; if you are applying another coat. The standard curing time for paint is about two weeks. Try not to have anything in the room that could cause premature staining, such as burning a candle.
As always, make sure you are reading the labels on the paint you choose to purchase. Different companies will recommend different paints. And don’t forget weather permits!
What Is the Ideal Room Temperature?
Believe it or not, weather plays a major part in the painting process. As well as proper ventilation. You could do everything right from start to finish, but if you don’t have a way to regulate the temperature of the room you are working in, all your hard work could end in disaster.
Ideally, the temperature for the area you are working in should stay between 50- and 70-degrees Fahrenheit.
When it is hotter outside, and you are working in an area without a controlled climate, you can usually bring in some fans to do the trick. Not much will happen to the paint if it gets a little hotter than 70 degrees in the room. It just may take a little longer to dry.
However, during the colder months, you want to be more careful. Working in a room without a controlled climate could really be detrimental to your painting job. If the room hits lower than 50 degrees this could end with cracks in your paint. Something you definitely don’t want.
What Kind of Equipment Will I Need?
Now for the fun part! You have chosen the proper paint for your ceiling tiles as well as primer. You know the standard dry time and weather restrictions. Now, let’s talk about equipment. After all, you can’t paint with your hands. Well, you can, but this won’t be very effective.
Starting with the proper painting attire. You will want old clothes, and most likely an old hat for painting your ceiling tiles. You will also want to cover every square inch of the floor and furniture that is left in the room before you begin. Along with a roll of blue painter’s tape.
Let’s talk brushes. You will need a good brush for cutting. Cutting is what you do around the corners and edges of the ceiling. Now, if you have drop ceiling tiles that are removable, you won’t have to worry about cutting as much. Still though, you may want a good brush to paint your tiles with. A roller might be a little excessive in this case.
Here are some tips for the type of brush you’ll need:
Natural-bristle brushes are made with animal hairs. This is best for oil-based paints and primers
are made with animal hairs. This is best for oil-based paints and primers Blended nylon/polyester brushes are easy to work with all types of latex paints and are easy to clean
are easy to work with all types of latex paints and are easy to clean Polyester brushes are stiff and work well with latex paints
A 4” brush is what you will want for the large flat surfaces
The two types of brush end you will need:
Chisel trim brush- this is great for cutting in around the edges of the ceiling where it meets the wall
this is great for cutting in around the edges of the ceiling where it meets the wall Square trim brush- this is the style brush you will want for painting the flat surfaces, like acoustic tiles
The two brush styles you will want to use are:
Angle sash- this is the perfect style for cutting in ceilings
this is the perfect style for cutting in ceilings Flat sash- is the style you will use for the flat areas
This brush kit is a great price and will do the job nicely.
For the flat tiles such as vinyl tiles, you may want to purchase a roller to get the job done a little quicker.
The best roller to use for this is a Medium 3/8” nap roller cover.
You can find a decently priced six-pack of roller covers here.
A couple brushes and rollers are great for painting ceilings. However, if you can invest in a sprayer, you will find this to be extremely convenient. This will ensure you get an even coat across your entire ceiling. It will also prevent any dripping you could get from using brushes or rollers.
How to Use a Sprayer?
Keep in mind that each sprayer is different. The angle and volume can vary. You will want to choose a sprayer with an angle and volume somewhere in the middle.
Here is where you can get a sprayer for a decent price.
Below are steps on how to set up and use your sprayer:
First, you will want to stir your paint and strain it to remove any debris. If the sprayer gets clogged it will cause the paint to splatter. You will definitely want to test your sprayer on a piece of cardboard before starting on your ceiling. Make sure you maintain the same distance from your body to the board at all times. Practicing long, straight strokes. Now begin on your project. Work slowly, spraying in one-foot width spaces. You do not want to rush this, or your paint will be uneven. Sprayers dispense a lot of paint at once. Once you reach the corners, spray vertically in quick spurts. This will avoid overloading the area. Take a step back when you’ve finished and check over your work. If there are any light or missed spots, go over them with a brush or roller. Lastly, thoroughly clean your sprayer every time you use it. If yours comes with a flush feature that lets you connect to your garden hose, this will allow for easy cleanup.
How Do I Apply Paint to Ceiling Tiles?
Using the techniques you have learned from this article, you are ready to apply your paint. The main thing with painting is to make sure you apply it evenly. You also want to be careful not to use too much paint. This could cause dripping and bubbles to form on your ceiling tiles. Be patient with your work; it’s a slow but rewarding process.
If you are applying spray paint, you will first want to make sure you are in a well-ventilated area with a face mask on. You should only need one coat of this, but it is all based on preference. Hold your spray can about 6 inches to a foot away from the tiles and apply in straight sweeps. This will ensure the paint goes on evenly.
Acoustic or drop ceiling tiles can easily be taken down and painted, and then place back on the ceiling. This adds a little convenience to the job. If you are doing this, you won’t need a sprayer. A good brush can get this job done efficiently. However, if you already have a sprayer on hand, you can definitely still use it for this.
Of course, after you are done painting, you will want to make sure you clean your brushes so you can reuse them later.
Can you paint fiberboard ceiling? – TheKnowledgeBurrow.com
Can you paint fiberboard ceiling?
How to Paint Fiberboard Panels. Re-painting existing, already-painted fiberboard panel or tile ceilings or walls requires using an interior paint that is compatible with the paint that’s already on the surface.
How do you paint old fiber ceiling tiles?
Use a semi-gloss latex or oil paint on most ceilings, though in a home theater use a flat paint to avoid distracting reflections. Paint the outside edge of the grid with a brush and then spray or roll the rest of the ceiling. Let the paint dry and apply a second coat if the coverage seems uneven.
How do you paint textured ceiling tiles?
Open the all-in-one primer/paint, if painting tin tiles, and stir with a paint stir stick. Pour some of the primer/paint into a paint tray. Apply primer to the tiles with a wide paintbrush using straight brush strokes. Allow to dry completely.
Why do ceiling tiles turn yellow?
The most common cause of yellow splotches and stains on ceilings is water damage. Ceilings can also undergo yellow staining from water damage when they’re below a leaky or poorly insulated roof or attic. The bottom line is this: If water has access to your ceiling, it will likely turn yellow sooner or later.
Can you paint acoustic ceiling tiles?
Coat yes, paint no! Traditional paint will fill the pores in acoustical ceiling tiles therefore voiding its sound dampening qualities. Alpine Painting can apply a specialty coating, such as ProCoat, made for acoustical ceiling tiles.
Is it OK to paint fiberglass ceiling tile?
The fiberglass and laminated tiles have a hard, shiny coating and shouldn’t be painted. If in doubt, take a tile to an Armstrong dealer and ask if you can paint it. Only use latex (water-based) paint on the tiles.
Are there any good mineral fiber ceiling tiles?
MINERAL FIBER CEILING TILES. There are a lot of good things you can say about mineral fiber tiles, but longevity just isn t one of them. Our company receives calls on a daily basis from people frantically looking for acoustic mineral fiber tiles to match those they are replacing due to water damage.
Can you use mineral fiber tile in the basement?
Unfortunately, the conditions of a basement are not favorable to mineral fiber tiles. Often, ceiling grids in a basement are used to grant access to pipes along the ceiling and when water drips from the pipes (whether from condensation or a leak in the pipe), the tile is left with a very noticeable, yellow stain.
What kind of ceiling tiles do I need for a commercial space?
Mineral Fiber Ceilings | Armstrong Ceiling Solutions – Commercial Mineral Fiber and Fiberglass Ceiling Tiles Mineral Fiber and Fiberglass Ceiling Tiles The broadest range of textures, sizes, shapes, and price points with key performance features to enhance the design of any commercial space.
Wall Panel Repair & Paint
Fiberboard Ceiling/Wall Panel Repair & Paint
Repair procedures for fiberboard ceiling & wall panels POST a QUESTION or COMMENT about fiberboard building sheathing repairs
InspectAPedia tolerates no conflicts of interest. We have no relationship with advertisers, products, or services discussed at this website.
Fiberboard insulating sheathing repair suggestions:
This article offers advice on procedures for reparing loose, warped, gouged or stained fiberboard ceiling and wall panels or tiles. We borrow from conservationists and we include some DIY homeowner procedure suggestions for non-historic buildings.
This article series describes and provides photographs that aid in identifying various insulating board sheathing materials used on building walls and roofs, such as Homasote, Celotex, Insulite, and Masonite, Upsonboard, Nu-Wood and other insulating board sheathing products.
We also provide an ARTICLE INDEX for this topic, or you can try the page top or bottom SEARCH BOX as a quick way to find information you need.
Repair or Painting Damaged Fiberboard Panels
Repairs to Loose or Warped Fiberboard Sheets
Loose fiberboard can be re-attached using 4d finishing nails, though if your experience is like mine you’ll need to drive longer nails, perhaps 6d on a 45 degree angle through the fiberboard into the stud or ceiling joist for the nail to hold the material in place.
Wilson and Snodgrass suggest that it may be possible to repair de-laminated soft fiberboard by injecting wheat paste between de-laminated layers, using a mixture of 1 tablespoon of wheat starch to 5 tablespoons of distilled water, microwaved 20-30 seconds until the mixture is stiff and translucent.
To make such a repair you may need to remove the panel or to form a press that can be applied to the damaged wall or ceiling surface.
Those authors describe removing a warped panel for repair so that it can be wet slightly, placed flat, and pressed while drying. I do not recommend this repair except for structures and panels of historic value, as in my experience, unless you’re an experienced conservationist, trying to remove a 70 year old fiberboard panel from a wall or ceiling leads to ever worse damage to the panel.
Really? For other than historic preservation purposes, in my view it makes more sense to remove and replace damaged fiberboard panels with new ones of the same or similar texture and color. You won’t find beveled Nu-Wood panels in new stock as the product has been out of production since about the 1970’s or earlier.
If there is extensive damage throughout a non-historic structure, remove the panels entirely and replace them with drywall. That step brings your building closer to modern fire-code requirements, and it provides an opportunity to upgrade exposed wiring, plumbing, insulation and and to inspect the structure for hidden rot or insect damage.
You could instead leave the panels in place and cover them over with drywall: a step involving less mess. But you may find that the window and door trim and receptacles and switches in the room all need to be built-out, making this option expose its own achilles-heel.
Watch out: if you are working on a historic building you should not remove nor modify its materials before consulting with your local historic preservation authority.
Repairs to Dings & Gouges in Nu-Wood®, Homasote®, or other Fiberboard Wall or Ceiling Panels or Tiles
BJ’s photograph of Nu-Wood like fiberboard wall paneling above provides more information about the identification of these panels. – B.J. by private email 2017/07/29
The gouge contributed by the movers exposes the characteristic brown soft wood fibers that we’d expect in a fiberboard panel.
The vertical V-groove in thephotograph above is a bit narrower than the panel butt-joint v-groove photo that we provide below. So measuring between the actual butt joints will give the true panel width, probably 48″.
Repairs to a deep ding or gouge in fiberboard panels can take either approach.
DIY homeowner approach to interior fiberboard repair on walls and ceilings.
Vacuum out or gently dust any very loose materials and dirt or debris from the gouge. Paint the area of damage with a latex or acrylic paint to seal and stabilise the loose fibers. Homasote recommends using latex-based paints and where glues are needed, the company recommends Titebond® #5262 or Elmers® Carpenters Glue Fill the gouge using a latex-based or white vinyl or phenolic non-shrinking caulk or, as recommended by some fiberboard manufacturers like Homasote, you can use a polyurethane sealant.
For deep gouges or wide areas of damaged fiberboard you probably need to use one of the putty-type products listed here and you may need more than one pass, after keeping the initial fill-patchbelow the final surface, to bring the repair out flush with the original surface.
To patch small holes and gouges in fiberboard such as Homasote or NuWood we have successfully used the patching compounds listed below.
For large holes or badly warped panels it’s best to cut out or remove and replace the damaged area or the entire panel.
Watch out: these repairs work very well on fiberboard wall and ceiling surface repairs indoors but outdoors I have not found such surface patching durable over the longer term.
Fillers for Fiberboard Panels, Homasote, Nu-Wood Damage Spots
Dash Patch for HOMASOTE PANEL REPAIR [PDF] shown just above, recommended & listed as a “joint filler” at the Homasote website at http://www.homasote.com/assets/files/installation/dash_patch.pdf – retrieved 2020/04/14
Dash Patch is a PorRok product: Por-rok products are licensed through Novex Systems Interntional and manufactured/ distributed by CGM, Inc
DASH PATCH is a gypsum based powder which, when mixed with water forms a plastic composition that can be troweled onto most surfaces to provide a smooth base for resilient or hard surfaces. DASH PATCH is designed to have rapid setting, high strength, adhesion and workability. DASH PATCH will not shrink or expand.
Durham’s “Rock Hard” Water Putty [shown above].
Durham’s Water Putty is a light tan colored powder that is simply mixed with water to form a patching compound. Don’t use more water than necessary to spread a paste that will adhere to the fiberboard;
You may need to either texture the surface as it’s nearly dry or smooth the surrounding surface before painting.
Sikaflex®-1c SL [recommended by Homasote as a “joint filler”] also listed as BASF Master seal.
Sika Sikaflex-1c SL is a single component, self-leveling, premium-grade polyurethane sealant with an accelerated curing capacity. Sikaflex 1cSL can be used in concrete joint 24 hours after the concrete is poured and also in damp concrete applications.
SONOLASTIC® NP 1™ [recommended by Homasote as a “joint filler”] is also a polyurethane sealant.
Other patching products that may work acceptably on fiberboard walls and ceilings:
Aquacoat® Clear Wood Grain Filler – not a filler but possibly for use as a sealant?
Aqua Coat Clear Grain Filler is a water-based, easy-to-apply gel designed for filling and leveling the pores of “open-grain” wood structures such as oak, mahogany, and ash. It reduces the number of sealers and top coats required to obtain a glass-like, high-build finish.
Aqua Coat Clear Grain Filler is a water-based, easy-to-apply gel designed for filling and leveling the pores of “open-grain” wood structures such as oak, mahogany, and ash. It reduces the number of sealers and top coats required to obtain a glass-like, high-build finish. Bona Pacific Water Borne Fille, a trowelable fcompound for filling holes & gouges
Timbermate® Waterbased Wood Filler
Timbermate Woodfiller is an Interior grade 4 in 1 woodputty, grainfiller, edgefiller and crackfiller. When thinned slightly with water can also be used as a sanding sealer. Timbermate does not shrink, sink, crack or fall out and has an indefinite shelf life.
The secret ingredient of Timbermate is tap water therefore containing no Acrylic, Latex or Solvents.
MDF:
Due to the finishing system used to manufacture MDF it is essential to seal the job with a water based non-acrylic product before applying top coats. Therefore TIMBERMATE meets your needs.
Do you Need to Match the Surface Texture of Surrounding Fiberboard?
If the original fiberboard panel surface was textured such as shown in some of the Nu-Wood illustrations and also the classic textured Homasote and other interior-use fiberboard wallboard panels, your patch will look too-smooth unless you texture the surface.
We want to avoid creating a too-smooth island of patch in the middle of a rough-textured panel.
Options for matching the original surface texture include the following:
Use a scrap of existing fiberboard to press gently into the nearly-dry surface of the patched area to match the surrounding surface texture.
Some experimenting may be needed to sort out just how hard to press the texture-imprinting scrap and you may need to make a reverse-imprint block if the surface indentations rather than raised elements are so-reversed as to be noticeable.
to press gently into the nearly-dry surface of the patched area to match the surrounding surface texture. Some experimenting may be needed to sort out just how hard to press the texture-imprinting scrap and you may need to make a reverse-imprint block if the surface indentations rather than raised elements are so-reversed as to be noticeable. Use a thin, flexible, flat-bladed drywall knife that is at least a four inches wider than the widest width of the opening that you need to tool.
When making a final pass over the patch surface to smooth your filling compound, hold the drywall blade lightly on the surface so that you allow it to travel up and down over the irregularities of the original surface near the repair-work.
That movement will permit the blade to move up and down or side to side, closely-matching the texture of the surrounding surface.
Above you can see my imperfect but satisfactory attempt to copy the rough texture of T111 plywood siding into what would otherwise have been smooth filler/sealant used at the corner of this building.
I used a small 6-inch drywall knife, dragging it almost at right angles to the surface, holding the blade lightly. As the blade bobbled over the rough T-111 surface the parallel lines in the existing surface copied into the surface of the sealant to make that filler less obvious.
Restoration-conservationist approach to fiberboard repair
Make a flour and water paste, mix up fibers from a scrap of extra fiberboard of the same or similar brand and model,
of the same or similar brand and model, fill the gouge with a patch of fiberboard material and paste or a cut and trimmed patch to fit,
press until dry, polish the surface,
paint to match surrounding surface.
Expertise, plenty of time and labor, and trouble mean this is probably not appropriate for a non-historic building.
Once the panel surface has been repaired you’ll need to re-paint the panel, wall, or ceiling if you don’t want to look at an obvious, white patch job that doesn’t match its surroundings.
See FIBERBOARD PANEL PAINTING below.
Watch out: Because a few fiberboard products such as some Nu-wood (Conwed) ceiling tiles contained asbestos, see a discussion of possible asbestos at plants producing these cellulose-based ceiling tiles produced
at ASBESTOS CEILING TILE FAQs
Watch out: about fire safety.
I like these old fiberboard walls, but I am compelled to add the caution that for improved fire-resistance to meet modern codes you may ultimately decide to laminate a layer of drywall over them – something to discuss with your local building inspector.
While treatments were done to some products to improve fire resistance their fire rating, particularly after many decades of service and possible deterioration, might be in question.
How to Paint Fiberboard Panels
Re-painting existing, already-painted fiberboard panel or tile ceilings or walls requires using an interior paint that is compatible with the paint that’s already on the surface.
If the existing fiberboard surface is stained from previous leaks, and assuming you were smart enough to fix the leaks before trying to paint, you may need to seal the stained area with a lacquer primer-sealer to prevent the stain from bleeding-through the new paint job.
This is particularly necessary on fiberboard panel paint jobs since solvents in some paints (as well as some water leaks) can dissolve tannins and other components in the panel to form a brown or black stain that may simply bleed through a new coating of a water-based latex or acrylic paint.
Watch out: using an incompatible paint on an already-painted surface can cause the new or old or both layers of paint to fail by peeling, bubbling, or falling right off of the surface. Details are
at INCOMPATIBLE PAINTS [separate web article at InspectApedia].
Painting previously-un-painted fiberboard panels, comes up when a fiberboard-covered interior room is being converted from storage to living space or “modernized” or when you’re sick of looking at stained Beaverboard.
If you must paint previously un-coated fiberboard, the job may not be as easy as you think: a bleed-through problem may infect your paint job unless you first coat the fiberboard with a lacquer primer/sealer, just as I discussed above.
Above: a painted-over Nu-Wood ceiling discussed below in a Q&A
about NUWOOD ASBESTOS CONTENT
Watch out: as we warn throughout these articles, don’t start slapping paint onto un-painted surfaces of a historic building before you’ve consulted your conservation authority.
Note: presently in the U.S. a separate company, Nu-Wood Synthetical Architectural Millwork, Syracuse, NY, produces polyurethane-based faux stone and brick panels and columns used indoors and outdoors. These products are not those described in the article above.
Watch out: if you’re worried about asbestos in fiberboard panels or sheathing products,
see SHEATHING, FIBERBOARD ASBESTOS CONTENT
Fiberboard Conservation, Repair, Painting Research
Photo: Homasote 440 Sound Board insulating board, a cellulose / paper product cited below.
“Conwed Corporation, An Inventory of Its Records at the Minnesota Historical Society Manuscripts Collection”, Minnesota Historical Society, retrieved 2015/12/04, original source: http://www2.mnhs.org/library/findaids/00477.xml
HOMASOTE 440 SoundBarrier® INSTALLATION INSTRUCTIONS [PDF] Homasote, 932 Lower Ferry Road, West Trenton, New Jersey 08628 USA, 800-257-9491 609-883-3300 Fax: 609-883-3497 609-530-1584 Sales Extension 1500 Website: www.homasote.com Email: [email protected] Technical Support: Extension 1332 Email: [email protected]
Excerpt: Homasote 440 SoundBarrier® is a special-density, structural board made from 100 percent environmental Homasote® cellulose fiber, a homogeneous composition manufactured with uniformly distributed protection against termites, rot and fungi and resistance to moisture. It also insulates, with twice the R-value of wood.
See also instructions for all Homasote products at http://www.homasote.com/installation
Excerpt: Homasote 440 SoundBarrier® is a special-density, structural board made from 100 percent environmental Homasote® cellulose fiber, a homogeneous composition manufactured with uniformly distributed protection against termites, rot and fungi and resistance to moisture. It also insulates, with twice the R-value of wood. See also instructions for all Homasote products at http://www.homasote.com/installation HOMASOTE 440 SoundBarrier® ARCHITECTURAL SPECIFICATIONS [PDF] includes installation recommendations but not much about repair, retrieved 2020/04/14
Excerpt:
Replace panels that cannot be repaired.
Excerpt: Replace panels that cannot be repaired. Jester, Thomas C., ed. Twentieth-century building materials: History and conservation. Getty Publications, 2014.
Oregon Caves NM: HISTORIC STRUCTURES REPORT (Part V), [PDF] U.S. National Park Service, discussing preservation of Nu-Wood panels, retrieved 2017/07/30, original source: https://www.nps.gov/parkhistory/online_books/orca-hsr/hsr5.htm
SHEATHING, FIBERBOARD – Fiberboard insulating sheathing used on or in buildings
Wilson, Richa, Kathleen Snodgrass, “Early 20th-Century Building Materials: Fiberboard and Plywood”, [PDF] (2007) United States Department of Agriculture, Forest Service, Technology & Development Program, 073-2308-MTDC, retrieved 2017/07/29, original source: https://www.fs.fed.us/t-d/pubs/htmlpubs/htm07732308/
This article makes helpful distinctions between fiberboard, low-density fiberboard, medium density fiberboard, and hardboard.
Reader Comments & Q&A
@Jocelyn Berman,
That sounds reasonable.
Thanks for the response. The sill plate is only damaged in a few areas; 3′ section length by one wall, and 8′ section at a corner (4′ on each side) near the a/c compressor. As a precaution, I am going to remove the 1st two bottom courses of cedar shakes and remove the fiberboard insulation to check the entire sill perimeter, just to make sure there are no other needed sill repairs, a week before we are ready to install the new siding. I already dug down 6″ from the sillplate exposing the slab and using salvaged 2″ thick paving stones and gravel from the old patio, around the house perimeter, leaving 4″ of exposed slab, so there will no longer be soil build-up. Thanks again for the advice.
@Jocelyn Berman,
I wish we could be more helpful and apologize, but most of your questions can’t be answered usefully just based on a text note. For example “what kind of board is on the exterior?”
But in general, for the problems you describe, the best solution is to remove siding and rotted framing, supporting the building wall as necessary, then build up a masonry foundation to a foot above grade or more; then repair the framing, bringing it down to a pressure-treated sill plate atop the new foundation.
As you plan to re-side the whole building with vinyl it does not , in my OPINON, make economic sense to try to match the original fiberboard sheathing and cedar shingles or shakes; any temporary weatherproof enclosure would suffice.
I just bought a Hi-Ranch built in 1974 on a slab with cedar shakes and 1/2″ rigid board under the shakes. The board is dark grayish/brownish and appears fine pieces or like sawdust, where has disintergrated and broken off into small pieces around 6-10″ as my handyman broke off 6′ length and 16″ high, from the sill plate up about two shake courses due to soil build up over slab and moisture/seepage into the board and sill plate. No paper between the shakes and board, so moisture discoloring the board is evident where shakes are missing from walls and seepage from soil build up over slab. When re-grading the soil to remove soil over slab, we could see the moisture/seepage from the soil had rotted out some of the board and damaged the cedar shakes touching the soil. We started to remove 2 courses of shakes in the section we found sill rot, and removed the damaged board as well, and now need to decide; 1. what product to use to replace the board and seal the joint to the remainging board, so we can replace the cedar shakes temporarily. The inside of the house has paper covered batt insulation in the walls between the studs, between the attic joists, and foil batts in exterior wall in the bathroom. We plan to re-side the entire house, in vinyl siding. If it’s too late to do in November, we will do it in the spring. My next questions are 2. besides what type of board is on the exterior, 3. is the board acting as a structural element attached to the studs, and should I leave it all; just replaceing 16″ from the sill up around the perimeter, replacing the disintergrated board due to the soil encroachment. 4. Lastly, if the board is not a structural element, should it all be removed when we remove the shakes and just install foil insulation board covered by vinyl siding. Thanks for any advice.
Re-posting without improper link
so according to this it says fiberboard ceiling boards and panels contained asbestos
Moderator reply:
Rose that’s a law firm looking for litigation business, not an authoritative information source on asbestos use in building products.
In general, fiberboard is a plant product: made from cane or bagasse or wood fibers – those are not asbestos.
There were some reports of cross-contamination of some fiberboard products made by companies at the same time and same location as where those same manufacturers produced or used asbestos in other products.
Use the on page search-box to find ASBESTOS in FIBERBOARD and you’ll find
SHEATHING, FIBERBOARD ASBESTOS CONTENT https://inspectapedia.com/structure/Fiberboard-Sheathing-Asbestos.php
that actually cites supporting scholarly reserch
@samie,
You posted this question and we replied at
https://inspectapedia.com/interiors/Fiberboard-Ceilings-Walls.php
would asbestos be in a 1950s mobile home ceiling.the ceiling is not tiles,it is a panel or board material
@Greg,
Using a ceiling tile like the one in your photo, provided the tile itself is new enough that you’re not worried about fooling with asbestos material, is a clever move if you don’t have scraps of fiberboard panel to repair the damage in your earlier photo.
Use a very sharp box knife (“drywall knife” like the fancy Stanley Box Cutter shown below) and a steel straight edge to cut out the damaged area;
Work carefully, don’t get trash in your eyes and don’t cut off a finger. Getting blood all over the ceiling is a mess (speaking from experience).
I make my existing-ceiling cuts on a 45 degree angle with the larger-dimension “up” towards the ceiling.
I trim my replacement piece of fiberboard (or ceiling tile) to be just about 1/8″ smaller in length and width, and of course cut its bevel the opposite to that in the ceiling opening.
By angling the replacement square up into the ceiling and if necessary pulling it down with a couple of coarse-threaded sheet metal screws, I glue the replacement in place using a paintable acyrlic sealant.
When the repair is flush I leave it alone for the sealant to cure.
As your original ceiling was smooth, you may want to use some drywall compound to skim-coat the area of repair before re-painting the ceiling.
Let me know how this works for you.
Below: Stanley box cutter knife useful for cutting LDF and MDF fiberboard panels
The ceiling is board and batten, and is fixed, I was just going to use the ceiling tile as additional material to fill in the hole (image attached).
With the hardware stores closed in Canada, it’s hard to know what to get.
Hey Daniel,
I have a cottage which has a hole in the ceiling caused by a water leak and stepping through by mistake from the attic. It seems like the fiberboard is cardboard, is there risk to using a water based filler as it would just be absorbed by cardboard and not bond?
I found another ceiling tile, and was going to cut a hole the same size as the (ceiling 6″ hold saw”), put sticky tape in the attic to hold it in place, then caulk around and finally fill in. What do you think?
Any building supplier,
But first take a look at the fiber board repair suggestions above on this page. Are you sure that won’t work for you?
Our home is just about to close escrow but we need to fix a huge concave hole in the fiberboard. Where do I find this material?
Thanks
In 1970 I was a carpenter apprentice and learning names of the tools we used
In the case of what we call a utility knife today was called a Cellotex knife
The explanation given by the old carpenters was that the knife was developed to cut Cellotex
50 years later I still call it a Cellotex knife
Ned
Our best advice for patching a crack or ding in a Beaverboard ceiling panel, better organized and more complete than if I make it up off the cuff here, is in the text of the article above on this page.
Clean, seal, paint.
@Ned adams,
How to patch crack in beaver board ceiling circa 1948
…
Continue reading at FIBERBOARD SHEATHING IDENTIFICATION – topic home, or select a topic from the closely-related articles below, or see the complete ARTICLE INDEX.
Or see these
Recommended Articles
Suggested citation for this web page
FIBERBOARD PANEL REPAIR at Inspect A pedia.com – online encyclopedia of building & environmental inspection, testing, diagnosis, repair, & problem prevention advice.
Or see this
INDEX to RELATED ARTICLES: ARTICLE INDEX to BUILDING INTERIORS
Or use the SEARCH BOX found below to Ask a Question or Search InspectApedia
Or see
INDEX to RELATED ARTICLES: ARTICLE INDEX to BUILDING STRUCTURES
Or use the SEARCH BOX found below to Ask a Question or Search InspectApedia
…
Ask a Question or Search InspectApedia
Try the search box just below, or if you prefer, post a question or comment in the Comments box below and we will respond promptly.
Search the InspectApedia website
Note: appearance of your Comment below may be delayed: if your comment contains an image, web link, or text that looks to the software as if it might be a web link, your posting will appear after it has been approved by a moderator . Apologies for the delay. Our Comment Box is provided by Countable Web Productions countable.ca
Technical Reviewers & References
Click to Show or Hide Citations & References
So you have finished reading the how to paint fiberboard ceiling tiles topic article, if you find this article useful, please share it. Thank you very much. See more: how to paint drop ceiling tiles, how to paint ceiling tiles, spray paint drop ceiling tiles, painting old 12×12 ceiling tiles, best paint for drop ceiling tiles, paint ceiling tiles before and after, how to paint acoustic ceiling tiles, painting ceiling tiles ideas