
You are looking for information, articles, knowledge about the topic nail salons open on sunday near me how to put a nail into concrete wall on Google, you do not find the information you need! Here are the best content compiled and compiled by the Chewathai27.com team, along with other related topics such as: how to put a nail into concrete wall how to hammer nail into concrete wall without drill, how to put nails in concrete wall, how to put a nail into brick wall, how to put nail in wall without drill, nails for concrete, fluted masonry nails, how to drive concrete nails by hand, types of concrete nails
Drill a pilot hole into the concrete wall, using a drill and masonry bit. The hole should be the same size in diameter as the masonry nail anchor. Insert the anchor into the hole so the top rim is flush with the surface of the wall. Hammer the nail into the anchor.Hold a masonry nail against the concrete wall with your fingers. A masonry nail, also known as a concrete nail, is made of tough steel and designed with fluted shafts that help them drive into concrete without breaking. Place the tip of the masonry nail against the marking you made and hold it steady with your fingers.Concrete nails are made of high-carbon hardened steel and have fluted shafts that help them sink into the concrete. You can also use masonry nails, which have a square cross-section and are tapered from the head to the tip. Masonry nails are cheaper than concrete nails and are less likely to break or bend.
Contents
Can you nail into a concrete wall?
Hold a masonry nail against the concrete wall with your fingers. A masonry nail, also known as a concrete nail, is made of tough steel and designed with fluted shafts that help them drive into concrete without breaking. Place the tip of the masonry nail against the marking you made and hold it steady with your fingers.
Can nails go into concrete?
Concrete nails are made of high-carbon hardened steel and have fluted shafts that help them sink into the concrete. You can also use masonry nails, which have a square cross-section and are tapered from the head to the tip. Masonry nails are cheaper than concrete nails and are less likely to break or bend.
How can I hang something on a concrete wall without drilling?
- Adhesive Wall Hooks. If the concrete block wall is painted and has a relatively smooth—not porous—finish, hanging pictures may be as simple as installing removable adhesive wall hooks. …
- Hardwall Hangers. …
- Masonry Nails.
How do you attach a concrete wall without drilling?
A common way to secure wooden items to concrete without drill is by using epoxy glue systems. This glue is specifically manufactured for these problems. Before opting for this method, you need to thoroughly clean off and dry the wood for them to bond correctly.
Do you need to predrill holes for concrete nails?
Carpenter’s hammers are not intended for driving hardened steel nails into concrete. Another tip is to use a masonry bit and pre-drill holes through the wood piece and into the concrete wall or floor. You can have good success if you’re driving nails into concrete that is less than one year old.
Can you hammer a nail into a brick wall?
The nail can be used to hang a picture or to secure decorations, such as Christmas lights. Using a hammer to pound the nail into the brick is not an option because the nail will chip the brick and will not hold. But a nail can be inserted into a brick wall if you use the proper procedure and tools.
How do you nail nails with masonry?
- Mark the location for the nail with a pencil. …
- Select a masonry drill bit slightly smaller than the diameter of the nail shaft. …
- Place the masonry nail into the drilled hole. …
- Pull down on the nail after installation to ensure that it’s in the masonry firmly and doesn’t wiggle.
Can you screw into concrete without drilling?
Can you screw directly into concrete? Concrete screws are a quick and convenient way to fasten to concrete. The best thing about these screws is that you can screw directly into concrete without any need for hammering or an anchor or shield to install.
What is the best screw for concrete?
For that reason, the best concrete screws are either stainless steel, galvanized, or zinc coated. Many are simply coated with a corrosion-resistant layer, which is usually blue. These materials do better in damp conditions and resist the moisture present in concrete surfaces.
Why is the nail not going into the wall?
The most common reason a drill won’t penetrate a wall at all is because the drill is spinning in the wrong direction. If the drill bit enters the wall and then hits resistance, the typical cause is a metal plate or masonry obstruction.
Can you screw into concrete?
Concrete screws are a quick and convenient way to fasten to concrete. The best thing about these screws is that you can screw directly into concrete without any need for hammering or an anchor or shield to install. All you have to do is drill a hole and drive in the screw.
How do you nail wood into concrete?
The fastest and easiest way to attach most wood parts to concrete is to use a powder-actuated gun. To use it, load a special gun nail and a . 22 caliber gun shell into the barrel. Press the nose against the workpiece, pull the trigger and the shell will drive the fastener directly into the concrete.
Can you hammer a nail into a brick wall?
The nail can be used to hang a picture or to secure decorations, such as Christmas lights. Using a hammer to pound the nail into the brick is not an option because the nail will chip the brick and will not hold. But a nail can be inserted into a brick wall if you use the proper procedure and tools.
How to Hammer Nails Through Concrete Walls | Hunker
- Article author: www.hunker.com
- Reviews from users: 1941
 Ratings
 - Top rated: 3.5
- Lowest rated: 1
- Summary of article content: Articles about How to Hammer Nails Through Concrete Walls | Hunker Updating …
- Most searched keywords: Whether you are looking for How to Hammer Nails Through Concrete Walls | Hunker Updating Whether you are trying to finish a concrete basement or just hang a tool hook on the wall, the odds are at some point a nail will have to be driven through a cement wall.
- Table of Contents:
Step 1
Step 2
Step 3
How to Put a Nail in a Concrete Wall: 10 Steps (with Pictures)
- Article author: www.wikihow.com
- Reviews from users: 3223 Ratings
- Top rated: 3.3
- Lowest rated: 1
- Summary of article content: Articles about How to Put a Nail in a Concrete Wall: 10 Steps (with Pictures) Updating …
- Most searched keywords: Whether you are looking for How to Put a Nail in a Concrete Wall: 10 Steps (with Pictures) Updating The toughness and durability of concrete makes it a popular building material for walls. Concrete walls can also add a modern, industrial aesthetic to a room. However, their strength and durability can make it difficult to drive nails into…
- Table of Contents:
Steps
Community Q&A
Warnings
Things You’ll Need
You Might Also Like
References
About This Article
Did this article help you

How to Drive Nails Into Concrete by Hand
- Article author: www.thespruce.com
- Reviews from users: 49463 Ratings
- Top rated: 4.9
- Lowest rated: 1
- Summary of article content: Articles about How to Drive Nails Into Concrete by Hand Updating …
- Most searched keywords: Whether you are looking for How to Drive Nails Into Concrete by Hand Updating The easiest method of driving nails into concrete is with a power-actuated nailer, but it’s cheaper to drive them by hand, using special nails.
- Table of Contents:
Before You Begin
Safety Considerations
What You’ll Need
Instructions
/how-to-nail-into-concrete-by-hand-3573191-hero-4137b9c211ea43eca4c2318e416c8002.jpg)
How to Fasten to Concrete – EASY WAY – Walls/Floors/Block – YouTube
- Article author: www.youtube.com
- Reviews from users: 21684 Ratings
- Top rated: 3.2
- Lowest rated: 1
- Summary of article content: Articles about How to Fasten to Concrete – EASY WAY – Walls/Floors/Block – YouTube Updating …
- Most searched keywords: Whether you are looking for How to Fasten to Concrete – EASY WAY – Walls/Floors/Block – YouTube Updating How to mount & attach hooks, brackets, shelves & more to concrete & brick. Basement & garage walls can easily be used to gain free space in your home for org…concrete, brick, cement, hammer drill, how-to, how to, leah, strike anchor, how to install, drive anchor, sleeve anchor, cement screws, concrete screws, attaching to concrete, attaching to brick, attaching to cement, anchor, anchors, how to use, permanent, tips, tip, tricks, easy, simple, diy, do-it-yourself, do it yourself, tutorial], confast, nail its, drive nails, easy concrete, garage organization, mounting brackets to concrete, allett mower, nailing concrete, nailing into concrete
- Table of Contents:
How To Hammer A Nail In Concrete or Brick. How to hang a picture. – YouTube
- Article author: www.youtube.com
- Reviews from users: 9355 Ratings
- Top rated: 4.7
- Lowest rated: 1
- Summary of article content: Articles about How To Hammer A Nail In Concrete or Brick. How to hang a picture. – YouTube Updating …
- Most searched keywords: Whether you are looking for How To Hammer A Nail In Concrete or Brick. How to hang a picture. – YouTube Updating How to hang a picture on concrete or brick. Using this simple nail you can hang anything on cinder block, concrete, cement, or bricks. The THS fluted nail …how to hammer a nail in concrete, concrete, how to hang a picture, hanging, hang, diy, wall, picture, how to hang a heavy mirror, home improvement, how to hang a mirror, wall anchors, howto, how to hang a picture on brick, pictuure hanging, picture hanging, hang pictures, picture hanging level, hanging up pictures, picture frame hanging, mounting hanger, types of picture hooks, stud finder, frame, mirror, art, anchor, stud, mount, how to hang pictures, brick, nail, pictures, artwork, tools, tool
- Table of Contents:
How to Put a Nail in a Concrete Wall: 10 Steps (with Pictures)
- Article author: www.wikihow.com
- Reviews from users: 28157 Ratings
- Top rated: 4.2
- Lowest rated: 1
- Summary of article content: Articles about How to Put a Nail in a Concrete Wall: 10 Steps (with Pictures) Updating …
- Most searched keywords: Whether you are looking for How to Put a Nail in a Concrete Wall: 10 Steps (with Pictures) Updating The toughness and durability of concrete makes it a popular building material for walls. Concrete walls can also add a modern, industrial aesthetic to a room. However, their strength and durability can make it difficult to drive nails into…
- Table of Contents:
Steps
Community Q&A
Warnings
Things You’ll Need
You Might Also Like
References
About This Article
Did this article help you
How to Drive Nails Into Concrete by Hand
- Article author: www.thespruce.com
- Reviews from users: 46854 Ratings
- Top rated: 4.0
- Lowest rated: 1
- Summary of article content: Articles about How to Drive Nails Into Concrete by Hand Drive the Nails … Reposition the board over the pilot holes, aligning the board with the marks on the floor. Insert concrete or masonry nails … …
- Most searched keywords: Whether you are looking for How to Drive Nails Into Concrete by Hand Drive the Nails … Reposition the board over the pilot holes, aligning the board with the marks on the floor. Insert concrete or masonry nails … The easiest method of driving nails into concrete is with a power-actuated nailer, but it’s cheaper to drive them by hand, using special nails.
- Table of Contents:
Before You Begin
Safety Considerations
What You’ll Need
Instructions
Error 403 (Forbidden)
- Article author: www.quora.com
- Reviews from users: 49936 Ratings
- Top rated: 3.6
- Lowest rated: 1
- Summary of article content: Articles about Error 403 (Forbidden) Your best bet is to use a masonry bit. Its made of metal but has special cutters made for drilling masonry and concrete. A hammer drill will also help greatly. …
- Most searched keywords: Whether you are looking for Error 403 (Forbidden) Your best bet is to use a masonry bit. Its made of metal but has special cutters made for drilling masonry and concrete. A hammer drill will also help greatly.
- Table of Contents:
How to Put a Nail in a Concrete Wall – How to
- Article author: sportsclinictampico.com
- Reviews from users: 25794 Ratings
- Top rated: 4.2
- Lowest rated: 1
- Summary of article content: Articles about How to Put a Nail in a Concrete Wall – How to Place the masonry nail into the drilled hole. Hammer it into place, keeping the nail straight throughout the process. Use a nail that penetrates … …
- Most searched keywords: Whether you are looking for How to Put a Nail in a Concrete Wall – How to Place the masonry nail into the drilled hole. Hammer it into place, keeping the nail straight throughout the process. Use a nail that penetrates … Related Articles How to Put Pegs in Wood What to Do When You Hit an Electric Wire Within a Wall Framing Hammer Vs. Regular Hammer What Gauge of Nails
- Table of Contents:
Safety Considerations
Using a Concrete Nail Gun
Find helpful tips how to’s and tools to get the job done
Concrete Nails Can Be Regular 16d Sinker Nails
Should the Wood Be Treated Using Concrete Nails
Where Should I Position the Wood
How Deep Should I Drill Into the Concrete
Recent Posts
Categories

How to Drive Nails into Concrete by Hand? – House Construction
- Article author: www.woodworkingarchive.biz
- Reviews from users: 38376 Ratings
- Top rated: 4.4
- Lowest rated: 1
- Summary of article content: Articles about How to Drive Nails into Concrete by Hand? – House Construction Drill a pilot hole with a drill and a masonry drill inse the concrete wall. The hole should be the same diameter as the nail anchor for … …
- Most searched keywords: Whether you are looking for How to Drive Nails into Concrete by Hand? – House Construction Drill a pilot hole with a drill and a masonry drill inse the concrete wall. The hole should be the same diameter as the nail anchor for … The hardness and toughness of concrete make it a common wall construction adopted and preferably by many people. Concrete walls also add a modern industrial
- Table of Contents:
Tips On How To Drive Nails Into Concrete By Hand
Step By Step To Drive Nails Into Concrete With Drill And Masonry
How to Put a Nail in a Concrete Wall – Rado Tech Savvy
- Article author: rado.altervista.org
- Reviews from users: 13083 Ratings
- Top rated: 3.3
- Lowest rated: 1
- Summary of article content: Articles about How to Put a Nail in a Concrete Wall – Rado Tech Savvy [Edit]Driving Masonry Nails into Concrete · Mark the wall where you want to put a nail with a pencil. · Hold a masonry nail against the concrete … …
- Most searched keywords: Whether you are looking for How to Put a Nail in a Concrete Wall – Rado Tech Savvy [Edit]Driving Masonry Nails into Concrete · Mark the wall where you want to put a nail with a pencil. · Hold a masonry nail against the concrete …
- Table of Contents:
Rado Tech Savvy
[Edit]Steps [Edit]Warnings [Edit]Things You’ll Need [Edit]References
Putting Nails Into Concrete Walls – HomeOwnersHub
- Article author: www.homeownershub.com
- Reviews from users: 23767 Ratings
- Top rated: 4.3
- Lowest rated: 1
- Summary of article content: Articles about Putting Nails Into Concrete Walls – HomeOwnersHub All you need is an electric drill and the proper size masonry drill bit to suit the size you are installing. Just drill holes in the concrete and screw them in. …
- Most searched keywords: Whether you are looking for Putting Nails Into Concrete Walls – HomeOwnersHub All you need is an electric drill and the proper size masonry drill bit to suit the size you are installing. Just drill holes in the concrete and screw them in. Not a problem with a hammer drill Steve B said something like: It’s worth mentioning that these masonry screws you are referring to actually tap out (as in …
- Table of Contents:

See more articles in the same category here: https://chewathai27.com/toplist.
How to Drive Nails Into Concrete by Hand
Attaching wood to concrete is one of those projects that occasionally comes up during remodeling projects. For example, if you are building partition walls in the basement or in a home with a slab-on-grade foundation, you will need to attach wood sole plates to serve as the base for the wall studs. Professional carpenters often use a powder-actuated nailer for this—a tool that fires special nails through the wood and into the concrete, using 22-caliber gunpowder cartridges. If you expect to be doing a lot of concrete nailing, you may want to consider investing in a powder-actuated nailer.
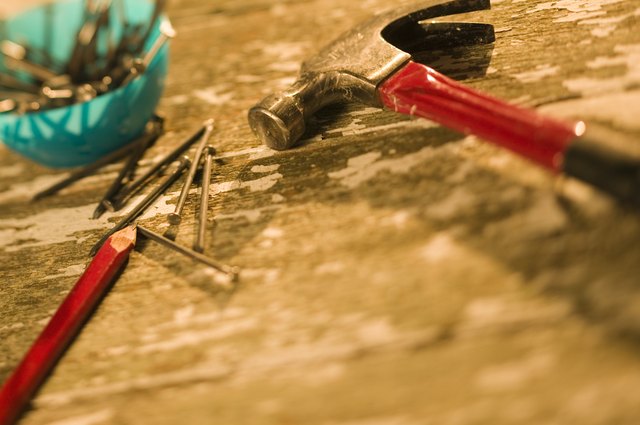
But if you have only a few nails to drive, driving them with a hammer is much more cost-effective. There are special hardened nails to use for this application, which are quite different than the nails used with a powder-actuated nailer. Concrete nails are made of high-carbon hardened steel and have fluted shafts that help them sink into the concrete. You can also use masonry nails, which have a square cross-section and are tapered from the head to the tip. Masonry nails are cheaper than concrete nails and are less likely to break or bend.
Before You Begin
When hammering concrete nails or masonry nails, it’s best to use a framing hammer, which is heavier and more substantial than a standard claw hammer. With its added weight and milled face (checkerboard ridged head), a framing hammer makes the job easier, though note that damage may occur on the milled face of the hammer, as concrete nails are much harder than regular framing nails. Even with this heavier hammer, you will need to drill pilot holes for the nails. This is best done with a hammer drill and a masonry bit that is the same diameter or slightly smaller than the nails you’re using.
When nailing lumber to concrete, make sure to use pressure-treated wood. Standard lumber can rot due to moisture that wicks through the concrete over time.
Safety Considerations
Many DIYers fail to use hearing protection and eye protectors when using hand tools, feeling that only power tools warrant this level of caution. But any time you are using a hammer or other impact tool, it’s a good idea to use basic safety equipment. A hammer can easily break a nail—especially the brittle, hardened steel of a concrete or masonry nail—and send it flying through the air. There are also instances where the face of a hammer can chip and send a shard flying. The sound created when pounding nails can also damage hearing over time, so don’t overlook hearing protectors for all phases of the work—not just when drilling pilot holes.
Make sure to wear a particle mask when drilling in concrete, as cement dust can be damaging to the lungs.
How to Drive Nails Into Concrete by Hand
Attaching wood to concrete is one of those projects that occasionally comes up during remodeling projects. For example, if you are building partition walls in the basement or in a home with a slab-on-grade foundation, you will need to attach wood sole plates to serve as the base for the wall studs. Professional carpenters often use a powder-actuated nailer for this—a tool that fires special nails through the wood and into the concrete, using 22-caliber gunpowder cartridges. If you expect to be doing a lot of concrete nailing, you may want to consider investing in a powder-actuated nailer.
But if you have only a few nails to drive, driving them with a hammer is much more cost-effective. There are special hardened nails to use for this application, which are quite different than the nails used with a powder-actuated nailer. Concrete nails are made of high-carbon hardened steel and have fluted shafts that help them sink into the concrete. You can also use masonry nails, which have a square cross-section and are tapered from the head to the tip. Masonry nails are cheaper than concrete nails and are less likely to break or bend.
Before You Begin
When hammering concrete nails or masonry nails, it’s best to use a framing hammer, which is heavier and more substantial than a standard claw hammer. With its added weight and milled face (checkerboard ridged head), a framing hammer makes the job easier, though note that damage may occur on the milled face of the hammer, as concrete nails are much harder than regular framing nails. Even with this heavier hammer, you will need to drill pilot holes for the nails. This is best done with a hammer drill and a masonry bit that is the same diameter or slightly smaller than the nails you’re using.
When nailing lumber to concrete, make sure to use pressure-treated wood. Standard lumber can rot due to moisture that wicks through the concrete over time.
Safety Considerations
Many DIYers fail to use hearing protection and eye protectors when using hand tools, feeling that only power tools warrant this level of caution. But any time you are using a hammer or other impact tool, it’s a good idea to use basic safety equipment. A hammer can easily break a nail—especially the brittle, hardened steel of a concrete or masonry nail—and send it flying through the air. There are also instances where the face of a hammer can chip and send a shard flying. The sound created when pounding nails can also damage hearing over time, so don’t overlook hearing protectors for all phases of the work—not just when drilling pilot holes.
Make sure to wear a particle mask when drilling in concrete, as cement dust can be damaging to the lungs.
How to Put a Nail in a Concrete Wall
Related Articles
How to Put Pegs in Wood
What to Do When You Hit an Electric Wire Within a Wall
Framing Hammer Vs. Regular Hammer
What Gauge of Nails Should Be Used for Hardwood Floors?
How to Attach Air Vents & Screens in a Masonry Foundation
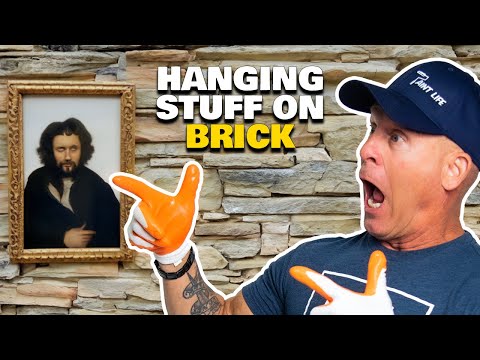
Exterior and interior brick surfaces provide a low-maintenance and durable building material, but hanging decorative items requires special nails and correct installation procedures. Masonry nails have grooved shafts that cling to the brick joint masonry so that they don’t slip or loosen under the weight of the hanging object. These nails are simpler to install than masonry screws and usually leave behind a smaller hole. Properly install these nails so that they remain sturdy and don’t cause permanent damage to an otherwise attractive brick surface.
Mark the location for the nail with a pencil. Select a location in the masonry joints between the bricks, not into the actual brick because the brick may crack or shatter.
Select a masonry drill bit slightly smaller than the diameter of the nail shaft. Drill a hole in the joint with the masonry bit.
Place the masonry nail into the drilled hole. Hammer it into place, keeping the nail straight throughout the process. Use a nail that penetrates 1 1/4 inch into the joint.
Pull down on the nail after installation to ensure that it’s in the masonry firmly and doesn’t wiggle.
Things You Will Need
Masonry drill bit
You can repair the nail hole later if you must remove the nail. Simply fill the hole with a masonry repair filler after removing the nail.
Warning
Wear protective goggles when drilling and nailing into brick masonry. Cement shards can cause injury.
Last Updated: May 29, 2020 References
This article was co-authored by our trained team of editors and researchers who validated it for accuracy and comprehensiveness. wikiHow’s Content Management Team carefully monitors the work from our editorial staff to ensure that each article is backed by trusted research and meets our high quality standards.
There are 10 references cited in this article, which can be found at the bottom of the page.
This article has been viewed 14,861 times.
The toughness and durability of concrete makes it a popular building material for walls. Concrete walls can also add a modern, industrial aesthetic to a room. However, their strength and durability can make it difficult to drive nails into them. Fortunately, there are specialized tools and materials you can use to make the job easier. To minimize the risk of cracking the concrete, you’ll want to use a hammer-set anchor nail. You could also drive masonry nails into the wall for an easy and convenient option.
u00a9 2020 wikiHow, Inc. All rights reserved. wikiHow, Inc. is the copyright holder of this image under U.S. and international copyright laws. This image is not licensed under the Creative Commons license applied to text content and some other images posted to the wikiHow website. This image may not be used by other entities without the express written consent of wikiHow, Inc.
n
Tip: If you don’t have a hammer drill, you can use a standard power drill, but you must use a carbide-tipped masonry bit and it will take much longer to drill into the concrete wall.
Any number of home remodeling projects may require that you attach wood framing members to concrete or masonry surfaces. For example, if you are building a new partition wall in a basement or on a concrete slab, you’ll need to anchor the sole plate to the concrete floor. This can be a tedious process if you are driving nails by hand, requiring you to drill pilot holes with a hammer drill and masonry bit. But the task becomes exponentially easier if you use a powder-actuated concrete nail gun.
If you have more than a couple of concrete nails to drive—or if you just like using gadgets designed for specialized tasks—you should buy or borrow a nail gun designed for concrete. Officially known as a powder-actuated nailer, this tool goes under different names, including gun nailer, .22 nailer, power nailer, or by the trademarked brand name Ramset.
A concrete nail gun is a dead-simple tool consisting of a hollow metal barrel and a firing pin. Actual gunpowder from a modified .22-caliber shell propels specially designed nails through the wood and into the masonry. Either with a hammer blow or a trigger pull, a firing pin strikes the back of the shell, setting off a controlled explosion safely contained within the tool. Gas from the detonation escapes through the barrel and drives a nail that has been placed there.
There are several manufacturers of this tool, including Ramset, Dewalt, and Hilti. Some styles work by striking a hammer to the end of the tool, which sets off the gunpowder charge; others have a trigger that is pulled to fire the cartridge.
As a do-it-yourself homeowner, you may want this tool for:
Basement finishing, when you want to attach sole plates to the concrete floor to create walls
Attaching metal electrical boxes to a concrete wall
Securing metal or wood studs to concrete
Hanging cabinets to masonry walls
Attaching brackets to the mortar between bricks in order to hold shelves
Safety Considerations
While you are more likely to get hurt on a ladder or by electric shock, any tool that uses gunpowder warrants attention.
Always load the nail first, then the cartridge. If you have the cartridge loaded before inserting the nail, there is a chance that the charge may detonate accidentally and fire the nail into you.
Treat the nail gun like any gun and keep the barrel pointed away from you and other people. The gun is designed so that it will only fire when the tip is pressed down against a work surface, but accidents have been known to happen.
When using a hammer-blow type of nailer, remember that significant force by a hammer is required to drive the firing pin. If you cannot provide that force in one decisive blow, a trigger-style tool may be a better choice.
Professional tools like the Ramset XT540 use a 10-shot strip of powder loads that automatically advances after each shot. As a do-it-yourselfer working on a limited scale, it may be better to choose a tool in which each shot is loaded individually.
Keep the nail gun perpendicular to the work material and never at even the slightest angle.
The Occupational Safety and Health Administration (OSHA) reports that most powder-actuated nailer injuries happen when a body part is placed in front of the barrel. The second most prevalent type of injury comes from blowback or projectile debris. Be sure to always use safety glasses.
You will need hearing protection since the nail gun produces a very loud bang that can harm your ears.
OSHA requires that employees who use a concrete nail gun take a test and be licensed to use the tool. However, as a homeowner user, you do not need to be licensed. You should, though, carefully read the manufacturer’s instructions and follow them precisely. And the OSHA guidelines offer good information for DIYers using this tool
Using a Concrete Nail Gun
Unlike when you manually drive nails into concrete, a concrete nail gun does not require that you drill a pilot hole. In fact, it is unsafe to fire into a pilot hole.
Beginners can find it tricky to get nails to penetrate to the proper depth. Either the concrete is too hard and the nail fires only partway into the material, or the masonry and workpiece are too soft, and the nail penetrates right through the wood. Remember that the depth of the nail will be controlled by several variables: the length of the nail, the thickness of the wood, the hardness of the masonry surface, and the size of the powder load.
Manufacturers offer several different powder loads to match different needs. Ramset has a simple-to-follow, color-coded set of guidelines that tells you which charge to use in conjunction with nail length and work material. One powder load manufacturer offers six different powder loads—gray, brown, green, yellow, red, and purple—in order of increasing power.
Although the method is not perfect, you can roughly gauge the penetration needed with this test: Hit a nail onto the concrete or masonry surface, then examine the point of the nail. If the point of the nail flattens, the material is quite hard and will require a more powerful charge. If it penetrates easily, the masonry is soft and will require a less powerful charge. Poured concrete is typically quite hard, requiring a powerful charge to sink the nail, while cinderblock or other forms of brick are relatively soft.
Trying to screw or nail into concrete sounds like a near-impossible task. But attaching to concrete really isn’t much more difficult than fastening to wood—if you use the correct tools and specialized fasteners. These four types of fastener are specifically designed for attaching to concrete, and most can also be used in brick, stone, and concrete block as well.
Before installing most concrete fasteners, you must first drill a hole using a carbide-tipped masonry bit. The quickest, easiest way to drill into concrete is with a hammer drill, which uses both bit rotation and concussive blows to bore holes. If you don’t own a hammer drill you can use a standard drill, but it’ll take two to three times longer to drill each hole.
It’s also important to blow or vacuum the concrete dust from the hole before inserting the fastener. Fasteners grip much more tightly to clean, dust-free holes.
For attaching something relatively light to concrete, it’s hard to beat the speed and ease of hammer-set anchors. Each anchor consists of an unthreaded pin set into a metal sleeve. Simply drill a hole into the concrete, hold the fixture you’re fastening over the hole, then use a hammer to tap the anchor into the hole. As the pin is hammered in, the sleeve expands outward, trapping the anchor in the hole.
Hammer-set anchors, also known as nail anchors, typically require a 1/4-inch-diameter hole and come in lengths ranging from 1 to 2 inches. A 50-piece box of 1-1/4-inch-long anchors costs about $8.
Hammer-set anchors are perfect for attaching metal electrical boxes, wood furring strips, conduit, and shelf brackets to concrete, block, and brick. Keep in mind that they are not removable.
The soft-metal shield is one of the oldest and most effective concrete fasteners available. It’s little more than a ribbed, slightly tapered metal sleeve that fits into a hole. Because the shield is made from soft, almost lead-like material, it provides the perfect surface for threading in a sheet-metal screw.
When installing a soft-metal shield, it’s important to drill the proper-size hole. If the hole is too large, then the shield will spin in the hole. If it’s too small, the shield will crush when you tap it in. Also, be sure to clean all dust from the hole prior to installing the shield.
Soft-metal shields are commonly available in lengths ranging from 3/4 to 1-1/2 inches. Expect to pay about $6 for a box of 50 shields. Sheet-metal screws must be purchased separately. The shields can be used in concrete, block, and brick.
The concrete screw represents the newest and most popular way to fasten to concrete, and it’s easy to see why. All you need to do is drill a hole and drive in the screw. There’s no hammering required or additional anchor or shield to install. And the screw can easily be removed if needed.
Concrete screws feature high–low threads that bite tightly to the sides of the hole. To ensure a solid attachment, be certain to use the drill bit recommended by the screw manufacturer, and bore the hole about 1/4 inch deeper than the screw length to avoid bottoming out when you put in the screw.
Concrete screws come in 3/16- and 1/4-inch diameter, in lengths up to 3-3/4 inches. Both hex-head and Phillips-head styles are available. They can be used in concrete, block, and brick. Expect to pay about $6 for a box of 50 screws.
If you don’t think fastening to concrete can be fun, then you’ve never used a powder-actuated fastener. This tool is essentially a .22-caliber pistol that fires hardened nails into concrete. How cool is that? (Some tool manufacturers also offer .25- and .27-caliber models.)
Powder-actuated fasteners are ideal for securing 2×4 sleepers to floors, furring strips to walls, and plywood subfloors to slabs. They provide a strong and fast way to attach to concrete—but you can’t remove the nails once they’ve been fired in.
The gun accepts a wide range of nails, called pins, ranging from about 1/2 to 3 inches, and various charges, also known as loads. The larger the load, the more gunpowder it contains. Loads are numbered and color-coded for easy identification, ranging from Gray No. 1 (least powerful) to Purple No. 6 (most powerful). Which load to use depends on several factors, including the nail length, thickness of material being fastened, and hardness of the concrete.
Be aware that, like a nail gun, a powder-actuated fastener is a potentially dangerous tool. Use it only to fasten to poured concrete—never to concrete block, brick, or any other surface. And always wear safety goggles and hearing protection.
Powder-actuated fasteners come in a wide range of prices, starting at about $75, but you can also rent one for about $40 per day, not including pins and loads. Expect to pay about $12 to $20 for a 100-piece box of 3-inch pins, and about $8 for the same number of Yellow No. 4 loads.
Finally, it’s worth mentioning that for about $20 you can buy a manual powder-actuated fastener that you hit with a hammer to fire the load.
Masonry nails will not go in neither will picture hooks. Years ago I had some good nails that went into concrete with a K on the end, someone must still sell these nails, or is there another way? I live in UK.
8 Answers
buy some masonry nails to be specific. you can buy them at any hardware store. some come with a little washer on the end of them. or for hanging pictures you can also get plastic hooks with a sticky side facing the wall. im sure you can get these in hardware stores too.
Nails For Concrete Walls
This Site Might Help You.
How do I bang nails onto a concrete wall?
Masonry nails will not go in neither will picture hooks. Years ago I had some good nails that went into concrete with a K on the end, someone must still sell these nails, or is there another way? I live in UK.
you cannot knock a nail be it a masonry nail or any other type of nail into solid concrete . you must use either a nail gun or you drill a hole first . show me a man who says he can and i will show you a liar ..Ive been in construction for over forty years and never seen it done yet !but a hilti cartridge gun will soon sort it out
Learn how to glue almost anything! We’re here to help.
Find helpful tips, how to’s and tools to get the job done.
5 Reasons to Use a Drywall Adhesive
When installing interior drywall, LIQUID NAILS ® Drywall Adhesive or LIQUID NAILS ® Heavy Duty Construction Adhesive can help you get the job done quickly and improve the finish quality.
How To Build A Deck
When you’re building a deck with wood or composite lumber, supplementing nails, screws, and other traditional fasteners with construction adhesive is an easy way to get stronger, longer-lasting results.
Construction Adhesive Tips For Yard Jobs
Your outdoor projects are your most visible, so how good they look and how well they last is a huge reflection on you. Follow these quick and easy construction adhesive tricks that your competitors may not even consider.
Dry Time for LIQUID NAILS ® Brand Construction Adhesive and Caulk
For any construction adhesive or caulk, drying or curing time depends on a number of factors.
How To Conquer Challenging Vertical Applications Using Construction Adhesives
Installing vertical materials can sometimes be a challenge, especially when physical fasteners are not easily used. Construction adhesives are an alternative solution because they can successfully bond many substrates.
How To Install A Fire Pit
To install a fire pit, all you need is your block of choice and LIQUID NAILS ® FUZE*IT ® All Surface Construction Adhesive to get the job done. Liquid Nails FUZE*IT has an extreme temperature resistance, and will secure your blocks in place.
How To Install Interior Trim Molding Using Construction Adhesive
Use LIQUID NAILS ® Fuze*It All-Surface Construction Adhesive, or LIQUID NAILS ® Ultra Quick Grip Adhesive for your interior trim and molding installation to save you time and to give you a better finished product.
How To Install Brick Veneer
If you are installing brick veneer indoors, you do not need to use mortar. As long as your wall is relatively flat in spaces like fireplace surrounds and kitchen backsplashes, you can use a construction adhesive instead.
How To Install Mirrors The Right Way
Choosing the right adhesive is critical for a mirror installation. The silver backing on the back side of your mirror is extremely sensitive to adhesives. Some adhesives can burn through the silver backing, and damage your mirror. We recommend using LIQUID NAILS ® Mirror Adhesive.
How To Build A Retaining Wall
Beautify your customers’ landscapes and prevent erosion with a durable retaining wall up to three layers of substrate high. Landscape block and wall adhesive are all you need.
How To Soundproof Your Walls
The perceived quality of a wall is determined partly by its sound deadening abilities. Luckily, there is an easy and low-cost solution.
How To Install Paneling and Tileboard With Construction Adhesives
Decorative paneling and tile boards can accent a space in your home, and can easily be installed with a construction adhesive. To get the job done, we recommend using LIQUID NAILS ® Heavy Duty Construction Adhesive.
How To Stop Your Floors From Squeaking
There’s often that one spot on a floor that creaks and groans. But there doesn’t have to be. With the right construction adhesive you can eliminate unpleasant squeaks in both new and existing hardwood floors.
The Facts About Moisture-Curing Adhesives
Most adhesives are either latex or solvent-based. Latex adhesives cure when the water in them evaporates. Solvent-based adhesives cure when the solvent in them evaporates. But there’s a third kind of adhesives, called moisture-curing adhesives, which cure by reacting with moisture in the air or the substrate.
How To Build An Outdoor Kitchen Island With a Construction Adhesive
When building an outdoor kitchen island, concrete or stone is a popular choice, but it’s not necessary. You can use wood as an alternative to build a kitchen island, when using a construction adhesive. Even though wood is lighter, there are steps you can take to help make a wooden frame almost as sturdy as traditional construction at a fraction of the cost and hassle.
How To Repair Your Roof With Liquid Nails
With the proper use of construction adhesives, you can prevent roof damage and make simple roof repairs in case anything gets damaged.
How To Use Construction Adhesives in Freezing Conditions
One of the many challenges in residential construction is working with adhesive on frozen lumber. This typically occurs when installing subflooring to joists, and improper installation techniques can lead to long-term issues like floor noise. Here are some tips for working with construction adhesives when the temperature drops.
How To Store Your Construction Adhesive
Storing adhesives the right way allows you to use your adhesive to complete multiple projects over time instead of throwing it away after one use.
How To Separate Materials Bonded Together With Construction Adhesive
Removing adhesive from objects can be tricky, but we have the right tips to help you complete your project.
How to Remove Construction Adhesive From Skin
If you got construction adhesive on your skin, there are a few ways to safely remove it. Most adhesives and caulks can be removed once softened.
How to Remove Construction Adhesives
There are a few ways to remove construction adhesive after you bonded two materials together. Occasionally you may need to wipe away construction adhesive or separate two objects bonded with it, such as two boards, two bricks, etc. Most adhesives and caulks can be scraped off when they are softened.
Sometimes the simplest everyday tasks, such as hammering nails, can turn out to be the most complex. It is likely that at least once in your life, you decorated your flat and you hurt your finger when trying to hammer a nail into a wall; or maybe you have not been able to have it stay in place and well embedded to the wall. Hammering nails seems like an easy this task, but it has its tricks. Today, at OneHowTo.com we explain how to hammer a nail into the wall without bending it, hurting your fingers, and damaging the wall.
How to hammer a nail without bending it
One of the first problems arising when hammering nails is that, if they are very thin, they bend or do not go into the wall properly. If you want the nail to slide smoothly within the wall, an excellent trick is to moisten it with a little olive oil or run it over a bar of soap.
That trick will allow the nail to be inserted straight and smoothly.
How to hammer a nail without hurting your fingers
When hammering nails, a typical problem we experience is hurting our fingers by unintentionally hammering them. To prevent this from happening to you, there are a couple of useful tricks you can use.
The first trick is to get a long plastic comb; the one typically used by men, and place the nail between any of its bristles. The comb will allow it to stay in place so that you can hammer the nail to the wall without having to bring your fingers close, thus avoiding hurting yourself.
If you do not have a comb, it is not a problem. You can insert the nail in a rectangular piece of cardboard that will serve to hold it without the need of having your fingers close. It is a good trick, isn´t it?
How to hammer a nail without damaging the wall
In addition to these recommendations for hammering a nail without bending it and without hurting your fingers, you must also take into account how to properly hold the hammer. The further away from the head you hold the hammer the more accurate the hit. That will allow the nail to enter more precisely into the point where you want it to go. Take it into account and you will get better results when hammering nails into a wall.
Lastly, remember that the hit must always be straight and never tilted down. If you fail to do this, it is possible that the nail bends and does not enter as expected.
If you are interested in home decoration and DIY, you might want to check our Home section.
If you want to read similar articles to How to Hammer a Nail into a Wall, we recommend you visit our Hobbies & Science category.
About
Ask Tim
Press
Advertise
Concrete nails can be just regular 16d sinker nails. Two side-by-side will fit tight in a 1/4-inch-diameter hole in concrete. Copyright 2018 Tim Carter
“Take two of the 16d coated sinker nails and hold them together so the heads of the nails are even. Tap both nail heads at the same time lightly until they. “
Free & Fast Bids
Concrete Nails Can Be Regular 16d Sinker Nails
You can use regular 16d sinker nails as concrete nails in an upcoming project where you need to attach a piece of treated lumber to a poured concrete slab or a wall. The wood could be a 2 x 4 bottom plate for a wall or a simple 2 x 2 cleat for some utility shelving in your basement or garage.
I remember my dad drilling a large hole into dense concrete to install lead anchors to achieve this goal. It took hours and hours. Fortunately, I discovered my own way using regular 16 penny coated sinker nails and a hammer drill to permanently attach wood to concrete faster than you can say Jiminy Cricket. I can drill ten holes and install the nails in less than 15 minutes!
Degree of Difficulty:
What Tools and Nails Do You Need?
You’ll just need a one-pound box of 16d coated sinker nails, a 20-ounce hammer, and a roto-hammer drill equipped with a 1/4-inch carbide-tipped bit that can drill a hole 6 inches deep.
Should the Wood Be Treated Using Concrete Nails?
Be sure the wood you’re using is treated lumber. It’s always a good idea to use treated lumber for any wood in contact with poured concrete.
Concrete can become damp from contact with soil causing regular lumber to rot. Wood-destroying insects like carpenter ants and termites are often found near poured concrete that’s touching wet or damp soil. These insects do not like to eat treated lumber.
Where Should I Position the Wood?
Position the wood exactly where you want it to be when contacting the poured concrete. If it’s a bottom plate for a wall, gravity will hold it in place for you. If it’s a cleat for wall shelving, you may want to enlist a helper to hold the wood tight against the wall as you operate the drill.
Should the Drill Be in Hammer Mode?
Turn on the drill making sure it’s in the hammer mode. Hammer drills are amazing tools that use a rapid back and forth hammer motions while the drill is also rotating. The hammer blasts pulverized poured concrete and drilling is very easy.
Will the Hammer Drill Penetrate the Wood Plate?
The hammer drill will easily penetrate the wood. You don’t need to pre-drill a hole in the wood with a wood bit before using the carbide masonry bit. Just drill into the wood with the carbide bit.
Should the Drill Be Pulled From the Hole While Drilling?
Once the bit starts to bite into the poured concrete creating dust, extract the bit from the concrete and wood about every five seconds as you drill. This helps pull up to the surface much of the concrete dust and particles creating less friction on the sides of the drill bit. Apply even pressure on the drill as you drill down.
How Deep Should I Drill Into the Concrete?
Continue drilling until the hole in the poured concrete is at least two and one-half inches deep. If you’re drilling through 2x material this means four inches of the six-inch-long drill bit must be buried in the wood and concrete. (1.5 + 2.5 = 4 inches)
How Many 16d Sinker Nails Should I Use?
Take two of the 16d coated sinker nails and hold them together so the heads of the nails are even. Tap both nail heads at the same time lightly until they come in contact with the poured concrete.
Continue striking the nails with the hammer with heavier blows making sure the hammerhead strikes the nails squarely in the center of the hammerhead. Short strong hammer strokes are better than wild large strokes that can bend the nails.
How Well Do the Two Nails Hold in the Concrete?
The combined diameter of the two 16d sinker nails is perfect to produce a very strong bite into the concrete. If you do this right and the concrete is strong, you often need a crowbar to extract the nails at a later date.
More in Blog:
How to Safely Clean and Restore Modern Hard Surfaces December 6, 2017
How to Safely Clean and Restore Modern Hard Surfaces December 6, 2017 It’s Hard to Beat Ancient Concrete September 27, 2017
It’s Hard to Beat Ancient Concrete September 27, 2017 Vertical Concrete Artistry, Part 3: Shotcrete April 21, 2017
Concrete is not the easiest material to work with, especially if you’re trying to build a structure (like a house) that involves the use of both concrete and wood products. Fortunately, there are many ways to make the transition from concrete floors and wall frames to wood floors and drywall. Most masonry contractors have their favorites when it comes to attaching wood to concrete, but the newer members of the crew might not. The following is a breakdown of the pros and cons of four versatile fasteners most often used for attaching wood to concrete. Cut nail
Nails
The easiest approach is simply to nail the wood to the concrete. Two common nail options are shown below: the cut nail and the concrete nail.
The cut nail has a square, tapered shape with a square tip. These nails are driven through a board and into concrete underneath, much like nailing a wood board to a wood floor. These nails are cheap, hold well (as long as they penetrate at least ¾ inch into the concrete) and are extremely hard to pull out. Concrete nail
Concrete nails are shaped like thick common nails. The shaft is surrounded with striations to improve holding power, and the steel is hardened so that it won’t bend when it hits the concrete. Like cut nails, these are affordable, hold very well and are difficult to remove. Both types require stout, accurate hammering and have a shear strength of 500 to 600 pounds.
Screws
Hardened screws can be driven into concrete as long as you first drill a proper-sized clearance hole. These screws come in a wide variety of shank diameters and lengths, along with several head designs, including Phillips, slotted and heavy-duty hex. Typically, a package of these screws comes with a masonry drill bit sized to the screw diameter. Toggle Bolts
To install them, position the wood part in place. Drill a clearance hole through the wood and into the concrete using a masonry drill. This is usually a much easier job than driving nails by hand. The shear strength is much higher, too — about two to four times as much, depending on diameter and length.
Toggle Bolts
Because of the prevalence of concrete block construction, hollow wall fasteners come into play on many jobs. They are installed by drilling a hole into the block until a void inside the block is reached. Then the two side wings on the bolt are squeezed together and pushed into the hole. When they enter the block void, the wings spread out again and can’t be pulled from the hole.
These bolts are also used for hanging wood parts (along with light fixtures and shower curtain rods) in areas between wood framing members inside walls. Toggle bolts are stronger than nails, with a shear rating between 550 and 1,700 pounds, but they’re not as strong as concrete screws. Steel anchor
Heavy-Duty Anchors
When fasteners are used to support horizontal beams on vertical surfaces, such as ledgers that support deck framing on the side of a concrete wall, they need to be strong. The best option for this work is to use steel anchors and matching lag screws.
These fasteners have shear ratings much higher than other choices — in some cases, up to 7,000 pounds. The anchors are installed in predrilled holes in the concrete that match the size of the lag screw being used. The anchor packaging identifies the correct screw size.
Because these anchors have relatively large diameters, a standard VSR drill with a concrete bit doesn’t match the job. A ½-inch hammer drill is a much better choice. These tools outperform regular drills because they have a hammering feature that makes the bit reciprocate in and out while it turns. This hammering action helps break up the concrete in the bit’s path, which makes it easier to drill away the extra concrete when attaching wood to concrete. Spiral concrete bit and 7-inch cordless drill
Boring Holes in Concrete
A concrete drill bit and a typical VSR drill are all that’s required to install concrete nails and screws — and even some small-diameter toggle bolts. The fastener packaging will explain what diameter bit should be used for the fastener to work properly. Large-diameter masonry bit and ½-inch hammer drill
Large-diameter holes are required for big toggle bolts and almost all anchors. Typically, these bits have carbide tips to prolong tool life and are driven with a heavy-duty hammer drill. This tool turns the bit as other drills do. But, it also has a percussion feature that makes the concrete easier to drill.
The fastest and easiest way to attach most wood parts to concrete is to use a powder-actuated gun. To use it, load a special gun nail and a .22 caliber gun shell into the barrel. Press the nose against the workpiece, pull the trigger and the shell will drive the fastener directly into the concrete. No predrilling or elaborate measuring and layout are needed to position the fastener — just hold the board against the concrete and fire the tool.
This gun costs more than a decent drill (as much as $200 more), but it makes light work of most jobs. Before you reach for this tool, read the operators’ manual carefully. This will ensure you’re using the correct amount of powder and the right size fasteners. Always wear eye goggles and ear protection when using a powder-actuated gun.
With the right tools and fasteners, it’s easy to fasten wood to concrete in home construction projects.
Hi. I have a picture I want to put up and it is close to a light switch and I don’t know how to tell if there are wires in the wall behind it before I do . Please help x
9 Answers
Uh, you don’t hang pictures next to light switches. Remember, blind people are going to grope around feeling for the switch. You don’t want grope marks all over your picture.
But just to give a straight answer to your question: you buy a stud finder, which tells you where nails already exist and it’s safe to put another nail there.
The box containing the light switch is mounted on the side of a stud. The wiring most likely runs up or down the same side of the stud. Studs are located in each corner of the wall and every 16″ in between. You cam locate them with a tape measure. If you can find the nails holding the drywall to the studs, that should confirm The location of studs. Electrical wiring rarely penetrates studs except to reach outlets below widows which prevent vertical runs.
The above aside, light switches are usually just inside doors. Hanging pictures in that position is odd.
Stay away from that switch at-least 6″ from the plate .If you hang the picture with heavy frame then you need to find the studs to make it sure it’s strong enough to hold and will not fell down.
To find the studs? use a stud finder or just use a measuring tape measure from the edge of the switch cover 15 1/2 inches ( either left or right where ever you want to hang the picture) then put a small mark then try to drive/ put a small nails if you hit the solid then it’s right there you can finally anchor your frame in that area. The standard studs spacing is 16″ then to another so if you cannot hit the solid where your mark is? try to poke again at-least half inch from the first hole then do the same at the other side (left or right).
If you using studs finder then just follow the guide included at the unit( although this unit is not accurate)it create sounds once hit a solid but not guarantee that’s the studs.
To put screws in concrete you need special screws, a drill and the right technique. Concrete screws are the only kind of screws that are strong enough to penetrate concrete. They come in different lengths, and it’s important to have several sizes on hand. Concrete is a dense material, so you’ll need a screw that can penetrate 1 inch (2.5 centimeters) into the concrete; then add an additional inch (2.5 centimeters) more than the thickness of the material you are attaching to the concrete, so that the screw is embedded strongly enough.
Knowing how to drill the hole is important when you use concrete screws. You have to allow for a little extra depth to your drill hole, because dust accumulates inside. A hammer drill is good for this purpose because you can adjust the depth of the hole so it won’t be too shallow or too deep.
There are two kinds of screw heads for work with concrete — hex head or flat head Phillips. Hex screws are easier to drive in, but they don’t look as nice because the caps are raised and they can’t be flush to the surface; so your choice depends on the location of the screw. Align the screw and then use constant low-to-medium pressure on the drill when driving in the screw. Never drive the screw in at high speed, which can damage the threads and cause the screw head to break.
Sometimes you can run into problems when putting screws in concrete. If you’re having trouble driving the screw in, the hole might not be deep enough or there might be too much dirt inside. If the screw spins with no grip and doesn’t tighten, you may have to put a plastic anchor in the hole and drive the screw directly into the anchor.
Related Content
About
Podcasts
Privacy Policy
Ad Choices
Terms
Sitemap
Careers
Contact Us
Help
Reprints
Do Not Sell My Info
Newsletter
Get the best of HowStuffWorks by email!
Keep up to date on: Latest Buzz · Stuff Shows & Podcasts · Tours · Weird & Wacky
Copyright © 2020 HowStuffWorks, a division of InfoSpace Holdings, LLC, a System1 Company
We use cookies to personalise content and ads, to provide social media features and to analyse our traffic. We also share information about your use of our site with our social media, advertising and analytics partners who may combine it with other information that you’ve provided to them or that they’ve collected from your use of their services. You consent to our cookies if you continue to use our website.
Do not sell my data
So you have finished reading the how to put a nail into concrete wall topic article, if you find this article useful, please share it. Thank you very much. See more: how to hammer nail into concrete wall without drill, how to put nails in concrete wall, how to put a nail into brick wall, how to put nail in wall without drill, nails for concrete, fluted masonry nails, how to drive concrete nails by hand, types of concrete nails