
You are looking for information, articles, knowledge about the topic nail salons open on sunday near me how to run ethernet cable from basement to second floor on Google, you do not find the information you need! Here are the best content compiled and compiled by the Chewathai27.com team, along with other related topics such as: how to run ethernet cable from basement to second floor how to run ethernet cable between floors without drilling, how to run cable to basement, running ethernet cable to second floor, how to run ethernet cable through walls, how to run ethernet cable through ceiling, how to run cable from basement to second floor, how to run ethernet cable from basement to first floor, how to run cat6 through walls
Straighten out a wire coat hanger. Tape the Ethernet cable along the hanger’s length. Slip the hanger and cable through the hole in the floor and ceiling below. Go down to the lower level and pull the cable through the hole.Basically, you plug one powerline adapter into a wall socket near your modem or router and run a single ethernet cable to it. Then, in any room that you want to have an internet connection, you plug in another powerline adapter and then use ethernet cables to get the connection from the adapter to your device.Drill destination hole in floor. Run wire through hole. Feed the wire through the back of the outlet box, insert the box in the wall, and mount it in place. Strip the wires and attach them to the wall jack or run them to the device.
Contents
How do I run an Ethernet cable from downstairs to upstairs?
Basically, you plug one powerline adapter into a wall socket near your modem or router and run a single ethernet cable to it. Then, in any room that you want to have an internet connection, you plug in another powerline adapter and then use ethernet cables to get the connection from the adapter to your device.
How do you run Ethernet cable between floors?
Drill destination hole in floor. Run wire through hole. Feed the wire through the back of the outlet box, insert the box in the wall, and mount it in place. Strip the wires and attach them to the wall jack or run them to the device.
How do I get Ethernet across my house?
The TP-Link Powerline Network Adapter Kits let you transfer Ethernet traffic through your home’s electrical wiring. The kits contain two modules that plug into outlets in your home and can then pass Ethernet traffic between them.
How do I get Ethernet when my router is far away?
Just plug the powerline adapter into an outlet near your router and connect it to the router via an Ethernet cable. Then in the other room, plug the powerline adapter into an outlet near the device and connect it to the device with an Ethernet cable.
Can you run Ethernet through vents?
You should never run an ethernet cable through the vents in your home. The heated air in your vents can damage the wires, which will interrupt your internet service and release toxic fumes from the cable’s plastic casing. An ethernet cable inside a vent poses a fire risk.
Can I have a router upstairs and downstairs?
Finally, wireless signals tend to be stronger below the router than above it, so when placing the router, the higher the better. If you plan to use the same one upstairs and downstairs, consider placing the modem/router upstairs, if possible.
Can an electrician install Ethernet?
While some computer service companies offer Ethernet installation, most homeowners entrust the wiring to a local licensed electrician. Installing Ethernet is pretty straightforward: Make an outlet. Run the cable to your jack.
How much does it cost to run Ethernet cable through house?
Cost to Wire Ethernet in House
The cost of installing ethernet cable in a house ranges from $0.25 to $0.70 per foot of cable. The CAT family of cables has several types, with CAT-5, CAT-6 and CAT-7 being the most popular at this time.
How far can you run an Ethernet cable?
Cable Length: The maximum length of an Ethernet cable is about 295 feet (90 meters). Good quality cables with shielding and thicker conductors can reach further but some trial and error will be required. Keep in mind that cable runs are rarely straight so plan on extra cable for some twists and turns.
How do I get Ethernet in multiple rooms?
Installation is also pretty easy. Just plug the powerline adapter into an outlet near your router and connect it to the router via an Ethernet cable. Then in the other room, plug the powerline adapter into an outlet near the device and connect it to the device with an Ethernet cable.
How do I extend my Internet connection to my basement?
The simplest way to extend a Wi-Fi network is via a Wi-Fi repeater (range extender). A Wi-Fi repeater connects to your Wi-Fi devices and a Wi-Fi router in your home and retransmits any data it receives. A Wi-Fi repeater will only work if it can connect to your home’s main Wi-Fi router with a good enough signal.
Do powerline Ethernet adapters work?
Powerline adapters will work for providing high-speed Internet to your gaming computer or console, but they are not your best option. Powerline adapters have lower latency than Wi-Fi, which is good. However, they do not have the same reliability or speed compared to their alternatives.
How do I get Ethernet in multiple rooms?
Installation is also pretty easy. Just plug the powerline adapter into an outlet near your router and connect it to the router via an Ethernet cable. Then in the other room, plug the powerline adapter into an outlet near the device and connect it to the device with an Ethernet cable.
Do wireless Ethernet adapters work?
Powerline adapters will work for providing high-speed Internet to your gaming computer or console, but they are not your best option. Powerline adapters have lower latency than Wi-Fi, which is good. However, they do not have the same reliability or speed compared to their alternatives.
How do I extend my wired Internet connection?
You can extend your ethernet cable via inline couplers. Wire both ends of both cables with RJ45 male connectors, and use inline ethernet couplers with female /female RJ45 connectors. Another option is to wire an RJ45 ethernet port on one end of one of the cables and extend them directly.
Can you run Ethernet through vents?
You should never run an ethernet cable through the vents in your home. The heated air in your vents can damage the wires, which will interrupt your internet service and release toxic fumes from the cable’s plastic casing. An ethernet cable inside a vent poses a fire risk.
How to Run an Ethernet Cable From the Basement to Upstairs | It Still Works
- Article author: itstillworks.com
- Reviews from users: 34746
 Ratings
 - Top rated: 4.6
- Lowest rated: 1
- Summary of article content: Articles about How to Run an Ethernet Cable From the Basement to Upstairs | It Still Works Updating …
- Most searched keywords: Whether you are looking for How to Run an Ethernet Cable From the Basement to Upstairs | It Still Works Updating With the advent of wireless technologies, computer users have been able to set up computers throughout a building without the use of bulky Ethernet cables. However, there are instances when hardwired Ethernet cables are required. A professional can be called in to run the cable from room to room but the cost is often …
- Table of Contents:
Step 1
Step 2
Step 3
Step 4
Step 5
Step 6

EASIEST Most RELIABLE Way to Get Ethernet From Basement to Upstairs, & Anywhere! – YouTube
- Article author: www.youtube.com
- Reviews from users: 44189 Ratings
- Top rated: 3.5
- Lowest rated: 1
- Summary of article content: Articles about EASIEST Most RELIABLE Way to Get Ethernet From Basement to Upstairs, & Anywhere! – YouTube Updating …
- Most searched keywords: Whether you are looking for EASIEST Most RELIABLE Way to Get Ethernet From Basement to Upstairs, & Anywhere! – YouTube Updating PURCHASE HERE (best price): https://amzn.to/2Xj5GHxLike this video and all my others? Buy me a coffee https://www.buymeacoffee.com/thekmz1Check out my amazon…actiontec moca, moca adapter, ethernet over coax, coax ethernet, easiest way to run ethernet upstairs, run ethernet from basement to upstairs, how to get ethernet upstairs, how to get ethernet across floors, easiest way to run ethernet, ethernet from one floor to the next, ethernet from upstairs to downstairs, ethernet without running wire, ecb6200, how to run ethernet upstairs, how to run ethernet downstairs, use coax for ethernet, how to use coax for ethernet
- Table of Contents:
How To Get Wired Internet Upstairs – Step By Step – EMF Academy
- Article author: emfacademy.com
- Reviews from users: 13399 Ratings
- Top rated: 4.6
- Lowest rated: 1
- Summary of article content: Articles about How To Get Wired Internet Upstairs – Step By Step – EMF Academy Updating …
- Most searched keywords: Whether you are looking for How To Get Wired Internet Upstairs – Step By Step – EMF Academy Updating
- Table of Contents:
Three Ways To Get Wired Internet Upstairs
Related Questions
Hello I’m Christian

How to Run Wires in Existing Walls and Floors – Today’s Homeowner
- Article author: todayshomeowner.com
- Reviews from users: 33369 Ratings
- Top rated: 4.0
- Lowest rated: 1
- Summary of article content: Articles about How to Run Wires in Existing Walls and Floors – Today’s Homeowner Updating …
- Most searched keywords: Whether you are looking for How to Run Wires in Existing Walls and Floors – Today’s Homeowner Updating Need a new phone jack in your bedroom or installing speakers for your home theater system? While you could simply string the wires along the floor, it’s best to snake the wires inside walls or under floors. With careful planning, a few special tools, and the right techniques, it can be easier than you may think. Read on to find out how.
- Table of Contents:
How To Install Fast Internet In The Basement – Part 1 – Connect Ethernet Cat7 Cable To Basement – YouTube
- Article author: www.youtube.com
- Reviews from users: 15159 Ratings
- Top rated: 5.0
- Lowest rated: 1
- Summary of article content: Articles about How To Install Fast Internet In The Basement – Part 1 – Connect Ethernet Cat7 Cable To Basement – YouTube Updating …
- Most searched keywords: Whether you are looking for How To Install Fast Internet In The Basement – Part 1 – Connect Ethernet Cat7 Cable To Basement – YouTube Updating an How To Install A Fast Internet In The Basement Part 1 Or conneect internet to basement shows how to get ethernet CAT7 cable to basement from the main wi…video, chia sẻ, điện thoại có máy ảnh, điện thoại quay video, miễn phí, tải lên
- Table of Contents:

Error 403 (Forbidden)
- Article author: www.quora.com
- Reviews from users: 8415 Ratings
- Top rated: 3.8
- Lowest rated: 1
- Summary of article content: Articles about Error 403 (Forbidden) 1. Best: use fishing tape and run the cable through the attic/crawlspace etc from the switch to the other room. 2. Good: use powerline … …
- Most searched keywords: Whether you are looking for Error 403 (Forbidden) 1. Best: use fishing tape and run the cable through the attic/crawlspace etc from the switch to the other room. 2. Good: use powerline …
- Table of Contents:
How To Run Cable From Basement To Second Floor | 6 Step Guide
- Article author: homeaffluence.com
- Reviews from users: 7584 Ratings
- Top rated: 3.4
- Lowest rated: 1
- Summary of article content: Articles about How To Run Cable From Basement To Second Floor | 6 Step Guide Use a 3/4-inch bit to drill through the substrate and make sure the drill bit is perpendicular to the floor. Next, remove the drill bit and then … …
- Most searched keywords: Whether you are looking for How To Run Cable From Basement To Second Floor | 6 Step Guide Use a 3/4-inch bit to drill through the substrate and make sure the drill bit is perpendicular to the floor. Next, remove the drill bit and then … While it may seem like a simple task, running cable from the basement of your home to the second floor involves just connecting two wires.
- Table of Contents:
How to Run Cable from Basement to Second Floor
How to Run Basement to the Top Level with an Ethernet Cable
Frequently Asked Questions
Conclusion
A Simple Guide to Running Ethernet Cable from Upstairs to Your Basement – TechiPark.Com
- Article author: techipark.com
- Reviews from users: 46154 Ratings
- Top rated: 4.3
- Lowest rated: 1
- Summary of article content: Articles about A Simple Guide to Running Ethernet Cable from Upstairs to Your Basement – TechiPark.Com The first thing you need to do is run the cable. If you have an unfinished basement or one with no drywall, this should be pretty simple. You’ll … …
- Most searched keywords: Whether you are looking for A Simple Guide to Running Ethernet Cable from Upstairs to Your Basement – TechiPark.Com The first thing you need to do is run the cable. If you have an unfinished basement or one with no drywall, this should be pretty simple. You’ll … A Simple Guide to Running Ethernet Cable from Upstairs to Your Basement
- Table of Contents:
What You’ll Need
Pick Your Path
Run the Cable
Connect the Wires
Check Your Work
Test Your Connection
Troubleshooting Tips
Conclusion
Search On TechiparkCom

wiring – Running ethernet cable from living room (main floor) to second floor office – Home Improvement Stack Exchange
- Article author: diy.stackexchange.com
- Reviews from users: 39127 Ratings
- Top rated: 4.4
- Lowest rated: 1
- Summary of article content: Articles about wiring – Running ethernet cable from living room (main floor) to second floor office – Home Improvement Stack Exchange Our house has an unfinished basement , main floor, and second floor. We have our router set up next to our TV on the main floor. There are … …
- Most searched keywords: Whether you are looking for wiring – Running ethernet cable from living room (main floor) to second floor office – Home Improvement Stack Exchange Our house has an unfinished basement , main floor, and second floor. We have our router set up next to our TV on the main floor. There are …
- Table of Contents:
2 Answers
2
Your Answer
Not the answer you’re looking for Browse other questions tagged wiring ethernet cables or ask your own question

See more articles in the same category here: Top 122 tips update new.
How to Run an Ethernet Cable From the Basement to Upstairs
With the advent of wireless technologies, computer users have been able to set up computers throughout a building without the use of bulky Ethernet cables. However, there are instances when hardwired Ethernet cables are required. A professional can be called in to run the cable from room to room but the cost is often high. Use a few basic tools and techniques to run an Ethernet Cable from one floor to the next, saving on the cost of professional installation.
Step 1
i Polka Dot Images/Polka Dot/Getty Images
Measure the distance between the devices that will use the Ethernet cable. The Ethernet cable is going to run from one device, such as a computer to another device. The Ethernet cable is run along the walls and baseboards, as well as between floors. Measure the length of all walls and baseboards that the cable will come in contact with. Add an extra 10 feet to the overall measurement to allow for a miscalculation in the overall measurements.
Step 2
Locate an access point between floors. The cable will go through the upper floor and into the basement at a point closest to the device’s location on the lower level. Find a location in the corner of the upper room or along the upper room’s baseboard. Choose a location as close to the basement wall as possible. Ideally, the location should be directly above the location of the device being set up in the basement. Avoid locations where there is wiring, such as overhead lighting or light switches. Turn off all electrical power to avoid problems should the drill come in contact with live wiring.
Step 3
i Brand X Pictures/Brand X Pictures/Getty Images
Drill through the floor using a ¾-inch drill bit. Hold the drill at a 90-degree angle to the floor. After drilling through the flooring and subfloor, pull the drill from the hole and remove the drill bit. Attach a 12- to 16-inch extension to the drill, reattaching the ¾-inch drill bit to the extension’s end. Place the extension and drill bit into the hole. Maintaining the drill at a 90-degree angle, drill through the ceiling below. Stop when the drill cuts through the lower room’s ceiling.
Step 4
Mount the Ethernet cable. Using cable mounts, run the cable along the baseboards, starting on the upper level. Cable mounts have a clip that holds the cable in place and a built-in nail that attaches the mount to the baseboard’s surface. Place the mounts every 4 feet. Position the Ethernet cable into the mount and attach it to the wall. Continue until the opening between floors is reached.
Step 5
Thread the cable through the hole. Straighten out a wire coat hanger. Tape the Ethernet cable along the hanger’s length. Slip the hanger and cable through the hole in the floor and ceiling below. Go down to the lower level and pull the cable through the hole.
Step 6
i Jupiterimages/Photos.com/Getty Images
How To Get Wired Internet Upstairs – Step By Step
*This post may contain affiliate links. Please see my disclosure to learn more.
A while back I wrote up a complete guide to installing hard wired internet that walks you step by step through the process of ditching your WiFi and using ethernet cables instead.
The guide is rather complete, but I realized that one thing I unintentionally left out of that article was how to get your hard-wired internet upstairs.
There are quite a few reasons that you might want to move away from WiFi and use a wired connection instead. A wired internet connection offers:
Lower EMF radiation exposure More reliability Faster speeds More secure than a WiFi connection
And much more. If you’re unfamiliar with the first one on that list, then I’d encourage you to check out other articles in the knowledge section of EMF Academy or just search around the site. I have a ton of articles about the potential dangers of WiFi and how to reduce your exposure.
Three Ways To Get Wired Internet Upstairs
Ok, let’s get to the guide. I’m going to walk you through three total options of how to accomplish this task, and inside of each section I’ll let you know what you’ll need.
Option 1 – Powerline Adapters
TP-Link Powerline Adapters
This is almost certainly the best way to get wired internet upstairs or anywhere else in your house. It’s fast, simple, and fairly inexpensive.
The only downside is that the internet speeds will be a little bit slower than our second option of installing ethernet cables.
The way that powerline networking works are actually really simple. Basically, you plug one powerline adapter into a wall socket near your modem or router and run a single ethernet cable to it. Then, in any room that you want to have an internet connection, you plug in another powerline adapter and then use ethernet cables to get the connection from the adapter to your device.
The powerline adapters actually use the electrical wiring in the home to pass the internet connection between the access point (the powerline adapter connected to your modem) and all the other adapters plugged into your devices.
Then, you basically have a simple home network, much like you’d have using ethernet cables, but without the hassle of cutting holes in the wall and crimping wires.
Many powerline adapters also work as wi-fi signal repeaters or extenders, but you can easily disable the wifi on these devices and just use them for the pass-through internet connection.
The other big benefit of this method is that just like using ethernet cables, this method produces virtually no EMF radiation.
I’d personally suggest going with this set of powerline adapters from TP-Link that you can get on Amazon. Just be sure to get at least one for each room that you want to have internet connection in, and get a few extra ethernet cables.
Option 2 – Ethernet Cables
This is one of the more popular options, and is great in the long-term, but can be a little bit troublesome to set up in the beginning. Essentially what we’re doing here is running ethernet cables between our router, modem, or switch, to all the rooms of the home that you’ll want internet access in. This will give you great speed and reliability.
I cover this more in-depth in the guide I mentioned above, but let’s go over the basics of how to do this step by step.
Step 1. Determine Setup
The first thing I need you to do is take a look at your current internet setup and determine if you have a modem and a router, or just a modem.
You’ll know you’ll have a modem because there will be a coaxial cable coming out the wall and plugging into the back of the device. The coaxial cable is what your internet service provider (ISP) uses to actually provide you with the internet.
Sometimes, this modem is also a router, meaning that it provides the WiFi to the house, however more commonly you’ll have a separate router if you’ve had WiFi in the house.
It’s important to determine what is what because we’ll want to be sure we create a proper setup to begin with, and we’ll want to turn off the WiFi once we have the ethernet system set up.
Step 2. Determine Port Requirements and Get A Switch
The next thing we’re going to need to do is to decide how many ethernet ports we’ll need so that we know which switch (sometimes called a splitter) to buy. You’ll want one port for each cable you are going to run to your house or upstairs in your home.
So, if there are 5 rooms in your home that you are going to run cables to, you’ll need at least a 6 port switch (remember that one port has to be left open so that you can connect an ethernet cable from your modem or router.
Here are links to good quality switches that will work perfectly for this:
These are all Netgear switches, but TP-Link also makes really good switches for this purpose.
Once you have your switch, you’ll want to make sure your cable modem is connected to the coax cable and receiving internet, and then plug one end of an ethernet cable into the modem and the other end into the switch.
Running an ethernet cable between the modem and your switch.
Step 3 – Run Ethernet Cables Upstairs
Finally, it’s time to actually run the ethernet cables.
First of all, you need to know what kind of cable to get. You can either get these cables already pre-done, like this one I like from Amazon, or you can get them in very long lengths that you can cut to size. However, for this latter method, you’ll need to know how to reattach the heads, or how to wire them to ethernet wall sockets.
Don’t worry, I’ll give you some resources for both options. Before you get there though, you need to know what kind of cable to get. You’ll commonly see these cables in either:
Cat5 (sometimes called Cat5e): This is a super inexpensive cable that you’ll find in buildings all over the world. However, it doesn’t run at quite the speeds you might be wanting, usually at less than 100 gigabits per second.
This is a super inexpensive cable that you’ll find in buildings all over the world. However, it doesn’t run at quite the speeds you might be wanting, usually at less than 100 gigabits per second. Cat6: This is what I would recommend, it’s a little bit more expensive, but it won’t slow down your ethernet connection at all.
Now, If you’re going to take your internet from your switch to the second floor of your home, or anywhere else in the house in a more permanent way, I’d suggest that you plan to actually install network jacks into the walls. This will not only make it much easier to connect devices in the future, but will also increase the value of your home.
You will need a few tools though, and quite a bit of ethernet cabling.
If you’re unsure how to accomplish this, take a second and watch this video that will walk you through it:
Once you know how to do that, now we just need to look at how to actually run the cables from wherever your router/switch is to the rooms of your house.
I personally found the following video to be super helpful when I was doing this in my own home:
Option 3 – MoCA
The last option for getting wired internet upstairs that I want to talk about is something called MoCA (multimedia over coax).
This is honestly sort of a mix between the first two options, but in my opinion is not quite as good as either one. It isn’t as good of a long-term solution, as far as speed and reliability go, as running cat 6 ethernet cables, but also isn’t as quick and simple as the powerline adapters.
Moca adapters work by using coaxial cables run between the room your modem is in, and your living room, bedroom, or anywhere else that you need internet. The installation is fairly straight forward though, and I’ll show you a video in a second that will walk you through it.
The biggest issue with this type of network is that most homes don’t already have coaxial cables running between rooms (just like it’s rare to see phone lines running between rooms), and if you don’t, then this really isn’t any better option then using ethernet cables.
Just like with the powerline adapters, MoCA systems do offer wireless connection as well, but this can be easily disabled.
If you need to get internet just from one room, to an upstairs bedroom, and you have some coaxial cable lying around, then maybe this is an option for you, however if not, it’s probably not worth it.
Here is a great video that shows you how to get a MoCA connection from your router to the upstairs, or another part of your house.
Related Questions
Alright, now that we’ve covered three simple ways to get internet upstairs, or to another room, let’s go over some other common questions that you may have.
How Do I Get WiFi On A Second Floor?
There are actually quite a few simple ways to do this, but first let’s take a look at your actual router.
If you have a large home, it is very likely that you just don’t have a router that is nearly powerful enough for your needs. If you’re using a very inexpensive router (that does not have antennae) then you need to get one that is more suited for penetrating walls or pushing a wireless network over much farther distances.
Your WiFi router needs to be suited for your home, or you’ll notice your internet signal falling off as you get just a few rooms away from your router.
For example, this Asus wireless router is meant to push a WiFi network throughout your whole house, and will do a very good job.
However, this inexpensive router from Belkin is really meant only for a small apartment.
So, if you’re having trouble getting WiFi on a second floor, this might be the first thing I would look at.
If you already have a nice router, and you’re still not getting a good connection upstairs, then you might want to look into a set of powerline adapters like we talked about above.
In fact, what many people will do is plug a powerline adapter into a socket near their router, and then plug another one upstairs. Then, they’ll connect a second router or network extender into the upstairs powerline adapter, and it will push a duplicate network on the second floor.
If your Netflix still isn’t loading fast enough, then you may just want to look into getting a Mesh router setup that will extend your network cleanly through your whole house.
Can WiFi Go Through Walls?
Yes, WiFi can absolutely penetrate walls, especially depending on how powerful the router is that is pushing the WiFi signal.
However, all walls and surfaces are not the same. For example, most WiFi signals will have no issue penetrating drywall, thin boards, windows, plywood, etc. however thicker things like concrete or metal might dramatically reduce, or entire block, the signal.
How to Run Wires in Existing Walls and Floors
Wires running along the floor are unsightly and may pose a safety hazard.
Need a new phone jack in your bedroom or installing speakers for your home theater system? While you could simply string the wires along the floor, it’s best to snake the wires inside walls or under floors.
Wiring new construction before the drywall goes in is a piece of cake compared to fishing them through existing walls and floors. But with careful planning, a few special tools, and the right techniques, running wires in the wall of your home may be easier than you might think.
If you’re not up to the challenge, consider running the wires in special hollow moldings that take the place of standard crown molding or quarter round.
Tools
Fish tape
Tools needed for running wires:
Drill and bits
Stud Finder
Measuring Tape
Flashlight
Drywall keyhole Saw
Fish Tape or Wire Coat Hanger
Electrical Tape
String and fishing weight
Before You Start
Check Building Codes: Most areas allow homeowners to install their own low-voltage wiring—such as phone lines, computer network cable, and speaker wire—but check to be sure.
Most areas allow homeowners to install their own low-voltage wiring—such as phone lines, computer network cable, and speaker wire—but check to be sure. Select Proper Wire or Cable: Make sure you use UL rated in-wall wiring that meets local building and fire codes—including CM, CMR, or CMP for computer networking, and CL2 or CL3 for speakers.
Make sure you use UL rated in-wall wiring that meets local building and fire codes—including CM, CMR, or CMP for computer networking, and CL2 or CL3 for speakers. Turn off the Power: Always turn off the breakers in your electrical box before you begin to reduce the chance of an electrical shock should you accidently cut or drill into existing wiring.
Always turn off the breakers in your electrical box before you begin to reduce the chance of an electrical shock should you accidently cut or drill into existing wiring. Avoid Electrical Wires: Keep speaker, computer, and phone wires away from standard electrical wiring for safety reasons and to reduce interference.
Keep speaker, computer, and phone wires away from standard electrical wiring for safety reasons and to reduce interference. Choosing Walls: Whenever possible, run your wiring through interior walls, since exterior walls contain bracing and insulation.
Planning
Start by taking some time to consider the best location for the new wire. Eyeball existing electrical outlets, and make sure you’re a safe distance away (the next stud over or more) to avoid interference or hitting existing wires.
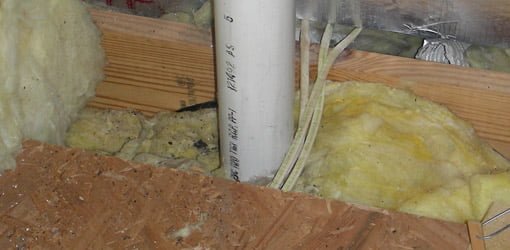
Check the attic for unseen problems like pipes and wires hidden in the wall.
Next, examine the location from the attic, crawlspace, or basement to see if it’s accessible and free of hidden wiring or plumbing. It may also be a good idea to scan the wall using a metal detecting stud finder to locate obstacles like copper plumbing pipes and metal ductwork that may be hidden in the wall.
Once your route has been mapped out, calculate the amount of wire or cable you’ll need. Measure the distance from start to end, add a few extra feet for connections, and an additional 10% or so for unexpected problems or obstacles. The last thing you want is to come up short, so allow plenty extra and follow the old adage of “measure twice and cut once.”
How to Fish Wires
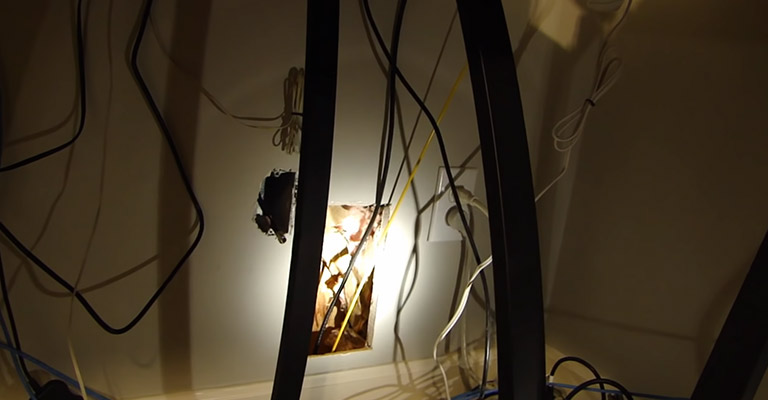
When you’re ready to begin, turn off the power and use your stud finder to locate an open area in the wall between the studs. Drill a small pilot hole where the outlet will be, and use a straightened metal coat hanger to feel inside the wall for any unforeseen obstructions. If you’re looking for an excuse to acquire the latest high-tech tool, a cable mounted inspection camera, such as the Ridgid SeeSnake, makes a great way to see inside a wall. If everything looks good, enlarge the hole for the wire or outlet box. Be sure to use an outlet boxes that’s made to attach to an existing wall, but don’t install it until the wire has been run.
Cut hole in wall for outlet. Drill hole into wall plate. Now, go up to your attic, or down to the basement or crawlspace, and drill a hole in the top or bottom wall plate in the same wall cavity as the outlet. Attach the wire or cable to a fish tape or coat hanger using electrical tape, and feed it into the hole until it reaches the opening at the other end. If you’re working from the attic, you can drop a weighted string down wall cavity, then attach the wire to the string and pull it through. Run the wire or cable to its destination. This may involve fishing it through another wall cavity, or out a small hole drilled in the floor.
Drill destination hole in floor. Run wire through hole. Feed the wire through the back of the outlet box, insert the box in the wall, and mount it in place. Strip the wires and attach them to the wall jack or run them to the device.
Clean Up
If you drilled pilot holes that didn’t work out, patch them with a dab of spackling compound. Sand the patch smooth when dry and touch up with matching paint. Fill any errant small holes in the floor with matching wood putty, and larger ones with a mixture of sanding dust and epoxy glue.
So you have finished reading the how to run ethernet cable from basement to second floor topic article, if you find this article useful, please share it. Thank you very much. See more: how to run ethernet cable between floors without drilling, how to run cable to basement, running ethernet cable to second floor, how to run ethernet cable through walls, how to run ethernet cable through ceiling, how to run cable from basement to second floor, how to run ethernet cable from basement to first floor, how to run cat6 through walls