
You are looking for information, articles, knowledge about the topic nail salons open on sunday near me how to sand ceramic pottery on Google, you do not find the information you need! Here are the best content compiled and compiled by the Chewathai27.com team, along with other related topics such as: how to sand ceramic pottery how to sand glazed ceramic, how to smooth bottom of pottery, best sandpaper for ceramics, what grit sandpaper for ceramic tile, sanding greenware, can you sand ceramic mug, pottery sanding tools, shrinkage ceramics definition
Contents
Can ceramic be sanded?
If you are sanding your pottery once it is bisque fired, you can use wet/dry sandpaper. This will minimize how much clay dust is created when sanding. However, if you are sanding greenware, wetting your pottery is not an option. So, you have to be extra cautious when sanding.
What kind of sandpaper do you use on ceramics?
180-220 grit sandpaper is ideal to start with. Then you can go finer to 400 to polish up your pieces. For porcelain that is ordinarily smooth and susceptible to scratches, it is better to start with ultra-fine sandpaper like 320-400 grit to see how it works.
Can you sand glazed ceramics?
Sanding off the Ceramic Glaze
The most common post-firing method is to use sandpaper to remove the glaze. This is a good method to remove the glaze from a small area like sharp edges. To use this method, you can use wet or dry sandpaper. I prefer dry sanding and always wear a Dust Mask when doing so.
Can you use sandpaper on clay?
I start with medium sandpaper (60-120 grit) to polish rougher areas and remove larger bumps in the clay, then I move on to fine (160-240 grit) and super fine (400-800 grit) sanding papers to polish the clay. The sanding process is very long and tedious, but it’s crucial to achieve the smooth surface.
Can you use sandpaper on porcelain?
As long as the porcelain remains wet, a person can use various fine grades of sandpaper. Yes, sandpaper. You must remember to use very fine-grit sandpaper, and the porcelain must remain wet at all times. As long as the porcelain is wet, the sandpaper will “float” on the surface and will not scratch it.
Can glazed ceramic be painted?
The secret to painting on glazed ceramic is DecoArt’s new Glass Paint! They come in a ton of colors and are absolutely essential for painting on smooth surfaces like glass or glazed ceramic. You even have the option of baking it for a dishwasher-safe option.
Will sanded grout scratch ceramic tile?
While the coarseness of sanded grout may make it a bit more challenging to clean, the sand itself shouldn’t scratch most types of ceramic or glass tiles. However, if you have tile with a high-gloss finish, you should spot-test a small amount of the dry grout on a loose tile prior to grouting and installing it.
Can I use sanded grout on ceramic tile?
Unsanded grout should be used in joints that are less than 1/8-inch-wide. It has a smooth texture and clings well to vertical surfaces, which makes it useful for grouting ceramic wall tiles. Sanded grout should be used for flooring and wall tile joints wider than 1/8 inch because it resists shrinkage and cracking.
Sanding Pottery – How and When to Sand your Pots
- Article author: thepotterywheel.com
- Reviews from users: 48029
 Ratings
 - Top rated: 4.0
- Lowest rated: 1
- Summary of article content: Articles about Sanding Pottery – How and When to Sand your Pots Updating …
- Most searched keywords: Whether you are looking for Sanding Pottery – How and When to Sand your Pots Updating Sanding pottery is something you can do at different stages as a pot is being made. Here are some important dos and don’ts for sanding pots.
- Table of Contents:
Sanding Greenware Pottery
Easy Coil Pots – 3 Ways to Make Simple Coil Pots
What is Fired Clay Called – The 3 Main Terms For Fired Clay
Related Posts
How to Make a Clay Slab – 4 Easy Ways to Roll Clay Evenly
Slab Built Mugs – 4 Ways to Make Fab Slab Mugs
How to Make Slab Pottery Mug Templates – 6 Great Designs
5 Best Sandpapers For Ceramics – The Creative Folk
- Article author: www.thecreativefolk.com
- Reviews from users: 5503 Ratings
- Top rated: 3.3
- Lowest rated: 1
- Summary of article content: Articles about 5 Best Sandpapers For Ceramics – The Creative Folk Updating …
- Most searched keywords: Whether you are looking for 5 Best Sandpapers For Ceramics – The Creative Folk Updating If you want to sand your ceramics down to perfection, look no further than our buyer’s guide to sandpaper for ceramics!
- Table of Contents:
Things To Look For When Choosing Sandpaper For Ceramics
The 5 Best Sandpapers For Ceramic

How To Remove Glaze From Pottery – Pottery Crafters
- Article author: potterycrafters.com
- Reviews from users: 40055 Ratings
- Top rated: 3.1
- Lowest rated: 1
- Summary of article content: Articles about How To Remove Glaze From Pottery – Pottery Crafters Updating …
- Most searched keywords: Whether you are looking for How To Remove Glaze From Pottery – Pottery Crafters Updating Want to learn how to remove glaze from pottery? It’s important to choose the right one for your pottery. This article will give you several great ways.
- Table of Contents:
Reasons for Removing Glaze From Pottery
Methods of How to Remove Glaze From Pottery
Pre-firing Methods for Removing the Glaze From Pottery
Post-firing Methods for Removing the Glaze From Pottery
How to Remove Glaze From Terra Cotta Pots
How Do I Remove Glaze From Ceramic Tile
Can I Use a Hairdryer to Remove Glaze From Pottery
Post navigation
Similar Posts
About Marie
Smooth and Refine Your Ceramic Sculpture – YouTube
- Article author: www.youtube.com
- Reviews from users: 18044 Ratings
- Top rated: 3.5
- Lowest rated: 1
- Summary of article content: Articles about Smooth and Refine Your Ceramic Sculpture – YouTube Updating …
- Most searched keywords: Whether you are looking for Smooth and Refine Your Ceramic Sculpture – YouTube Updating Middle School Art Demo (Part 3 of the Abstract Ceramic Sculpture Series).To see STUDENT EXAMPLES and WORKS IN PROGRESS from my art room, check out:@brambleto…art lesson, middle school art, clay project, clay tutorial, clay lesson, abstract sculpture lesson, how to finish your clay project, smooth out clay, ceramic sculpture, middle school art projects, middle school art projects ideas, clay projects, clay projects for kids, clay projects for beginners, clay projects ideas, clay projects for middle school, clay tutorial for beginners, clay lesson plans middle school, clay lessons for elementary
- Table of Contents:

Sanding Pottery – How and When to Sand your Pots
- Article author: thepotterywheel.com
- Reviews from users: 29033 Ratings
- Top rated: 3.8
- Lowest rated: 1
- Summary of article content: Articles about Sanding Pottery – How and When to Sand your Pots If you don’t have much sanding to do, then you can use regular wet/dry sandpaper. This is the sandpaper that is used for sanding building and DIY materials. …
- Most searched keywords: Whether you are looking for Sanding Pottery – How and When to Sand your Pots If you don’t have much sanding to do, then you can use regular wet/dry sandpaper. This is the sandpaper that is used for sanding building and DIY materials. Sanding pottery is something you can do at different stages as a pot is being made. Here are some important dos and don’ts for sanding pots.
- Table of Contents:
Sanding Greenware Pottery
Easy Coil Pots – 3 Ways to Make Simple Coil Pots
What is Fired Clay Called – The 3 Main Terms For Fired Clay
Related Posts
How to Make a Clay Slab – 4 Easy Ways to Roll Clay Evenly
Slab Built Mugs – 4 Ways to Make Fab Slab Mugs
How to Make Slab Pottery Mug Templates – 6 Great Designs
Sanding Pots – Jon Rawlings Pottery
- Article author: www.jonrawlingspottery.com
- Reviews from users: 24289 Ratings
- Top rated: 5.0
- Lowest rated: 1
- Summary of article content: Articles about Sanding Pots – Jon Rawlings Pottery The sandpaper on the far right is silicon carbe sandpaper made by Gator and especially good at giving more coarsely sanded pots a silky finish. I use 80, 120, … …
- Most searched keywords: Whether you are looking for Sanding Pots – Jon Rawlings Pottery The sandpaper on the far right is silicon carbe sandpaper made by Gator and especially good at giving more coarsely sanded pots a silky finish. I use 80, 120, …
- Table of Contents:
Sanding Pots
Leave a Reply
Author
Archives
Categories
The Best Sandpaper, Grinding Blocks, and Abrasives for Pottery and Ceramics — The Studio Manager
- Article author: www.thestudiomanager.com
- Reviews from users: 35618 Ratings
- Top rated: 3.3
- Lowest rated: 1
- Summary of article content: Articles about The Best Sandpaper, Grinding Blocks, and Abrasives for Pottery and Ceramics — The Studio Manager The Best Sandpaper, Grinding Blocks, and Abrasives for Pottery and Ceramics · 3M Pro Grade Sandpaper. The purple, plastic-backed 3M Pro Grade … …
- Most searched keywords: Whether you are looking for The Best Sandpaper, Grinding Blocks, and Abrasives for Pottery and Ceramics — The Studio Manager The Best Sandpaper, Grinding Blocks, and Abrasives for Pottery and Ceramics · 3M Pro Grade Sandpaper. The purple, plastic-backed 3M Pro Grade … A guide to waterproof sandpaper, silicon carbide grinding block, and other
abrasive tools for use in a pottery or ceramic studio. - Table of Contents:
Table of Contents
Sandpaper
Grinding Blocks
Diamond Hand Pads
Silicon Carbide Grinding Wheels and Cups for Power Tools
Wet Grinders
Sanding Tips and Tricks
Summary

Wet Sanding Tutorial — pottery to the people
- Article author: www.potterytothepeople.com
- Reviews from users: 1052 Ratings
- Top rated: 3.8
- Lowest rated: 1
- Summary of article content: Articles about Wet Sanding Tutorial — pottery to the people So I want to show you this simple method for how to sand pottery safely. It’s called wet-sanding, which uses water to capture all that … …
- Most searched keywords: Whether you are looking for Wet Sanding Tutorial — pottery to the people So I want to show you this simple method for how to sand pottery safely. It’s called wet-sanding, which uses water to capture all that … It all begins with an idea.
- Table of Contents:
Coil Bowl Tutorial
How to Sgraffito Pottery

Tips for Pottery Sanding & Grinding Safety – DiamondCore Tools
- Article author: diamondcoretools.com
- Reviews from users: 176 Ratings
- Top rated: 3.4
- Lowest rated: 1
- Summary of article content: Articles about
Tips for Pottery Sanding & Grinding Safety – DiamondCore Tools
While you’re sanding or grinding your ceramic pieces, it’s important that you are adding water. This will help to keep dust particles from … … - Most searched keywords: Whether you are looking for
Tips for Pottery Sanding & Grinding Safety – DiamondCore Tools
While you’re sanding or grinding your ceramic pieces, it’s important that you are adding water. This will help to keep dust particles from … Smoothing your pottery by sanding and grinding is an important step in making sure that you are creating a great piece that has outstanding craftsmanship! - Table of Contents:
Minimize Clay Dust
Let the Diamonds Do the Work
Use Water
Pottery Sanding & Grinding Tools Safety
Leave a comment
Currency

Do You Believe in Sanding? | JillyBeanPottery
- Article author: jillybeanpottery.com
- Reviews from users: 41638 Ratings
- Top rated: 3.3
- Lowest rated: 1
- Summary of article content: Articles about
Do You Believe in Sanding? | JillyBeanPottery So, why do I (or why should you) sand ceramic pots? Basically, clay shrinks. My work, which is fired to cone 10 or 2365º, actually shrinks three … … - Most searched keywords: Whether you are looking for
Do You Believe in Sanding? | JillyBeanPottery So, why do I (or why should you) sand ceramic pots? Basically, clay shrinks. My work, which is fired to cone 10 or 2365º, actually shrinks three … - Table of Contents:
Highly textured hand built functional ceramic art
2 thoughts on “Do You Believe in Sanding”

What grit sandpaper do you use to smooth bisqueware? : Pottery
- Article author: www.reddit.com
- Reviews from users: 44972 Ratings
- Top rated: 3.4
- Lowest rated: 1
- Summary of article content: Articles about What grit sandpaper do you use to smooth bisqueware? : Pottery The key thing here is to sand with water!!! Get wet/dry sandpaper, run some water over your bisque, get your sandpaper wet, and sand away. Rewet … …
- Most searched keywords: Whether you are looking for What grit sandpaper do you use to smooth bisqueware? : Pottery The key thing here is to sand with water!!! Get wet/dry sandpaper, run some water over your bisque, get your sandpaper wet, and sand away. Rewet … Obviously the goal is to not have to do too much, but when i do, what should I use to get a nice smooth result?
- Table of Contents:
About Community
Powerups
Powerup to unlock perks for rPottery
See more articles in the same category here: Top 122 tips update new.
Sanding Pottery – How and When to Sand your Pots
30 shares Facebook
Pinterest 30
Affiliate Disclaimer
As an Amazon Associate I earn from qualifying purchases. It helps me keep the website going. Thank you for your support.
If you are reading this article, you probably want to know how to smooth the surface of your pottery. So, you may be surprised to hear that sanding pottery is actually a source of disagreement amongst some potters.
The reason for this is that when you sand pottery, you inevitably create clay dust, which contains silica. Silica is known to be a health hazard if it is inhaled. Therefore, sensible potters are at pains to minimize clay dust when they work or clear up.
For some potters, the risk of creating airborne silica is too high to justify sanding pottery. So, they recommend focusing on methods whilst making the pottery that will ensure a smooth surface. Rather than having to tidy up the surface afterward by sanding.
Nevertheless, a lot of potters do sand their pottery. And there are ways of sanding pottery that minimize any health risks. This article is all about why, how, and when to sand pottery safely. After all, everyone likes a nice smooth bottom. Hey, you can’t write an article about sanding pottery without making a joke about smooth bottoms.
Sanding Greenware Pottery
Here are some of the reasons you might want to sand your greenware pottery:
If you’re just learning how to make ceramics, your piece may not be as even as you would have liked. Perhaps your pot is a bit wonky and you want to even up the lip or the foot ring.
You may have added some design features that have left little burrs or bobbles of clay on the surface. For example, perhaps you have done some sgraffito or incising on your clay surface. This may have left little raised edges around the detailing that you want to tidy up.
or incising on your clay surface. This may have left little raised edges around the detailing that you want to tidy up. Trimming your pottery can leave circles around your pottery where the trimming tools have removed clay. You may want to remove some of these by sanding.
Leather hard clay can look quite forgiving. When clay has the sheen of being slightly damp, it can look smoother than when the clay has dried thoroughly. It can sometimes help to sand your clay when it’s bone dry to even out the surface.
Sanding Greenware Pottery
Whatever the reason for sanding pottery in its greenware stage, here are some tips on how to do it.
If you are sanding unfired clay you need to be careful not to overdo it. Greenware clay is very soft and can be sanded down easily. It’s easy to go overboard and sand away too much detail or shape from an unfired pot.
Grogged Greenware
Dry unfired clay that contains grog or sand does not sand well. When you rub or sand grogged clay, the gritty grog rubs against the soft clay body and scratches the surface. The more you sand, the more scratched the surface becomes. Keep any sanding of grogged greenware clay to a minimum.
If you are using grogged clay, you can avoid having to sand your greenware as follows:
When your clay is still plastic and soft, you can tidy the surface with a metal rib.
Once your clay is leather hard, you can use a rubber rib to smooth and compress your clay. This can work wonders with grogged clay. I invariably smooth my pots with a rubber rib after trimming them to take out any trimming marks.
When you have trimmed your pots, use a damp sponge to smooth the foot and lip of your pot. This is sometimes called ‘wet sponging’.
You can also use a piece of damp chamois leather. Be aware that a wet sponge or chamois on grogged clay can wipe away the smaller clay particles. The result of this is that the larger pieces of gritty grog can be left behind and exposed. So, keep sponging and wiping to a minimum too.
Smooth Stoneware or Porcelain Greenware
Greenware clay that contains smaller clay particles and is without grog, is less likely to scratch when being sanded. For example, smooth ungrogged stoneware or porcelain can tolerate being sanded without encountering the issues described above.
If you have a large surface area of smooth clay that needs to be removed or smoothed, you can start off using sandpaper. Sandpaper is graded according to its ‘grit’. The lower the number used to grade, the higher the grit. So, 80 grit sandpaper is coarser than 220 grit paper.
To sand away significant amounts of greenware you could start with a coarser paper, like 80 grit. And then as you want to smooth the surface, you could switch to 220 grit paper.
Another suggestion when sanding greenware is to use a green kitchen scrubby rather than sandpaper.
When green scrubbies are new, they are quite stiff and abrasive. But once they have been used a few times, they soften up and become less harsh. These are a good way of smoothing down your greenware surface and keeping scratches to a minimum.
Alternatively, fine wire wool can be a good way of smoothing down burrs and rough edges on greenware.
Sanding Greenware and Safety
If you are sanding your pottery once it is bisque fired, you can use wet/dry sandpaper. This will minimize how much clay dust is created when sanding. However, if you are sanding greenware, wetting your pottery is not an option. So, you have to be extra cautious when sanding.
Sanding greenware generates a lot of clay dust. Some potters suggest simply sanding over a bucket of water so that the dust falls into the bucket. However, I have found that a lot of the dust becomes airborne and doesn’t fall into the water. Greenware dust is like icing sugar, and the particles are very light and fine.
Furthermore, greenware dust will stay suspended in the air for hours if not days after sanding. You may not be able to see the dust, but it will linger for a long time after you have sanded. This is evident, as dust tends to settle on work surfaces for days after you have finished sanding.
For that reason, if I’m sanding green pottery, I always sand outside and away from any open windows or doors. If it’s raining and you have a spraying booth , then sand in there. Otherwise, wait until it’s stopped raining and go outside to sand.
Wear a respirator that is designed to filter out small airborne particles.
When you have finished sanding your piece, don’t take off the respirator and blow the dust off the surface. Instead, brush off the dust with a soft cloth or mop brush.
Sanding Bisqueware Pottery
There are a few reasons why you might want to sand bisqueware.
You may notice sharp edges and rough patches that you missed before it went into the kiln.
Pottery may come out of a bisque fire feeling rougher than it did before it went in. This is normally the case for clay that contains grog or sand. The reason for this is that grog is clay that has already been fired and ground up into granules.
Grog has already gone through the shrinking and densification process. The raw unfired clay that the grog sits in dries and shrinks as it’s fired. By contrast, the grog stays as it is, and creates a rough texture on the pottery surface.
Grog has already gone through the shrinking and densification process. The raw unfired clay that the grog sits in dries and shrinks as it’s fired. By contrast, the grog stays as it is, and creates a rough texture on the pottery surface. If you are using stoneware or porcelain bisque fired pottery is still porous and softer than glaze-fired pottery. It is easier to sand pottery that is bisque fired rather than waiting until it is glaze fired.
Sharp edges and rough uneven patches in the clay won’t be concealed by glaze. Instead, the glaze will often draw attention to blemishes. If you are using a breaking glaze , it will break over the blemish, and highlight it.
Either way, shiny surfaces tend to accentuate bumps, undulations, and changes in texture. These details might be an intentional design feature. But if they are not, it’s best to get rid of them when the clay is bisqueware or earlier.
Earthenware or stoneware bisque is more likely to need sanding than porcelain or clay with a high porcelain content. This is because porcelain clay particles are more refined.
Also, if porcelain does contain grog, it’s normally a very fine grog. As such, sanding porcelain bisqueware is normally just a matter of smoothing off sharp edges.
How to Sand Bisqueware
After you have bisque fired your pottery, it’s a good idea to run your hand over it carefully. This will help you feel any rough or sharp spots that need sanding.
Unlike greenware, bisqueware is ceramic, and will not dissolve in water. For that reason, you can get bisqueware wet when you are sanding it. This helps keep airborne dust made during sanding to a minimum. It’s therefore generally recommended that you use wet/dry sandpaper to sand bisque.
Nevertheless, wet sanding bisqueware doesn’t eliminate dust completely. So, it’s still a good idea when sanding bisque pottery to do it outside and wear a respirator.
There are different ways to actually wet sand. Some potters run their pottery under a tap, wet the sandpaper, and then sand. Others dunk the pot and paper briefly in a bucket of water, and sand.
Personally, I use a bucket of water. But rather than dunking the pot, I wet the sandpaper. Then I sand the dry bisque using the wet sandpaper. I prefer not to get the bisque completely wet if I can avoid it.
Cleaning your Bisque After Sanding
You can experiment with what works for you and the clay you are using. Whichever method you choose, after you have sanded, you will need to clean the pot surface.
Wet sanding will create a paste on the surface of the pot that needs to be removed before firing. Loose bisque particles on the pot surface will cause problems when you are glazing.
For example, dust and bisque particles can prevent glaze from bonding to the pot surface. You can end up with bare patches on your pottery, where the glaze has crawled away from dust and particles. This is known as crawling.
You can clean up the sludgy paste with a wet sponge. Or you can run your pottery under the tap or dunk it in water and remove the loose bisque.
Bisque is absorbent, so if you completely submerge the bisque it can take a day or so to dry out. Whichever way you remove the debris, let the pots dry out before you apply your glaze.
If your bisque is waterlogged, the glaze won’t adhere as well to the pot on application. As a result, you may not get the kind of glaze coverage you were hoping for.
What to Use When Sanding Bisqueware Pottery?
If you don’t have much sanding to do, then you can use regular wet/dry sandpaper. This is the sandpaper that is used for sanding building and DIY materials. Most potters will sand stoneware bisque with wet/dry sandpaper that is 180-220 grit.
The most common types of sandpaper available are aluminum oxide and silicon carbide sandpaper. Aluminum oxide sandpaper is tough, but silicon carbide sandpaper is a finer abrasive (source). As such it’s a good choice for getting a smooth finish on a refined surface like pottery.
Whilst porcelain is a hard ceramic, its surface is also less textured than stoneware. As a result, it’s easier to ruin a piece of porcelain by scratching an otherwise smooth surface with sandpaper.
Some potters use 220 grit sandpaper on porcelain. However, you might be advised to start off with a 320 grit and see how you get on. If you find that the 320 isn’t quite strong enough, you can try something grittier. But, when sanding it’s best to proceed with caution.
Other Materials for Sanding
Sandpaper is the obvious choice for sanding. However, sandpaper is just that. It is sand that has been stuck to a reinforced paper backing.
Whilst sandpaper might sand down bisqueware for a while, it won’t last very long. This is because its construction is quite flimsy compared to the ceramic that it’s sanding.
Sandpaper might be ok for smaller areas or lighter sanding. However, if you want to sand a lot of bisqueware, then you might be better using a sanding screen.
Sanding Screens
A sanding screen is made from mesh, and it has abrasive particles attached to the surface. Sanding screens are often used for sanding drywall because the dust passes through the holes in the mesh.
As a result, the screens last longer than sandpaper. The same is true when sanding ceramics. Screens last longer because the mesh is tougher, and the dust falls away rather than accumulating as you rub.
Another advantage of using a sanding screen is that, although they are tough, they are less aggressive than sandpaper. This is because there are fewer abrasive particles on the mesh surface area.
Like sandpaper, you can get sanding screens with different grit sizes. When sanding larger amounts of bisque, you can start off with a sanding screen. The sanding screen will do the bulk of the work.
Then you can finish off the sanding process with a finer grit sandpaper. Perhaps something like a 320 sandpaper.
Diamond pads
Another alternative is diamond pads. These can be bought as circular pads to attach to power tools. But you can also buy handheld diamond pads that are very handy for smoothing out edges of ceramics. They can be used wet or dry and they are specifically designed for sanding glass, ceramics, and porcelain.
Sanding Glazed Pottery
Here are some of the reasons that you might want to sand glazed pottery.
After the glaze fire, you notice that the foot or base of the pot is a little rough. It’s important that functional ware, like mugs, bowls, and plates are smooth so they don’t scratch table surfaces.
You applied too much glaze and it dripped onto the foot of the pot during the glaze fire.
You may want to reglaze your pottery
Smoothing the Base of Your Glazed Pots
As with sanding bisque, wet sanding will give you a smoother more polished surface. It also helps you avoid silica dust from glaze as well as clay being kicked up into the air.
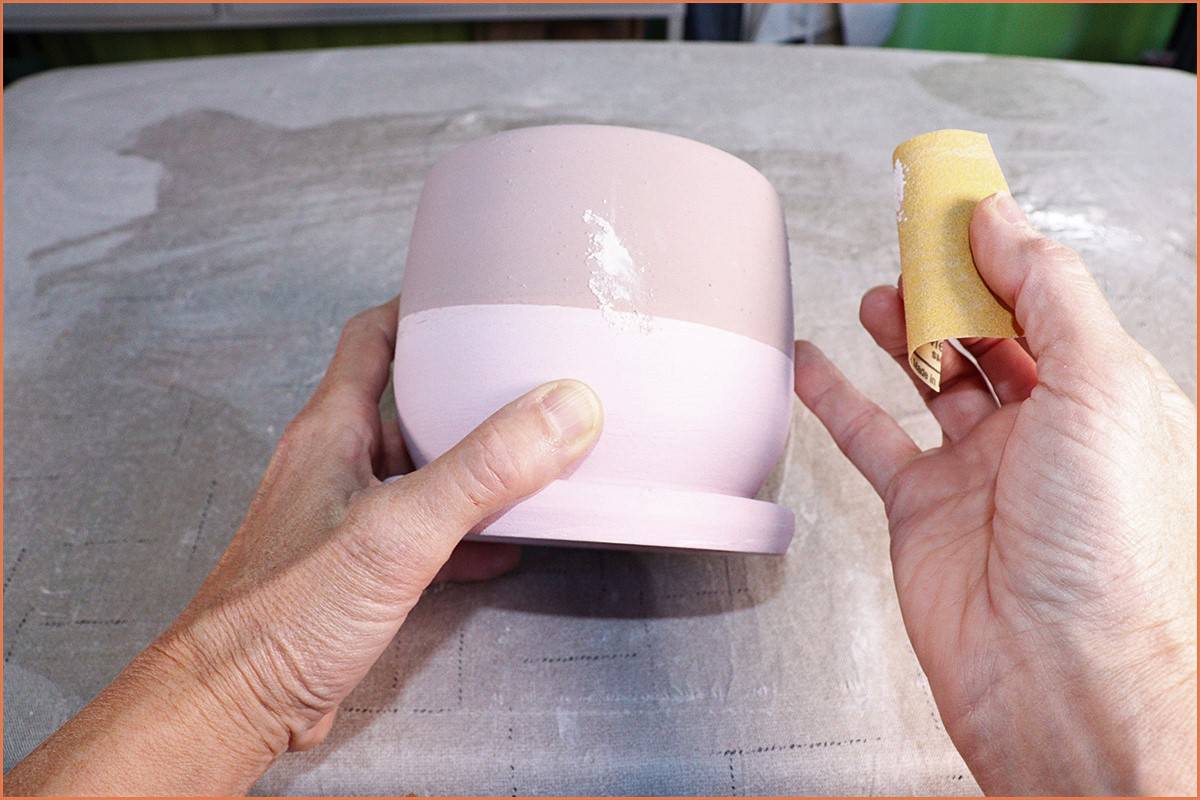
If you have just a few pieces to sand, you can hold your sandpaper in your hand and sand away.
To make life a little easier, you can tape some sanding paper or screen to your worktable. Then you can move the foot of the pot back and forward on the paper until it’s smooth.
Use Velcro to attach a sanding disc to a wheel bat. Then put the bat on the wheel and rotate the wheel head. You can then hold the foot of the pot on the sanding disc as it rotates. You can wet sand by squeezing some water from a sponge over the sanding disc as it rotates.
Diamond Core makes a range of sanding discs designed to be used in a similar way on the wheelhead.
If you’re sanding down a lot of bases another efficient way to do this is to use a wet air grinder. Jeff Campana describes an innovative way of mounting a grinder on a wooden jig over a sink.
When the grinder is securely mounted you hold the base of your pot up against the grinder head. This grinder is designed so that water flows as the head rotates.
When the grinder is securely mounted you hold the base of your pot up against the grinder head. This grinder is designed so that water flows as the head rotates. The reason this is so efficient is that the grinder head rotates at 55000 rpm. By contrast, a wheelhead rotates at around 200 rpm. So, if you’re smoothing large numbers of pots, the wet air grinder will be less effort and take less time.
John Britt has made a good video demonstrating the wet air grinder setup.
Grinding off Drippy Glaze
If your glaze has dripped during the glaze fire, you can grind the drips off in the following ways.
Using a bench grinder. These are simple inexpensive electrical power tools. The bench grinder has rotating disks on either end. You can attach disks with different levels of grit. If you hold the glaze drips up against the rotating disk, it will grind the glaze off.
The disadvantage of using a bench grinder is that it is a dry method of grinding. So, there it does pose the problem of creating glaze dust. One solution is to use a wire wheel. This generates less dust than a grinding pad.
However, it does not eliminate the dust risk completely. As such, it’s important to wear a respirator when you use a bench grinder. Goggles are also essential to avoid damaging your eyes if pieces of glaze spin off the rotating disk.
Another option is to use a Dremel tool. These are smaller pen-like tools that can offer you a bit more control when grinding off smaller drips. You can attach different-sized bits to the Dremel tool, with different levels of abrasion.
Sanding Your Glazed Pottery for Reglazing
If you are not happy with the finish on your glaze, you can reglaze your pottery. This basically involves applying another layer of glaze to the pot and refiring.
Glaze adheres to bisqueware because the bisque is porous and absorbs the water from the clay. This is not the case with glazed pottery. A glazed surface is not porous.
Therefore, if you are reglazing pottery, you need to find ways to make the glaze stick to the non-porous surface. One way to do this is to sand the existing surface a little. This creates a rough texture that the new layer of glaze can key into.
Final Thoughts
Although sanding pottery is a bit controversial, it is also very useful. Pottery can be sanded at almost any stage. You just need to adapt your sanding approach to suit the stage that your pottery is at. The key tips are to proceed with caution. Once you have sanded your ceramics you can’t un-sand them. So, test your surface first with finer grades. You can always increase the grit of your sandpaper if you need to. The second key tip is to keep yourself safe. Always wear a respirator, and if you are using a grinder of any kind wear goggles.
5 Best Sandpapers For Ceramics
*This post may contain affiliate links. Please see my disclosure to learn more.
It is not unusual for ceramics to turn out a little less than perfect. You might notice a sharp edge here, some rough-textured patch there, or an uneven bottom that makes your wares wobble.
Glazing isn’t of much help in concealing these flaws. Conversely, glazing a piece with such blemishes further draws attention to them because they tend to stick out more. You might even get bubbles or drips after glazing, adding to the imperfections.
What is the best sandpaper for ceramics? The best kind of sandpaper to remove burrs or drips, smooth rough edges, touch up the details, or level the base of ceramics is wet sandpaper with a grit between 180-400. Start with a coarser grit and work your way to a finer grit.
Sanding your ceramic wares after bisque firing or glazing remedies these rough, sharp, or uneven spots. It refines details, the overall aesthetic, and the feel, adding value to your craftsmanship.
To learn more about sanding ceramics, continue reading this post. There’s plenty of information on the best sanding papers and how to choose them, plus tons of other helpful tips.
Things To Look For When Choosing Sandpaper For Ceramics
Sandpapers are not created equal. Some are general-purpose, while others are specific for wood, metal, glass, or ceramics. To find the best sandpaper for ceramics, you must take into account the following factors.
1. Grit
Sandpaper does scratch ceramics, especially when dry sanding. For this reason, the grit must be top of your checklist. Sandpapers come in different grades, commonly referred to as grit and indicated by numbers. The smaller the number, the more abrasive the sandpaper.
You do not want coarse grit sandpaper because of potential scratches on porcelain in particular. 180-220 grit sandpaper is ideal to start with. Then you can go finer to 400 to polish up your pieces.
For porcelain that is ordinarily smooth and susceptible to scratches, it is better to start with ultra-fine sandpaper like 320-400 grit to see how it works. If not sure, broaden the variety to experiment with more options. But the type of clay you have should guide you in determining what grit to use.
Earthenware and stoneware clay is more likely to feel rugged when touched than porcelain. There’s also the element of grog to factor in.
2. Type Of Sandpaper
Aluminum oxide and silicon carbide are the two most prominent sandpapers available in the market. Silicon carbide sandpapers sand very finely and are ideal for smooth surfaces like ceramics.
Aluminum oxide sandpapers tend to be aggressive and suitable for surfaces that need more work, like removing a significant layer of material. They are not the best for ceramics unless that is the result you intend to get, for example, when leveling poorly balanced feet.
3. Capacity
When choosing sandpaper for ceramics, you must gauge its capabilities against the number of pieces/surface area you want to sand.
If you’re doing one small or medium piece or a little patch, you can go with ordinary sandpaper. But if you’re sanding in large-scale or a considerable part, you will need to replace the sandpaper too frequently, which is exhausting and uneconomical.
You might have to look at diamond pads or sanding screens. These are better sanding options for big tasks as they are durable.
4. Wet Sanding Ability
Ceramics must always be wet sanded. Sanding ceramics dry produces a lot of fine silica dust that is suspended in the air for days, posing severe health problems to anyone who inhales it.
Crafting is not all about fun but also responsibility. To keep yourself and those around you safe, opt for wet sanding. You can achieve this by either dunking the bisque fired piece in water first or soaking then using the wet sandpaper as you go. Instead of dust, you’ll create a sludge that you can wipe off.
Water also acts as a lubricant, preventing clogging. Clogged sandpaper creates deeper, wider scratches which are contrary to what you want to achieve by sanding.
Please note that not all sandpapers are made for wet sanding, so pay attention when making your purchase. Check for resin bonding, electroplated paper, and other waterproof qualities.
5. Convenience Features
How do you want to sand your ceramics? By hand, using a block, or a palm sander? Sandpapers come in different shapes and sizes, though you can always cut them to size to fit your needs.
Some features can be added to enhance the usability experience, for example, non-slip grip features for manual sanding or hooks and loops to attach to palm sanders.
The 5 Best Sandpapers For Ceramic
By now, you must be thinking, what is the best sandpaper for ceramics? The best sandpaper for ceramics is a very fine grit dry/wet sandpaper that won’t go too hard on the surface.
But there’s plenty of sandpaper brands. It is easy to fall prey to the wrong one and end up ruining your best work. Worry not because we already did thorough research for you and shortlisted from hundreds of products the 5 best sandpapers for ceramics.
1. 3M Pro Grade 220 Grit Sandpaper
Check Current Price on Amazon
The 3M pro-grade advanced sandpaper is nothing like your ordinary sandpaper. It is designed to last much longer.
Pro-grade is a dry/wet sandpaper with anti-clogging properties. It enables you to wet sand your ceramics without fear of damaging the sandpaper or your wares.
The top surface is made with anti-slip technology, which enhances a firm grip. Using it is such a breeze. It gives you complete control with zero frustration.
Each pack contains 20 9×12-inch sheets of 220 grit sandpaper which is an excellent value as you can cut one sheet into smaller sizes as per your needs.
2. Keama 120-5000 Assorted Grit Sanding Paper
Check Current Price on Amazon
If you are not sure of the grit you need and want to buy a variety to try out cost-effectively, this is the product for you. The assortment of grit from the aggressive 120 to the light buffing 5000 grit sandpaper is satisfying.
The sandpaper is sturdily built with waterproof silicon carbide and an electroplated coated paper that doesn’t tear or crumble easily. They last a long time.
You’ll love how this sandpaper resists loading up when wet sanding. It doesn’t clog and works with the same efficiency. There are 45 sheets in a pack, 3 for each grit number. They measure 9 by 3.6-in with the grit number printed for easy identification and retrieval.
3. Z-Lion Diamond Abrasive Paper Sheets
Check Current Price on Amazon
The best sandpapers for ceramics are those designed precisely for that. This Z-Lion diamond sandpaper is one of the few.
It is well put together with electroplated bonds for enhanced useful life. The backing is made of cloth which makes it super flexible. It gets even in the tightest spots.
You get 4 relatively small sheets, measuring 3.54-in by 2.16-in, but they do a superior job on ceramics without the need for applying too much pressure. They come in a nice range of 60, 120, 200, and 400 grit.
4. Poliwell Assorted Grit Sanding Sheets
Check Current Price on Amazon
For versatile sandpapers that you can use by hand with a manual pad and a palm sander too, go for this products. The 4.5 by 5.5-in sheets come with the hook and loop for 1/4 inch sheet palm sanders and fits perfectly.
You get an impressive assortment of 10 different grades of sandpaper from 60 to 1000 grit.
There’s everything for the different types of ceramic clay, including grog and non-grog stoneware, earthenware, and porcelain at whatever stage, be it bisque fired or glazed.
There are five sheets for each grit number summing up to 50 sheets which is ample sandpaper to cater to all your sanding needs for a long time.
The quality is superior as it is made from ceramic silicon carbide, latex water, and heat-resistant paper and glue, which is eco-friendly too. It allows for both dry and wet sanding.
5. 3M Wetordry Assorted Grit Sandpaper
Check Current Price on Amazon
Last but not least is the wetordry sandpaper from a reputable brand which works amazing for wet sanding. You can expect the same efficiency as other 3M products.
This pack of sandpapers is made from silicon carbide with a paper backing bonded by resin. You are assured that it is waterproof and will not come apart while in use.
You get three different grades of sandpaper: 2 pcs 220 grit, 2 pcs 320 grit, and 1 pc 400. It is a fine selection for obtaining that silky smooth finish on your ceramics. You can’t go wrong with this brand.
Up Next: How To Seal Acrylic Paint On Ceramic Mugs
How to Remove Glaze From Pottery
The main challenge potters have when trying to remove glaze from pottery is to do it properly. If you remove too much of the glaze, you can damage the pottery and ruin the original design or finish. The good news is there are several methods you can use, but it’s important to choose the right one for your pottery.
One popular method is to sand the glaze off the pottery. However, this will require some patience, as you’ll need to sand slowly and evenly to avoid damaging the piece.
This article will explore how to remove glaze from pottery before and after firing it. I will also provide some tips on how to avoid removing too much of the original glaze or design.
Affiliate Disclaimer: We are ambassadors or affiliates for many of the brands we reference on the website. As an Amazon Associate, I earn from qualifying purchases.
Reasons for Removing Glaze From Pottery
There are several reasons why you may want to remove glaze from your pottery:
To Fix a Mistake :
You may have applied the glaze too thick. As a result, your glaze dripped in one area. You also could have applied a glaze where you don’t want it.
To Change the Look:
If you’re not happy with how the glaze looks. You may want to change the color of the glaze. You’ll need to remove the existing glaze. This is a common reason why potters need to remove the glaze from their pottery.
For Aesthetics Reasons :
You may want to remove the glaze to achieve the desired effect. For example, if you’re trying to create a distressed finish.
For Functional Purposes:
In some cases, the glaze may not be functional. For example, if you didn’t use a food-safe glaze on pottery that will be used for eating or drinking, you’d need to remove the glaze and reglaze before firing.
Glaze Dripped off Your Pottery During the Final Fire:
Glaze dripped onto your kiln shelf. While kiln wash will protect the kiln shelves, it won’t protect the bottom of your pottery piece.
Methods of How to Remove Glaze From Pottery
The methods to remove glaze can be divided into pre-firing and post-firing. In both cases, such tasks do take a little time and patients.
Pre-firing methods involve removing the glaze in the Bisque Stage before the glaze firing. The great thing is the glaze can be fixed before it becomes permanent.
Post-firing methods are after the Final Fire when the glaze has become permanent and can’t be removed with pre-firing methods.
Pre-firing Methods for Removing the Glaze From Pottery
Removing pottery glazes before firing is easier when you choose one of these methods:
Sanding off Glazed Pottery
One of the most popular pre-firing methods is to use sandpaper to remove the extra glaze from the pottery. This is a good option if you need to remove the glaze from a small area.
To use this method, you need a Dust Mask. Make sure the glazed surface is totally dry before removing the unwanted glaze for the best results. Wet glaze or wet sandpaper may clump up the glaze making the removal uneven.
Rub the sandpaper over the area where you want to remove the glaze. You can use a variety of sandpaper grits, starting with coarse grit and working your way to a fine grit.
Tip to avoid removing too much glaze: The key is not to rub on the glazed surface too hard. The best thing you can do is slowly, evenly, and lightly rub until all of the unwanted old glaze is removed.
Sponging off Your Glaze From Pottery
This pre-firing method is to use a wet sponge to rub the glaze off of the pottery. This is a good method for removing the glaze from a small area like a glaze drip.
Dip your sponge in warm water and ring it out. You don’t want the sponge to be too wet. A damp sponge works best. Too much water will get the glaze too wet and risk smudging the glaze.
Gently rub over the area where you want to remove the coats of glaze. Continue rubbing until all of the unwanted glaze is removed.
Tip to avoid removing too much glaze: Frequently rinse your sponge out, and don’t rub too hard.
Washing Glaze off Your Pottery
This is a good option if you need to remove the glaze from the whole piece. To use this method, wet the pottery and let it sit for a bit to allow the water to penetrate the glaze. Then rub the glaze off with a sponge. A damp sponge will remove the glaze better than a wet sponge.
Continue rubbing and rinse out the sponge often until all of the glaze is removed before reglazing. Allow the piece to dry out for the reapplied glaze to adhere properly.
Scraping off Your Glaze From Pottery
If you need to remove small amounts of glaze from your pottery. You can use a Clean-Up Tool or another sharp object like a dental tool to scrape it off. This method works well to get globs off the top of the glaze.
Tip to avoid removing too much glaze: Don’t apply too much pressure with the tool, or you will gouge into the glaze.
Post-firing Methods for Removing the Glaze From Pottery
Glaze can drip onto your kiln shelves, whether you’re firing at a higher temperature or low fire glazes. High temperatures tend to move glaze more easily, but lower temperatures can still melt the ceramic glazing. It depends more on the type of glaze (stable or flowing).
To learn how to remove the glaze from pottery after firing, I suggest using one of the following methods:
Sanding off the Ceramic Glaze
The most common post-firing method is to use sandpaper to remove the glaze. This is a good method to remove the glaze from a small area like sharp edges.
To use this method, you can use wet or dry sandpaper. I prefer dry sanding and always wear a Dust Mask when doing so. Start by rubbing coarse sandpaper in a circular motion over the area to remove the glaze.
Because the glaze has vitrified and is now glass-like, you will have to apply more pressure. Continue rubbing until the glaze is removed. Then, switch to finer sandpaper for a smooth surface.
The surface of the glazed area will become dull. Therefore, you will need to Reglaze and Refire the piece.
Grinding off the Glaze From Pottery
There are several ways to grind off sharp edges or glaze drips from your glazed ceramic.
Rotary Tool
If you happen to apply the glaze too thick and it melts to the bottom of your pot, not all is lost. You can Grind the Melted Glaze off with your Handheld Rotary Tool. It has come in handy on more than several occasions. The Diamond Bits work the best on the glaze. You can also use the rotary tool to sand down sharp edges.
When using this method, always wear Safty Glasses. Unfortunately, I learned my lesson the hard way and got hit in the eye with a tiny speck of glaze.
Dip the diamond bit in water and place the grinder over the area where you want to remove the glaze. If you don’t use water, wear a Dust Mask.
Tabletop or Bench Grinder
When using a Tabletop Ginder or Bench, it’s best to use it outdoors if possible.
A Bench Grinder will take care of sharp edges on your glaze in a flash. Safety Glasses and a Dust Mask Should also be worn when operating the Tabletop Grinder.
Bat Grinder
If you need to remove the glaze from the bottom of your pottery, you can use a Bat Grinder. You would place the bat grinder on the pottery wheel to use this method. Then apply your piece over the area where you want to remove the glaze.
The potter’s wheel should be rotating slowly. No higher than medium speed. And keep the bat grinder WET, WET, WET throughout the process. I didn’t want to understate the wet part.
Tip to avoid removing too much glaze: It is important to avoid using too much pressure when using any of these grinding tools on your pottery to prevent damaging the pottery.
How to Remove Glaze From Terra Cotta Pots
Terra Cotta pots are a classic choice for stylish and functional home décor. Still, over time, the glaze can become stained or faded. Suppose you’re looking to restore your terracotta pots to their original beauty. In that case, there are a few simple steps you can follow.
First, clean the pot with water and a sponge.
Next, use sandpaper and water on the pot’s surface to remove any loose glaze. You will want to use coarse sandpaper to scratch the surface.
Finally, rinse the pot thoroughly and allow it to air dry. Reglaze and refire to cone 06.
Here are a few tips to help restore the Terra Cotta Pot:
Work slowly and carefully when sanding the pottery. Too much pressure can damage the terra cotta clay.
Avoid using harsh chemicals or abrasive materials. These can also damage the pottery.
Conclusion
Removing glaze from pottery can be a challenge, but with the right methods, it is possible. This article has outlined different ways to remove the glaze depending on your needs. I have also provided tips for how to avoid removing too much of the original glaze on the pottery. With these tips in mind, you’ll be able to remove the glaze from your pottery without damaging your pottery.
FAQ’s
How Do I Remove Glaze From Ceramic Tile?
To remove the ceramic glaze from ceramic tile, you will need to use a grinder or other rotary tool to remove the glaze. First, wet the diamond bit, and then apply the rotary tool over the tile surface where you want to remove the glaze. The glaze will start to come off. Continue grinding until the glaze is removed. The area where you ground the surface of the ceramic product will now have a dull appearance. You can apply a new glaze to the dull surface of tile with a clear glaze and refire to make the dull tile shinning again.
Can I Use a Hairdryer to Remove Glaze From Pottery?
No, I do not recommend using a hairdryer to remove glaze from pottery. This just gets the ceramic surface hot. Instead, I recommend using one of the other methods outlined in this article.
So you have finished reading the how to sand ceramic pottery topic article, if you find this article useful, please share it. Thank you very much. See more: how to sand glazed ceramic, how to smooth bottom of pottery, best sandpaper for ceramics, what grit sandpaper for ceramic tile, sanding greenware, can you sand ceramic mug, pottery sanding tools, shrinkage ceramics definition