
당신은 주제를 찾고 있습니까 “cubase iterative quantize – Iterative Quantizing tricks in Cubase“? 다음 카테고리의 웹사이트 Chewathai27.com/you 에서 귀하의 모든 질문에 답변해 드립니다: Chewathai27.com/you/blog. 바로 아래에서 답을 찾을 수 있습니다. 작성자 Marula Music 이(가) 작성한 기사에는 조회수 4,527회 및 좋아요 57개 개의 좋아요가 있습니다.
Table of Contents
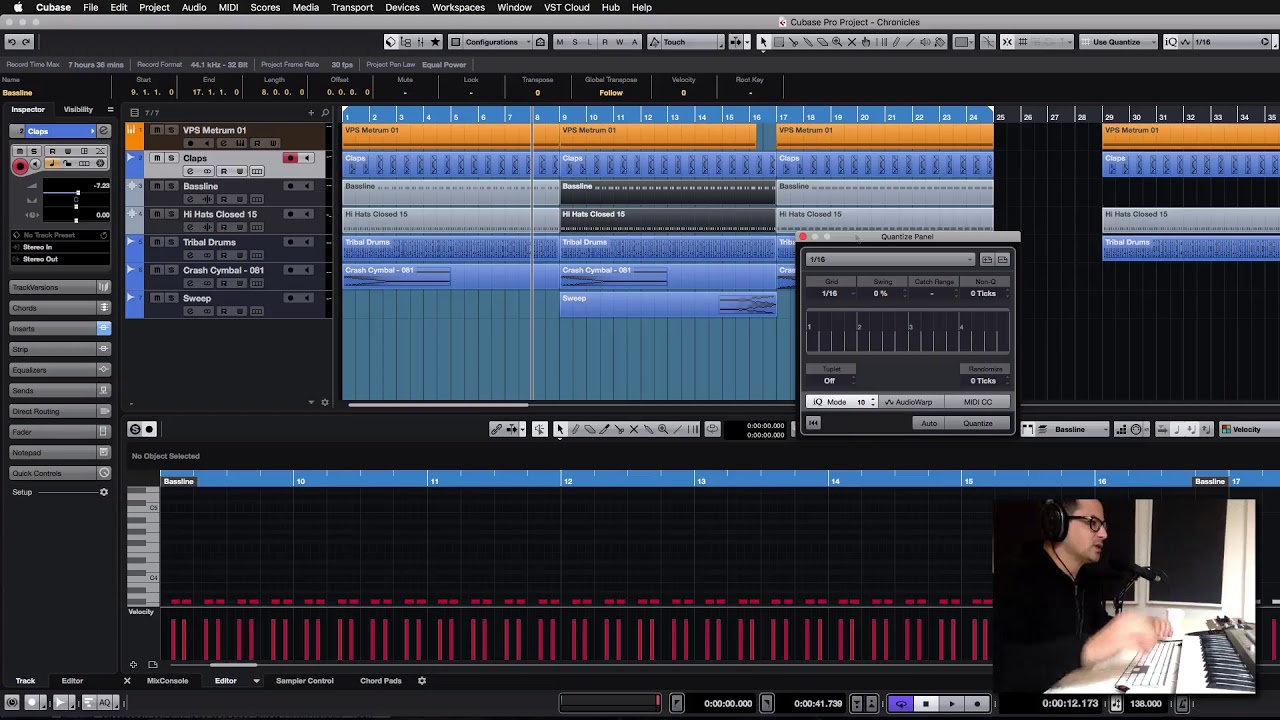
cubase iterative quantize 주제에 대한 동영상 보기
여기에서 이 주제에 대한 비디오를 시청하십시오. 주의 깊게 살펴보고 읽고 있는 내용에 대한 피드백을 제공하세요!
d여기에서 Iterative Quantizing tricks in Cubase – cubase iterative quantize 주제에 대한 세부정보를 참조하세요
Ever wanted to get that morphing time signature effect from Hallucinogen or Shpongle? This little Cubase trick comes pretty close.
Don’t forget to like and subscribe if you’re enjoying these videos.
Also check out the blog at my website www.marulamusic.com for more reviews, tips and news.
cubase iterative quantize 주제에 대한 자세한 내용은 여기를 참조하세요.
‘Randomize’ vs ‘Iterative Quantize’ – Cubase – Steinberg Forums
They are kind of the opposite of each other. If you have everything hard quantized on the gr and it sounds robotic then use randomize to move …
Source: forums.steinberg.net
Date Published: 12/15/2021
View: 5421
Iterative quantize shortcut for Cubase – Vi-Control
quick Cubase question: is there a shortcut / key command to tweak the percentage of iterative quantize in Cubase directly on selected notes?
Source: vi-control.net
Date Published: 8/9/2021
View: 6809
Advanced MIDI Quantizing in Cubase 7 – Ask.Audio
Iterative quantization allows Cubase to move the notes closer to the gr, without placing them perfectly (and boringly) in time.
Source: ask.audio
Date Published: 2/9/2021
View: 9780
Iterative Quantize | Renoise
Iterative quantization (also known as partial quantization) moves notes towards the nearest line, but not all the way as normal quantization …
Source: www.renoise.com
Date Published: 8/20/2022
View: 8025
A question on Quantize : r/cubase – Reddit
You can also set up quantize presets like “20% swing, with 10 tick (ms?) randomness”… then you can quantize/iterative-quantize based on those …
Source: www.reddit.com
Date Published: 6/14/2021
View: 970
주제와 관련된 이미지 cubase iterative quantize
주제와 관련된 더 많은 사진을 참조하십시오 Iterative Quantizing tricks in Cubase. 댓글에서 더 많은 관련 이미지를 보거나 필요한 경우 더 많은 관련 기사를 볼 수 있습니다.
주제에 대한 기사 평가 cubase iterative quantize
- Author: Marula Music
- Views: 조회수 4,527회
- Likes: 좋아요 57개
- Date Published: 2017. 8. 21.
- Video Url link: https://www.youtube.com/watch?v=RoOZkynFS6Y
What is iterative quantize Cubase?
Description. Iterative quantization (also known as partial quantization) moves notes towards the nearest line, but not all the way as normal quantization does. You can use it to correct the timing of recorded notes without making it sound too ‘mechanical’.
What are hitpoints in Cubase?
Hitpoints mark musically relevant positions in audio files. Cubase can detect these positions and create hitpoints automatically by analyzing onsets and melodic changes of the audio. All hitpoint operations can be performed in the Sample Editor window and in the lower zone editor.
What is audio quantize?
Quantizing means moving recorded audio or MIDI and positioning it on the nearest grid position that is musically relevant. Quantizing is designed to correct errors, but you can also use it in a creative way. You can quantize audio and MIDI to a grid or to a groove.
What is Time Warp in Cubase?
The Time Warp tool allows you to adjust musical positions of events or parts to time positions. You can adjust positions in musical time based material to positions in time. You can match material with a musical time base to material with a linear time base.
What is Audio Warp?
The AudioWarp section allows you to perform timing settings for your audio. This includes applying Swing and manually changing the rhythm of the audio by dragging beats to time positions on the grid.
How do I stretch audio in Cubase?
- Select File > Import > Audio File, select the audio loop that you want to import, and click OK.
- Select the audio loop in the project.
- Select Audio > Advanced > Stretch to Project Tempo.
Where is musical mode in Cubase?
In the Sample Editor, you can activate Musical Mode in the AudioWarp section, the Definition section, and the toolbar. You can also activate/deactivate Musical Mode from within the Pool by clicking the corresponding checkbox in the Musical Mode column. Cubase supports ACID® loops.
Iterative Quantize
Iterative quantization (also known as partial quantization) moves notes towards the nearest line, but not all the way as normal quantization does. You can use it to correct the timing of recorded notes without making it sound too ‘mechanical’.
IQ has 3 controls:
shift: moves all notes forward or backward in time by a fixed amount before the actual quantization. It is included to correct for systematic timing errors (when all notes are delayed by a fixed time).
quantize: the quantization strength. The higher this value is, the more the note is moved. A strength of 100% is the same as full quantization, 50% will move the note halfway to the nearest line, and 0% won’t move the notes at all.
quantize to * lines: a value of n will move the notes to the nearest nth line. For example, if you set it to the same value as your Lines Per Beat value, the notes will be quantized with respect to the nearest beat.
Note that this tool may not work well with notes or note off events that are too close to each other in the same column. There are two options that are intended for dealing with this, but unfortunately they will not solve this issue in every situation.
‘Randomize’ vs ‘Iterative Quantize’
Hi there,
What’s the difference between ‘Randomize’ and ‘Iterative Quantize’ (Mode button) in terms of the resulting recording?
What’s the point in using these both effects simultaneously?
What would be the easiest and most effective way to quantize a live MIDI recording and still avoid robotic tightness?
PS. Has Greg already covered advanced quantization in his Google Hangout sessions? I’d appreciate it if somebody shared a link.
Paul
Iterative quantize shortcut for Cubase
Yeah i found out yesterday that there are a lot of things not assignable to key commands, for example the amount of legato overlap, the “midi cc follows quantize” and indeed iterative quantize amount.
Wonder why even though almost everything is assignable, there are still these little things that are not…
Advanced MIDI Quantizing in Cubase 7
Anyone who’s followed my books or online courses know I’m not a fan of hard MIDI quantization, wherein the notes are placed perfectly on the timing grid. Basically, hard quantization strips a large portion of the human nuance from a MIDI recording, which really sterilizes the result. Unless you’re creating music that’s designed to sound electronic and robotic, hard quantization is generally something to be avoided.
Fortunately, Cubase 7 has a wealth of quantization tools that won’t strip out the groove. In fact, Cubase always keeps the original timing of the MIDI recordings intact, allowing you to go back in time and remove any quantizations you may have previously applied, with the exception of the Freeze MIDI Modifiers command. In this tutorial, I’ll show you four advanced MIDI quantization methods that you can use to tighten the timing of your recordings.
Quantize Settings and Commands
The quantization settings can be adjusted either on the right side of the Project Window toolbar, near the middle of the toolbar in the Key or List Editors, or in the Quantize Panel, but the latter offers you many more options (Figure 1).
Figure 1: Quantize settings in the Project Window and Editors (left), and the Quantize Panel (right).
Like most editing processes, making a selection of the MIDI event(s) (Project Window) or MIDI notes (Editors) will need to precede a Quantize command. You can access the Quantize Panel either by selecting it from the Edit menu, or by clicking the rightmost segment of the quantize settings in the Project Window or Editors. To execute the Quantize command, you can select Quantize from the Edit menu, or simply type Q on your computer keyboard. To remove any quantization previously applied (even after the Project has been saved and closed), select Reset Quantize from the Edit menu.
Method One: Auto Q
Auto Q is an abbreviation of Auto Quantization. The Auto Q button is located in the lower-left corner of the Transport Panel as shown in Figure 2.
Figure 2: The Auto Q button, ON or OFF, shown ON.
Clicking the Auto Q button will toggle it on or off. When it’s on, MIDI notes will be quantized automatically during the recording, as per the quantize settings. This method works really well when you’re working very quickly because you don’t need to execute a quantize command after the recording. Then if for any reason you want to return the recording to its original timing, you can make a selection and choose Reset Quantize from the Edit menu.
Method Two: Using the Quantizer MIDI Plug-in
Cubase 7 has many powerful real-time MIDI plug-ins, including the Quantizer. It can be assigned to the MIDI Inserts of either MIDI or Instrument tracks as shown in Figure 3.
Figure 3: The Quantizer plug-in assigned to MIDI Insert 1 of a MIDI Track, edit button enabled.
The Quantizer plug-in will apply the quantization to the playback of the track, without altering the timing of the events on the track. Like using the Auto Q method, the Quantizer plug-in allows you to work quickly without having to execute the Quantize command after the recording. But it also provides you the ability to modify the quantization settings in real time during playback. This allows you to listen to the results and make fine adjustments to the settings.
To assign the Quantizer, click the MIDI Inserts tab in the Inspector (far left of Figure 1), click on an empty Insert slot (1-4), and select Quantizer from the plug-in list. The settings for the Quantizer can be viewed by clicking the edit button (lowercase ‘e’) located to the right of the slot power button.
The Quantize Note setting establishes the timing grid, whereas the Swing slider adjusts how off-beats are swung forward towards a downbeat. The Strength setting alters how rigidly the notes are placed on the grid. A setting of 100% will result in a hard quantization, whereas lower settings will retain more of the original performance timing. The Delay slider adjusts all the notes on the track forward or backwards in time, and is based in milliseconds.
The Quantizer plug-in can be saved as part of a Track Preset. This is helpful when you find a drum set patch you really like and want to load the Quantizer whenever you load that drum set. Also, if you have a Quantizer setting you’re happy with and wish to apply it to the actual MIDI data, you can right/Control-click the selected event and choose MIDI > Freeze MIDI Modifiers. However, be aware that doing so will prevent you from ever using the Reset Quantize command on that event.
Method Three: Using Iterative Quantize
Iterative quantization allows Cubase to move the notes closer to the grid, without placing them perfectly (and boringly) in time. This is identical to adjusting the Strength control on the Quantizer plug-in to a setting below 100%. However, the Iterative Quantize option is available to any MIDI event via the Quantize command. Refer back to the left image in Figure 1 and locate the Q button to the right of the quantize note setting (1/16). When you click that button, it will switch to iQ, or Iterative Quantize mode. The Strength setting is found in the iQ Mode in the Quantize Panel as shown in Figure 4.
Figure 4: The Quantize Panel, iQ Mode enabled, Strength = 77%.
With the iQ Mode enabled (and set below 100%), any Quantize command will ‘firm up’, but not make perfect, the timing of the MIDI notes. I like to choose a low setting around 50 to 60%. Then if one Quantize command (Edit > Quantize, or typing Q on the computer keyboard) doesn’t get the timing close enough, successive Quantize commands will move the notes closer and closer. Be aware that after several Iterative Quantize commands, the MIDI data will eventually become hard quantized.
Method Four: Creating Groove Quantize Presets
This method allows you to use other MIDI events as the quantize grid that other MIDI events can follow. For example, if you have a drum event with a killer groove, along with a bass event that isn’t quite ‘locking in’, you can quantize the bass event against the drum event.
To create a Groove Quantize Preset, select the MIDI event that has the desired MIDI timing, then go to the Edit menu, select Advanced Quantize, then choose Create Groove Quantize Preset. That new preset will be added to the default presets in the Quantize settings or Quantize Panel and will be given the name of the event from which it was created. In the case of Figure 5, the name “Standard Studio Kit 120Bpm 44 10bars” has been assigned to the preset.
Figure 5: Groove Preset created and named as per the source event.
With the new preset selected, you can now apply that quantization to other events in the current Project by executing a Quantize command. You can even enable the iQ mode for a more relaxed quantization. If you’ve created a groove you’d like to use in other Cubase Projects, you can click on the Quantize Presets at the top of the Quantize Panel and choose Save Preset and Rename Preset, if so desired.
Using any of these methods can make the recording of MIDI data faster and thereby increase your productivity. They can also provide you with a lot of variety and a degree of musicality that may have required an intense degree of manual editing.
Iterative Quantize
Iterative quantization (also known as partial quantization) moves notes towards the nearest line, but not all the way as normal quantization does. You can use it to correct the timing of recorded notes without making it sound too ‘mechanical’.
IQ has 3 controls:
shift: moves all notes forward or backward in time by a fixed amount before the actual quantization. It is included to correct for systematic timing errors (when all notes are delayed by a fixed time).
quantize: the quantization strength. The higher this value is, the more the note is moved. A strength of 100% is the same as full quantization, 50% will move the note halfway to the nearest line, and 0% won’t move the notes at all.
quantize to * lines: a value of n will move the notes to the nearest nth line. For example, if you set it to the same value as your Lines Per Beat value, the notes will be quantized with respect to the nearest beat.
Note that this tool may not work well with notes or note off events that are too close to each other in the same column. There are two options that are intended for dealing with this, but unfortunately they will not solve this issue in every situation.
키워드에 대한 정보 cubase iterative quantize
다음은 Bing에서 cubase iterative quantize 주제에 대한 검색 결과입니다. 필요한 경우 더 읽을 수 있습니다.
이 기사는 인터넷의 다양한 출처에서 편집되었습니다. 이 기사가 유용했기를 바랍니다. 이 기사가 유용하다고 생각되면 공유하십시오. 매우 감사합니다!
사람들이 주제에 대해 자주 검색하는 키워드 Iterative Quantizing tricks in Cubase
- Music Production
- Psy Trance
- Psytrance
- Tutorial
- Music Tutorial
- Psy Trance tutorial
- How to Sound like Halucinogen
- shpongle
- time signatures
- edm production
- psychedelic
- trance
- protoculture
- studio
- how to
- edm
- vst
- plugin
- cubase
- lessons
- tips
Iterative #Quantizing #tricks #in #Cubase
YouTube에서 cubase iterative quantize 주제의 다른 동영상 보기
주제에 대한 기사를 시청해 주셔서 감사합니다 Iterative Quantizing tricks in Cubase | cubase iterative quantize, 이 기사가 유용하다고 생각되면 공유하십시오, 매우 감사합니다.