
You are looking for information, articles, knowledge about the topic nail salons open on sunday near me pwm analogwrite on Google, you do not find the information you need! Here are the best content compiled and compiled by the https://chewathai27.com/to team, along with other related topics such as: pwm analogwrite analogWrite, digitalWrite, digitalWrite Arduino, analogWrite ESP32, Lệnh analogWrite trong Arduino, analogRead, digitalRead, Xung PWM la gì
Table of Contents
analogWrite() | Cộng đồng Arduino Việt Nam
- Article author: arduino.vn
- Reviews from users: 23567
 Ratings
 - Top rated: 3.4
- Lowest rated: 1
- Summary of article content: Articles about analogWrite() | Cộng đồng Arduino Việt Nam analogWrite() là lệnh xuất ra từ một chân trên mạch Arduino một mức tín hiệu analog (phát xung PWM). Người ta thường điều khiển mức sáng tối … …
- Most searched keywords: Whether you are looking for analogWrite() | Cộng đồng Arduino Việt Nam analogWrite() là lệnh xuất ra từ một chân trên mạch Arduino một mức tín hiệu analog (phát xung PWM). Người ta thường điều khiển mức sáng tối …
- Table of Contents:
Bạn đang ở đây
Giới thiệu
Cú pháp
Ví dụ
Tổng hợp các bài viết về Intel Galileo
BIT MATH – Các phép toán thao tác trên bit
Mục lục
analogWrite() – Arduino Reference
- Article author: www.arduino.cc
- Reviews from users: 33417 Ratings
- Top rated: 3.7
- Lowest rated: 1
- Summary of article content: Articles about analogWrite() – Arduino Reference Writes an analog value (PWM wave) to a pin. Can be used to light a LED at varying brightnesses or drive a motor at various speeds. After a call … …
- Most searched keywords: Whether you are looking for analogWrite() – Arduino Reference Writes an analog value (PWM wave) to a pin. Can be used to light a LED at varying brightnesses or drive a motor at various speeds. After a call … The Arduino programming language Reference, organized into Functions, Variable and Constant, and Structure keywords.
- Table of Contents:
analogWrite là gì
- Article author: dientutuonglai.com
- Reviews from users: 14229 Ratings
- Top rated: 3.4
- Lowest rated: 1
- Summary of article content: Articles about analogWrite là gì analogWrite ghi một giá trị analog (sóng PWM) vào một chân. Có thể được sử dụng để thắp sáng LED ở các độ sáng khác nhau hoặc điều khiển động cơ ở nhiều tốc … …
- Most searched keywords: Whether you are looking for analogWrite là gì analogWrite ghi một giá trị analog (sóng PWM) vào một chân. Có thể được sử dụng để thắp sáng LED ở các độ sáng khác nhau hoặc điều khiển động cơ ở nhiều tốc … Trong bài viết này Điện Tử Tương Lai sẽ giúp bạn tìm hiểu hàm analogWrite là gì và dùng để làm gì.
analogWrite ghi một giá trị analog (sóng PWM) vào một…analogWrite là gìTrong bài viết này Điện Tử Tương Lai sẽ giúp bạn tìm hiểu hàm analogWrite là gì và dùng để làm gì.
analogWrite ghi một giá trị analog (sóng PWM) vào một… - Table of Contents:
Thông tin địa chỉ công ty
Dịch vụ
Đăng ký dịch vụ
analogWrite() (PWM) – Input/Output | Reference | Particle
- Article author: docs.particle.io
- Reviews from users: 46904 Ratings
- Top rated: 3.3
- Lowest rated: 1
- Summary of article content: Articles about analogWrite() (PWM) – Input/Output | Reference | Particle analogWrite() (PWM) … Writes an analog value to a pin as a digital PWM (pulse-wth modulated) signal. The default frequency of the PWM signal is 500 Hz. Can be … …
- Most searched keywords: Whether you are looking for analogWrite() (PWM) – Input/Output | Reference | Particle analogWrite() (PWM) … Writes an analog value to a pin as a digital PWM (pulse-wth modulated) signal. The default frequency of the PWM signal is 500 Hz. Can be … Reference manual for the C++ API used by user firmware running on Particle IoT devices
- Table of Contents:
Bài 4: PWM | Thay đổi ánh sáng của LED trên Arduino | ARDUINO KIT
- Article author: arduinokit.vn
- Reviews from users: 48417 Ratings
- Top rated: 4.5
- Lowest rated: 1
- Summary of article content: Articles about Bài 4: PWM | Thay đổi ánh sáng của LED trên Arduino | ARDUINO KIT Hàm analogWrite() là một lệnh được ghi giá trị trên một chân của Arduino. Các chân PWM (~) thường xuất hiện trên Board Arduino Uno là 3, 5, 6, 9, 10, 11. …
- Most searched keywords: Whether you are looking for Bài 4: PWM | Thay đổi ánh sáng của LED trên Arduino | ARDUINO KIT Hàm analogWrite() là một lệnh được ghi giá trị trên một chân của Arduino. Các chân PWM (~) thường xuất hiện trên Board Arduino Uno là 3, 5, 6, 9, 10, 11.
- Table of Contents:
Sơ đồ đấu nối
Code mẫu
Giải thích code
Bài viết liên quan
Điều hướng bài viết
Bài viết liên quan
Bài 1 Chớp tắt LED trên Arduino Uno
Bài 2 Chớp tắt LED trên Arduino Uno (Phần 2)
Bài 3 Sử dụng Arduino làm hệ thống đèn giao thông
Bài 5 Thay đổi màu sắc Led RGB sử dụng Arduino
Bài 6 Tạo âm thanh (Còi) bằng Arduino
Bài 7 Cảnh báo nhiệt độ (LM35) bằng còi báo sử dụng Arduino Uno
Bài viết mới
analogWrite() | Arduino Reference
- Article author: arduinogetstarted.com
- Reviews from users: 18402 Ratings
- Top rated: 4.7
- Lowest rated: 1
- Summary of article content: Articles about analogWrite() | Arduino Reference Writes an analog value (PWM wave) to a pin. Can be used to light a LED at varying brightnesses or drive a motor at various speeds. After a call to analogWrite() … …
- Most searched keywords: Whether you are looking for analogWrite() | Arduino Reference Writes an analog value (PWM wave) to a pin. Can be used to light a LED at varying brightnesses or drive a motor at various speeds. After a call to analogWrite() … How to use analogWrite() Function with Arduino. Learn analogWrite() example code, reference, definition. Writes an analog value (PWM wave) to a pin. What is Arduino analogWrite().analogWrite(),Arduino analogWrite(),analogWrite() Arduino,analogWrite,Arduino analogWrite,analogWrite Arduino,analogWrite() reference,analogWrite() example,analogWrite() code,analogWrite reference,analogWrite example,analogWrite code,analogWrite function,analogWrite function reference,analogWrite function example,analogWrite function code,analogWrite() function,analogWrite() function reference,analogWrite() function example,analogWrite() function code,Arduino analogWrite() reference,Arduino analogWrite() example,Arduino analogWrite() code
- Table of Contents:
Description
Syntax
Parameter Values
Return Values
Example Code
See Also

ESP8266 NodeMCU PWM with Arduino IDE – Dim LED (Analog Output) | Random Nerd Tutorials
- Article author: randomnerdtutorials.com
- Reviews from users: 43247 Ratings
- Top rated: 4.3
- Lowest rated: 1
- Summary of article content: Articles about ESP8266 NodeMCU PWM with Arduino IDE – Dim LED (Analog Output) | Random Nerd Tutorials Learn how to generate PWM signals with ESP8266 NodeMCU using Arduino IDE analogWrite function. Build a simple circuit that dims an LED using the ESP8266 LED … …
- Most searched keywords: Whether you are looking for ESP8266 NodeMCU PWM with Arduino IDE – Dim LED (Analog Output) | Random Nerd Tutorials Learn how to generate PWM signals with ESP8266 NodeMCU using Arduino IDE analogWrite function. Build a simple circuit that dims an LED using the ESP8266 LED … Learn how to generate PWM signals with ESP8266 NodeMCU using Arduino IDE analogWrite function. Build a simple circuit that dims an LED using the ESP8266 LED PWM controller.esp8266 nodemcu pwm with arduino ide,esp8266 pulse-width modulation pwm arduino ide,esp8266 generate pwm produce signals,esp8266 pwm arduino ide example project led,esp8266 pwm dim led arduino ide
- Table of Contents:
ESP8266 NodeMCU PWM (Pulse-Width Modulation)
analogWrite()
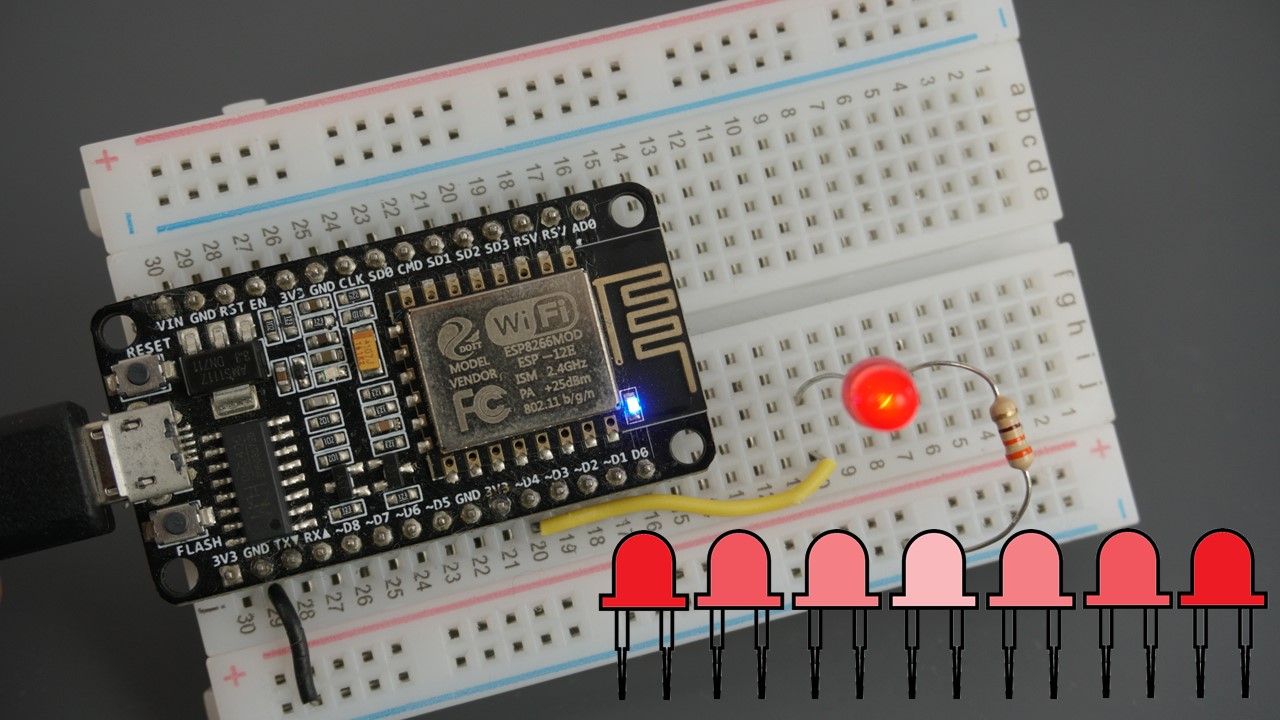
ESP8266 NodeMCU Dim LED with PWM
Schematic
ESP8266 NodeMCU PWM Code
Upload the Code
Demonstration
Wrapping Up
Download our Free eBooks and Resources
Phần 1: Arduino Căn Bản với Esp8266 → Analog output – Công nghệ cho mọi người
- Article author: ohtech.vn
- Reviews from users: 30674 Ratings
- Top rated: 3.8
- Lowest rated: 1
- Summary of article content: Articles about Phần 1: Arduino Căn Bản với Esp8266 → Analog output – Công nghệ cho mọi người Để sử dụng PWM trong Arduino, ta dùng hàm analogWrite(). Bạn không cần gọi hàm pinMode() để đặt chế độ OUTPUT cho chân sẽ dùng để phát xung PWM trên mạch … …
- Most searched keywords: Whether you are looking for Phần 1: Arduino Căn Bản với Esp8266 → Analog output – Công nghệ cho mọi người Để sử dụng PWM trong Arduino, ta dùng hàm analogWrite(). Bạn không cần gọi hàm pinMode() để đặt chế độ OUTPUT cho chân sẽ dùng để phát xung PWM trên mạch … Khóa học IoT với Arduino phần căn bản, giúp làm quen với vi điều khiển và nhiều loại module khác nhau.
- Table of Contents:
Phần 1 Arduino Căn Bản với Esp8266
Cú pháp
Thiết bị cần chuẩn bị
Ví dụ
Kiến thức cơ bản
Liên hệ với Arduino

Arduino project: the analogWrite() function and PWM
- Article author: flaviocopes.com
- Reviews from users: 3594 Ratings
- Top rated: 4.3
- Lowest rated: 1
- Summary of article content: Articles about Arduino project: the analogWrite() function and PWM PWM means Pulse Wth Modulation, and it’s a technique we use to simulate an analog output from digital devices. We basically emit a HIGH signal … …
- Most searched keywords: Whether you are looking for Arduino project: the analogWrite() function and PWM PWM means Pulse Wth Modulation, and it’s a technique we use to simulate an analog output from digital devices. We basically emit a HIGH signal … We use the analogWrite() function provided by the Arduino language to output an analog signal.
Ok, not really an analog signal, but a PWM signal.
If you take an Arduino Uno for example, you will notice there are 6 analog input pins, A0-A5, but no analog output pins.
We use digital output pins in a particular way to simulate an analog output.
PWM means Pulse Width Modulation, and it’s a technique we use to simulate an analog output from digital devices. - Table of Contents:

Tạo xung PWM dùng Arduino
- Article author: dientuviet.com
- Reviews from users: 31891 Ratings
- Top rated: 3.5
- Lowest rated: 1
- Summary of article content: Articles about Tạo xung PWM dùng Arduino Arduino và PWM. Arduino IDE có một hàm được tích hợp sẵn “analogWrite()”, có thể được sử dụng để tạo ra một tín hiệu PWM. Nó … …
- Most searched keywords: Whether you are looking for Tạo xung PWM dùng Arduino Arduino và PWM. Arduino IDE có một hàm được tích hợp sẵn “analogWrite()”, có thể được sử dụng để tạo ra một tín hiệu PWM. Nó … Trong bài viết này, bạn sẽ tìm hiểu về PWM là gì và làm thế nào bạn có thể nhận được ngõ ra PWM từ các chân số của Arduino.
- Table of Contents:

See more articles in the same category here: Chewathai27.com/to/blog.
Cộng đồng Arduino Việt Nam
Bạn cần tìm hiểu về xung PWM trước khi đọc bài viết này !
Giới thiệu
analogWrite() là lệnh xuất ra từ một chân trên mạch Arduino một mức tín hiệu analog (phát xung PWM). Người ta thường điều khiển mức sáng tối của đèn LED hay hướng quay của động cơ servo bằng cách phát xung PWM như thế này.
Bạn không cần gọi hàm pinMode() để đặt chế độ OUTPUT cho chân sẽ dùng để phát xung PWM trên mạch Arduino.
Cú pháp
analogWrite([chân phát xung PWM], [giá trị xung PWM]);
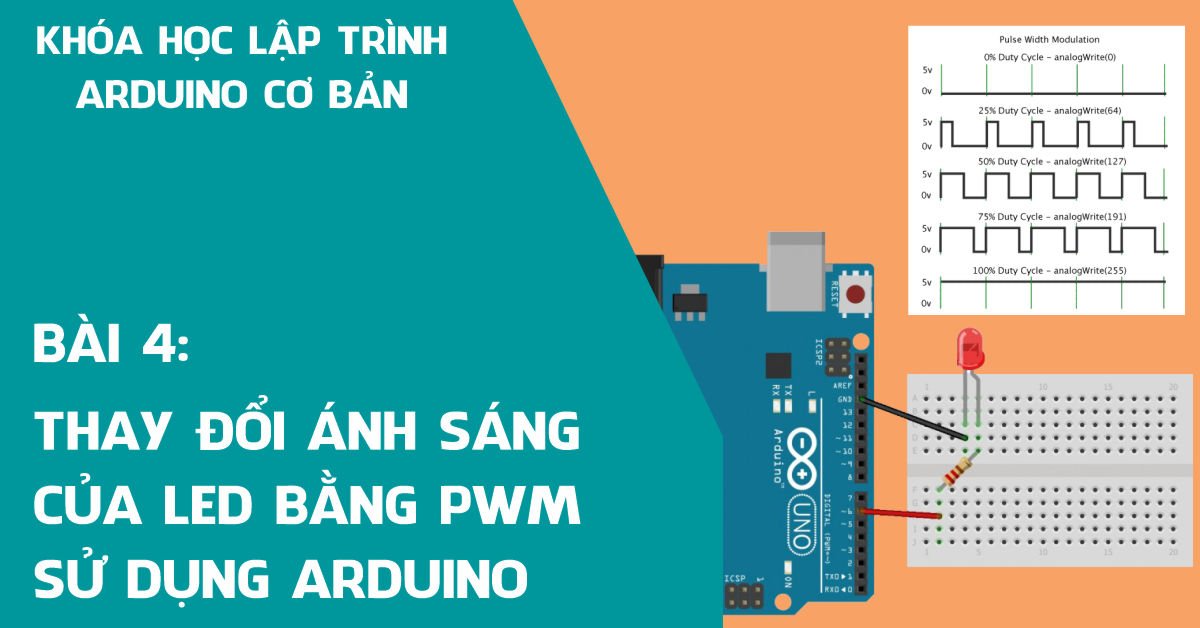
Giá trị mức xung PWM nằm trong khoảng từ 0 đến 255, tương ứng với mức duty cycle từ 0% đến 100%
Ví dụ
int led = 11; void setup() { } void loop() { for (int i = 0; i <= 255; i++) { analogWrite(led,i); delay(20); } } Đoạn code trên có chức năng làm sáng dần một đèn LED được kết nối vào chân số 11 trên mạch Arduino.
analogWrite là gì
Trong bài viết này Điện Tử Tương Lai sẽ giúp bạn tìm hiểu hàm analogWrite là gì và dùng để làm gì.
analogWrite ghi một giá trị analog (sóng PWM) vào một chân. Có thể được sử dụng để thắp sáng LED ở các độ sáng khác nhau hoặc điều khiển động cơ ở nhiều tốc độ khác nhau. Sau khi gọi analogWrite (), chân sẽ tạo ra một sóng hình chữ nhật ổn định của chu kỳ nhiệm vụ được chỉ định cho đến lần gọi tiếp theo tới analogWrite () (hoặc gọi tới digitalRead () hoặc digitalWrite ()) trên cùng một chân.
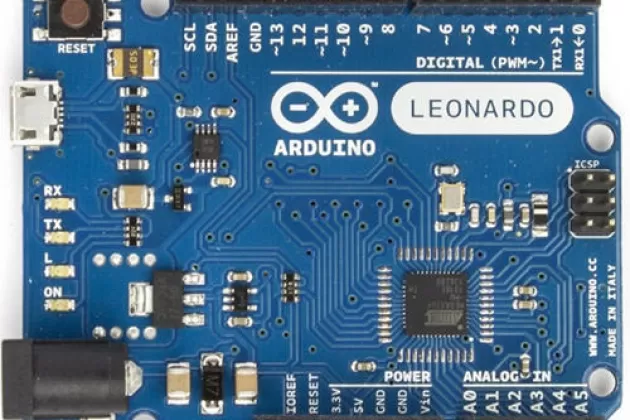
Bo Chân PWM Tần số PWM Uno, Nano, Mini 3, 5, 6, 9, 10, 11 490 Hz (chân 5 và 6: 980 Hz) Mega 2 – 13, 44 – 46 490 Hz (chân 4 và 13: 980 Hz) Leonardo, Micro, Yún 3, 5, 6, 9, 10, 11, 13 490 Hz (chân 3 và 11: 980 Hz) Uno WiFi Rev2, Nano Every 3, 5, 6, 9, 10 976 Hz Bo MKR * 0-8, 10, A3, A4 732 Hz MKR1000 WiFi * 0 – 8, 10, 11, A3, A4 732 Hz Zero * 3 – 13, A0, A1 732 Hz Nano 33 IoT * 2, 3, 5, 6, 9 – 12, A2, A3, A5 732 Hz Nano 33 BLE/BLE Sense 1 – 13, A0 – A7 500 Hz Due ** 2-13 1000 Hz 101 3, 5, 6, 9 chân 3 và 9: 490 Hz, chân 5 và 6: 980 Hz
* Ngoài khả năng PWM trên các chân được lưu ý ở trên, bo MKR, Nano 33 IoT và Zero có đầu ra analog thực khi sử dụng analogWrite () trên chân DAC0 (A0).
** Ngoài khả năng PWM trên các chân được lưu ý ở trên, Due có đầu ra analog thực khi sử dụng analogWrite () trên các chân DAC0 và DAC1.
Bạn không cần gọi pinMode () để đặt chân làm đầu ra trước khi gọi analogWrite ().
Hàm analogWrite không liên quan gì đến các chân analog hoặc hàm analogRead.
Cú pháp
analogWrite(pin, value)
Thông số
pin: chân Arduino để ghi vào. Các kiểu dữ liệu được phép: int.
value: chu kỳ nhiệm vụ: từ 0 (luôn tắt) đến 255 (luôn bật). Các kiểu dữ liệu được phép: int.
Return
Không có gì
Code mẫu
Code mẫu này sẽ đặt đầu ra cho đèn LED tỷ lệ với giá trị đọc từ chiết áp.
Lưu ý
Các đầu ra PWM được tạo ra trên các chân 5 và 6 sẽ có chu kỳ nhiệm vụ cao hơn mong đợi. Nguyên nhân là do các tương tác với các hàm millis() và delay (), dùng chung bộ đếm thời gian bên trong được sử dụng để tạo ra các đầu ra PWM đó. Bạn có thể thấy rõ trên các cài đặt chu kỳ làm việc thấp (ví dụ: 0 – 10) và có thể dẫn đến giá trị 0 không tắt hoàn toàn đầu ra trên các chân 5 và 6.
analogWrite() (PWM) – Input/Output | Reference
Input/Output
analogWrite() (PWM)
analogWrite
Writes an analog value to a pin as a digital PWM (pulse-width modulated) signal. The default frequency of the PWM signal is 500 Hz.
Can be used to light a LED at varying brightnesses or drive a motor at various speeds. After a call to analogWrite(), the pin will generate a steady square wave of the specified duty cycle until the next call to analogWrite() (or a call to digitalRead() or digitalWrite() on the same pin).
// SYNTAX analogWrite(pin, value); analogWrite(pin, value, frequency);
analogWrite() takes two or three arguments:
pin : the number of the pin whose value you wish to set
: the number of the pin whose value you wish to set value : the duty cycle: between 0 (always off) and 255 (always on). Since 0.6.0: between 0 and 255 (default 8-bit resolution) or 2^(analogWriteResolution(pin)) – 1 in general.
: the duty cycle: between 0 (always off) and 255 (always on). Since 0.6.0: between 0 and 255 (default 8-bit resolution) or in general. frequency : the PWM frequency (optional). If not specified, the default is 500 Hz.
NOTE: pinMode(pin, OUTPUT); is required before calling analogWrite(pin, value); or else the pin will not be initialized as a PWM output and set to the desired duty cycle.
analogWrite() does not return anything.
Gen 2 Devices (E Series, Electron, Photon, and P2; does not include E404X):
On the Photon, P1, Electron, and E Series, pins A3 and A6 (DAC) are DAC (digital-to-analog converter) pins. The analogWrite() function sets an analog voltage, not a PWM frequency, when used on these pins. When controlling LED brightness, you should always use PWM, not DAC.
// EXAMPLE USAGE int ledPin = D1; // LED connected to digital pin D1 int analogPin = A0; // potentiometer connected to analog pin A0 int val = 0; // variable to store the read value void setup() { pinMode(ledPin, OUTPUT); // sets the pin as output } void loop() { val = analogRead(analogPin); // read the input pin analogWrite(ledPin, val/16); // analogRead values go from 0 to 4095, // analogWrite values from 0 to 255. delay(10); }
NOTE: When used with PWM capable pins, the analogWrite() function sets up these pins as PWM only.
Additional information on which pins can be used for PWM output is available on the pin information page.
Gen 3 Devices (B Series SoM, Tracker SoM, Tracker One, Boron, Argon, and E404X):
On Gen 3 devices, the PWM frequency is from 5 Hz to analogWriteMaxFrequency(pin) (default is 500 Hz). On Gen 3 Feather devices (Argon, Boron), pins A0, A1, A2, A3, A4, A5, D2, D3, D4, D5, D6, D7, and D8 can be used for PWM. Pins are assigned a PWM group. Each group must share the same frequency and resolution, but individual pins in the group can have a different duty cycle. Group 3: Pins D2, D3, A4, and A5.
Group 2: Pins A0, A1, A2, and A3.
Group 1: Pins D4, D5, D6, and D8.
Group 0: Pin D7 and the RGB LED. This must use the default resolution of 8 bits (0-255) and frequency of 500 Hz. On the Boron SoM, pins D4, D5, D6, D7, A0, A1, A6, and A7 can be used for PWM. Pins are assigned a PWM group. Each group must share the same frequency and resolution, but individual pins in the group can have a different duty cycle. Group 2: Pins A0, A1, A6, and A7.
Group 1: Pins D4, D5, and D6.
Group 0: Pin D7 and the RGB LED. This must use the default resolution of 8 bits (0-255) and frequency of 500 Hz. On the Tracker SoM, pins D0 – D9 can be used for PWM. Note that pins A0 – A7 are the same physical pin as D0 – D7. D8 is shared with TX (Serial1) and D9 is shared with RX (Serial1). When used for PWM, pins are assigned a PWM group. Each group must share the same frequency and resolution, but individual pins in the group can have a different duty cycle. Group 3: RGB LED
Group 2: D8 (TX), D9 (RX)
Group 1: D4, D5, D6, D7
Group 1: D0, D1, D2, D3
P2 and Photon 2 Devices:
On the P2 and Photon 2, all PWM pins and the RGB LED share the same PWM timer and must share the same PWM frequency, though each pin can have a separate duty cycle. Pin Pin Name Description MCU 23 A5 / D14 A5 Analog in, GPIO, PWM. PB[4] 35 D1 / A4 D1 GPIO, PWM, I2C SCL, A4 Analog In PB[5] 36 D0 / A3 D0 GPIO, PWM, I2C SDA, A3 Analog In PB[6] 40 S0 / D15 S0 GPIO, PWM, SPI MOSI, Serial3 TX. (Was P1S0 on P1.) PA[12] 41 S1 / D16 S1 GPIO, PWM, SPI MISO, Serial3 RX. (Was P1S1 on P1.) PA[13] 49 A2 / D13 A2 Analog in, PWM, GPIO PB[7]
Gen 2 Devices (E Series, Electron, Photon, and P2; does not include E404X):
So you have finished reading the pwm analogwrite topic article, if you find this article useful, please share it. Thank you very much. See more: analogWrite, digitalWrite, digitalWrite Arduino, analogWrite ESP32, Lệnh analogWrite trong Arduino, analogRead, digitalRead, Xung PWM la gì